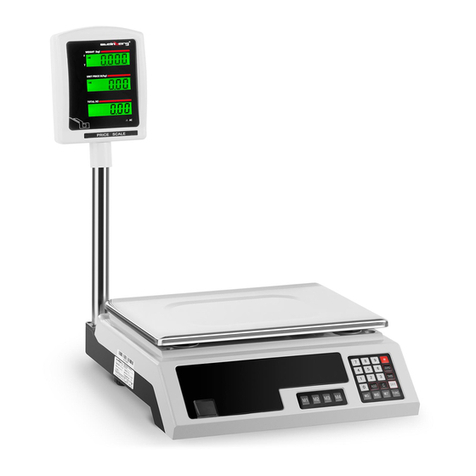
Detecto MS-1600 User manual

T
D
E
T
C
O
E
A Division of Cardinal Scale Manufacturing Co.
®
Mailing & Shipping Scales
MS 15 / 30 / 100 / 1600
Operation Manual
PO Box 151 • Webb City, MO 64870
417-673-4631
8540-M104-O1 Rev J
01/07 Printed in USA

2

1
USPS Services Supported
1st Class/Priority
3rd Class/Parcel Post
Express Mail PO-PO
Express Mail PO-Addressee
1st Class Presort/ZIP+4
International Air
International Surface
International Express
Library
Book
Bound Printed Matter
Certified
Registered
Return Receipt
Insurance
Special Delivery
COD
SERIAL NUMBER___________________
DATE OF PURCHASE_______________
PURCHASED FROM________________
_________________________________
_________________________________
RETAIN THIS INFORMATION FOR FUTURE USE
PRECAUTIONS
Before using this instrument, read this
manual and pay special attention to all
“WARNING” symbols:
TABLE OF CONTENTSINTRODUCTION
We wish to thank you for your purchase of our
Mailing and Shipping Scale. This instrument has
been designed and manufactured within the
U.S.A. with quality and reliability.
This manual will help acquaint you with the
features of this instrument, its proper installation,
adjustment, operation and care. Please read
this manual before attempting to operate the
system and keep it handy for future
reference.
FCC COMPLIANCE STATEMENT
WARNING! This equipment generates, uses and can
radiate radio frequency energy and if not installed and
used in accordance with the instructions manual, may
cause interference to radio communications. It has
been tested and found to comply with the limits for a
Class A computing device pursuant to Subpart J of
Part 15 of FCC Rules, which are designed to provide
reasonable protection against such interference when
operated in a commercial environment. Operation of
this equipment in a residential area is likely to cause
interference in which case the user at his own
expense will be required to take whatever measures
necessary to correct the interference.
All rights reserved. Reproduction or use, without express
permission, of editorial or pictorial content, in any manner,
is prohibited. No patent liability is assumed with respect to
the use of the information contained herein. While every
precaution has been taken in the preparation of this book,
we assume no responsibility for errors or omissions.
Neither is any liability assumed for damages resulting from
the use of the information contained herein. All instructions
and diagrams have been checked for accuracy and ease
of application; however, success and safety in working
with tools depend to a great extent upon the individual
accuracy, skill and caution. For this reason, we are not
able to guarantee the result of any procedure contained
herein. Nor can we assume responsibility for damage to
property or injury to persons occasioned from the
procedures. Persons engaging the procedures do so
entirely at their own risk.
SPECIFICATIONS.........................
INSTALLATION.........................................2
3()00).'#,)03AND3#2%73
,%6%,3#!,%
POWER SUPPLY./4%.............................3
SYSTEM SET UP ........................................3
2ATE5PDATES
KEYPAD DESCRIPTION ............................
UPS Keypad Operation .........................
UPS Special Services ............................
USPS Keypad Operation .......................
Function Keys ........................................
CALIBRATION .............................................
CARE AND MAINTENANCE ........................1
TROUBLESHOOTING GUIDE .....................1
COUNTRY CODES ......................................1
UPS Services Supported
Ground
2nd Day
3 Day
Next Day Air
Next Day Letter
International
Delivery Confirmation
Response
Oversize
Declared Value
COD
Dimensional Weight
Other Features ZIP to Zone Conversion
Manual Weight Entry
Piece Count for Bulk Mail
Full Numeric Keypad
User Replaceable Rate
Cartridge
Designed and Manufactured in the USA
IMPORTANT ELECTRICAL
WARNING
SPECIFICATIONS

2
INSTALLATION
The instructions contained in this section should be read and understood prior to attempting to
complete the installation.
Place the system in a stable, vibration-free location away from direct sunlight and away from any
rapid moving air source. Make certain the power cords are stored out of the way of normal traffic.
Operating Temperature Range .......................................32°F to 104°F
Power Requirements ......................................................110/115 VAC 50/60 Hz
Capacity and
Graduation Size.......MS-15 .............................................15 lb x 0.05 oz
MS-30 .............................................0 - 30 lb x 0.1 oz
MS-100 ...........................................0 - 99 lb 15.8 oz x 0.2 oz
MS-1600 .........................................0 - 99 lb 15.9 oz x .1 oz
Platform Size (Inches) .....................................................15.5" W x 8.75" D
Height ..............................................................................4 inches
Display Size and Type ....................................................20 character 14-segment
11mm Vacuum Fluorescent
and supplemental LED’s
CAUTION!!! - Do not place the scale on any unstable cart, stand, or table. The scale
may fall, causing injury to the operator, and seriously damage the unit; or proper
operation of the scale may be inhibited.
SHIPPING CLIPS and SCREW
The load cells are protected from damage in shipping by four (4) shipping clips under the four (4)
overload springs and one shipping screw located on the bottom of the scale (see figure 1). Remove
the clips, screw, and the warning label before using the scale and re-install them before transporting
or shipping the scale. Note: Hand tighten the shipping screw.
CAUTION!!! Transporting or shipping the scale without the shipping clips and screw
installed will void the load cell warranty.
LEVEL SCALE
Level the scale if necessary by adjusting the four legs on scale bottom, up or down, until the bubble in
the level gage located on the scale housing centered as shown in figure 1. After level is achieved,
lock legs in place by tightening lock nuts against the scale bottom.
Leveled
Not leveled
REMOVEREMOVE
REMOVEREMOVE
Shipping clip
Shipping screw
(located on bottom of scale)
Remove shipping clips from
springs (4 places), remove
shipping screw from bottom
side of scale (1 place).
Figure 1

3
Place stainless steel platform on weighbridge by aligning holes in weighbridge with pins located on
bottom of platform.
Rate/Program
Cartridge
Label Side
Down
Pull to
remove
Push to
Insert
Figure 2
Rate/Program Cartridge Installation
The Rate/Program Cartridge may have been shipped separate. If so, it must be installed in the
instrument before beginning operation. This module is inserted into the cutout on the right side of the
instrument as shown in Figure 2. Note that the label on the Rate/Program Module is on the bottom
side and that the connector end of the Module is inserted into the opening in the instrument
enclosure.
Insert the power cord plug into a grounded wall outlet. This completes the installation procedure.
POWER SUPPLY NOTE!
If an extension cord must be used, it should be a 3-wire fully grounded type. On Models requiring 220
VAC power, it is the responsibility of the customer to have the proper power cord plug installed which
conforms to national electrical codes and local codes and ordinances.
To avoid electrical hazard DO NOT under any circumstances, cut,
remove or bypass the power cord grounding prong.
SYSTEM SETUP
Before operation may begin it will be necessary to enter operational parameters into your
MS15/MS30/MS100/MS1600. Once this data is entered, it will be retained in memory and used
whenever necessary. If it is necessary to change this data at a later point in time, repeat this
procedure.
Turn the MS15/MS30/MS100/MS160 on while pressing the ENTER key. The system will display:
DETECTO MS15/MS30/MS100/MS1600 VX.X
and then change to
INSTALLED AT XXX
then change to
DEFAULT? (1/0) X

4
Where X is the current state of the default option (1=Yes, 0=No). The display asks whether you wish
the system to automatically select the “USPS 1st Priority” mode of shipment on completion of any
USPS transaction or the “UPS Ground” mode of shipment on completion of any UPS transaction. The
default of service occurs when weight returns to zero.
The next display is:
COUNT OPTION?(1/0) X
The COUNT feature must be disabled in “Legal For Trade” applications. Press “1” to enable the
COUNT key to operate, “0” to disable COUNT.
The next display is:
USPS HANDLING CHG
Pressing “0” to disable or “1” to enable the USPS handling charge. If enabled, the system will prompt
for the method of charge:
PERCENT? (1/0)
Pressing “1” will establish a handling charge based on a percentage of the service charge, and the
system will prompt for the percentage amount:
PERCENT =
Pressing “0” will establish a fixed amount to add to the service charge, and the system will prompt for
the fixed amount:
AMOUNT =
The next display is:
UPS HANDLING CHG
Pressing “0” to disable or “1” to enable the UPS handling charge. If enabled, the system will prompt
for the method of charge:
PERCENT? (1/0)
Pressing “1” will establish a UPS handling charge based on a percentage of the service charge, and
the system will prompt for the percentage amount:
PERCENT =
Pressing “0” will establish a fixed amount to add to the service charge, and the system will prompt for
the fixed amount:
AMOUNT =
The next display is:
CLEAR ZIP?
Pressing “1” for yes will cause the ZIP code/zone to clear whenever the weight on the scale is zero.
Press “0” for no to retain the last ZIP code entered.
When complete, the last display will be:
DONE
This completes system setup of the scale. Remove and reapply power to the unit. The scale is now
completely ready for operation.

5
RATE UPDATES
When UPS or Postal Rates change and new software are provided, it will arrive in the Rate/Program
cartridge. Remove old cartridge and replace as shown in figure 2.
Special UPS International rates have been added for Broward and Dade counties in Florida. Units
operating in these counties must be specified during rate updates.
KEYPAD DESCRIPTION
The keypad is comprised of three sections each containing keys of similar function. These three
sections are UPS Section, the USPS Section and the Function Section. Each time a key is pressed
the scale will emit a short beep to signal receipt of the keystroke. As with any keypad, certain
precautions in its use must be taken. Do not use sharp or pointed objects to press the keys. Use
only your finger tip to press the desired key. The keypad should be cleaned only with a damp (not
wet) cloth. Do not use abrasive cleaners, strong detergents or solvents to clean the keypad. Make
certain to remove the power cord from the scale before cleaning the keypad.
UPS KEYPAD OPERATION
The UPS keypad section consists of eight keys located in the middle of the keyboard. These keys
are used to select various modes of UPS service as well as some special services. Each of the keys
will be described in detail throughout this section.
NOTE:
If an acceptable ZIP has not been entered into the system when a UPS mode is selected, the system
will first display:
ZIP =
Enter the first 3 digits of the destination ZIP code.
OUNCES RATE ZONE ZIPPOUNDS
COUNT
MAN
WEIGHT 0
7
4
2
5
89
6
3
ZERO
CE
ENTER
GROUND
INTL
2 nd
DAY
NEXT
DAY
AOD OVER
SIZE
DECL
VALUE
INTL
SURF
1st
PRIOR
RET
RECPT
3 rd
PRC-PST
EXP
PO-PO
EXP
PO-AD
INTL
AIR
CERT INS
SPEC LIBRAY
BND
PRNT
MTR
BOOK
1st
PS
ZIP+ 4
REGIS
COD ZIP
MS-30
0-5lb x .1oz
5-30lb x .5oz
FUNCTIONUPSUSPS
SET
METER
A Division of Cardinal Scale Manufacturing Co.
DETECTO
1
3
DAY
Keypad Layout

6
GROUND - Pressing this key selects UPS Ground Service.
Selection is indicated by LED in the key. UPS now supports
Comercial and Residential ground rate structures. The
status for each displayed to the right of the zone number in
the display. A small ‘r’ for residential and a small ‘c’ for
commercial. Press the UPS Ground key until the desired
rate is selected.
If UPS GroundTrac was enabled during scale setup, press
the GROUND key until a ‘T’ appears on the display between
the rate and zone, and a small ‘c’ is displayed between the
zone and ZIP code for UPS GroundTrac rate. Press the
GROUND key again to change to UPS GroundTrac
Residential, a small ‘r’ will be displayed. Press the GROUND
key again to return to standard UPS Ground.
2ND DAY - Pressing this key selects UPS Second Day Air Service and displays 1=Letter,
2=Package?. Press “1” to select the letter rate and press “2” to select package rate.
NEXT DAY - Pressing this key selects UPS Next Day Air Service and displays 1=Letter,
2=Packages?. Press “1” to select the letter rate and press “2” to select package rate.
If UPS 2nd Day or Next Day Air Dimensional Weight is to be used, place the parcel on the scale and
press either the 2ND DAY or NEXT DAY key. Press the “2” key to select Package. The scale will
display the actual weight and the shipping charges based on the actual weight.
Press the OVERSIZE key. The display will change to:
LENGTH=
Enter the length of the package in inches, rounding up to the nearest whole inch. Press ENTER. The
next prompt is:
HEIGHT=
Enter the height of the package in whole inches. Press ENTER for the next display:
WIDTH=
Enter the width of the package in whole inches. Press ENTER. The dimensional weight will then be
displayed.
If dimensional weight is to be used, the OVERSIZE key will be lit and the scale display will return to
weight/rate mode. The shipping charges displayed will be the dimensional weight rate (note that the
weight displayed at this time is still the actual weight of the package).
If actual weight is to be used, the OVERSIZE key will not be lit and the display will return to the actual
weight rate.
If the package is too large as determined by the dimensional weight calculation, the display will flash
OVER WEIGHT LIMIT and return to the actual weight rate. Note that this package is too large to ship
via UPS.
3 DAY - Pressing this key selects UPS 3 Day Select Service (on older scales this key was used for
Next Day Letter).
INTL - This key selects UPS International Service. After pressing the key the display will prompt for
Canada, press “1” for yes or “0” for no. The display next prompts for the type of service, followed by a
prompt for the UPS zone. Use the numeric keys to enter the zone.
NOTE: Consult UPS International Service Guide for zones.
GROUND
INTL
2 nd
DAY
NEXT
DAY
AOD OVER
SIZE
DECL
VALUE
UPS
3
DAY
UPS Keypad Layout

7
UPS SPECIAL SERVICES
After pressing one of the mode keys previously described special services offered by UPS may then
be selected. The following describes the special service keys:
DECL VALUE - This key selects Declared Value, UPS’s Package Insurance. Pressing this key will
cause the display to request the declared value dollar amount. The operator should then enter the
declared value using the numeric keys followed by pressing the ENTER key. The system will
calculate and momentarily display the declared value fee. The fee is then added to the current
shipping charges and the total displayed on the display line. The Declared Value service may be
turned off by pressing the key a second time. The LED key indicator is illuminated when declared
value service is selected.
AOD - Pressing this key selects Delivery Confirmation Response special service. The SIGNATURE
REQ’D? prompt is displayed and when “1” for YES or “0” for NO is selected, the next prompt,
REPLAY ADDRESS? is displayed. When “1” for YES or “0” for NO is selected, the fee will be
displayed for a moment, then added to the current shipping charges and the total rate displayed. To
cancel the Delivery Conformation Response service, press the AOD key again.
OVERSIZE - This key selects the Oversize Package rate for UPS Ground and 3 Day Select and is
used to calculate dimensional weight for UPS Next Day and Second Day Air Services. This key is
also used for the non-standard surcharge on USPS First Class.
ADDITIONAL HANDING - Press the red SPEC key to add the UPS additional handling charge to the
displayed shipping rate.
USPS KEYPAD OPERATION
This section describes the use of the keys
contained in the US Postal Service
(USPS) section of the keypad. Refer to
above layout or to the actual keypad for
the layout of these keys.
1ST/PRIOR - This key selects the First
Class or Priority Mail service. The system
automatically changes from First Class to
Priority Mail when the weight exceeds the
limit for First Class. The LED key indicator
is illuminated when 1st/PRIOR service is
selected.
3RD/PCR PST - This key selects the Third Class or Parcel Post (Fourth Class) service. System
selects the Third Class rate unless the weight of the item exceeds the Third Class limit. In this
instance the Fourth Class or Parcel Post rate will be selected automatically. If the weight is within the
range where either Third Class or Parcel Post could be used, the display will prompt:
USE 4TH CLASS? (1/0)
Press “1” for the Fourth Class rate or press “0” for the Third Class rate. Note: When calculating Fourth
Class rates, the scale automatically calculates the BMC discounted rate for qualifying ZIP codes. To
calculate the non-discounted rate enter the destination zone number. For “Local” use zone 0. The
LED key indicator is illuminated when 3rd/PCR PST service is selected.
EXP PO-PO - This key selects Express Mail Post Office to Post Office service. The LED key indicator
is illuminated when EXP PO-PO service is selected.
EXP PO-AD - This key selects Express Mail Post Office to Addressee service. The LED key indicator
is illuminated when EXP PO-AD service is selected.
INTL
SURF
1st
PRIOR
RET
RECPT
3 rd
PCR-PST
EXP
PO-PO
EXP
PO-AD
INTL
AIR
CERT INS
SPEC LIBRAY
BND
PRNT
MTR
BOOK
1st
PS
ZIP+ 4
REGIS
USPS
USPS Keypad Layout

8
INTL AIR - This key selects the international air rates listed by the USPS. Pressing this key causes
the display line to show: EXPRESS (1/0). Press “1” for International Express Service. The display will
show: 1=ON DEMAND, 2=CUSTOM. Press “1” to select Express On Demand Service or press “2” for
Express Custom Service. The display will then prompt for Country Code. If “0” was pressed at the
EXPRESS 1/0 prompt, the display will change to: 1=LTR, 2=PRCL, 3=PTDMTR or 4=SM PACKET?
Press “1” to select LETTER mode, “2” for PARCEL POST mode, “3” for PRINTED MATTER mode
or “4” for SMALL PACKET mode.
If LETTER, PARCEL POST or SMALL PACKET is selected, the display prompts “COUNTRY
CODE=” (see the Country Code section of this manual for a list of these country code numbers).
Enter the country code number, causing the system to momentarily display the country’s name.
The rate is then calculated and displayed for the destination country, based on the weight of the item
being mailed. The country code for the selected country will be shown continuously in the ZIP section
of the display line.
If a “3” is selected for PRINTED MATTER, the display line will show: 1=REG, 2=BK, 3=PER?
Press “1” to select REGULAR PRINTED MATTER mode, “2” for BOOKS and SHEET MUSIC mode,
“3” for PUBLISHER’S PERIODCALS mode. The display line will then show “COUNTRY CODE=.”
Proceed as described under the section for letter or parcel post modes.
1ST-PS/ZIP+4 - This key selects either the Presort, ZIP+4 or both discounts for First Class mail
meeting the requirements defined by the USPS. Pressing this key causes the display to show:
1=PRESORT, 2=ZIP+4. If “1” is pressed, the display changes to: 1=PST, 2=ZIP+4, 3=3 DIGIT. The
operator selects the Presort discount by pressing the appropriate key. When PST, ZIP+4 or 3 DIGIT
discounts are added to the USPS Priority mail function, the price will be displayed in 1/10 of a penny
(99.999). All other functions will display in the traditional currency format.
When using presorted USPS 1st Class Mail it is the responsibility of the operator to insure the mailing
meets applicable Postal Service regulations of presorted mail. All ZIP+4 mailings must be 2.5 oz or
less, if more the following error message will be displayed: OVER WEIGHT LIMIT.
CERT - This key selects the USPS Certified Mail. The charge for this service will be displayed
momentarily, and then added to the displayed rate and the total shown. This service may be turned
off and its fee removed from the total charge by pressing the key again. The LED key indicator is
illuminated when CERT service is selected.
REGIS - This key selects USPS Registered Mail. Pressing this key after selecting a compatible class
of service will cause the system to ask for the dollar indemnity amount for the item to be registered by
displaying “AMOUNT =” in the display line. The operator enters the required amount using the
numeric keys and pressing ENTER. The system will then prompt:
INSURANCE? Y
Press “1” (or ENTER) for YES or “0” for NO.
The fee for registration will appear momentarily, then be added to the displayed rate and the total
shown in the display line. This service may be cancelled and the fee removed from the total charge
by pressing this key again. The LED key indicator is illuminated when REGIS service is selected. If
insurance was selected, the system will illuminate the insurance key.
NOTE: If Insurance is already active (not associated with Registered) prior to selecting the Registered
service, the REGISTERED key will not be accepted. If Registered is active, the INSURANCE key will
not be accepted.
INS - This key selects insurance for the item to be mailed. Pressing this key causes the display line
to indicate “AMOUNT =”. The operator enters the insurance amount and presses ENTER. The fee for
the insurance is displayed momentarily and added to the displayed rate. The LED key indicator is
illuminated when INS service is selected.

9
INTL SURF - This key selects the International surface rates listed by the USPS. Pressing this key
causes the display line to show: 1=PRCL, 2=PTDMTR, 3=SM PACKET?
Press “1” to select PARCEL POST mode, “2” for PRINTED MATTER mode or “3” for SMALL
PACKET mode.
If PARCEL POST or SMALL PACKET is selected, the display line will show “COUNTRY CODE=”
which asks for the country code number assigned to the destination country (see the Country Code
section of this manual for a list of these country code numbers). The operator enters the country code
number, causing the system to momentarily display the country’s name. The rate is then calculated
and displayed for the destination country based on the weight of the item being mailed. The country
code for the selected country will be shown continuously in the ZIP Section of the display line.
If a “2” is selected for PRINTED MATTER, the display line will show: 1=REG, 2=BK, 3=PER?
Press “1” to select REGULAR PRINTED MATTER mode, “2” for BOOKS and SHEET MUSIC mode,
“3” for PUBLISHER’S PERIODICALS mode. The display line will then show “COUNTRY CODE=”
Proceed as described under the section for parcel post or small packet modes.
RET RECPT - This key selects USPS Return Receipt for certified or registered items. For domestic
modes, pressing this key will cause the display to ask for the specific type of receipt requested by
showing “WHERE (1) OR WHEN (2)?.” The operator should enter either a “1” to select where or
enter a “2” to select when. For international modes, “RETURN RECEIPT WHEN” is automatically
selected. After selection has been made, the applicable fee will be displayed momentarily and added
to the displayed rate. Note that pressing the RET RCPT key a second time will clear the return
receipt request and remove its associated fee from the charge shown. The LED key indicator is
illuminated when RET RECPT service is selected.
SPEC - This key selects USPS Special Delivery. The fee for special delivery will be shown
momentarily, then added to the current postage and the total charge displayed. The LED key
indicator is illuminated when SPEC service is selected. Also used for UPS Additional Handling
Charge.
LIBRAY - This key selects the Library class rates for mail meeting the requirements set by the USPS.
The LED key indicator is illuminated when LIBRAY service is selected.
BOOK - This key selects Book class rates for mail meeting the requirements set by the USPS. The
LED key indicator is illuminated when BOOK service is selected.
BND PRNT MTR - This key selects Bound Printed Matter rates for those articles meeting USPS
requirements. The LED key indicator is illuminated when BND PRNT MRT service is selected.
FUNCTION KEYS
The following keys are contained
in the Function Keypad section
of the keyboard. Refer to the
layout below or to the actual
keypad.
COD - Pressing this key selects
the COD special service for both
UPS and USPS. After pressing
this key the display line prompts
for the COD amount. Enter the
COD amount using the numeric
keys followed by pressing
ENTER. The display will indicate
the COD fee then add it to the current shipping charges and show the total. To cancel the COD
service press the COD key a second time. The LED key indicator is illuminated when COD service is
selected.
COUNT
MAN
WEIGHT 0
7
4
2
5
89
6
3
ZERO
CE
ENTER
1
COD ZIP
FUNCTION
SET
METER
Function Keypad Layout

10
ZIP - This key is used to enter the country code number, ZIP code or zone or other identification
depending on the selected mode of service.
COUNT - This key (if enabled - see System Set Up) selects the count feature which allows the
system to count and display the total number of identical items placed on the scale platform. Press
this key and the display prompts “ADD PIECES =.” Place a sample number of the pieces to be
counted onto the scale platform and enter this number via the keypad. Press ENTER, the display will
show “COUNT” with the number of pieces shown in the RATE section of the display line. Items may
be removed or added to the scale platform and the system will indicate the number of items in the
group. The LED key indicator is illuminated when the count mode is selected.
SET METER - This key is not used.
MAN WEIGHT - Press this key to manually enter the known weight of a package. The display will first
prompt for pounds; enter the number of pounds and press ENTER. The display then prompts for
ounces. The rate for the selected class of service is then calculated based on the manual weight
entry. The manual weight will be retained until cleared by pressing the MANUAL WEIGHT key again.
0 through 9 - These ten keys are used to enter numeric data as required by the system.
ZERO - This key is used to zero the weight display.
CE - This key is used to clear the data entered for corrections during editing of data. Note that it is
only effective if pressed prior to pressing the ENTER key.
ENTER - This key is used to complete a data entry and “lock” the rates shown on the display. Rates
will remain “locked” for approximately 5 seconds. This function can be used when a package size
limits visibility of the display. After pressing the ENTER key, the package can be moved to view the
displayed rate.
CALIBRATION
The following describes the Calibration of the MS15/MS30/MS100/MS1600 Scale in the event that
the scale should need recalibration. A qualified technician should perform this function to maintain the
instrument’s high degree of accuracy.
Before beginning calibration, the following equipment is required:
15 pounds of test weights (MS15 Only) or
30 pounds of test weights (MS30 Only) or
50 pounds of test weights (MS100/MS1600 Only)
Small flat blade screwdriver
Phillips screwdriver

11
With the scale power OFF,
remove the four (4) screws
securing the right side panel (as
viewed from the scale front) and
remove the panel. Referring to
the figure 3, locate the
Calibration/Setup switch.The
switch is protected by a small
plastic cover to prevent
unauthorized access to this data.
Remove the plastic cover by
loosening the two screws on the
bottom of the scale. With the
switch exposed, push the switch
to the opposite setting. Turn the
MS15/MS30/MS100/MS1600 on.
When power is turned on the
system will display:
DETECTO MS15/MS30/MS100/MS1600 VX.X
and then change to
INSTALLED AT XXX
and then change to
LOAD SCALE TO 15 lb (MS15 Only)
LOAD SCALE TO 30 lb (MS30 Only)
LOAD SCALE TO 50 lb (MS100/MS1600 Only)
Place the weight on the scale, wait about 5 seconds for the scale to stabilize, then press the ENTER
key to start calibration. The display will start to fill with dashes from the left to the right. When finished,
the unit will display:
UNLOAD SCALE
Remove the weight from the scale, wait about 5 seconds for the scale to stabilize, then press the
ENTER key to finish calibration. The display will start to fill with dashes from the left to the right.
When finished, system operation continues as described in System Set Up.
Complete the system set up or press the ENTER key until the unit displays:
DONE
This completes calibration of the scale. Return the Calibration/Setup switch to its original position.
Remove power from the scale base and re-install the plastic cover. Replace the side panel and apply
power to the unit. The scale is now calibrated and ready for operation.
CARE AND MAINTENANCE
1. DO NOT subject the scale platform to sudden shocks.
2. DO NOT press keys too hard, only a light touch is necessary. Activate keys with your finger,
NEVER use a sharp object.
3. DO NOT submerge the scale in water or spray water directly on it and DO NOT use abrasives to
clean the instrument. Clean the cover with a damp soft cloth and mild detergent. The platform
may be removed from scale and submerged in water with a mild detergent, always dry it
completely afterwards.
4. DO NOT use acetone or other volatile solvents for cleaning.
Calibration/Setup
Switch
Right side of Scale
Calibration/Setup
Operation
Figure 3
Calibration Switch Setup

12
FUSE REPLACEMENT
If the need to check or replace a fuse arises please follow Steps 1 through 4 carefully.
1. Turn scale power switch to the OFF position and unplug power cord from wall outlet.
2. Press inward on the fuse holder cap, turn counterclockwise and release. The cap along with the
fuse should then be ejected on the fuse holder. See figure 4.
3. Pull out the old fuse. Place new fuse in holder: 3AG 1/4 ASB type for 110 VAC; 3AG 1/8 ASB
type for 220 VAC. Snap the fuse holder back into position.
4. The power may now be turned on.
To prevent risk of fire, be certain to use type and rating recommended for your Model
scale.
ALWAYS remove power source from scale before removing or
replacing fuse to prevent risk of electrical shock.
CAUTION LABEL
ON/OFF SWITCH
POWER CORD
FUSE
ADJUSTABLE FOOT
OMITTED FOR CLARITY
Figure 4
Fuse Replacement
TROUBLESHOOTING GUIDE
The following guide is intended to help isolate and correct minor problems. If, after consulting this
guide, you are unable to correct the problem, contact your Detecto dealer for assistance.
SYMPTOM PROBABLE CAUSE PROBABLE SOLUTION
System Dead No AC power Check power cord
Fuse blown Replace fuse
No program module Insert program module
Improperly seated Re-seat program module
program module
Incorrect Scale Incorrect software Make sure software is for
Weight same model scale
Improperly calibrated Calibrate Scale
Scale base not level Make sure scale base is level
Unstable weight Noisy power source Install line filter or conditioner
Power not grounded Ground the power outlet
Vibration and/or Relocate scale
excessive air flow
Incorrect rates Improper service Select the proper service
Improper installation Contact Detecto dealer

13
101 Afghanistan
102 Albania
103 Algeria
104 Andorra
105 Angola
296 Anguilla
106 Antiqua / Barbuda
107 Argentina
300 Armenia
165 Aruba
108 Ascension
109 Australia
110 Austria
301 Azerbaijan
111 Azores
112 Bahamas
113 Bahrain
114 Bangladesh
115 Barbados
116 Belgium
117 Belize
118 Benin
119 Bermuda
120 Bhutan
121 Bolivia
122 Botswana
123 Brazil
301 Azerbaijan
111 Azores
112 Bahamas
113 Bahrain
114 Bangladesh
115 Barbados
116 Belgium
117 Belize
118 Benin
119 Bermuda
120 Bhutan
121 Bolivia
122 Botswana
123 Brazil
297 British Virgin Islands
124 Brunei
125 Bulgaria
126 Burkina
127 Burma
128 Burnundi
302 Byelarus
129 Cameroon
130 Canada
131 Cape Verde
132 Cayman Island
133 Central African Republic
134 Chad
135 Chile
136 China
137 Colombia
138 Comoros
139 Congo
140 Corsica
141 Costa Rica
190 Cote d’Ivoire (Ivory Coast)
312 Croatia
142 Cuba
143 Cyprus
144 Czechoslovakia
145 Denmark
146 Djibouti
147 Dominica
148 Dominican Republic
149 East Timor
150 Ecuador
151 Egypt
152 El Salvador
153 Equatorial Guinea
154 Estonia
155 Ethiopia
156 Faroe Islands
157 Falkland Islands
158 Fiji
159 Finland
160 France
161 French Guiana
162 French Polynesia
163 Gabon
164 Gambia
303 Georgia, Republic of
166 Germany, Federal Republic of
167 Ghana
168 Gibraltar
169 Great Britain & Northern Ireland
170 Greece
171 Greenland
172 Grenada
173 Guadeloupe
174 Guatemala
175 Guinea
176 Guinea Bissau
177 Guyana
178 Haiti
179 Honduras
180 Hong Kong
181 Hungary
182 Iceland
183 India
184 Indonesia
185 Iran
186 Iraq
187 Ireland
188 Israel
189 Italy
191 Jamaica
192 Japan
193 Jordan
194 Kampuchea (Cambodia formerly)
304 Kazakhstan
195 Kenya
196 Kiribati
Country Code Numbers

14
251 St. Pierre & Miquelon
252 St. Vincent & Grenadines
291 San Marino, Republic of
253 Sao Tome & Principe
254 Saudi Arabia
255 Senegal
315 Serbia
256 Seychelles
257 Sierra Leone
258 Singapore
316 Slovenia
259 Solomon Islands
260 Somalia
261 South Africa
262 Spain
263 Sri Lanka
264 Sudan
265 Surinam
266 Swaziland
267 Sweden
268 Switzerland
269 Syria
270 Taiwan
308 Tajikistan
271 Tanzania
272 Thailand
273 Togo
274 Tonga
275 Trinidad & Tobago
276 Tristan da Cunha
277 Tunisia
278 Turkey
309 Turkmenistan
279 Turks & Caicos Islands
280 Tuvalu
281 Uganda
310 Ukraine
283 United Arab Emirates
284 Uruguay
311 Uzbekistan
285 Vanuatu
286 Vatican City
287 Venezuela
288 Vietnam
299 Wallis & Futuna Islands
289 Western Samoa
290 Yemen, Republic of
292 Bosnia-Hercegovina
293 Zaire
294 Zambia
295 Zimbabwe
197 Korea, (Democratic Peoples Republic)
198 Korea, Republic of (South Korea)
199 Kuwait
305 Kyrgyzstan
200 Lao
201 Latvia
202 Lebanon
204 Lesotho
205 Liberia
206 Libya
203 Liechtenstein
207 Lithuania
208 Luxembourg
209 Macao
313 Macedonia (Rep. of)
210 Madagascar
211 Madeira Islands
212 Malawi
213 Malaysia
214 Maldives
215 Mali
216 Malta
217 Martinique
218 Mauritania
219 Mauritius
220 Mexico
306 Moldova
221 Mongolia
314 Montenegro
298 Montserrat
222 Morocco
223 Mozambique
307 Namibia
224 Nauru
225 Nepal
226 Netherlands
227 Netherlands Antilles
228 New Caledonia
229 New Zealand
230 Nicaragua
231 Niger
232 Nigeria
233 Norway
234 Oman
235 Pakistan
236 Panama
237 Papua New Guinea
238 Paraguay
239 Peru
240 Philippines
241 Pitcairn Island
242 Poland
243 Portugal
244 Qatar
245 Reunion Island
246 Romania
282 Russia
247 Rwanda
248 St. Christopher & Nevis
249 St. Helena
250 St. Lucia

Country Code Number Addendum Page 1
Addendum to Detecto Mailing Scales,
MS-4, MS-8, MS-15,
MS-30, MS-100 and MS-1600
COUNTRY CODE NUMBERS
This addendum lists the Country Code numbers used by the Detecto Mailing Scales listed
above to work in accordance with the new International mail services implemented by the U.S.
Postal Service effective May 14, 2007. Consult your scale operation manual for additional
operation information. For additional information about the new International mail services and
mail-piece eligibility consult your local post office or the International Mail Manual.
A
101 - Afghanistan
102 - Albania
103 - Algeria
104 - Andorra
105 - Angola
296 - Anguilla
106 - Antiqua & Barbuda
107 - Argentina
300 - Armenia
165 - Aruba
108 - Ascension
109 - Australia
110 - Austria
301 - Azerbaijan
B
112 - Bahamas
113 - Bahrain
114 - Bangladesh
115 - Barbados
302 - Belarus
116 - Belgium
117 - Belize
118 - Benin
119 - Bermuda
120 - Bhutan
121 - Bolivia
292 - Bosnia-Herzegovina
122 - Botswana
123 - Brazil
297 - British Virgin Islands
124 - Brunei Darussalam
125 - Bulgaria
126 - Burkina Faso
127 - Burma (Myanmar)
128 - Burundi
C
194 - Cambodia
129 - Cameroon
130 - Canada
131 - Cape Verde
132 - Cayman Islands
133 - Central African Republic
134 - Chad
135 - Chile
136 - China
137 - Colombia
138 - Comoros
139 - Congo, Democratic Republic of the
293 - Congo, Republic of the
141 - Costa Rica
190 - Cote d’Ivoire (Ivory Coast)
312 - Croatia
142 - Cuba
143 - Cyprus
144 - Czech Republic
D
145 - Denmark
146 - Djibouti
147 - Dominica
148 - Dominican Republic
E
150 - Ecuador
151 - Egypt
152 - El Salvador
153 - Equatorial Guinea
318 - Eritrea
154 - Estonia
155 - Ethiopia
F
157 - Falkland Islands
156 - Faroe Islands
158 - Fiji
159 - Finland
160 - France
161 - French Guiana
162 - French Polynesia

Country Code Number Addendum Page 2
G
163 - Gabon
164 - Gambia
303 - Georgia, Republic of
166 - Germany
167 - Ghana
168 - Gibraltar
169 - Great Britain & Northern Ireland
170 - Greece
171 - Greenland
172 - Grenada
173 - Guadeloupe
174 - Guatemala
175 - Guinea
176 - Guinea-Bissau
177 - Guyana
H
178 - Haiti
179 - Honduras
180 - Hong Kong
181 - Hungary
I
182 - Iceland
183 - India
184 - Indonesia
185 - Iran
186 - Iraq
187 - Ireland (Eire)
188 - Israel
189 - Italy
J
191 - Jamaica
192 - Japan
193 - Jordan
K
304 - Kazakhstan
195 - Kenya
196 - Kiribati
197 - Korea, Democratic People’s Republic
of (North)
198 - Korea, Republic of (South)
199 - Kuwait
305 - Kyrgyzstan
L
200 - Laos
201 - Latvia
202 - Lebanon
204 - Lesotho
205 - Liberia
206 - Libya
203 - Liechtenstein
207 - Lithuania
208 - Luxembourg
M
209 - Macao
313 - Macedonia, Republic of
210 - Madagascar
212 - Malawi
213 - Malaysia
214 - Maldives
215 - Mali
216 - Malta
140 - Marshall Islands
217 - Martinique
218 - Mauritania
219 - Mauritius
220 - Mexico
111 - Micronesia
306 - Moldova
221 - Mongolia
298 - Montserrat
222 - Morocco
223 - Mozambique
N
307 - Namibia
224 - Nauru
225 - Nepal
226 - Netherlands
227 - Netherlands Antilles
228 - New Caledonia
229 - New Zealand
230 - Nicaragua
231 - Niger
232 - Nigeria
233 - Norway
O
234 - Oman
P
235 - Pakistan
236 - Panama
237 - Papua New Guinea
238 - Paraguay
239 - Peru
240 - Philippines
241 - Pitcairn Island
242 - Poland
243 – Portugal
Q
244 - Qatar
R
245 - Reunion
246 - Romania
282 - Russia
247 - Rwanda

Country Code Number Addendum Page 3
S
248 - St. Christopher (St Kitts) & Nevis
249 - St. Helena
250 - St. Lucia
251 - St. Pierre & Miquelon
252 - St. Vincent & Grenadines
291 - San Marino
253 - Sao Tome & Principe
254 - Saudi Arabia
255 - Senegal
315 - Serbia-Montenegro (Yugoslavia)
256 - Seychelles
257 - Sierra Leone
258 - Singapore
317 - Slovak Republic (Slovakia)
316 - Slovenia
259 - Solomon Islands
260 - Somalia
261 - South Africa
262 - Spain
263 - Sri Lanka
264 - Sudan
265 - Suriname
266 - Swaziland
267 - Sweden
268 - Switzerland
269 - Syrian Arab Republic (Syria)
T
270 - Taiwan
308 - Tajikistan
271 - Tanzania
272 - Thailand
273 - Togo
274 - Tonga
275 - Trinidad & Tobago
276 - Tristan da Cunha
277 - Tunisia
278 - Turkey
309 - Turkmenistan
279 - Turks & Caicos Islands
280 – Tuvalu
U
281 - Uganda
310 - Ukraine
283 - United Arab Emirates
284 - Uruguay
311 - Uzbekistan
V
285 - Vanuatu
286 - Vatican City
287 - Venezuela
288 - Vietnam
W
299 - Wallis & Futuna Islands
289 - Western Samoa
Y
290 - Yemen
Z
294 - Zambia
295 - Zimbabwe

Country Code Number Addendum Page 4
ADDENDUM FOR MANUALS:
8540-M412-O1 03/96
8540-M320-O1 Rev C 9/95
8540-M104-O1 Rev H 7/05
04/07
Technical Support: Ph: 866-254-8261
v
Table of contents
Other Detecto Scale manuals
Detecto
Detecto solo User manual
Detecto
Detecto 8435 User manual

Detecto
Detecto 450 User manual
Detecto
Detecto 6876 User manual
Detecto
Detecto SlimPRO User manual
Detecto
Detecto ICON Series User manual
Detecto
Detecto AS-300D Series User manual
Detecto
Detecto D401 User manual
Detecto
Detecto IB400 User manual
Detecto
Detecto d219 User manual
Detecto
Detecto D303 User manual
Detecto
Detecto 6855KGEU User manual
Detecto
Detecto icon User manual

Detecto
Detecto 750 Manual
Detecto
Detecto 337 User manual
Detecto
Detecto P220 User manual
Detecto
Detecto AP-10 Reference guide

Detecto
Detecto PS-11 User manual
Detecto
Detecto VET400 User manual
Detecto
Detecto GP-400-758C Reference guide
