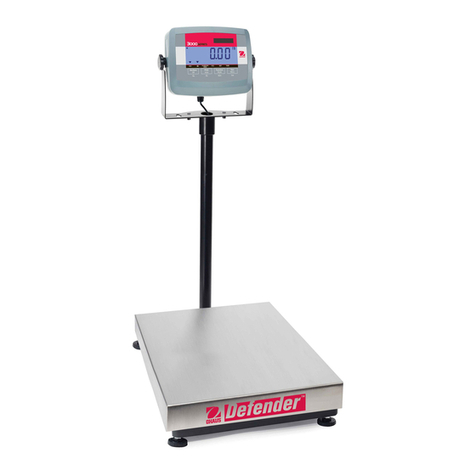
Detecto AS-300D Series User manual

AS-300D Series
Smart Bench Scales
Owner’s Manual
T
D
E
T
C
O
E
A Division of Cardinal Scale Manufacturing Co.
®
PO BOX 151 • WEBB CITY, MO 64870
417-673-4631
8527-M214-O1 Rev B
01/03
Printed in USA

SERIAL NUMBER
DATE OF PURCHASE
PURCHASED FROM
RETAIN THIS INFORMATION FOR FUTURE USE
PRECAUTIONS
Before using this instrument, read this
manual and pay special attention to all
“WARNING” symbols:
INTRODUCTION
The AS-300 series Smart Bench Scales consist
of the AS-300D and AS-350D. The AS-300D is a
100 pound capacity bench scale while the
AS-350D model is a 150 pound capacity scale.
Both models have a 12" x 14" stainless steel
platform. The scales are equipped with a
bi-directional RS232C compatible port for
communication with a variety of peripheral
devices.
This owner’s manual is provided to describe the
operation and interfacing requirements for these
scale models. The AS-300D and AS-350D
models include an integral vacuum fluorescent
7-segment weight display. Both scales may be
equipped with an optional ball transfer deck
allowing them to be placed at the end of a
conveyer.
The AS-350D is shipped from the factory in the
following configuration:
Pounds/Ounces Mode Selected
9600 Baud
8 Data Bits
No Parity
1 Stop Bit
TABLE OF CONTENTS
Installation ....................................................1
Specifications ...............................................2
Data Output/Command Format ....................2
Maintenance .................................................3
Part List ........................................................4
Part Identification ..........................................5
LIST OF FIGURES
Figure No. 1 ............Scale Installation
Figure No. 2 ............Part Identification
IMPORTANT ELECTRICAL
WARNING
All rights reserved. Reproduction or use, without
express permission, of editorial or pictorial
content, in any manner, is prohibited. No patent
liability is assumed with respect to the use of the
information contained herein. While every
precaution has been taken in the preparation of
this book, we assume no responsibility for errors
or omissions. Neither is any liability assumed for
damages resulting from the use of the
information contained herein. All instructions and
diagrams have been checked for accuracy and
ease of application; however, success and safety
in working with tools depend to a great extent
upon the individual accuracy, skill and caution.
For this reason, we are not able to guarantee the
result of any procedure contained herein. Nor
can we assume responsibility for damage to
property or injury to persons occasioned from
the procedures. Persons engaging the
procedures do so entirely at their own risk.
FCC COMPLIANCE STATEMENT
WARNING! This equipment generates, uses
and can radiate radio frequency energy and if
not installed and used in accordance with the
instructions manual, may cause interference
to radio communications. It has been tested
and found to comply with the limits for a
Class A computing device pursuant to
Subpart J of Part 15 of FCC Rules, which are
designed to provide reasonable protection
against such interference when operated in a
commercial environment. Operation of this
equipment in a residential area is likely to
cause interference in which case the user at
his own expense will be required to take
whatever measures necessary to correct the
interference.

1
Commodity
Tray
Capacity Label
Level
Indicator
Zero Button
Weighbridge
Weight
Display
Locking
Nut
Mounting
Foot
INSTALLATION
On receipt of your AS-300 series scale, carefully unpack the scale removing all packing material.
Examine the scale to make certain that there is no shipping damage. Should damage be discovered
contact the shipping company as soon as possible. The packing material and shipping carton should
be retained for possible examination by the shipping company.
Determine where the scale is to be located. It should be a smooth surface capable of supporting both
the scale and any load apt to be placed on the scale. It should not be in direct sunlight nor should it
be subject to air flow from heating/cooling vents, fans or similar devices.
Place the scale in the chosen location and remove the stainless steel commodity tray. The tray can
be removed by lifting upward on it removing it from the weighbridge. Locate the small level indicator
on the weighbridge and check to make certain that the scale is level. If the level indicator does not
show a level indication, the mounting feet should be adjusted to obtain a level condition. To adjust a
mounting foot, first loosen the lock nut then turn the mounting foot in the required direction to raise or
lower that corner of the scale. Once a level condition has been achieved, secure the mounting foot
settings by tightening each of the lock nuts. Replace the commodity tray on the weighbridge. Refer to
Figure No. 1 for additional information.
Make certain that the power switch on the rear of the scale is in the OFF position then plug the power
cord into a 115 vac grounded polarized power outlet and make certain that the power cord is not in
the way of normal traffic. The socket-outlet shall be installed near the equipment and shall be easily
accessible. If you are unsure whether your power outlet is correct, you should consult a qualified
electrician. Turn the power switch to the ON position.
If the display illuminates with a display segment test, installation of the scale is complete. If not, check
to make sure that the power outlet and the scale fuse are good.
SCALE INSTALLATION
Figure No. 1

2
SPECIFICATIONS
Platform Size: ...............................................................12" x 14"
Capacity:
AS-350D ............................................................150 lb
AS-300D ............................................................100 lb
Division Size:
AS-300D ............................................................0.5 oz
AS-350D
Pounds/Ounces Mode:
0-5 lb .......................................................0.1 oz
5 to 100 lb ...............................................0.5 oz
100 to 150 lb ...........................................1 oz
Pounds Only Mode (option) .........................0.02 lb
Pounds Only Mode (high resolution,option) .0.002 lb
Load Cell Capacity: .....................................................200 lb
Temperature Range: ....................................................-10°to +40°C
Calibration: ...................................................................Digital
External Controls: .........................................................Zero Button
Display: .........................................................................LED
7 segment - 0.5" high
Options: ........................................................................Ball Top Transfer
DATA OUTPUT/COMMAND FORMAT
The following describes commands that may be sent to the scale via its serial port and the format of
the weight and status data transmitted by the scale. Note that the commands are divided into two
groups: those used in the optional pounds only mode (only for AS-350D) and those used in the
pounds/ounces mode (both models). All commands are the ASCII equivalent and transmitted to the
scale.
Pounds Only Mode Selected (Optional-AS-350D only)
W=> Standard Resolution Request to Transmit Scale Weight
(This command can only be used when the scale mode has been set to the
Pounds Only Mode)
Scale Output Format: <STX>Snnn.nn<CR>
where:
<STX> = ASCII STX
nnn.nn = scale weight in pounds with decimal point
<CR> = Carriage Return
If the scale weight is below zero, over capacity, in motion or at center-of-zero, then the status word is
returned in place of the scale weight. See the Status Request Section for the format of the scale
status character.
H=> High Resolution Weight Request to Transmit Scale Weight
(This command can only be used when the scale mode has been set to the
Pounds Only Mode)
Scale Output Format: <STX>nnn.nnn<CR>
where:
<STX> = ASCII STX
nnn.nnn = scale weight in pounds with decimal point
<CR> = Carriage Return
If the scale weight is below zero, over capacity, in motion, or on center-of-zero, then the status word
is returned in place of the weight.
Z=> Zero Scale Weight Command
(resets scale weight to zero)
A=> Status Word Request

3
The status word is transmitted in the following format:
1 = Motion 0 = No Motion
1 = Over Capacity 0 = Not Over Capacity
1 = Below Zero 0 = Zero or Above
1 = Center of Zero 0 = Not at Center of Zero
Pounds/Ounces Mode Selected (Both Scale Models)
ASCII SO (%0E) => Enable Continuous Output
Disable On-Demand Output
ASCII SI (%0F) => Disable Continuous Output
Enable On-Demand Output
ASCII ~ (%7E) => Transmit Weight in Pounds/Ounces Mode
Data Format: <STX>bPPPbLBb00.0bOZbXCC<ETX>
where:
<STX> = ASCII STX
b = ASCII Space
PPP = Weight in Pounds
LB = Text Indicating Pounds
00.0 = Weight in Ounces
OZ = Text Indicating Ounce
X = Status Character
M = Motion
B = Below Zero
C = Over Capacity
CC = Checksum Byte
Checksum Byte - All hexadecimal digits up to but not including the checksum are exclusive-or’d with
each other to form a checksum byte. The byte is further split into two nibbles with the high nibble first.
Each nibble is or’d with an ASCII 0 (%30) to produce the final ASCII checksum value.
ASCII EOT (%04) =>Version Request Command
Causes the scale to transmit scale software revision level in the
following format: <STX>VVVCC<ETX>
where:
<STX> = ASCII STX
VVV = 3 Digit Revision Level
CC = Checksum Digits
<ETX> = ASCII ETX
The checksum digits (CC) are formed by exclusive or-ing all three version number digits (VVV) to
produce a checksum byte. This byte is then split into two nibbles with the high nibble transmitted first.
Each nibble is or’d with an ASCII 0 (%30) to form the final ASCII checksum representation.
MAINTENANCE
There are no user replaceable or serviceable parts contained within your AS-300 series scale. Do not
disassemble the scale. Maintenance should be limited to cleaning the exterior of the scale enclosure
with a damp cloth.
CAUTION! Make certain that you have turned the power switch to the OFF position and
removed the power cord from the wall outlet before cleaning the scale.
Should you ever need to replace the fuse, make certain that only fuses of the same type and rating
are used to ensure continued electrical protection. If you have any questions concerning service, you
should contact your scale service representative.
0110XXXX
^^^^

4
PART IDENTIFICATION
Please refer to Figure No.2 when placing an order for a part to ensure that you receive the correct
part.
Item Qty Part No. Description
1 1 2950-C064-5A Load Cell Assy
2 1 8527-D206-0A Weighbridge
3 1 427R1313 Commodity Tray
4 1 *511R9458 Calibration Seal
5 1 8530-D014-6A Analog Board Assy
6 1 6910-5095 Power Switch
7 1 *8527-A216-PS Serial Tag
8 6 6021-0665 #6-32 X .375 Pan Head Screw
9 8 6680-0004 #6-32 Inside Star Washer
10 2 6013-0039 #6-32 Hex Nut
11 2 *6540-1005 Jack Socket
12 2 *6680-0052 #4 Lock Washer
13 2 *6013-0245 #4-40 Hex Nut
14 4 6540-1011 Leveler Screw
15 4 6540-1012 Cap, Snap-On
16 8 6024-0039 Lock Washer
17 8 6013-0045 1/4-20 Hex Nut
18 4 6007-2133 M10-35mm
19 1 8527-C370-0A Display Board
20 1 6690-0001 Level
21 1 8527-B217-0A Zero Cable Assembly
22 1 8527-C099-0A Cable Assembly
23 1 8527-D371-0A Controller Assembly
24 1 8527-C099-1A Serial Cable
25 1 8527-B205-08 Load Cell Spacer
26 1 8527-D201-08 Base Assembly
27 1 8527-D210-08 Top Cover
28 1 8527-C211-08 Display Overlay
29 1 6670-0003 RFI Filter Assy
30 1 6610-4046 Fuse Holder
31 1 6610-4019 1/4 AMP Slow Blow Fuse
32 1 8527-B122-0A AC Cable Assembly
33 1 6980-0008 Strain Relief Bshng
34 4 6021-0448 #4-40 X .75 Flat Head Screw
35 2 8527-B109-0A Cable Assembly
36 4 6680-0045 .25 X .14 X .25 Nylon Spacer
37 13 6021-0423 #4-40 X .25 Pan Head Screw
38 13 6680-0026 #4 Internal Star Washer
39 10 6021-0611 #6-32 X .25 Flat Head Screw
40 4 6021-1412 .25-20 X 1.5 Hex Head Screw
41 1 *593R1007 Factor Set Label (Located on Bottom)
42 1 8527-B213-0A Cable Assembly
43 2 6025-2045 #6-32 x .63 Flat Head Screw
44 1 8527-B123-0A Filter Ground Cable
45 1 6021-0801 #8-32 X 3/8 Machine Screw
46 1 8527-B221-08 Power Supply Insul
47 1 6024-1000 #8 Internal Star Washer
48 1 8541-C254-0A Ball Transfer Assembly (Option)
49 1 8540-B305-08 Cover
50 2 6021-1257 #8-32 X .375 Truss Head Screw
51 1 6021-1823 3/8-24 X .5 Set Screw
52 8 *6680-0145 Rivnut
*Not Shown

5
15
14 17
16
18
31
30
37
38
43
29
32
9
10
35 6
1
25
36
19
39
34
28
21
26
23
5
9
8
40
17
16
20
50
49
2
27
18
3
48
22
24
PART IDENTIFICATION
Figure No. 2

U
N
A
M
&
E
D
S
I
G
U
N
E
D
F
A
C
T
R
E
D
I
N
U
S
A
.
.
.
U
N
A
M
&
E
D
S
I
G
U
N
E
D
F
A
C
T
R
E
D
I
N
U
S
A
.
.
.
Table of contents
Other Detecto Scale manuals

Detecto
Detecto 6560 User manual
Detecto
Detecto P220 User manual
Detecto
Detecto FH-133 User manual
Detecto
Detecto DL Series User manual
Detecto
Detecto DR550C User manual
Detecto
Detecto FHD-133 User manual

Detecto
Detecto PS-11 User manual
Detecto
Detecto MB130 User manual
Detecto
Detecto 685 Series User manual

Detecto
Detecto Detecto 8432-CH User manual
Detecto
Detecto 6029 User manual
Detecto
Detecto 7550 User manual
Detecto
Detecto VET550 User manual
Detecto
Detecto 6570 User manual
Detecto
Detecto AP-10 Reference guide
Detecto
Detecto 6880 User manual
Detecto
Detecto VET75 User manual
Detecto
Detecto AP-10 User manual
Detecto
Detecto 6027 Manual
Detecto
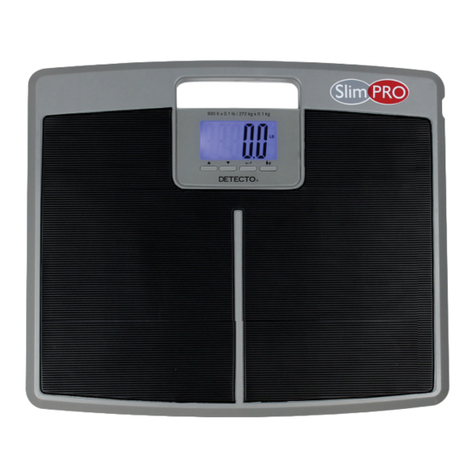
Detecto SlimPRO User manual
