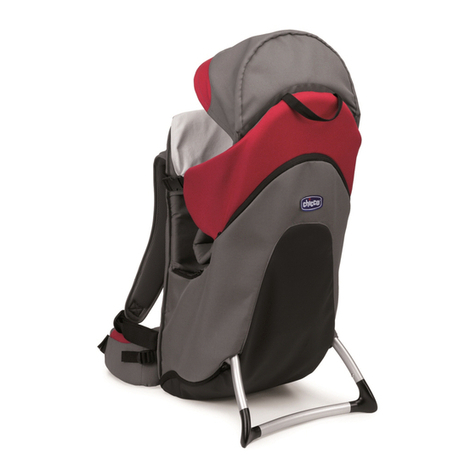
deuter KID COMFORT ACTIVE User manual

Die deuter Kid Comfort Kindertrage bietet Ih-
nen den Vorteil TÜV SÜD/GS geprüfter Quali-
tät für Ihr Kind. Beachten Sie für die Sicher-
heit Ihres Kindes bei jeder Nutzung der Kid
Comfort Kindertragen bitte jedoch die unten
stehenden Punkte:
SICHERHEITSHINWEISE
ZUR NUTZUNG
BEDIENUNGSANLEITUNG FÜR DIE KINDERTRAGEN
KID COMFORT ACTIVE, KID COMFORT, KID COMFORT PRO
ACHTUNG! SORGFÄLTIG LESEN
UND FÜR SPÄTERES NACH
SCHLAGEN AUFBEWAHREN
WARNUNG–Nicht verwenden, bis das Kind selbständig sitzen kann! Das Kind
sollte sich bereits aus eigener Kraft in die Sitzposition begeben können
(etwa ab dem 9. Monat– kann individuell jedoch sehr unterschiedlich sein).
Die maximale Zuladung für die Kindertrage beträgt 24 kg
(Kind 22 kg + Gepäck 2 kg).
Transportieren Sie Ihr Kind nur angeschnallt und und unter Verwendung
der Fußschlaufen. Achten Sie darauf, dass der Sicherheitsgurt dabei
optimal für ihr Kind eingestellt ist (s. Schritt 3).
WARNUNG – Lassen Sie das Kind nicht unbeaufsichtigt in dieser Rücken-
trage mit Gestell sitzen! Die Kindertrage nicht auf erhöhte Flächen oder ab-
schüssiges Gelände stellen. Bei Pausen das Kind aus der Trage nehmen.
Längeres Sitzen kann das Kind ermüden und in seinen Beinen zur Ein-
schränkung der Blutzirkulation führen. Nutzen Sie deshalb die Fußstüt-
zen und legen Sie häufig Bewegungspausen ein.
WARNUNG – Die Kopfposition des in der Trage sitzenden Kindes ist
höher als die des Trägers. Deshalb Vorsicht bei niedrigen Ästen,
Türrahmen u.ä.
D
KidComfort_Booklet_Insert_22.indd 1KidComfort_Booklet_Insert_22.indd 1 02.03.21 16:3602.03.21 16:36

(Siehe Skizzen Umschlag vorne)
AAbnehmbares, handwaschbares
Kinnpolster ist angenehm weich.
Kid Comfort Pro, Kid Comfort: Kinnpols-
ter mit abnehmbarem, auswaschbarem Be-
zug. Die ergonomische Polsterform gibt dem
Köpfchen samt Oberkörper seitlich Halt und
stützt die Halswirbelsäule, wenn das Kind mü-
de nach vorne sinkt.
WARNUNG–Bei Verwendung der Trage muss
der Erwachsene auf Folgendes achten:
• Die Kid Comfort eignet ausschließlich für den
Transport von Kindern durch Erwachsene.
• Prüfen Sie die Kindertrage vor jedem Ge-
brauch auf Beschädigungen.
• Nutzen Sie die Kindertrage niemals in be-
schädigtem Zustand (verbogener Rahmen,
gebrochene Schnallen, offenen Nähten etc.).
• WARNUNG – Der Erwachsene, der das Kind
trägt, muss sehr vorsichtig sein, wenn er
sich nach vorne beugt oder lehnt.
• WARNUNG – Die Trage ist für die Nutzung
bei Freizeitaktivitäten geeignet, nicht je-
doch bei Sportaktivitäten wie Radfahren,
Skifahren oder ähnliches.
• Das in der Trage sitzende Kind leidet schnel-
ler und stärker unter Witterungseinflüssen
als der sich in Bewegung befindliche Er-
wachsene. Stellen Sie daher sicher, dass
das Kind entsprechendgekleidet ist und
prüfen unterwegs regelmäßig die Tempera-
tur seiner Hände und Füße.
• Das Kind darf sich nicht auf den Sitz der
Kindertrage stellen.
• Die empfindliche Kinderhaut ist vor Sonnen-
einstrahlung mit einem Sonnendach ab-
zuschirmen. Zusätzlich sollten Sie Ihr Kind
immer mit entsprechendem Sonnenschutz
vor Streulicht schützen!
• Stellen Sie die Kindertrage mit dem Kind
nicht auf Tischen oder erhöhten Flächen ab.
• Stürze oder Ausrutscher können zu ernst-
haften Verletzungen des Kindes führen.
• WARNUNG – Der Träger muss jeder Zeit da-
rauf gefasst sein, dass eine unerwarte-
te Bewegung, ob von ihm selbst oder dem
Kind, sein Gleichgewicht beeinträchtigt.
• Es sollte darauf geachtet werden, Verlet-
zungen der Füße des Kindes zu vermeiden,
wenn die Trage abgestellt wird bzw. die
Trage am oder nahe dem Boden ist.
• WARNUNG – Beim Aufsetzen und Absetzen
der Trage ist mit Vorsicht vorzugehen.
• Der Rucksack der Kid Comfort Pro darf aus-
schließlich von Erwachsenen verwendet wer-
den. Durch die langen Gurtbänder besteht
für Kinder Strangulationsgefahr.
Bei Nichtbeachtung dieser Hinweise kann es zu
Verletzungen, dauerhaft körperlichen Schädi-
gungen oder sogar zum Tod des Kindes führen.
FUNKTIONEN
KidComfort_Booklet_Insert_22.indd 2KidComfort_Booklet_Insert_22.indd 2 02.03.21 16:3602.03.21 16:36

BDas ergonomisch geformte, gepolster-
te Sicherheitsgurtsystem garantiert
höchste Sicherheit. Unvorhergesehene, weite
Bewegungen des Kindes, die den Träger aus
der Balance bringen könnten, werden vermie-
den. Durch seitlich angeordnete, farbig ge-
kennzeichnete Schnallen ist er schnell ver-
ständlich, einfach bedienbar und sehr gut er-
reichbar. Die Höhe ist mühelos anpassbar
auch wenn das Kind schon sitzt.
(3. 5-Punkt-Sicherheitsgurt anpassen)
CMit zwei stabilen Handgriffen kann die
Trage mit Kind vom Träger allein auf
den Rücken gehoben und abgesetzt werden.
(6. Kindertrage auf- und absetzen)
DDie Sonnendachoption gibt die Mög-
lichkeit, insbesondere im Hochsom-
mer und im Gebirge, die empfindliche
Kinderhaut vor starker Sonneneinstrahlung
abzuschirmen. Sonnendach bei Kid Comfort
Active als Accessoire erhältlich, bei Kid Com-
fort mitgeliefert, bei Pro fest integriert.
(5. Sonnen- und Regendach anbringen)
EMit dem höhenverstellbaren Sitz be-
findet sich das heranwachsende Kind
immer in der idealen Position: das Kinn auf
Höhe der oberen Hälfte des Kinnpolsters.
Die Breite des Sitzpolsters variiert in Relati-
on zur eingestellten Höhe und ermöglicht in
Verbindung mit den Fußstützen eine alters-
gerechte gesunde Sitzhaltung: Je höher ein-
gestellt, desto breiter ist der Sitz für eine na-
türliche Anhock-Spreiz-Haltung, je tiefer ab-
gelassen, desto schmäler wird er für eine
aufrechte Sitzposition.
(2. Höhe des Kindersitzes einrichten)
FDen einfachen und sicheren Zustieg
über die Seite nutzen die Kinder mit
Begeisterung, um selbst in die Trage zu
schlüpfen. Auch das Hineinheben wird da-
durch wesentlich leichter und sicherer.
GHöhenverstellbare Fußstützen fördern
die Durchblutung der Kinderbeine,
damit diese länger warm bleiben und nicht
einschlafen. Die Fußstützen sind beweglich an-
gebracht. Das Kind kann also spielerisch sei-
ne Bein- und Sitzposition ändern, gleichzeitig
aber mit deren Hilfe nicht aufstehen. So wird
das Aufschaukeln beim Tragen oder das Kip-
pen der stehenden Kraxe wirksam verhindert.
(4. Höhe der Fußstützen einrichten)
HDer standfeste Aluminium-Rahmen
mit seinem breiten Klappfuß ist beim
Ein- und Aussteigen von großem Vorteil.
IPerfekt abgestimmte Rückensysteme ga-
rantieren deuter typischen Tragekomfort:
LITE AIR SYSTEM
Leichte und luftige Konstruktion mit perfek-
ter Lastübertragung: Der extrem leichte, mi-
nimalistische Kontaktrücken ist direkt mit
dem Rahmengestell verbunden und garan-
tiert so perfekte Lastübertragung und Kon-
trolle bei niedrigstem Gewicht. Das Lite Air
Rückenpanel sitzt kompakt, ist durch seine
Struktur aber angenehm belüftet.
AIRCOMFORT SENSIC VARIO
Perfekte Lastübertragung bei maximaler
Belüftung: Das Sensic System nutzt innova-
tiv den Leerraum zwischen dem Kindersitz
und dem Rücken des Trägers. Hier schafft
das Aircomfort-Netz einen Ventilationsraum,
D
KidComfort_Booklet_Insert_22.indd 3KidComfort_Booklet_Insert_22.indd 3 02.03.21 16:3602.03.21 16:36

(Siehe Skizzen Umschlag hinten)
1Tragesystem
anpassen
1.1 Zuerst sämtliche Riemen lockern. Kinder-
trage mit realistischem Gewicht, jedoch nicht
mit dem Kind selbst, beladen und schultern.
1.2 Hüftflossen mittig auf den Beckenkno-
chen platzieren und zuziehen.
1.3 Anschließend Schulterträger nur so
festziehen, dass das Hauptgewicht weiterhin
mit den Hüftflossen getragen wird.
1.4 Idealerweise liegt der Trägeransatz zwi-
schen den Schulterblättern. Um diese Position
einzustellen die Schulterträger über die Rücken-
längen-Anpassung höher oder tiefer platzieren:
1.5.1 VariSlide: Blitzschnell lässt sich die
Rückenlänge durch dieses System perfekt
und stufenlos genau anpassen. Dazu die zen-
tral am Rückensystem angebrachte Kunst-
stoffschnalle anheben a). Gleichzeitig die
Schulterträger in die passende Position zie-
hen oder schieben b).
1.5.2 VariQuick: Das Klettband am Träger-
herz öffnen und durch die passenden 4 Be-
über den die feuchte Luft ungehindert abzie-
hen kann. Der Schwerpunkt des Kindes bleibt
dabei in der gleichen Position wie bei einer
Kraxe mit Kontaktrücken. Das Tragesystem
ist direkt mit dem Rahmen der Kraxe verbun-
den. Die Vorteile sind enorm: Die ergonomi-
sche Kraxe sitzt perfekt und die Last wird op-
timal, weil körpernah, übertragen. Durch das
Spezialnetz genießt der Träger zugleich maxi-
male Belüftung.
JFür besten Tragekomfort schmiegen
sich S-förmige Schulterträger, formsta-
bil und mit luftigem 3D AirMesh bezogen, den
Schultern an.
KDank PullForward Verstellung sind die
Hüftflossen auch bei voller Ladung
leicht festzuziehen. Kid Comfort, Kid Comfort
Pro: Bewegliche Variflex ECL Hüftflossen um-
schließen mit ihren ergonomischen Polster-
einsätzen förmlich die Hüften und folgen je-
der Bewegung. Das Gewicht wird gleichmäßig
auf dem kräftigen Becken verteilt. Treppen,
unebene Pfade oder steilere Anstiege lassen
sich auf diese Weise Kraft sparend meistern.
LDamit beide Elternteile die Kraxe
angenehm tragen können, ist die
Rückenlänge mit wenigen Handgriffen genau
anpassbar. (1. Tragesystem anpassen)
BEDIENUNG
KidComfort_Booklet_Insert_22.indd 4KidComfort_Booklet_Insert_22.indd 4 02.03.21 16:3602.03.21 16:36

festigungsschlaufen führen a). Danach
Klettband festziehen und wieder fixieren b).
1.6 Nun den Winkel der Lageverstellriemen
anpassen: Rückenlänge S-M untere, M-L obe-
re Schnallen einfädeln. Durch Festziehen der
Lageverstellriemen an Schulterträgern und
Hüftflossen bekommt die Kindertrage enge-
ren Kontakt zum Rücken. Das sorgt für mehr
Stabilität in schwierigem Terrain. Für mehr
Belüftung etwas lockern.
Ist das Tragesystem an die Rückenlänge des
Trägers angepasst, die Kindertrage wieder
abnehmen und mit dem Einrichten der Sitz-
höhe fortfahren.
2Höhe des Kinder-
sitzes einrichten
2.1 Die Trage zum Einrichten auf dem Boden
absetzen. Die Riemen der Seitenflügel lockern
und den seitlichen Zustieg öffnen. 5-Punkt-Si-
cherheitsgurt ebenfalls lockern und öffnen.
2.2 Den Kindersitz nun vollständig absen-
ken. Dazu das Kinnpolster nach oben klappen,
die Sitzhöhen-Einstellschnalle anheben und
den Sitz mit der Hand nach unten drücken.
2.3 Stellen Sie sich an die Rückseite der
Trage und kontrollieren, ob diese stabil steht.
Zum Sichern der Trage während der weite-
ren Anpassungsschritte immer einen Fuß auf
dem Klappfuß platzieren.
2.4 Sie können nun das Kind in die Trage
heben oder es mit Unterstützung selbst über
die Seite einsteigen lassen. Führen Sie die
Arme ihres Kindes durch die Schulterträger
des Sicherheitsgurtes und schließen dessen
Brustgurt.
2.5 Die Sitzhöhe ist dann optimal, wenn das
Kind gut aus der Trage hinaussehen und die
Arme möglichst frei bewegen kann. Um den
Sitz in die ideale Höhe anzuheben den Einstell-
gurt soweit anziehen bis sich das Kinn des
Kindes knapp über der Schnalle für die Sitzhö-
heneinstellung befindet. Eine Hand unterstützt
dabei von unten die Bewegung des Sitzes.
35-Punkt-Sicherheits-
gurt anpassen
3.1 Nachdem sich der Kindersitz jetzt in
der idealen Höhe befindet, stecken Sie die
beiden Schließen des 5-Punkt-Sicherheitsg-
urtes in die seitlich am Sitz befindlichen, far-
big gekennzeichneten Schnallen.
3.2 Der Schulterträgeransatz des Sicher-
heitsgurtes sollte zwischen den Schulterblät-
tern des Kindes liegen: Greifen Sie hinter den
Rücken des Kindes, lösen das Klettband des
Trägerherzes und drücken es an der entspre-
chenden Position wieder an.
3.3 Dann die Schulterträger des 5-Punkt-
Sicherheitsgurtes eng aber nicht zu fest an-
ziehen. Kinnpolster nach unten klappen.
3.4 Seitlichen Zustieg schließen und an den
beiden Seitenflügeln die Riemen anziehen.
D
KidComfort_Booklet_Insert_22.indd 5KidComfort_Booklet_Insert_22.indd 5 02.03.21 16:3602.03.21 16:36

4Höhe der Fuß-
stützen einrichten
4.1 Die Breite des Sitzpolsters variiert in
Relation zur eingestellten Höhe und ermög-
licht in Verbindung mit den Fußstützen die
altersgerechte Sitzhaltung. Je nach Sitzposi-
tion müssen die Fußstützen in die obere a)
oder untere b) Position/Schnalle eingefädelt
werden. Während des Positionswechsels darf
sich die Fußstütze nicht in Reichweite des
Kindes befinden. Grundsätzlich gilt: Für klei-
nere Kinder mit einer höheren Sitzeinstellung
(4.2)die Fußstützen an der oberen Positi-
on befestigen. Für größere Kinder mit einer
tieferen Sitzposition (4.3)fädelt man die
Fußstützen an der unteren Position ein. Dem-
entsprechend die ideale Höhe der stufenlos
justierbaren Fußstützen durch ziehen oder lo-
ckern des Gurtbandes wählen:
4.2 Je höher der Sitz eingestellt wird, desto
breiter ist er für eine natürliche Anhock-
Spreiz-Haltung bei Kleinkindern. Die Beine
sollten hier leicht angewinkelt in den Fußstüt-
zen stehen.
4.3 Je tiefer der Sitz abgelassen wird,
desto schmäler ist er für eine aufrechte Sitz-
position bei etwas älteren Kindern. Hier die
Fußstützen so platzieren, dass die Beine we-
der frei nach unten hängen, noch zu stark
angewinkelt sind.
Zuletzt die unteren Riemen der Fußschlaufe
soweit anziehen, dass die Füße nicht mehr
abrutschen können.
5Sonnen- und Regen-
dach anbringen
ACHTUNG! Kontrollieren Sie die Haut ihres
Kindes regelmäßig, denn Kleinkinder haben
eine sehr empfindliche Haut. Schützen Sie ihr
Kind vor UV-Strahlen durch die Nutzung eines
Sonnenschutzdaches: für Kid Comfort Active
als Accessoire erhältlich, bei Kid Comfort mit-
geliefert, bei Kid Comfort Pro fest integriert.
Zusatz- oder Ersatzteile sollten nur vom Her-
steller oder Fachhandel bezogen werden.
5.1 Sonnendach Kid Comfort Active & Kid
Comfort: Gestänge in die beiden Stoffkanäle
auf der Vorderseite der Kopfstütze einstecken.
5.2 Sonnendach Kid Comfort Pro: Reißver-
schluss im Bereich der Kopfstütze komplett
öffnen und integriertes Sonnendach vorziehen.
5.3 Anschließend das Sonnendach mit den
Schnallen an der Kinnstütze befestigen.
Darüber kann der Regen-/Windschutz (nach-
rüstbar) gestülpt werden (o. Abb.). Passt auf alle
deuter Kraxen, die ein Sonnendach besitzen.
6Kindertrage
auf- und absetzen
6.1 Überprüfen Sie noch einmal den Sitz des
Sicherheitsgurtes und den seitlichen Zustieg,
ob er korrekt geschlossen ist. Gehen Sie nun
zur Rückseite der Kindertrage. Eine Hand hält
dabei den Griff an der Kopfstütze fest, um die
Trage zu sichern.
6.2 Fassen Sie mit der freien Hand den
KidComfort_Booklet_Insert_22.indd 6KidComfort_Booklet_Insert_22.indd 6 02.03.21 16:3602.03.21 16:36

WARTUNG
& PFLEGE
Der Kid Comfort Be-
zug ist abwaschbar
und kann mit lauwarmen Wasser und Neutral-
seife von Hand gereinigt werden. Das abnehm-
bare Kinnpolster A (mit abnehmbarem Bezug
bei Kid Comfort Pro, Kid Comfort) wird eben-
falls von Hand gereinigt und ist nicht Wäsche-
trockner geeignet. Um die Sicherheit der Kin-
dertrage zu gewährleisten, bitte die Trage vor
jeder Verwendung auf volle Funktionsfähigkeit
überprüfen. Bitte auch alle Riemen und das
Gestänge regelmäßig auf Verschleiß überprü-
fen. Einen verbogenen Rahmen niemals selbst
in Form biegen. Bei notwendigen Reparatu-
ren wenden Sie sich bitte an den Fachhandel
oder direkt an uns, um eine fachgerechte In-
standsetzung mit passenden Ersatzteilen zu
gewährleisten.
Griff auf der Rückseite. Der Griff an der Kopf-
stütze kann nun losgelassen werden.
Kontrollieren Sie, ob am Tragesystem die
Schultergurte gelockert und Brust- sowie
Hüftgurt geöffnet sind. Achten Sie darauf,
dass beim Aufsetzten keine Hindernisse im
Weg sind, gegen die die Kindertrage stoßen
könnte. Führen Sie die folgenden Schritte be-
hutsam ohne ruckartigen Bewegungen aus:
6.3 Stellen Sie sich etwa schulterbreit. Heben
Sie die Trage am Griff auf der Rückseite mit
einer Hand hoch und stützen sie auf ihrem
leicht angewinkelten Bein der Gegenseite ab.
6.4 Schlüpfen Sie mit dem freien Arm in
den passenden Schulterträger und nehmen
mit diesem das komplette Gewicht der Tra-
ge auf. Anschließend lassen Sie den Griff los
und schlüpfen mit dieser Hand in den ande-
ren Schulterträger.
6.5 Hüftflossen mittig auf dem Beckenkno-
chen platzieren und fest anziehen.
6.6 Dann die Schultergurte anpassen. Zu-
letzt den Brustgurt in die gewünschte Höhe
schieben und schließen.
6.7 Zuletzt Standbügel einklappen. An ei-
nem hörbaren „Klick“-Geräusch erkennt der
Träger, dass der Standfuß in der Stand- bzw.
der Transportposition eingerastet ist.
Das Absetzen erfolgt in umgekehrter Reihen-
folge wie das Aufsetzen der Kindertrage.
A
D
KidComfort_Booklet_Insert_22.indd 7KidComfort_Booklet_Insert_22.indd 7 02.03.21 16:3602.03.21 16:36

Kid Comfort Sun Roof
Der flexible, langlebige Sonnenschutz ist mit
Schnallen schnell an allen deuter Kindertra-
gen montiert. Das Sonnendach schützt das
Kind vor UV-Strahlen. Passend für Kid Comfort
Active, Kid Comfort Active SL, Kid Comfort.
Kid Comfort Chin Pad
Unsere Kindertragen sind mit dem großen,
ergonomischen Kopfkissen nachrüstbar. Es
fängt den müden Kinderkopf auch in den
Ecken der Kinderkraxe sanft auf und unter-
stützt einen entspannten Schlaf. Passend für
die Druckknopf-Befestigung der aktuellen
Modelle der Kid Comfort Serie.
Kid Comfort
Raincover Deluxe
Der komplette Regen- und Windschutz für die
Kindertragen. Passt auf alle Kraxen, die ein
Sonnendach besitzen.
Kid Comfort Foot Loops
Die höhenverstellbaren Fußstützen für unsere
Kindertragen sind nachrüstbar – mit Einstell-
möglichkeit zur Anpassung an die Kinderfüße
mit verschiedenen Schuhen.
ZUBEHÖR
KidComfort_Booklet_Insert_22.indd 8KidComfort_Booklet_Insert_22.indd 8 02.03.21 16:3602.03.21 16:36

deuter Kid Comfort child carriers are TÜV SÜD
tested and carry the GS safety certificate.
For your child’s safety, please consider the
following safety instructions when using the
Kid Comfort child carriers.
CAUTION – Not suitable for children/babies who cannot sit independent-
ly. The child must be able to sit up on their own (from around the ninth
month – with individual variations).
The maximum load capacity for the child carrier is 24 kg
(child 22 kg + load 2 kg).
Always carry your child strapped in and always use the foot loops.
Ensure the safety harness is adjusted correctly and fits the child
(see step 3).
CAUTION – Do not let the child sit in this carrier with support frame unsuper-
vised! Do not put the child carrier on a raised surface or on steep ground
with the child seated inside. Take the child out of the carrier during breaks.
Remaining seated for longer periods can reduce the circulation to your
child’s legs. Therefore, use the Kid Comfort foot loops and take regular
breaks to allow the child to get out and stretch its legs.
CAUTION – The child’s head is higher than the bearer’s head. Watch out
for low branches, door frames and similar obstacles.
EN
SAFETY & INSTRUCTION
INFORMATION
INSTRUCTION MANUAL FOR THE KID COMFORT ACTIVE,
KID COMFORT & KID COMFORT PRO CHILD CARRIERS
ATTENTION! READ CAREFULLY
AND KEEP IN A SAFE PLACE
FOR FUTURE REFERENCE
KidComfort_Booklet_Insert_22.indd 9KidComfort_Booklet_Insert_22.indd 9 02.03.21 16:3602.03.21 16:36

(See illustration on front cover)
AThe detachable chin pad is easy to
hand-wash and lovely soft for tired
little heads. Kid Comfort & Kid Comfort Pro:
The pad’s ergonomic shape provides com-
fortable stability for the head and the upper
body and stabilises the spine when the child
falls asleep and slouches forward. This pad
comes with removable and washable cover.
BThe ergonomically designed, padded
harness system ensures the high-
est levels of safety for your child. This helps
CAUTION you must consider the following
points when using the child carrier:
• The Kid Comfort is only suitable for the
transportation of a child by an adult.
• Always check the child carrier for signs of
damage prior to use.
• Never use the child carrier if damaged (bent
frame, broken buckles, split seams etc.).
• Never place the child carrier on a table,
counter or other raised surface.
• A slip or fall could lead to the child sustain-
ing severe injuries.
• CAUTION – The child carrier is appropriate
for leisure activities and not for sports such
as cycling, skiing or similar.
• Bear in mind that the child in the carrier
may suffer the effects of weather and tem-
perature before you do and with greater in-
tensity. Make sure the child is appropriate-
ly dressed and regularly check the tem-
perature of their hands and feet.
• Never allow the child to stand on the child
carrier seat.
• Young children’s skin is very sensitive to
sun and should be shielded with a sun
shade. We recommend you also use addi-
tional sun protection for your child.
• CAUTION – The adult carrying the Kid Com-
fort should be extra cautious when bending
over or leaning forward.
• CAUTION – The bearer should be aware
that unexpected movements (on the part of
the bearer as well as the child) may throw
them off balance.
• Be careful to protect the child’s feet from
injury when putting the child carrier down
or when the child carrier is near the ground.
• CAUTION – Be extra careful when putting
on or taking off the carrier.
• The backpack of the Kid Comfort Pro may
only be used from adults. For the child ex-
ists a risk of strangulation because of the
long straps.
Failure to comply with these instructions
could lead to severe injury, permanent physi-
cal damage and even fatality for your child.
FEATURES
KidComfort_Booklet_Insert_22.indd 10KidComfort_Booklet_Insert_22.indd 10 02.03.21 16:3602.03.21 16:36

prevent any unexpected movements from
the child bringing the bearer off balance. Co-
lour-coded buckles at the side make the har-
ness system clear and easy to operate and
access. And the seat height is easy to adjust,
even when the child is sitting in the cockpit.
(3. Adjusting the 5-point safety harness)
CTwo sturdy grab handles make the
Kid Comfort carriers easy to lift onto
the back without additional help. (6. Putting
on and taking off the child carrier)
DThe sun shade option protects the
child’s sensitive skin from harmful
sun radiation especially on hot summer days
or at high altitude. The sun shade is available
to buy separately as an accessory for the
Kid Comfort Active, comes included with the
Kid Comfort and comes attached with the Kid
Comfort Pro model. (5. Fitting the sun shade
and rain cover)
EHeight adjustable seat means the
child always sits in the ideal position:
the chin level with the upper half of the chin
pad. The width of the seat cushion matches
the adjusted seat height and, in combination
with the specific foot loop construction, en-
sures the sitting posture is ergonomic. The
width increases with the height of the seat to
guarantee a natural slightly splayed ‘frog leg’
position; the lower the seat the narrower the
width for a more upright sitting position.
(2. Adjusting the child seat)
FThe simple and safe side entry is very
popular with children who like to climb
into the seat by themselves. It also makes
lifting your child into the carrier easier.
GThe height adjustable foot loops
support circulation to the child’s legs
and prevents them from going numb or getting
too cold. The foot loops are flexible, so the
child can change its leg position or sitting
position, yet cannot be used to raise itself out
of the seat. This construction also prevents
the child carrier from swaying during use or
tipping over when down on the ground.
(4. Adjusting the height of the foot loops)
HThe sturdy aluminium frame with
its wide kickstand makes it safe and
easy to load and unload.
ISpecially constructed back systems
guarantee deuter’s high standards of
carry comfort:
LITE AIR SYSTEM
Light and airy with perfect load transfer
The ultra-lightweight, compact, full-contact
back system is directly connected to the
frame of the carrier, ensuring optimum load
transfer and stability, even with very light
loads. The Lite Air back panel sits compactly
while the structure gives it excellent ventila-
tion performance.
AIRCOMFORT SENSIC VARIO
Optimised load transfer with maximum ven-
tilation
The Sensic System makes innovative use of
the void between the child carrier and the
back of the person carrying it. This is where
the Aircomfort mesh performs its ventilation
function by allowing moisture vapour to es-
EN
KidComfort_Booklet_Insert_22.indd 11KidComfort_Booklet_Insert_22.indd 11 02.03.21 16:3602.03.21 16:36

(See illustration on back cover)
1Adjust the
carry system
1.1 First, loosen off all the straps. Load the
child carrier with an item(s) that is equivalent
in weight to your child and put it on.
1.2 Position the hip belt on the hip bones
and tighten.
1.3 Now tighten the shoulder straps,
but make sure the majority of the weight re-
mains on the hip belt.
1.4 Perfect position: the shoulder strap an-
chor points are between the shoulder blades.
Use the back length adjustment system to
raise or lower the position of the shoulder
straps until they are at the correct height.
1.5.1 VariSlide: This system lets you ad-
just the back length precisely and in no time
at all. Lift the plastic buckle in the centre of
the back panel a). At the same time, either
raise or lower the shoulder straps to the de-
sired position b).
1.5.2 VariQuick: Undo the Velcro strap lo-
cated in the middle of the back panel and
cape freely. The child’s centre of gravity re-
mains in the same position as it does with a
full-contact back system. The back system
is directly connected to the frame of the car-
rier, which has many advantages: The ergo-
nomic position of the carrier is maintained,
and the load is transferred effectively due to
its close proximity with the bearer. The spe-
cial mesh also provides the bearer with the
best possible ventilation.
JThe S-shaped shoulder straps wrap
themselves around the bearer’s shoul-
ders, retain their shape and are covered in
airy 3D AirMesh fabric for superior comfort.
KThe Pull-Forward system means
the hip fins are easy to tighten even
when the carrier is fully loaded. Kid Com-
fort, Kid Comfort Pro: Mobile Variflex ECL hip
fins with ergonomic padding wrap around
the hips and follow the natural movement
of your body. The load is evenly distribut-
ed across the solid pelvic basin. This means
less energy is required to negotiate stairs,
uneven ground or steeper terrain.
LThe back length is fully adjustable in
just a few easy steps, so that either
parent can carry the child carrier. (1. Adjust-
ing the carry system)
OPERATION
KidComfort_Booklet_Insert_22.indd 12KidComfort_Booklet_Insert_22.indd 12 02.03.21 16:3602.03.21 16:36

thread it through one of the 4 loops a). Then
pull the Velcro strap tight and fix it in place
again b).
1.6 Now adjust the angle of the stabilis-
er straps: for back length S/M thread through
lower buckles or for M/L through the upper
buckles. Tighten the stabiliser straps on the
shoulder straps and hip belt to ensure a com-
pact fit. This guarantees extra stability over
difficult terrain. For more ventilation loosen
the stabiliser straps.
After adjusting the carry system to the indi-
vidual back length, take off the child carrier
and then move on to adjusting the height of
the child’s seat.
2Adjust the height of
the child seat
2.1 Place the child carrier on the ground
before adjusting. Loosen the straps on the
side and open the side entry. Loosen and
open the 5-point safety harness.
2.2 Lower the child seat completely by lift-
ing the chin pad and raising the seat height
adjustment buckle. Then push the seat down.
2.3 Stand at the back of the child carrier to
make sure it is stable. Place one foot on the
kickstand to ensure it stays securely upright
throughout the following steps.
2.4 Lift the child into the carrier or ask the
child to enter the carrier via the side entry.
Thread its arms through the shoulder straps
of the 5-point safety harness and fasten the
chest strap.
2.5 The correct seating position is where
the child can see clearly over the top of the
carrier and, where possible, move its arms
freely. To adjust the seat to the correct
height, pull on the adjustment strap until the
child’s chin reaches just above the seat ad-
justment buckle. Slip one hand below the
seat for support while adjusting the seat.
3Adjust the 5-point
safety harness
3.1 Once the cockpit seat is at the right
height, stick the two ends of the safety har-
ness straps into the colour-coded buckles at
the side of the carrier.
3.2 Ideally, the anchor points of the safety
harness should be between the child’s shoul-
der blades. To adjust, release the Velcro har-
ness strap behind the child’s back and se-
cure it in the right position.
3.3 Tighten the shoulder straps of the
5-point safety harness so they are snug, but
not too tight. Fold down the chin pad again.
3.4 Close the side entry buckle and tighten
the straps on both side wings of the child seat.
EN
KidComfort_Booklet_Insert_22.indd 13KidComfort_Booklet_Insert_22.indd 13 02.03.21 16:3602.03.21 16:36

4Adjust the height of
the foot loops
4.1 The width of the seat cushion matches
the adjusted seat height and, in combination
with the specific foot loop construction en-
sures the sitting posture is ergonomic. Thread
the foot loop straps either into the upper a)
or lower b) position/buckle depending on the
child’s seating position. During this process,
keep the detached foot loop straps out of reach
of children. As a general rule: mount the foot
loops in the upper buckle for smaller children
with a higher seating position (4.2). For
taller children with a lower seat, mount the
footrests in the lower buckle (4.3). Then
adjust the foot loops to the required height
by tightening or releasing the straps:
4.2 The width increases with the height of
the seat to guarantee a natural slightly splayed
‘frog leg’ position for small children. The legs
should be at a slight angle in the foot loops.
4.3 The lower the seat, the narrower the
width of the seat, for an upright sitting po-
sition for slightly taller children. The legs
should neither dangle nor should they be at
too sharp an angle.
Finally, tighten the bottom strap to prevent
the foot from slipping out of the foot loop.
5Fitting the rain
cover and sun shade
NOTE! Check your child’s skin regularly be-
cause small children have very sensitive skin.
In strong sunlight, protect your child from UV
rays by using a sun shade (available to buy
as an accessory for the Kid Comfort Active
model, included with the Kid Comfort mod-
el and integrated in the Kid Comfort Pro mod-
el). Accessories or spare parts should only be
purchased directly from the manufacturer or
from specialist retailers.
5.1 Sun Shade Kid Comfort & Kid Comfort
Active: insert rods into the two fabric chan-
nels on the front of the head rest.
5.2 Sun Shade Kid Comfort Pro: open the
zipper on the head rest fully and pull out the
integrated sun shade.
5.3 Finally, fix the sun shade with the
buckles at the height of the chin pad to keep
it in place.
The rain/wind cover (available separately) can
be stretched over the top (not shown). Fits
over all deuter child carriers with a sun shade.
6Putting on
and taking off
6.1 Double-check the safety harness and
the side entry are properly secured. Stand at
the back of the child carrier. Place one hand
KidComfort_Booklet_Insert_22.indd 14KidComfort_Booklet_Insert_22.indd 14 02.03.21 16:3602.03.21 16:36

The fabric on the Kid
Comfort carriers can
be washed by hand
with lukewarm water and PH-neutral soap.
The detachable chin pad A (with remova-
ble cover on Kid Comfort Pro, Kid Comfort)
should be washed by hand and must not be
tumble dried. To guarantee the high stand-
ards of safety of the child carrier, always
check that the carrier is functioning properly
before each use. Please also regularly check
the frame and all straps for wear and tear.
Never try to reshape a bent frame yourself.
For any repairs or placements please contact
your specialist retailer or contact the manu-
facturer directly.
on the grab handle by the head rest to safely
secure the child carrier.
6.2 With your other hand, grab the handle
on the back of the carrier. You can now let go
of the handle on the head rest.
Check whether the shoulder straps of the
carry system are loosened off and the chest
strap and hip belt are open. Make sure there
are no obstacles in the way, which the child
carrier could collide with when shouldering
the pack. Avoid any sudden movements.
6.3 Stand with your feet at shoulder width.
Lift the child carrier by the handle on the
back with one hand and counterbalance with
the opposite leg at a slight angle.
6.4 Put your free arm through the corre-
sponding shoulder strap and place the entire
load of the child carrier onto this one shoul-
der. Let go of the handle and put the other
arm through the second shoulder strap.
6.5 Position the hip fins so the middle of
them spans the hip bones and tighten the hip
belt so it is snug.
6.6 Adjust the shoulder straps. And final-
ly position the chest strap at the right height
and close it. It provides extra stability for the
shoulder straps.
6.7 Fold away the kickstand. The audible
“click” sound signals that the kickstand has
snapped into its standing or transport position.
For taking off the child carrier follow these
steps in reverse order.
MAINTENANCE
& CARE
A
EN
KidComfort_Booklet_Insert_22.indd 15KidComfort_Booklet_Insert_22.indd 15 02.03.21 16:3602.03.21 16:36

Kid Comfort Sun Shade
The flexible, durable sun shade is quick and
easy to attach to all deuter child carriers. The
sun shade blocks out UV rays to protect your
child. Compatible with Kid Comfort Active, Kid
Comfort Active SL and Kid Comfort models.
Kid Comfort Chin Pad
Our large, ergonomic chin pad can be pur-
chased separately. It reaches right into the
corners of the cockpit to catch tired little
heads, whichever way they droop, and pro-
vides a soft and restful sleeping surface.
Compatible with the press stud configuration
of the latest models in the Kid Comfort range.
Kid Comfort
Rain Cover Deluxe
Comprehensive rain and wind protection for
deuter child carriers. Compatible with all car-
riers that are fitted with a sun shade.
Kid Comfort Foot Loops
Height-adjustable foot loops for our child carriers
can be purchased separately – and are width-
adjustable to suit different types of footwear.
ACCESSORIES
KidComfort_Booklet_Insert_22.indd 16KidComfort_Booklet_Insert_22.indd 16 02.03.21 16:3602.03.21 16:36

MODE D‘EMPLOI POUR LES PORTE-BÉBÉ
KID COMFORT ACTIVE, KID COMFORT, KID COMFORT PRO
ATTENTION ! LIRE ATTENTIVE
MENT ET CONSERVER POUR
CONSULTER ULTÉRIEUREMENT
CONSIGNES DE SÉCURITÉ
POUR L’UTILISATION
Le porte-bébé Kid Comfort vous offre l’avan-
tage d’une qualité testée par le TÜV SÜD GS
pour votre enfant. Cependant, pour la sécu-
rité de votre enfant, veillez à respecter les
points suivants lors de chaque utilisation :
AVERTISSEMENT– Ne pas utiliser avant que l’enfant ne sache s’asseoir tout
seul. L’enfant devrait déjà être capable de s’asseoir de lui-même (à partir du
9ème mois à peu près – cela peut toutefois être très variable selon les enfants).
La charge maximale supportée par le porte-bébé est de 24 kg.
(enfant 22 kg + paquetage 2 kg)
Ne transportez votre enfant qu’après l’avoir attaché et en utilisant les
étriers. Veillez à ce que le réglage de son harnais de sécurité soit opti-
mal. (voir étape 3)
AVERTISSEMENT – Ne laissez pas l’enfant assis sans surveillance dans
ce porte-bébé à armature ! Ne pas poser le porte-bébé en hauteur ou
sur un terrain en pente. Sortir l’enfant du porte-bébé lors des pauses.
Une longue position assise peut fatiguer l’enfant et ralentir la circulation
sanguine dans ses jambes. Pour cette raison, utilisez les repose-pieds et
faites des pauses fréquentes pour qu’il puisse bouger.
AVERTISSEMENT – Lorsque l’enfant est dans le porte-enfant, il peut se
trouver plus haut que le porteur. Il convient donc d’avoir conscience des
risques encourus (encadrement de porte, branches basses, etc.).
FR
KidComfort_Booklet_Insert_22.indd 17KidComfort_Booklet_Insert_22.indd 17 02.03.21 16:3602.03.21 16:36

AVERTISSEMENT – Lorsque le porteur utilise
le porte-enfant, il doit être conscient des
points suivants:
• Le Kid Comfort convient uniquement au
portage d’enfants par des adultes.
• Avant chaque utilisation, vérifiez que le
porte-bébé n’est pas endommagé.
• N’utilisez jamais le porte-bébé s’il est en-
dommagé (cadre déformé, boucles brisées,
coutures ouvertes...).
• Ne déposez pas le porte-bébé sur les tables
ou d’autres surfaces situées en hauteur.
• Les chutes ou les glissades peuvent occa-
sionner des blessures graves à l’enfant.
• AVERTISSEMENT – Le porte-enfant peut
être utilisé lors des activités de loisirs, mais
pas dans le cadre d’activités sportives.
• L’enfant assis dans le porte-bébé souffre
davantage et plus rapidement des aléas
climatiques que des adultes en mouve-
ment. Pour cette raison, assurez-vous que
votre enfant porte une tenue adaptée et
vérifiez régulièrement la température de
ses mains et de ses pieds durant le trajet.
• Protéger la peau sensible de l’enfant contre
les rayons de soleil avec un pare-soleil. De
plus, vous devriez toujours protéger votre
enfant contre la lumière diffuse avec une
protection solaire appropriée !
• L’enfant ne doit pas se mettre debout sur le
siège du porte-bébé.
• AVERTISSEMENT – L’adulte porteur doit être
très prudent lorsqu’il se penche ou s’appuie
vers l’avant.
• AVERTISSEMENT – Le porteur doit s’at-
tendre à tout moment à être déséquilibré
par un mouvement inconsidéré de sa part
ou de la part de l’enfant.
• Il convient d’éviter de blesser les pieds de
l’enfant quand on dépose le porte-bébé ou
quand le porte-bébé est posé par terre ou
près du sol.
• AVERTISSEMENT – Il convient d’être pru-
dent lorsqu’on endosse ou qu’on dépose le
porte-bébé.
• Le sac à dos Kid Comfort Pro doit être uti-
lisé uniquement pas des adultes. La lon-
gueur des sangles présente un risque
d’étranglement pour des enfants.
Le non-respect de ces recommandations
peut provoquer des blessures, des dommages
physiques durables, voir le décés de l’enfant.
FONCTIONS
(Voir croquis sur la couverture interne)
ALe support amovible et lavable pour
le menton est d’une agréable dou-
ceur. Kid Comfort & Kid Comfort Pro : la
forme ergonomique du rembourrage – avec
son revêtement amovible – permet un doux
soutien latéral de la petite tête et du tronc et
soutient les vertèbres cervicales quand l’en-
fant fatigué s’affaisse vers l’avant.
KidComfort_Booklet_Insert_22.indd 18KidComfort_Booklet_Insert_22.indd 18 02.03.21 16:3602.03.21 16:36

BLe système de sangles de sécurité
matelassées et ergonomiques garan-
tit une sécurité maximale. Les mouvements
amples imprévisibles de l’enfant qui pour-
raient déséquilibrer le porteur sont ainsi évi-
tés. Ses boucles ordonnancées sur les côtés
et repérées par un marquage de couleur per-
mettent de comprendre rapidement le fonc-
tionnement, sont aisément accessibles et fa-
ciles à manipuler. Il est possible d’adapter la
hauteur sans effort, même quand l’enfant est
déjà assis. (3. Adaptation du harnais de sé-
curité à 5 points d’attache)
CDeux poignées solides permettent
au porteur d’endosser et de déposer
seul le porte-bébé avec l’enfant. (6. Endosser
et déposer le porte-bébé)
DL’option pare-soleil offre la possibi-
lité, notamment en plein été ou en
montagne, de protéger la peau fragile de l’en-
fant d’un rayonnement solaire intense. Le
pare-soleil est disponible comme accessoire
pour Kid Comfort Active, fourni avec le mo-
dèle Kid Comfort, intégré dans la version Pro.
(5. Fixer le pare-soleil et le pare-pluie)
EAvec le siège réglable en hauteur,
l’enfant qui grandit se trouve toujours
dans la position idéale: le menton à hauteur
de la moitié supérieure de la mentonnière.
La largeur du siège rembourré varie en fonc-
tion de la hauteur réglée et permet, en rela-
tion avec les repose-pieds, la position assise
la plus adaptée à l’âge : plus le réglage est
haut, plus le siège est large pour une position
naturelle accroupie et jambes écartées, plus
le réglage est bas, plus le siège devient étroit
pour une position assise verticale. (2. Régler
la hauteur du siège enfant)
FLes enfants utilisent avec enthou-
siasme l’accès latéral simple et sûr
pour grimper tout seuls dans le porte-bébé.
Il permet aussi d’installer soi-même l’enfant
plus facilement et plus sûrement.
GLes repose-pieds réglables en hauteur
favorisent la circulation sanguine
dans les jambes de l’enfant, afin que celles-ci
restent chaudes plus longtemps et ne s’anky-
losent pas. La fixation des repose-pieds est
mobile. L’enfant peut donc facilement changer
sa position de pieds et d’assise, sans pouvoir
en même temps s’en servir pour se lever. Ce
qui évite efficacement les balancements ou
le basculement quand le porte-bébé est de-
bout. (4. Régler la hauteur des repose-pieds)
HLe cadre en aluminium extrêmement
stable avec son large pied repliable
est très avantageux pour installer ou pour
sortir l’enfant.
IDes systèmes de dos parfaitement har-
monisés garantissent le confort de por-
tage typique de deuter :
LITE AIR SYSTEM
Construction légère et aérée avec réparti-
tion parfaite des charges. Le dos à contact
minimaliste extrêmement léger est directe-
ment relié à la structure du cadre et garan-
tit ainsi une répartition et un contrôle des
charges parfaits tout en ayant un poids mini-
mal. Le panneau du dos Lite Air a une assise
compacte tout en étant agréablement aéré
grâce à sa structure.
FR
KidComfort_Booklet_Insert_22.indd 19KidComfort_Booklet_Insert_22.indd 19 02.03.21 16:3602.03.21 16:36

AIRCOMFORT SENSIC VARIO
Répartition parfaite des charges associée à
une aération maximale – Le Sensic System en
utilisant l’espace vide entre le siège enfant et
le dos du porteur. Le filet Aircomfort crée ici un
espace de ventilation permettant la libre éva-
cuation de l’air humide. Le centre de gravité
de l’enfant demeure dans la même position
que dans un porte-bébé avec un dos à contact.
Le système de portage est directement relié
au cadre du porte-bébé. Les avantages sont
énormes : le porte-bébé ergonomique a une
assise parfaite et la répartition de la charge
est optimale, car elle se fait près du corps.
Grâce au filet spécial, le porteur bénéficie en
même temps d’une ventilation maximale.
JPour un excellent confort de portage,
les bretelles en S indéformables et
pourvues d’un revêtement aéré AirMesh 3D
épousent la forme des épaules.
KGrâce au réglage PullForward, il est
possible de serrer facilement les stabili-
sateurs sur les hanches, même à pleine charge.
Kid Comfort, Kid Comfort Pro : les stabilisateurs
mobiles VariFlex ECL avec leurs inserts mate-
lassés ergonomiques épousent littéralement la
forme des hanches et suivent chaque mouve-
ment. Le poids est réparti uniformément sur le
bassin pour alléger la charge. Il est ainsi plus
facile d’aborder et de maîtriser les escaliers,
les sentiers cahoteux ou les montées plus ar-
dues en économisant ses forces.
LAfin que les deux parents puissent porter
agréablement le porte-bébé, il est pos-
sible d’ajuster la longueur au dos en quelques
gestes. (1. aptation du système de portage)
(voir croquis couverture arrière)
1Adaptation du
système de portage
1.1 Desserrer d’abord toutes les sangles. Char-
ger le porte-bébé avec un poids réaliste, tou-
tefois pas avec l’enfant lui-même, et l’endosser.
1.2 Centrer les stabilisateurs de hanches à
hauteur des os iliaques et resserrer.
1.3 Ensuite, serrer les bretelles de manière
à ce que la charge principale continue d’être
supportée par les stabilisateurs de hanches.
1.4 Idéalement, l’appui de la charge devrait
se situer entre les omoplates. Pour régler
cette position, placer les bretelles plus haut
ou plus bas en utilisant le dispositif da dapta-
tion à la longueur du dos :
1.5.1 VariSlide : ce système permet d’adap-
ter très rapidement la longueur du dos en
continu avec une précision parfaite. Pour ce-
UTILISATION
KidComfort_Booklet_Insert_22.indd 20KidComfort_Booklet_Insert_22.indd 20 02.03.21 16:3602.03.21 16:36
This manual suits for next models
2
Table of contents
Languages:
Other deuter Baby Carrier manuals