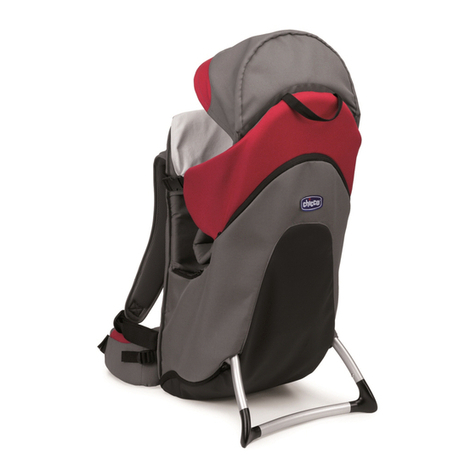
deuter Kid Comfort Air User manual

Die Deuter Kid Comfort Kindertrage bietet Ihnen
den Vorteil TÜV SÜD / GS geprüfter Qualität für
Ihr Kind. Beachten Sie für die Sicherheit Ihres Kin-
des bei jeder Nutzung der Kid Comfort Kindertra-
gen bitte jedoch die unten stehenden Punkte:
SICHERHEITS-
HINWEISE ZUR NUTZUNG
D
BEDIENUNGSANLEITUNG FÜR DIE KINDERTRAGEN KID COMFORT AIR, 2 & 3
ACHTUNG! BITTE FÜR SPÄ-
TERES NACHSCHLAGEN
AUFBEWAHREN!
WARNUNG – Nicht verwenden, bis das Kind selbständig sitzen kann! Das
Kind sollte sich bereits aus eigener Kraft in die Sitzposition begeben können.
Die maximale Zuladung für die Kindertrage beträgt 22 kg
(Kind 18 kg + Gepäck 4 kg).
Transportieren Sie Ihr Kind nur angeschnallt. Achten Sie darauf, dass der
Sicherheitsgurt dabei optimal für ihr Kind eingestellt ist (s. Schritt 3).
WARNUNG – Lassen Sie Ihr Kind nicht unbeaufsichtigt in dieser Trage sitzen!
Die Kid Comfort ist zwar selbststehend, aber selbst die stabilste Kindertrage
kann umkippen!
Längeres Sitzen kann das Kind ermüden und in seinen Beinen zur Einschrän-
kung der Blutzirkulation führen. Nutzen Sie deshalb die Fußstützen und
legen Sie häufig Bewegungspausen ein.
WARNUNG – Die Kopfposition des in der Trage sitzenden Kindes ist höher
als die des Trägers. Deshalb Vorsicht bei niedrigen Ästen, Türrahmen u.ä.

(Siehe Skizzen Umschlag vorne)
ADas abnehmbare Kinnpolster ist ange-
nehm weich. Kid Comfort 2 & 3: Die ergonomi-
sche Polsterform gibt dem Köpfchen seitlich samt
Oberkörper Halt und stützt die Halswirbelsäule,
wenn das Kind müde nach vorne sinkt.
BDer anatomisch geformte, gepolsterte
5-Punkt-Sicherheitsgurt für das Kind garan-
tiert höchste Sicherheit und ist durch seine ein-
fache Anpassbarkeit und die gelben Schnallen
extrem praktisch in der Handhabung. Unvorher-
gesehene, weite Bewegungen des Kindes, die
WARNUNG – Bei Verwendung der Trage
muss der Erwachsene auf Folgendes achten:
• Die Kid Comfort eignet ausschließlich für den
Transport von Kindern durch Erwachsene.
• Prüfen Sie die Kindertrage vor jedem Gebrauch
auf Beschädigungen.
• Nutzen Sie die Kindertrage niemals in beschä-
digtem Zustand (verbogener Rahmen, gebro-
chene Schnallen, offenen Nähten etc.).
• Stellen Sie die Kindertrage mit dem Kind nicht
auf Tischen oder erhöhten Flächen ab.
• Stürze oder Ausrutscher können zu ernsthaften
Verletzungen des Kindes führen.
• WARNUNG – Der Erwachsene, der das Kind
trägt, muss sehr vorsichtig sein, wenn er sich
nach vorne beugt oder lehnt.
• Das in der Trage sitzende Kind leidet schneller
und stärker unter Witterungseinflüssen als der
sich in Bewegung befindliche Erwachsene. Stel-
len Sie daher sicher, dass das Kind entsprechend
gekleidet ist und prüfen unterwegs regelmäßig
die Temperatur seiner Hände und Füße.
• Die empfindliche Kinderhaut ist vor Sonnen-
einstrahlung mit einem Sonnendach abzu-
schirmen. Zusätzlich sollten Sie Ihr Kind immer
mit Sonnenmilch vor Streulicht schützen!
• WARNUNG – Die Trage ist für die Nutzung
bei Freizeitaktivitäten geeignet, nicht jedoch
bei Sportaktivitäten wie Radfahren, Skifahren
oder ähnliches.
• WARNUNG – Der Träger muss jeder Zeit darauf
gefasst sein, dass eine unerwartete Bewegung,
ob von ihm selbst oder dem Kind, sein Gleich-
gewicht beeinträchtigt.
• Das Kind darf sich nicht auf den Sitz der Kin-
dertrage stellen.
• Es sollte darauf geachtet werden,Verletzungen
der Füße des Kindes zu vermeiden, wenn die
Trage abgestellt wird bzw. die Trage am oder
nahe dem Boden ist.
• WARNUNG – Beim Aufsetzen und Absetzen
der Trage ist mit Vorsicht vorzugehen.
Bei Nichtbeachtung dieser Hinweise kann es zu
Verletzungen, dauerhaft körperlichen Schädigun-
gen oder sogar zum Tod des Kindes führen.
FUNKTIONEN

den Träger aus der Balance bringen könnten,
werden vermieden. (3. 5-Punkt-Sicherheits-
gurt anpassen)
CMit zwei stabilen Handgriffen kann die
Trage mit Kind vom Träger allein auf den Rücken
gehoben und abgesetzt werden. (6. Kindertra-
ge auf- und absetzen)
DDie Sonnendachoption gibt die Möglich-
keit, insbesondere im Hochsommer und im Ge-
birge, die empfindliche Kinderhaut vor starker
Sonneneinstrahlung abzuschirmen – Sonnen-
dach bei Kid Comfort Air & 2 als Accessoire
erhältlich, bei 3 integriert. (5. Sonnen- und
Regendach anbringen)
EMit dem höhenverstellbaren Sitz befin-
det sich das heranwachsende Kind immer in der
idealen Position: das Kinn auf Höhe der oberen
Hälfte des Kinnpolsters. Die Breite des Sitz-
polsters variiert in Relation zur eingestell-
ten Höhe und ermöglicht in Verbindung mit
den Fußstützen die altersgerechte Sitzhaltung:
Je höher eingestellt, desto breiter ist der Sitz für
eine natürliche Anhock-Spreiz-Haltung, je tiefer
abgelassen, desto schmäler wird er für eine auf-
rechte Sitzposition. (2. Höhe des Kindersit-
zes einrichten)
FDen einfachen und sicheren Zustieg
über die Seite nutzen die Kinder mit Begeis-
terung, um selbst in die Trage zu schlüpfen. Auch
das Hineinheben wird dadurch wesentlich leich-
ter und sicherer.
GHöhenverstellbare Fußstützen fördern
die Durchblutung der Kinderbeine, damit diese
länger warm bleiben und nicht einschlafen. Die
Fußstützen sind beweglich angebracht. Das Kind
kann also spielerisch seine Bein- und Sitzpo-
sition ändern, gleichzeitig aber mit deren Hilfe
nicht aufstehen. So wird das Aufschaukeln beim
Tragen oder das Kippen der stehenden Kraxe
wirksam verhindert. (4. Höhe der Fußstützen
einrichten)
HDer äußerst standfeste Aluminium-Rah-
men mit seinem breiten Klappfuß ist beim Ein-
und Aussteigen von großem Vorteil.
IS-förmige Schulterträger, formstabil und
mit luftigem 3D Air Mesh bezogen, schmiegen
sich exakt den Schultern an.
JDurch das Vari Fit System können alle Kid
Comfort Modelle einfach und stufenlos ge-
nau an die Rückenlänge des jeweiligen
Trägers angepasst werden. Dies ist wichtig für
den perfekten Sitz der Trage und damit auch für
ein sicheres Trageverhalten ohne Aufschaukeln.
(1. Tragesystem anpassen)
KBelüftete Rückensysteme – Aircomfort
oder Aircontact – garantieren den typischen
Deuter-Tragekomfort. Zusätzlich schaffen die be-
währten Tragesysteme einen Ventilationsraum
zwischen Kind und Träger: Beide schwitzen
weniger, ein Hitzestau wird vermieden und kör-
pereigene Energie gespart.
LDie anatomisch geformten,beweglichen
Vari Flex Hüftflossen folgen souverän den Be-
wegungen des Trägers. Treppen, unebene Pfade
oder steilere Anstiege lassen sich auf diese Weise
Kraft sparend meistern. Mit ihrer Pull-Forward
Verstellung sind die Hüftflossen auch bei voller
Ladung leicht festzuziehen und zu justieren.
D

(Siehe Skizzen Umschlag hinten)
1Tragesystem
anpassen
1.1 Zuerst sämtliche Riemen lockern. Kinder-
trage mit einem realistischen Gewicht beladen
und schultern.
1.2 Hüftflossen mittig auf den Beckenknochen
platzieren und zuziehen.
1.3 Anschließend Schulterträger so festzie-
hen, dass das Hauptgewicht weiterhin mit den
Hüftflossen getragen wird.
1.4 Idealerweise liegt der Trägeransatz zwi-
schen den Schulterblättern. Um diese Position
einzustellen, mit dem VariFit System die Schulter-
träger höher oder tiefer platzieren:
1.5 Dazu das Abdeckpolster ausklappen.
1.6 Das orange Gurtband a) zum Verkürzen
der Rückenlänge anziehen oder b) zum Verlän-
gern lockern und Träger nachziehen. Das Band
sollte in der passenden Trägerposition straff ge-
spannt sein. Abdeckpolster wieder einklappen.
1.7 Nun den Winkel der Lageverstellriemen an-
passen: Rückenlänge S-M untere, M-L obere
Schnallen einfädeln. Durch Festziehen der Lage-
verstellriemen an Schulterträgern und Hüftflossen
bekommt die Kindertrage engeren Kontakt zum
Rücken. Das sorgt für mehr Stabilität in schwie-
rigem Terrain. Für mehr Belüftung etwas lockern.
Ist das Tragesystem an die Rückenlänge des Trä-
ger angepasst, die Kindertrage wieder abnehmen
und mit dem Einrichten der Sitzhöhe fortfahren.
2Höhe des Kinder-
sitzes einrichten
2.1 Die Trage zum Einrichten auf dem Boden
absetzen. Die Riemen der Seitenflügel lockern
und den seitlichen Zustieg öffnen. 5-Punkt-Si-
cherheitsgurt ebenfalls lockern und öffnen.
2.2 Den Kindersitz nun vollständig absenken.
Dazu das Kinnpolster nach oben klappen, die
Sitzhöhen-Einstellschnalle anheben und den Sitz
mit der Hand nach unten drücken.
2.3 Stellen Sie sich an die Rückseite der Tra-
ge und kontrollieren, ob diese stabil steht. Zum
Sichern während der weiteren Anpassungsschrit-
te immer einen Fuß auf dem Klappfuß platzieren.
2.4 Sie können nun das Kind in dieTrage heben
oder es mit Unterstützung selbst über den seitli-
chen Zustieg einsteigen lassen. Führen Sie die
Arme ihres Kindes durch die Schulterträger des
5-Punkt-Sicherheitsgurtes und schließen dessen
Brustgurt.
2.5 Um den Sitz in die ideale Höhe anzuhe-
ben den Einstellgurt soweit anziehen bis sich das
Kinn des Kindes auf Level der Sitzhöhen-Einstell-
schnalle befindet. Eine Hand unterstützt dabei
von unten die Bewegung des Sitzes.
BEDIENUNG

35-Punkt-Sicherheits-
gurt anpassen
3.1 Nachdem sich der Kindersitz jetzt in der
idealen Höhe befindet, stecken Sie die beiden
Schließen des 5-Punkt-Sicherheitsgurtes in die
am Sitz befindliche zentrale gelbe Schnalle.
3.2 Der Schulterträgeransatz des Sicherheitsg-
urtes sollte idealerweise zwischen den Schulter-
blättern des Kindes liegen. Greifen Sie hinter den
Rücken des Kindes, lösen das Klettband des Trä-
gerherzes und drücken es an der entsprechenden
Position wieder an.
3.3 Schließlich die Schulterträger des 5-Punkt-
Sicherheitsgurtes eng aber nicht zu fest anzie-
hen. Kinnpolster nach unten klappen.
3.4 Die Schnalle des seitlichen Zustiegs schlie-
ßen und die Riemen an den beiden Seitenflügel
des Kindersitzes anziehen.
4Höhe der Fuß-
stützen einrichten
4.1 Die Breite des Sitzpolsters variiert in Re-
lation zur eingestellten Höhe und ermöglicht in
Verbindung mit den Fußstützen die altersgerechte
Sitzhaltung. Je nach Sitzposition müssen die Fuß-
stützen in die obere (A) oder untere (B) Position/
Schnalle eingefädelt werden. Während des Positi-
onswechsels darf sich die Fußstütze nicht in Reich-
weite des Kindes befinden. Grundsätzlich gilt: Für
kleinere Kinder mit einer höheren Sitzeinstellung
(4.2) die Fußstützen an der oberen Position befes-
tigen. Für größere Kinder mit einer tieferen Sitz-
position (4.3) fädelt man die Fußstützen an der
unteren Position ein. Dementsprechend die ideale
Höhe der stufenlos justierbaren Fußstützen durch
ziehen oder lockern des Gurtbandes wählen:
4.2 Je höher der Sitz eingestellt wird, desto
breiter ist er für eine natürliche Anhock-Spreiz-
Haltung bei Kleinkindern. Die Beine sollten hier
leicht angewinkelt in den Fußstützen stehen.
4.3 Je tiefer der Sitz abgelassen wird, desto
schmäler ist er für eine aufrechte Sitzposition
bei etwas älteren Kindern. Hier die Fußstützen so
platzieren, dass die Beine weder frei nach unten
hängen, noch zu stark angewinkelt sind.
5Sonnen- und Regen-
dach anbringen
ACHTUNG! Kleinkinder haben eine sehr empfin-
dliche Haut. Rüsten Sie deshalb die Kid Comfort
bei starker Sonnenstrahlung mit einem Sonnen-
schutzdach aus. Zusatz- oder Ersatzteile sollten
nur vom Hersteller oder Fachhandel bezogen
werden (Sonnendach bei Kid Comfort Air & 2 als
Accessoire erhältlich, bei 3 integriert).
5.1 Sonnendach Kid Comfort Air & 2: Gestänge
in die beiden Stoffkanäle auf der Vorderseite der
Kopfstütze einführen.
5.2 Sonnendach Kid Comfort 3: Reißverschluss
im Bereich der Kopfstütze komplett öffnen und
integriertes Sonnendach vorziehen.
5.3 Die Haken des Sonnendaches in den
Schlaufen an der Kinnstütze einhängen.
Regendach Kid Comfort 3: Die extra erhältliche
Regenhaube wird über das Sonnendach gestülpt.
Regendach Kid Comfort Air & 2: Reißverschluss
am Sonnendach öffnen und Regenschutz entfal-
ten. (o. Abb.)
D

WARTUNG
& PFLEGE
Der Kid Comfort Bezug
ist abwaschbar und
kann mit lauwarmenWasser und Neutralseife von
Hand gereinigt werden. Das abnehmbare Kinn-
polster A wird ebenfalls von Hand gereinigt und
ist nichtWäschetrockner geeignet. Um die Sicher-
heit der Kindertrage zu gewährleisten, bitte die
Trage vor jeder Verwendung auf volle Funktions-
fähigkeit überprüfen. Bitte auch alle Riemen und
das Gestänge regelmäßig aufVerschleiß überprü-
fen. Einen verbogenen Rahmen niemals selbst in
Form biegen. Bei notwendigen Reparaturen wen-
den Sie sich bitte an den Fachhandel oder direkt
an uns, um eine fachgerechte Instandsetzung mit
passenden Ersatzteilen zu gewährleisten.
6Kindertrage
auf- und absetzen
6.1 Überprüfen Sie noch einmal den Sitz des Si-
cherheitsgurtes und den seitlichen Zustieg, ob er
korrekt geschlossen ist. Gehen Sie nun zur Rück-
seite der Kindertrage. Eine Hand hält dabei den
Griff an der Kopfstütze fest,um dieTrage zu sichern.
6.2 Fassen Sie mit der freien Hand den Griff
auf der Rückseite. Der Griff an der Kopfstütze
kann nun losgelassen werden.
Kontrollieren Sie, ob am Tragesystem die Schul-
tergurte gelockert und Brust- sowie Hüftgurt
geöffnet sind. Achten Sie darauf, dass beim Auf-
setzten keine Hindernisse im Weg sind, gegen
die die Kindertrage stoßen könnte. Führen Sie die
folgenden Schritte behutsam ohne ruckartigen
Bewegungen aus:
6.3 Stellen Sie sich etwa schulterbreit. Heben
Sie die Trage am Griff auf der Rückseite mit einer
Hand hoch und stützen sie auf ihrem leicht ange-
winkelten Bein der Gegenseite ab.
6.4 Schlüpfen Sie mit dem freien Arm in den
passenden Schulterträger und nehmen mit die-
sem das komplette Gewicht der Trage auf. An-
schließend lassen Sie den Griff los und schlüpfen
mit dieser Hand in den anderen Schulterträger.
6.5 Hüftflossen mittig auf dem Beckenkno-
chen platzieren und fest anziehen.
6.6 Dann die Schultergurte anpassen. Zuletzt
den Brustgurt in die gewünschte Höhe schieben
und schließen. Er stabilisiert den Sitz der Schul-
terträger.
6.7 Zuletzt Standbügel einklappen. An einem
hörbaren „Klick“-Geräusch erkennt der Träger,
dass der Standfuß in der Stand- bzw. der Trans-
portposition eingerastet ist.
Das Absetzen erfolgt in umgekehrter Reihenfol-
ge wie das Aufsetzen der Kindertrage.
IA

Deuter Kid Comfort child carriers are TÜV SÜD
tested and carry the GS safety certificate. For
your child’s safety, please consider the following
safety instructions when using the Kid Comfort
child carriers.
SECURITY ADVICE
FOR THE USE
GB
INSTRUCTION MANUAL FOR THE CHILD CARRIERS KID COMFORT AIR, 2 & 3
ATTENTION!
PLEASE RETAIN FOR
INFORMATION!
CAUTION – Do not use until the child is able to sit up by him/herself!
The child should be able to reach the sitting position by his/her own.
The maximum load capacity for the child carrier is 22 kg
(child 18 kg + load 4 kg).
Only carry the child with the safety belt fastened. Ensure the safety belt
is adjusted correctly and fits the child (see step 3).
CAUTION – Never leave the child unattended in the carrier!
Although the Kid Comfort can stand upright by itself, even the most stable
child carrier can tip over!
Remaining seated for a longer period of time can reduce blood flow
in the child’s legs. Therefore use the Kid Comfort footrests and to
regularly stop for exercise.
CAUTION: The child’s head is higher than the carrier’s head. Pay attention to
low hanging branches, door frames and similar obstacles.

(See illustration on front cover)
AThe removable chin pad is comfortably soft.
Kid Comfort 2 & 3: The pad’s ergonomic shape
provides comfortable stability for the head and
the upper body and stabilises the spine when the
child falls asleep and slouches forward.
BAnatomically shaped, padded 5-point
safety harness offers maximum child safety
CAUTION – you must consider
the following points
when using the child carrier:
• The Kid Comfort is only suitable for the trans-
portation of a child by adults.
• CAUTION – The child carrier is appropriate for
leisure activities and not for sporting activities
such as cycling, skiing or similar.
• Always check the child carrier for damages
prior to use.
• Never use the child carrier when damaged like
bent frame, broken buckles, undone seams etc.
• Never place the child carrier on tables, counter
or any other higher surfaces.
• Never allow the child to stand on the child
carrier’s seat.
• Be aware that the child in the carrier may suf-
fer from the effect of weather and tempera-
ture before you do and in a higher intensity.
Therefore make sure the child is appropriately
dressed and regularly check the temperature of
hands and feet.
• Protect the child’s sensitive skin from severe
sun radiation by using the sun roof. For addi-
tionally protection apply sunscreen!
• CAUTION – The carrier has to be aware that
unexpected motion (from carrier as well as
child) may affect the balance.
• Slip or fall can lead to severe injuries of the child.
• CAUTION – The adult carrying the Kid Comfort
should avoid any sudden movements that may
throw the child off balance.
• CAUTION – The adult carrying the Kid Comfort
should be extra cautious when bending for-
ward or leaning.
• To protect the child’s feet from injury, be care-
ful when putting the child carrier down or
when the child carrier is near the ground.
• CAUTION – Be extra careful when putting on
or removing the carrier.
Noncompliance of the directions can lead to se-
vere injuries, permanent physical damages and
even the death of the child.
FUNCTIONS

as well as maximum practability through easy
handling and adjustment. It further prevents the
child from excess swaying and unexpected, wide
movements that can affect the carrier’s balance.
(3. Adjusting the 5-point safety harness)
CTwo stable grab handles make the Kid
Comforts easy to lift on the back without additi-
onal help. (6. Putting on and taking off the
child carrier)
DThe sun roof option protects the child’s
sensitive skin from harmful sun radiation espe-
cially on hot summer days in high altitude –
sun roof for Kid Comfort Air & 2 available as
accessory, integrated in 3. (5. Mounting sun
and rain roof)
EHeight adjustable seat allows the child
to always sit in the ideal position: the chin on
the level of the upper half of the chin pad. The
width of the seat cushions matches the
adjusted height and thus guarantees an
ergonomic sitting posture in combination
with the specific footrest construction. The width
increases with the height of the seat to guaran-
tee a natural spread squat position; the lower the
seat the narrower the width for an upright sitting
position. (2. Adjusting the child seat)
FThe simple and safe side entry is very
popular with children: they have the option of
climbing into the seat by themselves. It is also
easy and safe to lift in your child with the yellow
buckled side access open.
GThe height adjustable footrests support
the blood flow of the child’s legs and prevents
the legs from ‘falling asleep’ or getting cold. The
footrests are flexible, so the child can playfully
change his/her leg and sitting position, yet at
the same time cannot lift him/herself out of the
seat. This construction further prevents the child
carrier from tilting over when standing. (4. Ad-
justing the height of the footrests)
HThe sturdy aluminium frame provides a
safe and stable free-stand with its wide kick-
stand and guarantees an easy access.
IThe S-shaped shoulder straps are inhe-
rently stable, come with an airy 3D AirMesh lining
and comfortably curve over the shoulders.
JWith the VariFit System all Kid Comfort
models can be effortlessly and steplessly
adjusted to the wearer’s individual back
length.This is vital for the perfect fit of the child
carrier and guarantees a safe and balanced carry.
(1. Adjusting the carry system)
KVentilated back systems – Aircomfort or
Aircontact – guarantee Deuter’s signature carry
comfort. The back systems further create a space
for airflow between child and carrier: this re-
duces perspiration, prevents heat accumulation
and saves energy.
LThe anatomically shaped, pivoting Vari
Flex hip wings follow complex movements
and thus save energy on stairs, uneven terrain or
steep paths. The Pull-Forward adjustment system
on the hip belt easily cinches the child carrier clo-
se to the body even when fully loaded.
GB

(See illustration on back cover)
1Adjust the
carry system
1.1 Loosen all straps. Load the child carrier with
realistic weight and shoulder the Kid Comfort.
1.2 Position the hip belt on the hip bones
and tighten.
1.3 Now tighten the shoulder straps, but make
sure the main weight remains on the hip belt.
1.4 The perfect position: the shoulder straps’
anchor points rest between the shoulder blades.
For precise adjustment lower or raise the shoul-
der straps with the VariFit system:
1.5 Unfold cover pad.
1.6 a) To shorten the back length tighten the
orange belt strap b) to raise the length loosen
the orange belt strap and re-adjust straps. For
a perfect position tension the band tightly. Put
cover pad back into position.
1.7 Now adjust the angle of the stabiliser
straps: for back length S-M thread lower, for
M-L upper buckles. Tighten the stabiliser straps
on the shoulder straps and hip belt to ensure a
compact fit. This guarantees extra stability on
difficult terrain. For more ventilation loosen the
stabiliser straps.
After adjusting the carry system to the individual
back length, take off the child carrier and con-
tinue with the adjustment of the height of the
child seat.
2Adjust the height of
the child seat
2.1 Place the child carrier on the ground be-
fore adjusting. Loosen the straps on the side and
open the side entry. Loosen and open the 5-point
safety harness.
2.2 To completely lower the child seat lift
the chin pad and raise the buckle for the seat’s
height adjustment. Push the seat down.
2.3 Stand behind the child carrier to check
whether it stands stable. During the following
steps always secure a safe stand by putting one
foot on the kickstand.
2.4 Lift the child into the carrier or ask the
child to enter the carrier him/herself via the side
entry. Put on the shoulder straps of the 5-point
safety harness and close the chest strap.
2.5 To raise the seat into the ideal position
pull the adjustment strap until the child’s chin is
on level of the buckle for the seat height adjust-
ment. Slip one hand below the seat to support
the adjustment.
USING

3Adjust the 5-point
safety harness
3.1 Now the seat has the ideal height, put
both buckles of the 5-point safety harness in the
central yellow buckle on the seat.
3.2 Ideally the anchor points of the safety har-
ness rest between the child’s shoulder blades. To
adjust release the Velcro band of the harness on
the child’s back and close it in the perfect posi-
tion.
3.3 Tighten the shoulder straps of the 5-point
safety harness snug, yet not too tight. Fold down
the chin pad.
3.4 Close the side entry buckle and tighten
the straps on both side wings of the child seat.
4Adjust the height
of the foot rests
4.1 The width of the seat cushions matches
the adjusted height and thus gurantees an er-
gonomic sitting posture in combination with the
specific footrest construction.Thread the footrest
straps either in the upper (A) or lower (B) po-
sition/buckle depending on the child’s seating
position. During this position change, keep the
detached footrest straps out of the reach of
children. As a general rule: mount the footrests
in the upper buckle for smaller children with a
higher seat position (4.2). For taller children with
a lower seat mount the footrests in the lower po-
sition (4.3). Then adjust the footrests to the ideal
height by tightening or releasing the straps:
4.2 The width increases with the height of the
seat to guarantee a natural spread squat position
for small children. The legs should rest slightly
angled in the footrests.
4.3 The lower the seat the narrower the width
for an upright sitting position for slightly taller
children. The legs should neither dangle nor
should the angle be too compressed.
5Mount the
sun and rain roof
NOTE! Children have very sensitive skin. There-
fore equip the Kid Comfort on sunny days with
the sun roof to protect the child from harmful
rays. Accessories or spare parts should be pur-
chased only from the manufacturer or specialised
retailers (sun roof available as accessory for Kid
Comfort Air & 2, integrated in 3).
5.1 Sun Roof Kid Comfort Air & 2: insert rods
in both fabric channels on the front of the head
rest.
5.2 Sun Roof Kid Comfort 3: fully open the
zipper on the head rest and pull out integrated
sun roof.
5.3 Attach the hooks of the sun roof in the
loops of the chin pad.
Rain cover Kid Comfort Air, 2 & 3: the accessory
rain cover is placed over the sun roof.
Small Rain cover Kid Comfort Air & 2: open the
zipper on the small sun roof and unfold rain cov-
er. (not illustrated)
GB

MAINTENANCE
& CARE
The Kid Comfort ma-
terial can be washed
by hand with luke-warm water and neutral
soap. The removable chin pad A should also be
hand washed. Do not place in a dryer. To guar-
antee the child carrier’s safety always check
before every use that the carrier is function-
ing properly. Please also regularly examine all
straps and the frame for wear and tear. Never
try to reform a bent frame yourself. For neces-
sary repairs and adequate replacement please
contact your specialised retailer or directly refer
to the manufacturer.
6Put on and take off
the child carrier
6.1 Again make sure the safety harness and
the side entry are closed correctly. Stand on the
back of the child carrier. One hand holds the
grab handle on the head rest to safely secure
the child carrier.
6.2 With the other hand grab the handle on
the back side. You can now let go the handle on
the head rest.
Check whether the shoulder straps of the carry
system are loose and the chest strap and hip
belt are open. Make sure there are no obstacles
in the way, which could collide with the child
carrier when shouldering the pack. Make sure
to avoid rash movements:
6.3 Stand shoulder wide. Lift the child car-
rier on the handle on the back side with one
hand and stabilise it with the slightly angled
opposite leg.
6.4 Put your free arm through the respective
shoulder strap and place the entire load of the
child carrier on this one shoulder. Let go the
handle and put on the other shoulder strap.
6.5 Place the hip wings centrally on the hip
bones and tighten snugly.
6.6 Adjust the shoulder straps. Finally place
the chest strap at requested height and close it. It
provides extra stability for the shoulder straps.
6.7 Fold in the kickstand. The audible “click”
sound ensures that the kickstand has snapped
into its standing or transport position.
For taking off the child carrier follow the steps
in reverse order.
IA

FR
MODE D‘EMPLOI POUR LES PORTE-BÉBÉ KID COMFORT AIR, 2 & 3
IMPORTANT ! À CONSERVER
POUR CONSULTATION
ULTÉRIEURE
CONSIGNES DE SÉCURITÉ
POUR L’UTILISATION
Le porte-bébé Kid Comfort vous offre l’avantage
d’une qualité testée par le TÜV SÜD GS pour
votre enfant. Cependant, pour la sécurité de votre
enfant, veillez à respecter les points suivants lors
de chaque utilisation :
AVERTISSEMENT – Ne pas utiliser avant que l’enfant ne sache s’asseoir
tout seul.
La charge maximale supportée par le porte-bébé est de 22 kg.
(enfant 18 kg + paquetage 4 kg)
Ne transportez jamais votre enfant sans l’avoir attaché préalablement.Veillez
à ce que le réglage de son harnais de sécurité soit optimal. (voir étape 3)
AVERTISSEMENT – Ne pas laisser l’enfant sans surveillance dans ce
porte-enfant.
Une longue position assise peut fatiguer l’enfant et ralentir la circulation
sanguine dans ses jambes. Pour cette raison, utilisez les repose-pieds et
faites des pauses fréquentes pour qu’il puisse bouger.
AVERTISSEMENT – Lorsque l’enfant est dans le porte-enfant, il peut se trou-
ver plus haut que le porteur. Il convient donc d’avoir conscience des risques
encourus (encadrement de porte, branches basses, etc.).

(Voir croquis sur la couverture interne)
ALa mentonnière amovible est agréable-
ment douce. Kid Comfort 2 & 3 : la forme ergono-
mique du rembourrage permet un doux soutien
latéral de la petite tête et du tronc et soutient
les vertèbres cervicales quand l’enfant fatigué
s’affaisse vers l’avant.
BLe harnais de sécurité anatomique
rembourré à 5 points d’attache de l’enfant
garantit une sécurité maximale, de plus il est ex-
AVERTISSEMENT – Lorsque le porteur uti-
lise le porte-enfant, il doit être conscient
des points suivants:
• AVERTISSEMENT – L’équilibre du porteur peut-
être altéré en raison des mouvements de l’en-
fant et de ses propres mouvements.
• AVERTISSEMENT – Le porteur fera très attention
lorsqu’il se baissera ou se penchera en avant.
• AVERTISSEMENT – Le porte-enfant peut être
utilisé lors des activités de loisirs, mais pas
dans le cadre d’activités sportives.
• AVERTISSEMENT – Il convient de prendre des
précautions lors de la mise en place ou du
retrait du porte-enfant.
• Sachez que l’enfant dans le porte-enfant peut
souffrir du temps et de la température avant
vous.
• Il convient de ne pas heurter les pieds de l’en-
fant lorsque le porte-enfant est au niveau du
sol ou à proximité.
• Le Kid Comfort convient uniquement au por-
tage d’enfants par des adultes.
• Le Kid Comfort ne convient pas à des activités
sportives telles que le vélo, le ski ou autres.
• Avant chaque utilisation, vérifiez que le
porte-bébé n’est pas endommagé.
• N’utilisez jamais le porte-bébé s’il est endom-
magé (cadre déformé, boucles brisées, cou-
tures ouvertes...).
• Ne déposez pas le porte-bébé sur les tables ou
d’autres surfaces situées en hauteur.
• L’enfant ne doit pas se mettre debout sur le
siège du porte-bébé.
• Il convient de protéger la peau sensible de
l’enfant des rayons du soleil en utilisant un
pare-soleil. De plus, il est recommandé de tou-
jours protéger votre enfant du rayonnement
diffus avec une crème de protection solaire.
• Assurez-vous que votre enfant porte une te-
nue adaptée et vérifiez régulièrement la tem-
pérature de ses mains et de ses pieds durant
le trajet.
Le non-respect de ces recommandations peut
provoquer des blessures, des dommages phy-
siques durables, voir le décés de l’enfant.
FONCTIONS

trêmement pratique à utiliser grâce à son réglage
simple et aux boucles jaunes. (3. Adaptation du
harnais de sécurité à 5 points d’attache)
CDeux poignées solides permettent au
porteur d’endosser et de déposer seul le porte-
bébé avec l’enfant. (6. Endosser et déposer
le porte-bébé)
DL’option pare-soleil offre la possibilité, no-
tamment en plein été ou en montagne, de proté-
ger la peau fragile de l’enfant d’un rayonnement
solaire intense –Le pare-soleil est disponible en
accessoire pour le Kid Comfort Air & 2, il est in-
tégré pour le modèle 3. (5. Fixer le pare-soleil
et le pare-pluie)
EAvec le siège réglable en hauteur, l’en-
fant qui grandit se trouve toujours dans la posi-
tion idéale : le menton à hauteur de la moitié su-
périeure de la mentonnière. La largeur du siège
rembourré varie en fonction de la hauteur réglée
et permet, en relation avec les repose-pieds, la
position assise la plus adaptée à l’âge : plus le
réglage est haut, plus le siège est large pour une
position naturelle accroupie et jambes écartées,
plus le réglage est bas, plus le siège devient
étroit pour une position assise verticale. (2. Ré-
gler la hauteur du siège enfant)
FLes enfants utilisent avec enthousiasme l’ac-
cès latéral simple et sûr pour grimper tout seuls
dans le porte-bébé. Il permet aussi d’installer soi-
même l’enfant plus facilement et plus sûrement.
GLes repose-pieds réglables en hauteur
favorisent la circulation sanguine dans les jambes
de l’enfant, afin que celles-ci restent chaudes plus
longtemps et ne s’ankylosent pas. La fixation des
repose-pieds est mobile. L’enfant peut donc facile-
ment changer sa position de pieds et d’assise, sans
pouvoir en même temps s’en servir pour se lever.
Ce qui évite efficacement les balancements ou
le basculement quand le porte-bébé est debout.
(4. Régler la hauteur des repose-pieds)
HLe cadre en aluminium extrêmement
stable avec son large pied repliable est très avan-
tageux pour installer ou pour sortir l’enfant.
ILes bretelles en S indéformables avec un
revêtement aéré Air Mesh 3D épousent exacte-
ment les épaules.
JAvec le système Vari Fit, tous les modèles
Kid Comfort peuvent s’ajuster simplement
et en continu à la longueur du dos du por-
teur respectif. Ceci est important pour un posi-
tionnement parfait du porte-bébé, donc pour un
portage sécurisé sans balancements. (1. Adap-
ter le système de portage)
KLes systèmes de dos aérés – Aircomfort
ou Aircontact – garantissent le confort de por-
tage typique de Deuter. En outre, les systèmes de
portage éprouvés créent un espacement ventilé
entre l’enfant et le porteur : tous deux transpirent
moins, on évite l’accumulation de la chaleur et on
réduit la dépense énergétique corporelle.
LLes stabilisateurs de hanches anato-
miques et mobiles Vari Flex accompagnent
parfaitement les mouvements du porteur.
On économise ainsi ses forces dans les escaliers,
les sentiers irréguliers ou les montées plus raides.
Le système de réglage Pull-Forward permet de
resserrer facilement et d’ajuster simplement les
stabilisateurs de hanches, même en pleine charge.
FR

(voir croquis couverture arrière)
1Adaptation du
système de portage
1.1 Desserrer d’abord toutes les sangles. Charger
le porte-bébé avec un poids réaliste et l’endosser.
1.2 Centrer les stabilisateurs de hanches à
hauteur des os iliaques et resserrer.
1.3 Ensuite, serrer les bretelles de manière à
ce que la charge principale continue d’être sup-
portée par les stabilisateurs de hanches.
1.4 Idéalement, l’appui de la charge devrait
se situer entre les omoplates. Pour ajuster cette
position, il convient de monter ou de descendre
les bretelles avec le système VariFit.
1.5 Pour cela, ôter le rembourrage.
1.6 a) Resserrer la sangle orange pour rac-
courcir la longueur de dos ou b) la relâcher
pour rallonger et ajuster le porte-bébé. Quand la
position du porte-bébé est ajustée, la sangle doit
être bien tendue. Remettre le rembourrage.
1.7 Adapter maintenant l’angle des sangles
de réglage de position : enfiler les sangles de
réglage dorsal S - M dans les boucles du bas,
les sangles M - L dans les boucles du haut. En
resserrant les sangles de réglage de position
aux bretelles et aux stabilisateurs de hanches, le
porte-bébé est en contact plus étroit avec le dos.
Cela procure davantage de stabilité en terrain
difficile. Pour plus d’aération, relâcher les sangles
de réglage de position. Quand le système de por-
tage est adapté à la longueur du dos du porteur,
déposer le porte-bébé et poursuivre avec le ré-
glage de la hauteur du siège de l’enfant.
2Réglage de la hau-
teur du siège enfant
2.1 Pour le réglage, poser le porte-bébé au
sol. Desserrer les sangles latérales et ouvrir l’ac-
cès latéral. Desserrer également le harnais de
sécurité à 5 points d’attache et l’ouvrir.
2.2 Abaisser maintenant entièrement le siège
enfant. Pour cela, basculer la mentonnière vers le
haut, soulever la boucle de réglage de la hauteur
du siège et appuyer avec la main sur le siège
pour le faire descendre.
2.3 Placez-vous derrière le porte-bébé et véri-
fiez si sa position est stable. Pour sécuriser le dé-
roulement des étapes suivantes, placez toujours
un pied sur le pied pliant.
2.4 Vous pouvez maintenant installer l’enfant
dans le porte-bébé ou l’aider à y grimper lui-
même par l’accès latéral. Passez les bras de votre
enfant par les bretelles du harnais de sécurité à 5
points d’attache et fermez sa sangle de poitrine.
2.5 Pour monter le siège à la hauteur idéale,
resserrer la sangle de réglage jusqu’à ce que le
menton de l’enfant se trouve au niveau de la
boucle de réglage de hauteur du siège. Pendant
UTILISATION

ce temps, une main soutient par en-dessous le
mouvement du siège.
3Adaptation du
harnais de sécurité
3.1 Après que le siège enfant soit placé à la
hauteur idéale, insérez les deux fermetures du
harnais de sécurité à 5 points d’attache dans la
boucle centrale jaune du siège.
3.2 La base des bretellesdu harnais devraitêtre
idéalement positionnée entre les omoplates de
l’enfant. Passez votre main derrière le dos de l’en-
fant, défaites la fermeture velcro du point central
et replacez-la dans la position correspondante.
3.3 Enfin, resserrer fermement sans forcer les
bretelles du harnais de sécurité à 5 points d’at-
tache. Abaisser la mentonnière.
3.4 Fermer la boucle de l’accès latéral et res-
serrer les sangles latérales sur les deux côtés du
porte-bébé.
4Réglage de hauteur
des repose-pieds
4.1 La largeur de l’assise rembourrée varie
en fonction de la hauteur réglée et permet, en
relation avec les repose-pieds, la position assise
la plus adaptée à l’âge. En fonction de la position
assise de l’enfant, les étriers de support pour les
pieds doivent être réglés en position haute (A)
ou basse (B). Pendant le changement de position,
l’étrier de support ne doit pas être accessible à
l’enfant. En règle générale, pour les petits en-
fants avec une position assise plus haute, il faut
régler les étriers en position haute (4.2). Pour
les enfants plus grands qui sont assis plus bas,
les étriers sont à enfiler en position basse (4.3).
Sélectionner en fonction de la position d’assise
la hauteur idéale avec le réglage en continu des
étriers, en resserrant ou en relâchant la sangle :
4.2 Plus le réglage est haut, plus le siège est
large pour une position naturelle accroupie et
jambes écartées, chez les enfants en bas-âge.
Les jambes doivent être légèrement pliées lors
de l’appui sur les repose-pieds.
4.3 Plus le réglage est bas, plus le siège est
étroit pour une position assise verticale chez les
enfants un peu plus âgés. Positionner les repose-
pieds de façon à ce qu’à la fois les jambes ne
pendent pas et qu’elles ne soient pas trop pliées.
5Pose du pare-soleil
et du pare-pluie
ATTENTION ! Les enfants en bas-âge ont une
peau très sensible. Pour cette raison, équipez
le Kid Comfort avec un pare-soleil en cas d’en-
soleillement important. Ne vous procurez des
accessoires ou des pièces de rechange qu’au-
près du fabricant ou d’un magasin spécialisé
(pare-soleil disponible en accessoire pour le Kid
Comfort Air & 2, intégré au modèle 3).
5.1 Pare-soleil Kid Comfort Air & 2: insérer les
tiges dans les deux passants en tissu à l’avant de
l’appui-tête.
5.2 Pare soleil Kid Comfort 3: ouvrir complè-
tement la fermeture éclair près de l’appui-tête et
sortir le pare-soleil intégré.
5.3 Passer les crochets du pare-soleil dans les
boucles de la mentonnière. Petit pare-pluie Kid
Comfort Air & 2: ouvrir entièrement la fermeture
éclair sur le paresoleil et déplier le pare-pluie.
FR

MAINTENANCE &
ENTRETIEN
Le revêtement du Kid
Comfort est lavable
et peut être nettoyé à la main à l’eau tiède et
avec un savon neutre. La mentonnière amovible
A doit également être lavée à la main et ne
doit pas passer au sèche-linge. Afin d’assurer la
sécurité du porte bébé, contrôler avant chaque
utilisation les fonctions du sac et l’usure des
sangles et des ceintures. Ne jamais redresser un
cadre déformé soi-même. L’approvisionnement
en pièces de rechange ou en pièces supplémen-
taires ne doit se faire qu’auprès du fabricant ou
du distributeur. Si des réparations s’avéraient
nécessaires, adressez-vous à un magasin spécia-
lisé ou directement à nous afin de garantir une
remise en état professionnelle.
6Endosser et déposer
le porte-bébé
6.1 Vérifiez encore une fois le bon position-
nement du harnais de sécurité et la fermeture
correcte de l’accès latéral. Placez-vous mainte-
nant derrière le porte-bébé. Pendant ce temps,
une main tient la poignée de l’appuie-tête pour
sécuriser le porte-bébé.
6.2 Avec votre main libre, saisissez la poignée
dorsale. Vous pouvez lâcher maintenant la poi-
gnée de l’appui-tête.
Contrôlez si les sangles d’épaules du système de
portage sont bien desserrées et si les sangles pec-
torale et ventrale sont bien ouvertes. Lorsque vous
endossez le porte-bébé,veillez à ce qu’il n’y ait au-
cun obstacle que vous soyez susceptible de heur-
ter avec celui-ci. Effectuez les gestes qui suivent
avec précaution sans mouvements saccadés:
6.3 Placez-vous pieds écartés à peu près à
largeur d’épaule. D’une main, soulevez le porte-
bébé avec la poignée dorsale et appuyez le côté
opposé sur votre jambe légèrement pliée.
6.4 Glissez votre bras libre dans la bretelle cor-
respondante et supportez avec ce bras le poids to-
tal du porte-bébé. Puis lâchez la poignée dorsale
et glissez l’autre main dans la seconde bretelle.
6.5 Placez les stabilisateurs de hanches au
milieu de l’os iliaque et resserrez-les fermement.
6.6 Adaptez ensuite les sangles des épaules.
Puis montez la sangle pectorale à la hauteur dé-
sirée et refermez-la. Elle stabilise la position des
bretelles.
6.7 Pour terminer, repliez l’étrier de support.Un
« clic » audible signale au porteur que l’étrier est
verrouillé en position de support ou de transport.
Pour déposer le porte-bébé, répéter la procédure
dans l’ordre inverse.
IA

Los porta bebés Deuter Kid Comfort están tes-
tados por la TÜV SÜD y llevan el certificado de
seguridad GS. Para la seguridad del niño, por
favor tenga en cuenta las siguientes instruccio-
nes de seguridad cuando use los porta bebes
Kid Comfort.
CONSEJO DE
SEGURIDAD PARA EL USO
ES
MANUAL DE INSTRUCCIONES PARA LOS PORTA BEBÉS KID COMFORT AIR, 2 & 3
¡ATENCIÓN!
POR FAVOR, GUÁRDESE
LA INFORMACIÓN!
AVISO – ¡No utilice hasta que el niño sea capaz de sentarse por sí mismo!
El niño debería ser capaz de sentarse por sí mismo.
La capacidad máxima de carga para el porta bebé es de 22 kg
(niño 18 kg + carga 4 kg).
Lleve siempre al niño con el cinturón de seguridad abrochado.
Asegúrese de que el cinturón de seguridad esté ajustado correctamente
y se ajuste al niño (véase paso 3).
AVISO – ¡Nunca deje el niño sin supervisión en el porta bebé! Aunque
el Kid Comfort puede mantenerse de pie por sí solo ¡incluso el porta bebé
más estable puede volcarse!
Permanecer sentado durante largos periodos de tiempo puede reducir la circu-
lación sanguínea en las piernas del niño. Por consiguiente, utilice los reposa-
piés del Kid Comfort y efectúe paradas con frecuencia para ejercitar las piernas.
AVISO: La cabeza del niño sobresale de la parte superior del porta bebé.
Preste atención a ramitas bajas, marcos de puertas y obstáculos similares.

(Véase el dibujo en la portada)
ALa barbilla desmontable es confortable-
mente suave. Kid Comfort 2 & 3: La forma ergo-
nómica de la barbilla proporciona estabilidad a
la cabeza y parte superior del cuerpo y estabiliza
la columna vertebral cuando el niño se duerme o
se encorva hacia adelante.
BEl arnés de seguridad de 5 puntos: ana-
tómico y acolchado ofrece una seguridad máxi-
ma para el niño y también proporciona una
AVISO – hay que considerar los siguientes
puntos cuando se utiliza el porta bebé:
• El Kid Comfort es adecuado solo para el trans-
porte de niños, por adultos.
• AVISO – El porta bebé es apropiado para acti-
vidades de ocio y no para actividades deportis-
tas como el ciclismo, esquí o similares.
• Revise siempre el porta bebé para detectar
daños antes de usarlo.
• Nunca utilice el porta bebé cuando esté daña-
do (marco doblado, hebillas rotas o costuras
descosidas etc.).
• Nunca ponga el porta bebé encima de mesas,
encimeras o otras superficies altas.
• Nunca permita que el niño se ponga de pie en
la silla del porta bebé.
• Sea consciente de que el niño en el porta bebé,
puede sufrir las inclemencias atmosféricas. Por
consiguiente asegúrese de que el niño esté
vestido apropiadamente y vigile con regulari-
dad la temperatura de las manos y pies.
• AVISO – El portador debe de ser consciente de
que movimientos inesperados (tanto del porta-
dor como del niño) pueden afectar al equilibrio.
• Proteja la piel sensible del niño de la radiación
severa del sol mediante el toldo. Para una pro-
tección adicional, ¡aplíquele crema de protec-
ción solar!
• Resbalar o caer pueden causar lesiones seve-
ras al niño.
• El portador debería evitar cualquier movimien-
to brusco que pueda desequilibrar al niño.
• AVISO – El adulto que lleva el Kid Comfort de-
bería tener una precaución extra a la hora de
doblarse o inclinarse.
• Para proteger los pies del niño, tenga cuidado
a la hora de poner el porta bebé en el suelo o
cuando el porta bebé esté cerca del suelo.
• AVISO – Tenga cuidado especialmente cuando
se coloque o quite el porta bebé.
El incumplimiento de las instrucciones puede
causar lesiones severas, daños físicos permanen-
tes o incluso la muerte del niño.
FUNCIONES
Other manuals for Kid Comfort Air
2
Table of contents
Languages:
Other deuter Baby Carrier manuals


