DEVANTI ZB-250 User manual

-1 -
INSTRUCTION MANUAL
Devanti ICE MAKER
ZB-250
Thanks for your choosing our ICE MAKER
Please read this Instruction Manual carefully before operation
Please keep it in a safe place and refer to it when necessary.

-2 -
Description
1. To p Lid 7. Icefull sensor
2. Control panel 8. Fan cover
3. Sliding door 9. Water out
4. Ice storage tank 10. Water inlet
5. Fan 11.Power cord
6. Evaporator
Specifications
Model
ICE2 / ZB-250
Ice Making Capacity 40kgs
Ice Sizes adjustable
Ice Storage Capacity 10kgs
Dimension 457*432*744
Voltage AC 220-240V/50Hz
Power cord 3 pins grounded plug. (to reduce risk of electric shock)
Spare Parts
No.
Description
Picture
Quantity
1 Filter Bracket option
2 Anti-drain Plug 1

-3 -
3 Filter Connector option
4 Adaptor 1
5 Water Follow
Controller 1
6 Filling Water
Pipe(1m) 1
7 Filling Water
Pipe(40cm) 1
8 Ice Scoop 1
Function
Instant making ice
Ice full alarming,add water water alarming
Crystalline ice in square
Before/First Use of Your Ice Maker
1.During transportation, the incline angle of the cabinet should not be over 45° .Do not turn the
Ice maker upside down. As this may damage the compressor and sealed system.
2.Remove all packing material and carefully check your ice maker to ensure it is in good
condition and that there is no damage to the ice maker or power cord and plug.
3The ice maker should be placed horizontally on a level surface. To ensure proper ventilation for
your ice maker allows 150mm of space at the top, the back and on each side. Do not install
the Ice maker near an oven, radiator, or any other heat source.
4.Before using the Ice maker for the first time, please wait 2 hours after positioning it, and keep
the front lid opens for at least 2hours
5.Ensure that the voltage indicated on the ice maker corresponds with the voltage in your home.
6.Pure water is not allowed to be used on this unit, spring water is recommended.
Safety Notes

-4 -
•Position the ice maker on flat, stable surface.
•This ice maker can only be used indoors.
•The installation and any repairs of the ice maker should be performed by qualified
technician.
•If the power cord is damaged; it must be replaced by a qualified person to avoid a
hazard.
•Do not immerse this product in water or use a jest washer to clean the unit.
•Do not cover this appliance when it is operating.
•Never tilt the appliance more than 45° from the vertical.
•Only use drinking or potable water with this appliance.
•This appliance can be used by children aged from 8 years and above and persons with
reduced physical, sensory or mental capabilities or lack of experience and knowledge if
they have been given supervision or instruction concerning use of the appliance in a
safe way and understand the hazards involved.
•Children shall not play with the appliance.
•Cleaning and user maintenance shall not be made by children without supervision
•Please keep all packaging material away from children and pets.
•If the power cord is damaged, it must be replaced by a qualified technician in order to
avoid a hazard.
•Do not store explosive substances such as aerosol cans with a flammable propellant in
this appliance.
•Warning: Keep all ventilation openings clear of obstruction. Unit should not be boxed in
without adequate ventilation.
•Warning: Do not use mechanical devices or other means to accelerate the defrosting
process.
•It is normal for the compressor and condenser surface to reach temperatures between
70°C and 90°C during operation and surrounding areas may be very hot.
•Due to fast freezing, ice cubes may appear “Cloudy”. This is air trapped in the water
and will not affect quality or taste of ice.
Control Panel Operation

-5 -
Area
Mark
Description
Indicators
ADD WATER
Check the water supply
TIMER
timer is working or time is under setting.
ICE
unit is under ice making process
ICEFULL
alert ice is full, need to be taken out
CLEAN
unit is under auto clean process.
LED screen
Buttons
button to change time setting
ON/OFF
turn on/off the unit
TIMER/CLEAN
set timer function or turn on auto clean function
Operating Instructions
Step 1 Fill water
connect the external water pipe at backofunit with the water tape as follows.
Step 1.1 Insert filter bracket into the
hole at back of the unit or
assemble the filter bracket
onto back of the unit with a
thread
Step 1.2 Take off the film of the filter,
and take off the covers at
both side
Step 1.3 Thread the filter connectors
to two sides of the connector

- 6 -
Step 1.4 Push the filter into the filter
bracket, make sure the flow
direction on filter is from left
to right
Step 1.5 Connect filling pipes at both
side of the filter, before
connecting the pipe to the
unit, please let the water flow
over the filter for several
seconds till the water come
out is clean
Step 1.6 Well assemble the water
filling controller and the metal
parts as right sketch
Step 1.7 Connect water filling
pipe(1m) to the water filling
controller
Step 1.8 Connect water filling
controller and metal parts to
water faucet as right sketch

- 7 -
Step 1.9 Put a barrel beside the unit,
and then turn on the water
filling controller to let the
water flow over the filter for
30seconds, till the water from
left side is clean
Step 1.10 Take off the anti-drain plug
from back of the unit, then
connect water pipe left to the
inlet hole(the left one)
Step 1.11
Insert the water filling
pipe(1m) to the drain hole(the
right one)
Step 1.12
If you need to take off the
pipe or replace it,please do
as follows:
Firstly take off the blue ring
named as A,then press the
white ring at the outer side
named as B,At last take out
the pipe
Step 2 Plug in.
Step 3 Timer setting: before press button ON/OFF, press button TIMER/CLEAN, the indicator
TIMER will light up, press button + or - to adjust the timer waken up time. If the timer function is
set, the indicator will light up
Step 4 Press button ON/OFF, unit starts to make ice, LED screen will show ambient
temperature
Step 5 Adjustment of ice making time: You can change the ice size by adjust the ice making
time as follow, at the last 10minutes before ice harvest, the LED screen will flash, press + or - to
adjust the ice making time for next cycles. One press of button +,data 1 will be shown on the

- 8 -
screen, and the ice making time for next cycles will be one minutes more.
For example, if LED flashes 10, at this time, you press button +, data 1 will be soon on the
screen, means next cycles, the ice harvest will count down from 11minutes. If two presses are
done, then count down from 12minutes.
Step 6 Auto clean function: before the unit is turned on, long press the TIMER/CLEAN button for
3seconds, unit will enter the auto clean mode.
Step 7 Press button ON/OFF again to turn unit off.
Caring
1.Clean the inner liner, water box, ice shovel and evaporator frequently. When cleaning, unplug
the unit and remove the ice cubes. Use a diluted solution of water and vinegar to clean the
inside and the outside surface of the Ice maker. Do not spray Ice maker with chemicals or
diluted agents such as acids, gasoline or oil. Rinse thoroughly before starting.
2.Keep ventilation openings in the appliance enclosure, or in the built-in structure, clear of
obstruction. Do not use mechanical devices or other means to accelerate the defrosting process,
other than those recommended by the manufacturer.
3.If the machine is reused after a long time, maybe the water pump cannot pump sufficient water
due to the air inside, the ADD WATER water indicator light will turn on in this case. To correct
this, press the START button again, then the machine will work normally.
4.To ensure the cleanliness of the ice cubes, water in the water reservoir should be replaced
every 24 hours.
5.If the compressor stops for any reason such as water shortage, too much Ice, power off, etc...
Do not start the system right away, wait 3 minutes, and then re-start the Ice maker.
6.Always change with fresh water before starting ice production at initial installation or after long
shut-off periods.
Troubleshooting
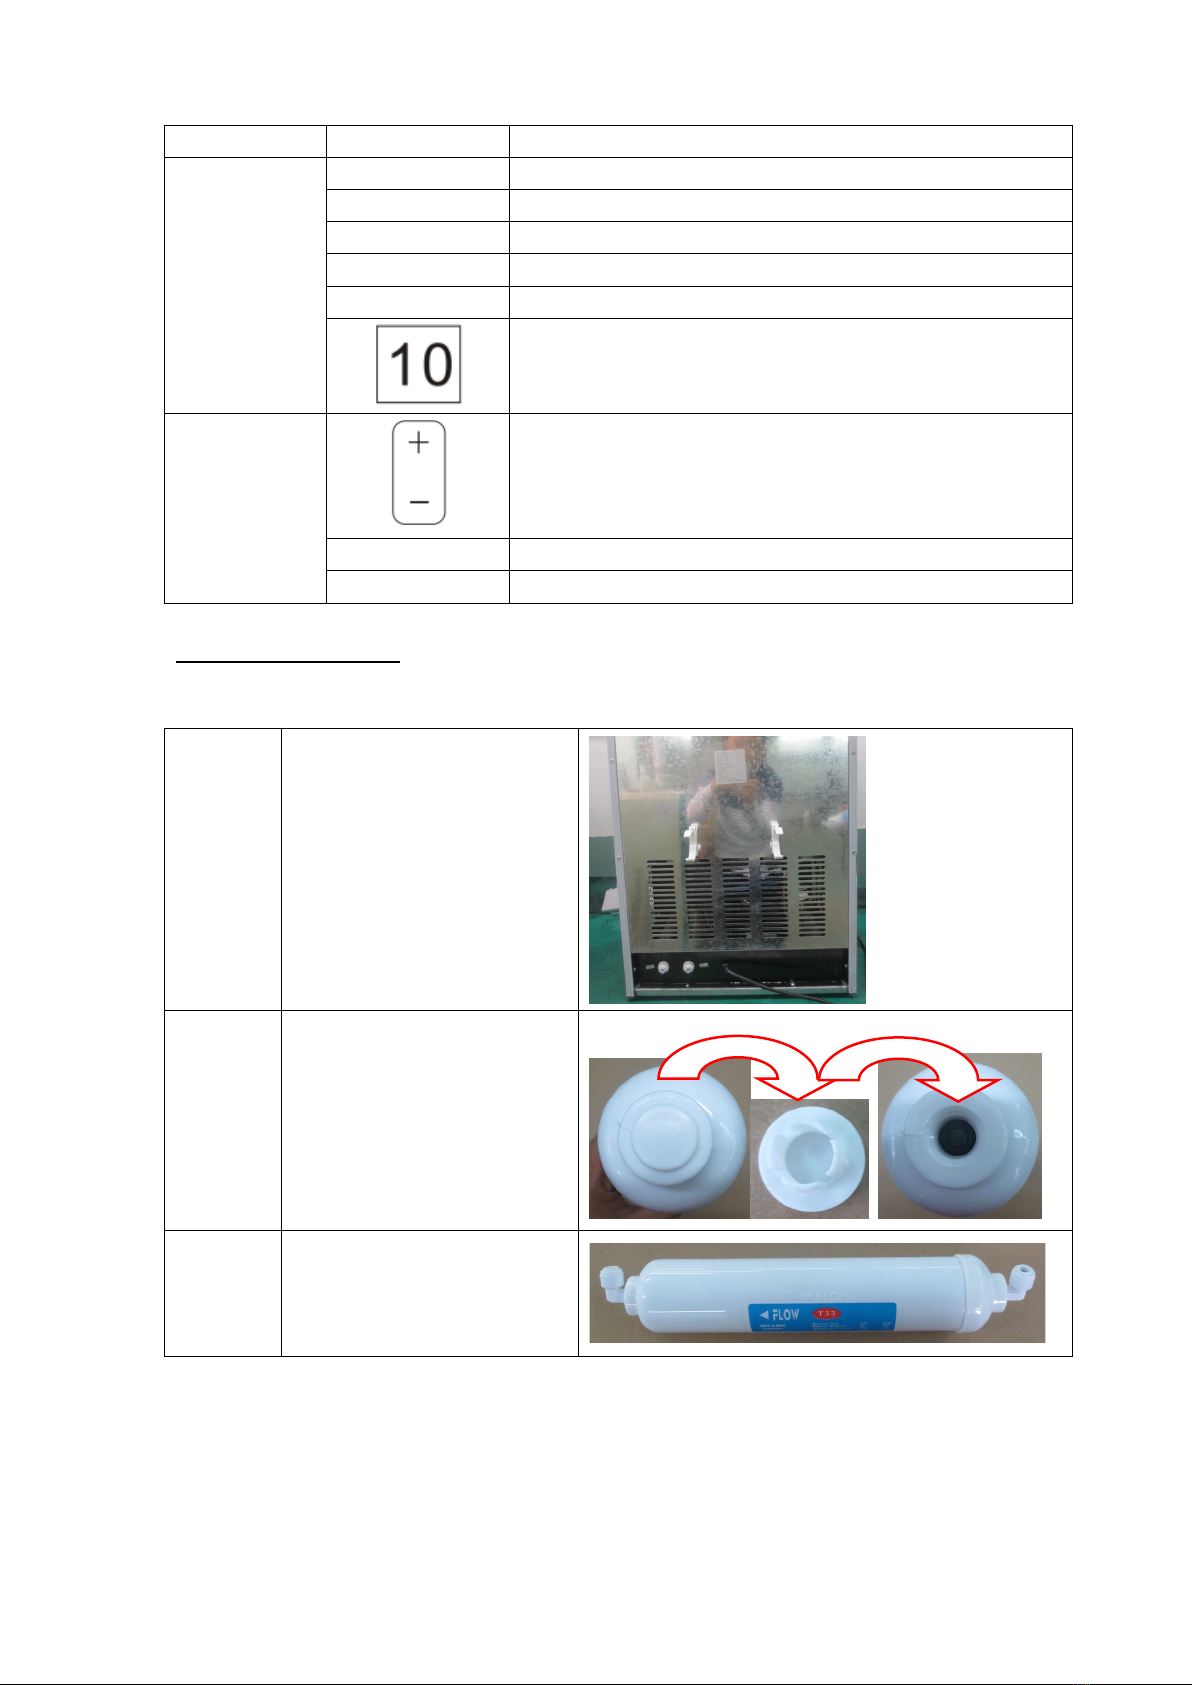
1. Please note, if the water filled to the evaporator is not symmetrical, small sundries maybe be
formed and lodged in the pipe which will mean that water will be filled to the evaporator causing
it to jam.
2. Please pull out the cap of the pipe, then let the water through the pipe in order to clean the
pipe, then you can replace the cap. It will make formal ice cubes
Problem
Possible Cause Suggested Solutions
The compressor works
abnormally with a
Buzzing
noise
The voltage is lower
than recommended
Stop the Ice maker and do not restart
until the voltage is normal.
The light of ADD WATER
is on
There is no water or
water is not enough
Press the “STOP” button, fill with
water, and press the “START” button
again to restart.

- 9 -
Indicator light on the
display is not on
1.Control panel wire
line is loosened
2.Control panel is
broken
Call for service
The water is flowing, ice
is made, however no
release of ice
Temperature sensors
are connected by
mistake
Call for service
Everything is correct but
no ice is made.
1.Refrigerant leaks
2.Cooling system
blocked
call for service
DISPOSAL
Electrical and battery-operated units that no longer work should not be disposed of with
normal household waste. They are to be collected separately, in accordance with the
2002/96 EC Directive for the disposal of electrical and electronic waste, and sent for proper
and environmentally-friendly recycling. Please check with your local authority for further
information.
Imported and distributed by:
Bonnington Plastics Limited
Bonningtons House
Glaisdale Parkway
Nottingham
NG8 4GP
Table of contents
Other DEVANTI Ice Maker manuals