EN - 8 A-DV56
Auto-ON
Enabled
ThisoptioncontrolstheAuto-ONfeature,whichautomaticallystartstheowofair
after breathing once or twice into the mask. This is always enabled when Auto-OFF is
enabled. If the unlocked symbol is shown, you are able to adjust this setting. If the
locked symbol is shown, this setting can only be adjusted by your provider.
MaskFitCheck
Enabled
Thisoptioncontrolsthemasktcheckfeature.Theairowtoyourmaskis
constantlymeasuredandiftheamountofairowexceeds95liters/minuteformore
than10%ofthetimeused,anoticationwillbecreated.Thisnoticationwillbe
displayed the next time you use the IntelliPAP.
LowBacklight
Enabled
Low backlight Enable will keep the backlight dim during operation. Low backlight
Disabled will turn the backlight OFF during operation.
ExitMenu
Press
Pressing the up key exits the Enable menu.
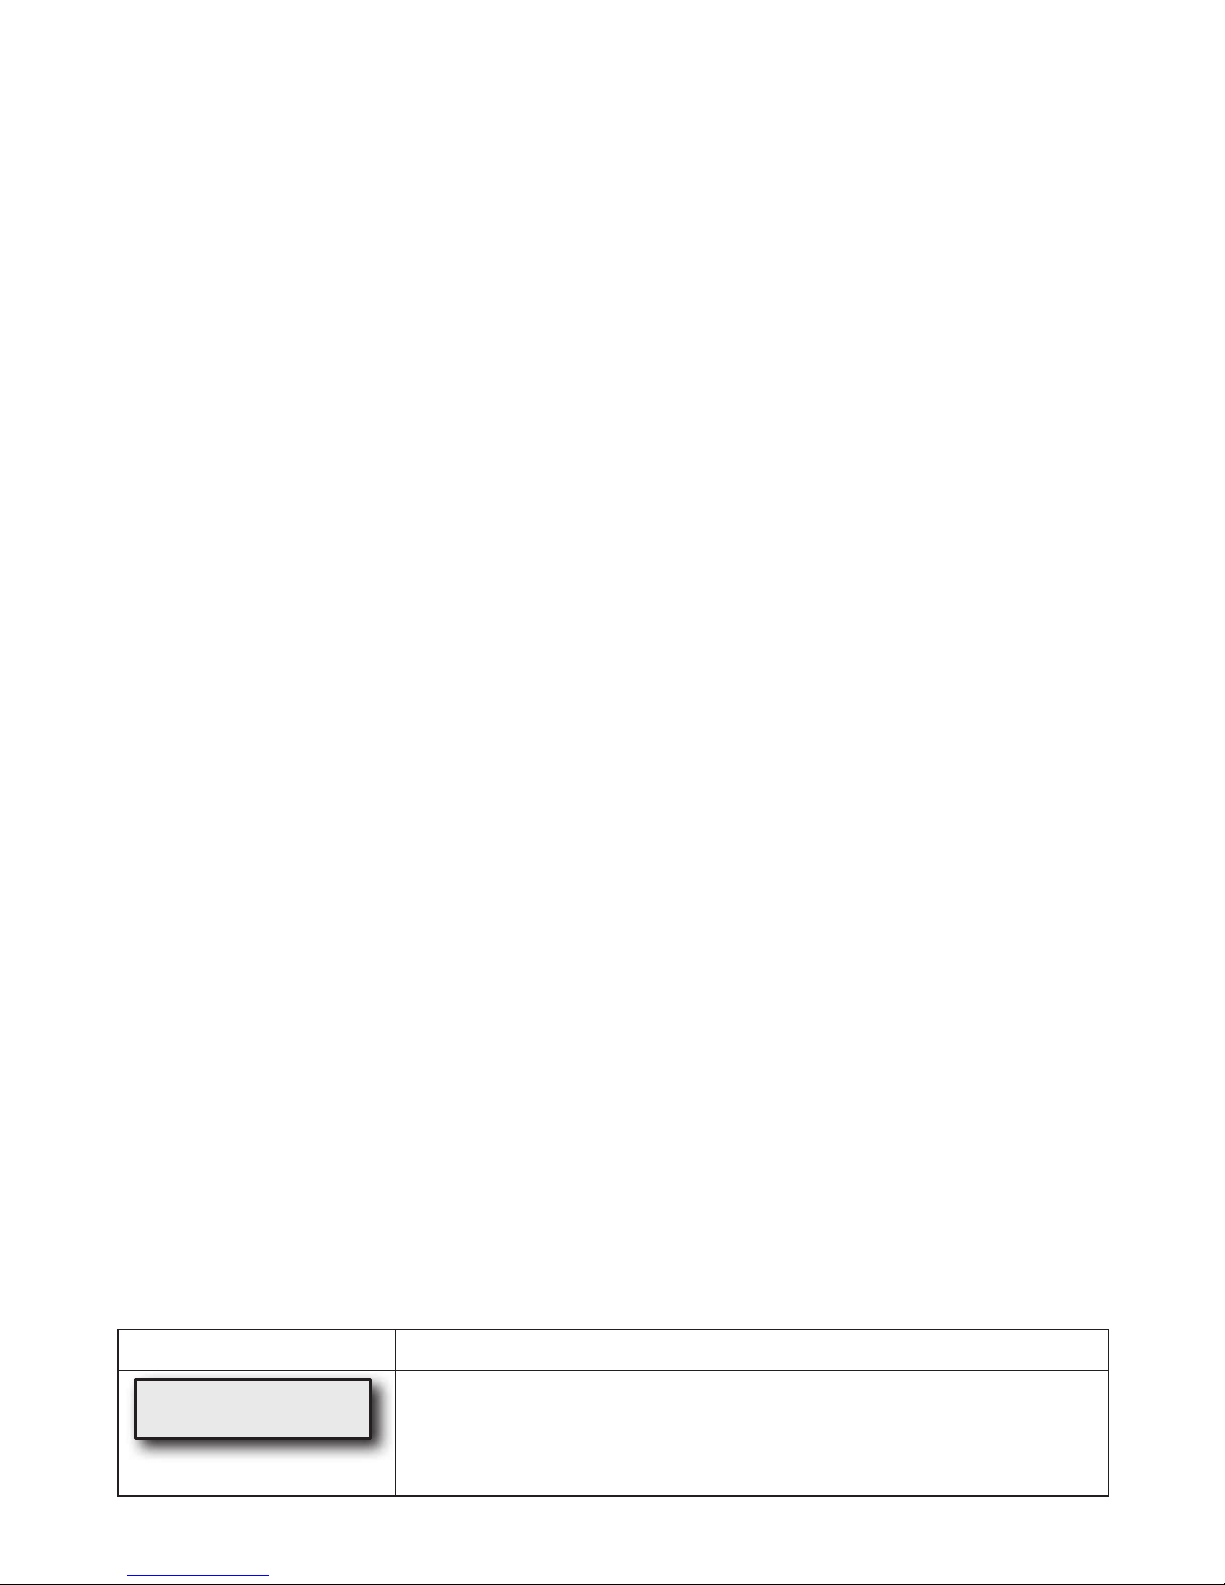
SmartCode and Adherence Score Information
Your homecare provider may contact you to retrieve SmartCode and Adherence Score information. To display the
SmartCode, press the LEFT arrow key once. Use the UP arrow or DOWN arrow keys to change the SmartCode reporting
period. Press the LEFT arrow key again to display the Adherence Score.
PATIENT MESSAGES
Your IntelliPAP will alert you of issues that may require some action on your part in order to make your therapy more
effective. You can press any key or button to clear the message from the display, but the IntelliPAP will operate normally
evenifthemessageisnotcleared.Twokindsofmessagesaredisplayed:RemindersandNotications.
Reminders
Reminders alert you when parts of your system need to be replaced. Some components of your system wear over time
and, if not replaced, may compromise your therapy. If you see a message on the display that is not listed below, you may
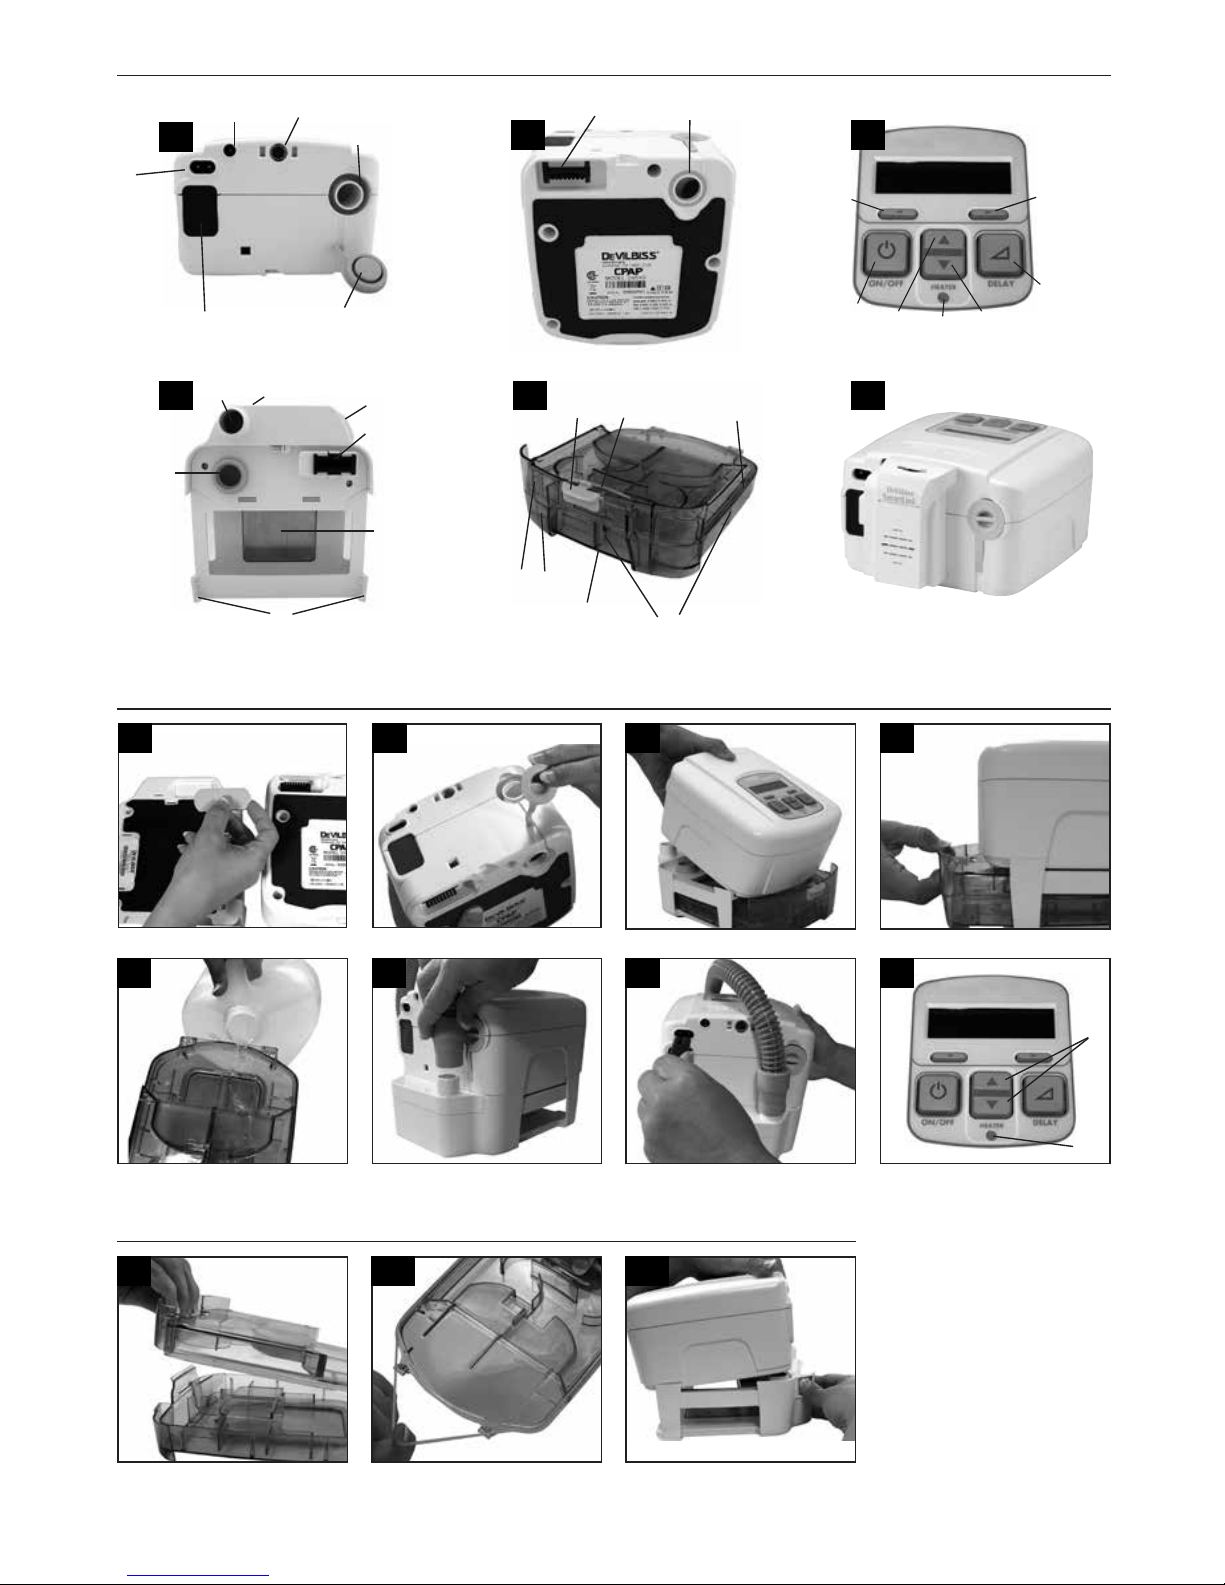
have the optional DeVilbiss SmartLink Module attached to your device (Fig. F), which provides additional messages. Refer
to the documentation that was provided with the SmartLink Module.
CleanFilter–Theltershouldbecheckedevery10daysforsignsofdirtorwearsothatitcanbecleanedasneeded.
This message helps to remind you to check it regularly.
Notifications
NoticationsidentifyconditionsinyourIntelliPAPthatmayrequireactionbyyouoryourequipmentproviderinorderto
maintain a high level of therapy. If you see a message on the display that is not listed below, you may have the optional
DeVilbiss SmartLink Module attached to your device (Fig. F), which provides additional messages. Refer to the
documentation that was provided with the SmartLink Module.
DelayRunningxxMinutesLeft–Whileacomfortdelaysessionisactive,thismessageisashedonthedisplayevery5
seconds to let you know how much time is left in the delay.
MaskLeak–ThismessagemeanstheIntelliPAPhasdetectedalargeamountofairowduringtherapyforatleast10%of
thetimeduringyourprevioususesession.Thisnoticationisdisplayedwhenthedeviceisturnedon.Ifthismessageis
displayed,putonthemaskandadjusttheheadgeartoensurethemaskisproperlyttedtoyourface.Followthemask
manufacturer’sdirectionsforadjustingthemaskandheadgearforpropertting.
MaskOff–Thismessageappearsduetoapoormasktoraremovedmask.Checkforleakaroundthemasksealand
make adjustments as necessary according to the mask manufacturer’s instructions. This message will be displayed until
thehighairowproblemiscorrected.Ifthehighairowconditionpersistsforabout20seconds,thedevicewill
automatically turn off if Auto-OFF is enabled.
DeviceFault – If a device fault message is displayed, refer to Troubleshooting for instructions.
INTELLIPAP TRAVEL INFORMATION
InternationalPowerChanges
Your IntelliPAP is approved for sale and use in North America and is equipped with a universal power supply that is
automatically capable of accepting line voltages of 100 to 240V~ 50/60Hz. Simply contact your equipment provider for the
correct style power cord for the region in which you will be traveling (refer to Accessories/Replacement Items for the
correct part number) to adapt your unit to the country’s power.