DeVilbiss SleepCube DV57 User manual

EN
DeVilbiss® SleepCube® Positive Airway Pressure Device
CAUTION–USA Federal law restricts this device to sale by, or on the order of a physician.
Assembled in USA. Instruction Guide.
ES
Dispositivo de presión positiva en las vías respiratorias SleepCube®
de DeVilbiss®
PRECAUCIÓN–La ley federal de EE. UU. limita la venta de este dispositivo a médicos o a personas que
dispongan de la correspondiente orden médica.
Ensamblado en EE. UU. Guía de instrucciones.
FR
Appareil de ventilation spontanée en pression positive SleepCube® de
DeVilbiss®
ATTENTION–Cet appareil ne peut être vendu que par un médecin ou sur ordonnance de ce dernier.
Assemblé aux États-Unis. Guide d’instructions.
ZH
DeVilbiss® SleepCube®正压通气设备
注意:美国联邦法律规定本设备只限医师购买或订购
美国组装。操作指南。
AR
DeVilbiss®SleepCube®
DV57 SleepCube AutoBilevel PAP Series 0044

SE-DV57-12
1
2
DV57 / DV5HH
DV5HH
A
10 4
6
2
78
B
53
Key Features
1
2
6
4
3
5
7
C
2
36
1
4
5
7
D
5
1
4
2
6
3
7
E
1 2
6
3
7
4
8
910 11
F
5

EN - 3SE-DV57-1
EN ENGLISH................................................................................................ EN-3
ES ESPAÑOL ............................................................................................... ES-25
FR FRANÇAIS.............................................................................................. FR-49
ZH CHINESE................................................................................................ ZH-72
AR ........................................................................................................ AR-94
TABLE OF CONTENTS
Symbol Definitions.................................................................................................................................................. EN - 4
Important Safeguards............................................................................................................................................. EN - 4
Introduction............................................................................................................................................................. EN - 5
Intended Use ................................................................................................................................................ EN - 5
Indications for Use........................................................................................................................................ EN - 5
Contraindication............................................................................................................................................ EN - 5
AutoBilevel Operating Diagram.................................................................................................................... EN - 5
Key Features.......................................................................................................................................................... EN - 6
SleepCube Device........................................................................................................................................ EN - 6
Keypad ......................................................................................................................................................... EN - 6
Humidifier Cradle.......................................................................................................................................... EN - 6
Water Chamber ............................................................................................................................................ EN - 6
Therapy Management System ..................................................................................................................... EN - 6
System Assembly................................................................................................................................................... EN - 6
Without Heated Humidification..................................................................................................................... EN - 6
With Heated Humidification.......................................................................................................................... EN - 6
Keypad and Display ............................................................................................................................................... EN - 6
Operation................................................................................................................................................................ EN - 7
Start-Up ........................................................................................................................................................ EN - 7
Controlling the Humidity ............................................................................................................................... EN - 7
SmartCode®and Adherence Score Information........................................................................................... EN - 7
Using the SmartFlex®Feature...................................................................................................................... EN - 8
Using the Comfort Delay Feature................................................................................................................. EN - 8
Shut Down.................................................................................................................................................... EN - 9
Enable Menu List.......................................................................................................................................... EN - 9
Patient Messages................................................................................................................................................... EN - 9
Reminders .................................................................................................................................................... EN - 9
Notifications.................................................................................................................................................. EN - 9
SleepCube Travel Information................................................................................................................................ EN - 10
SleepCube DC Operation....................................................................................................................................... EN - 10
Battery Power............................................................................................................................................... EN - 10
Supplemental Oxygen............................................................................................................................................ EN - 11
Accessories/Replacement Items............................................................................................................................ EN - 11
Maintenance........................................................................................................................................................... EN - 11
Cleaning ................................................................................................................................................................. EN - 12
Product Disposal .................................................................................................................................................... EN - 13
Troubleshooting...................................................................................................................................................... EN - 14
Specifications ......................................................................................................................................................... EN - 15
Guidance and Manufacturer’s Declaration............................................................................................................. EN - 17
Advanced Control Menus....................................................................................................................................... EN - 19

EN - 4 SE-DV57-1
SYMBOL DEFINITIONS
Class II electrical protection-
double insulated Locked Standby-turns blower on/off
Data port input/output Unlocked Heat
Next item on LCD display
IPX1
IPX1 Drip-proof, vertical 100-240 VAC input 50/60 Hz
Previous item on LCD display DC input: 12 VDC, center pin
positive Delay-starts the delay cycle
Increase value on LCD
display
Attention, consult
accompanying documents Manufacturer
Decrease value on LCD
display
Type BF equipment-applied
part
The device contains electrical and/or electronic equipment that must be recycled per EU Directive 2012/19/EU -
Waste Electrical and Electronic Equipment (WEEE)
IMPORTANT SAFEGUARDS
READ ALL INSTRUCTIONS BEFORE USING THIS
DEVICE.
SAVE THESE INSTRUCTIONS.
DANGER
• Electric Shock Hazard – Do not use while bathing.
• Electric Shock Hazard – Do not immerse this device into water or any other liquid.
• Electric Shock Hazard – Do not attempt to open or remove the cabinet. There are no user-serviceable internal
components. If service is required, return the product to your home care provider. Opening or tampering with the
product will void the warranty.
WARNINGS
• WARNING-APPLIEDPARTSTHATMAYEXCEED41˚C.
Thefollowingsurfacetemperaturesmayexceed41˚Cundercertainconditions:
• External surface of the CPAP.............................. 42.7˚C
• Patient Tubing Connector.................................... 43.9˚C
• LCD Display......................................................... 42.0˚C
• On/Off & Delay Button......................................... 41.8˚C
• HumidierHeaterPlate ....................................... 60.6˚C
• Serial Communication Port.................................. 42.7˚C
• The DeVilbiss SleepCube should be used only with masks recommended by DeVilbiss, your physician or respiratory
therapist.
• To avoid rebreathing of exhaled air, do not use a CPAP mask unless the device is turned on and providing a supply
of air. Venting in the mask should never be blocked. When the device is turned on and providing a fresh supply of
air,exhaledairisushedoutofthemaskvent.However,whenthedeviceisnotoperating,exhaledairmaybe
rebreathed. Rebreathing of exhaled air for longer than several minutes can, in some circumstances, lead to
suffocation. This warning applies to most CPAP devices.
• The DeVilbiss SleepCube is not a life support device and may stop operating with certain device faults or a power
failure. It is intended to be used on spontaneously breathing individuals weighing 66 lbs/30 Kg or greater.
• To avoid electric shock, always unplug power cord from wall outlet power source when performing cleaning.
• Use only accessories recommended by DeVilbiss.
• Alwaysremovethewaterchamberfromtheoptionalhumidiercradlebeforelling.
• Ifwaterhasspilledontothehumidiercradleorithasbeensubmergedintowater,unplugpowercordfrompower
source immediately. Allow device to dry completely before use.
• Neverblockairopeningsofthehumidiercradleorchamber.Donotinsertobjectsintoanyopeningsortubes.
• Forproperoperation,placesystemonaat,sturdy,levelsurface.
• Theoptionalhumidierisintendedforsingle-patientuseonly.

EN - 5SE-DV57-1
• Ifthesystemisplacedontheoor,donotpositionitwhereitmaybesteppedonwhengettingoutofbed.
CAUTION
• The circular data port connector,located on the back of the SleepCube,is used to attach accessories to the device.
The connector must only be used with accessories approved for use by DeVilbiss. Do not attempt to attach any other
device to this connector,as it may damage the CPAP or the accessory device.
• Never rinse or place the device in water. Never allow liquids to get into or around any of the ports, switches or air
lter.Doingsowillresultindevicedamage.Ifthisoccurs,discontinueuseandremovethepowercordfromthe
power source. Allow the device to completely dry before use.
• DonotplacetheSleepCubewhereitcanbeknockedontotheoor,or where the power cord may create a tripping
hazard.
• OnlytheDeVilbissDV5seriesHeatedHumidiersystemisrecommendedforusewiththeSleepCube.Other
humidiersystemsmaypreventthedevicefromdetectingsnoringandmaycauseinappropriatepressurelevelsin
the mask.
• Emptyanddryhumidierwaterchamberbeforetransporting.
INTRODUCTION
Intended Use
The DeVilbiss SleepCube Model DV57 Series AutoBilevel CPAP is intended for use in treating OSA in spontaneously
breathing patients 30 Kg (66 lbs) and above by means of application of positive air pressure. The device is to be used in
home and clinical environments.
Indications For Use (Optional Heated Humidifier)
Use on the advice and prescription of a licensed physician to help relieve the symptoms of dryness of the throat, nasal
passages and the mouth, which are common with positive airway pressure therapy. This is especially true in dry climates
and during the cold season when humidity in the air is typically lower than at other times.
Essential Performance
Sleep Apnea Breathing Therapy Equipment is considered not to have essential performance.
Contraindications
Do not use SleepCube system if your upper airway has been bypassed. Positive airway pressure therapy may be
contraindicated in some patients with the following pre-existing conditions:
• severe bullous lung disease
• pneumothorax or pneumomediastinum
• pathologically low blood pressure, particularly if associated with intravascular volume depletion
• dehydration
• cerebrospinaluidleak,recentcranialsurgeryortrauma
NOTE–Symptoms of dryness of the throat, nasal passages and the mouth are common with positive airway pressure
therapy. The SleepCube features an optional humidier system to help minimize these effects.
AutoBilevel Operating Diagram
AutoBilevel is typically used for OSA patients with higher prescribed pressures.

EN - 6 SE-DV57-1
KEY FEATURES (Page 2, Figures A-F)
DeVilbiss SleepCube Device
(Figures A and B)
1. Keypad/LCD Display (see Figure C)
2. Air Supply Port on Back
3. AirSupplyPortonBottom(foroptionalhumidier)
4. Air Supply Port Plug
5. HeaterPowerConnector(foroptionalhumidier)
6. AC Power Connector
7. DC Power Connector
8. Data Port
9. Power Cord (appropriate to your wall outlet) (not
shown)
10. Air Inlet Filter Opening
11 Connector Cover (not shown)
Keypad (Figure C)
1. On/Off
2. Previous Item
3. Next Item
4. Delay
5. Decrease Value
6. Increase Value
7. HeaterPowerLED(foroptionalhumidier)
Ask your equipment provider for information about other
DeVilbiss masks, equipment and accessories.
Humidifier Cradle (Figure D)
1. Heater plate
2. Heater power connector
3. Storage compartment for connector cover (on
bottom)
4. Air supply port inlet
5. Air supply port outlet
6. Flow generator release button
7. Flow generator locking tabs
Water Chamber (Figure E)
1. Chamber lid
2. Chamber base
3. Heat transfer plate (on bottom)
4. Sealing gasket
5. Water level indicators (front and sides)
6. Chamber release latch
7. Chamber disassembly lever
Therapy Management System (Figure F)
1. SmartLink®(optional)
SYSTEM ASSEMBLY
Without Heated Humidification
1. Locate the air supply port and heater power connector on the bottom of the SleepCube device. Ensure that each
opening has the appropriate soft cover securely attached.
2. Place the SleepCube on a stable surface such as a nightstand or table. If you wish, you may also place the device
ontheooratthebedside,beingcarefultoplacetheunitwhereitwon’tbekickedorsteppedon.Ensurethattheair
inlet in the back of the device is not blocked by anything such as curtains or bedding.
NOTE–Never place the SleepCube system on a soft surface such as a bed or couch during operation.
With Heated Humidification
CAUTION–The height of the SleepCube must be lower than the mask when using a humidier to prevent water from
getting into mask.
1. Ifyoursystemincludesahumidier,pleasefollowstepsinFigures1-7.
a. Locate the heater power connector on the bottom of the device. Remove the connector cover and insert it into
thestorageopeninginthebottomofthehumidiercradle.
b. Locate the air supply port at the bottom of the device. Remove the port plug and insert it into the air supply
port in the back of the device.
c. Placedeviceontohumidiercradleandclickintoplace.
d. Fillcleanchambertolllinewithdistilledwaterandinsertintocradle.
NOTE-Always use distilled water to avoid mineral buildup inside the chamber. Do not overll.
KEYPAD AND DISPLAY
Basic CPAP Controls
Name Symbol Function
ON/OFF TheON/OFFbuttonstartsandstopstheowofairfromthedevice.
HEATER
IfyourSleepCubehasaheater/humidierattached,thesebuttonsadjusttheheatersetting.
Increase the setting for more humidity and decrease the setting for less humidity.
DELAY
The Delay button activates the comfort delay feature and only functions if this feature has been
enabled. To understand how to set the parameters of this feature, please refer to the Using the
Comfort Delay Feature found on page EN - 8.
NOTE– The left and right arrow keys on the control panel provide access to menus for specic settings. Ask your
homecare provider for more information.

EN - 7SE-DV57-1
OPERATION
1. Fully insert the power cord into the back of the device. Plug the other end of the power cord into the AC wall outlet.
WARNING
Ensure the mains power cord is fully inserted into the CPAP and the power cord plug is completely inserted into a
fully functioning AC wall outlet. Failure to do so may cause an electrical safety hazard.
2. Attach air supply tubing to air supply port in the back of the device.
3. Prepare the mask (supplied by your equipment provider) by referring to the mask’s instruction guide.
4. Connect the air supply tubing to the mask.
NOTE–The air supply tubing supplied with the device is specially designed to prevent kinking and allow you to receive
optimal airow. Use only the 22 mm diameter, smooth-bore, kink-resistant tubing supplied with this device or an air supply
tubing recommended by your equipment provider.
Start-up
Put on your mask and press the ON/OFF button on the keypad OR put on your CPAP mask and take a few breaths to turn
onairowautomatically.Thepressureinyourmaskwillrisetothesetpressureinabout10seconds.
NOTE–If the device does not automatically start after taking 2-3 breaths, this feature may have been disabled. If Auto ON/
OFF is disabled, you must manually press the ON/OFF button to start and stop the device.
The keypad display shows the actual mask pressure while the device is in use. Because this is the actual pressure, the
device pressure reading may vary slightly as you breathe.
IfyourDeVilbissSleepCubesystemincludesahumidier,itsheatercontrolsandstatusaredisplayed.
NOTE– If the display on your device is not similar to those listed above, refer to the section entitled “Patient Messages” on
page EN-9.
Controlling the Humidity (optional)
Theheatersettingcanbeadjustedwithinarangeof1to10.Theoptimaltemperaturesettingisdependentontheambient
temperature and humidity of your room. If your room temperature is low and/or the relative humidity is high, then a lower
temperature setting may be necessary to prevent excess condensation in the air supply tubing. If the room temperature is
high and/or the relative humidity is low, then a higher temperature setting may be necessary for optimal comfort.
Theheatersettingof1resultsinaheaterplatetemperatureofapproximately84˚F(29˚C).Theheatersettingof10results
inaheaterplatetemperatureofapproximately149˚F(65˚C).
NOTE–Always allow at least 10 minutes of cooling time after turning the device off before removing the water chamber
from the humidier cradle.
WARNING
Do not attempt to ll the humidier while it is attached to the humidier cradle. Damage to the humidier cradle
may occur.
CAUTION– Use only distilled water that is at room temperature. Do not add any medication or other additives to the water.
CAUTION– For proper operation, ensure the ow generator is OFF before inserting humidier chamber.
WARNING
Never touch the heater plate on the humidier cradle. Never touch the heat transfer plate on the bottom of the
water chamber. These plates can reach temperatures as high as 149˚F (65˚C) during operation.
Do not operate the heater if the water chamber is empty. The heater plate may be turned off using the keypad
heater control when being used without water.
SmartCode and Adherence Score Information
Your homecare provider may contact you to retrieve SmartCode and Adherence Score information. To display the
SmartCode, press the LEFT arrow key once. Use the UP arrow or DOWN arrow keys to change the SmartCode reporting
period. Press the LEFT arrow key again to display the Adherence Score.
NOTE–To ensure accurate SmartCode information, the CPAP should remain plugged in and powered during the day. Do
not unplug daily.
The Quick View Menu shows a summary of information which is reported in the SmartCode data. Information in the Quick
View includes: Number of days used more than 4 hours (or can be set to 5 hours by clinician), AHI (Apnea/Hypopnea
Index), High Leak percent (percent of time at leak >95 L/m) and Daily Usage (average hours per day used). Each
parameter can be viewed in any of four time periods: 1 day, 7 days, 30 days and 90 days.

EN - 8 SE-DV57-1
Compliance information can be viewed without turning the CPAP on. With the blower OFF (display shows OFF), press the
left or right arrow keys on the keypad to scroll through the information.
Generating Compliance Reports for Employer/Insurer/Physician
SmartCode reports satisfy most requirements for ongoing compliance/adherence information, and the software retains
1,023 days (2.8 years) of data. We recommend you work with your provider to establish a routine for clearing SmartCode
data to ensure current usage information is available. Compliance meter should be cleared only after the required report is
generated, submitted and approved by the requestor. Once cleared, a new cycle of 2.8 years begins, and the only source
for the previous data will be the hard-copy reports.
NOTE-Only the provider has access to clear the meter.
Using The SmartFlex Feature in CPAP mode
Your SleepCube has a SmartFlex pressure relief feature to help make it easier to exhale against your prescribed pressure
by lowering the pressure slightly when you exhale. The pressure returns to your prescribed pressure during inhalation to
maintain your therapy.
The SmartFlex menu is available in CPAP mode and is a sub-menu that allows you to control various functions of your
SleepCube. It is accessed by pressing the down button while “SmartFlex Menu” is shown on the Display.
SmartFlex pressure relief includes three settings for exhale relief: 1, 2 and 3. (1 is the least amount of relief, 3 is the most
amount of relief). Setting SmartFlex pressure relief to OFF turns the SmartFlex feature OFF.
Thepressurewaveformcanalsobeadjustedindependentlyforinhalationandexhalationtosmooththetransitionwhen
SmartFlex pressure relief is active. The pressure waveform settings are SmartFlex-i (IRnd) and SmartFlex-e (ERnd) with
settings from 0 to 5 in steps of 1 (0 is the least amount of smoothing, 5 is the most amount of smoothing).
SmartFlex pressure relief can be operated Full-Time or during the Delay Only. The display will show “FLX” in the top row of
the default screen (between CPAP pressure and Mode) while SmartFlex pressure relief is operating.
When SmartFlex pressure relief is turned on Full-Time, the pressure relief operates at all times when you are breathing on
the device. When SmartFlex pressure relief is set to Delay Only, the pressure relief operates only during the Comfort Delay
periodandturnsoffafterthedelayperiodisnished.
The device contains a SmartFlex disengagement feature. If a patient is experiencing a respiratory event while the CPAP is
in the relief pressure mode, after a limited time the CPAP will shift to the prescription pressure and remain at this pressure
until normal breathing resumes.
Using The Comfort Delay Feature
YourSleepCubehasacomfortdelayfeaturetohelpmakeiteasierforyoutofallasleep.Theairowwillstartatalow
pressureandthengraduallyramp-uptotheprescribedsettingoverthelastfewminutesofthespecieddelaytime.
NOTE–When the comfort delay feature is activated, a message will ash on the display periodically, indicating the amount
of time remaining in the delay.
Youcanadjusttheamountoftimespentincomfortdelaybyusingtheadvanceddevicecontrols.TheDelayTimecanbe
adjustedfrom0to45minutesin5-minuteincrements.
NOTE–If you are unable to change the delay time, your provider has locked this setting.
Comfort Delay Feature In Standard CPAP Mode
WhenyouusethecomfortdelayfeaturewhileyourdeviceisoperatinginCPAPmode,theairowyoureceiveatthe
beginning of your therapy is temporarily lowered to a pressure selected by your physician when the device was setup.
Pressthedelaybuttontoactivatethecomfortdelayfeature.Theairowpressurewilldroptotheprescribedcomfortdelay
pressure.
The pressure will gently rise to the pressure prescribed for your therapy. You may repeat the comfort delay by pressing the
delaybuttonagainifyouhavenotfallenasleepduringtherstuse.
Comfort Delay Feature in Bilevel Mode
WhenyouusethecomfortdelayfeaturewhileyourSleepCubeisoperatinginBilevelmode,theairowyoureceiveatthe
beginningofyourtherapyisthedelaypressureprescribedbyyourphysicianwhenthedevicewassetup.Theairow
pressure will start at the delay pressure and gradually rise to the prescription setting. In Bilevel mode, the IPAP and EPAP
pressures will gradually rise until they reach the prescription settings.
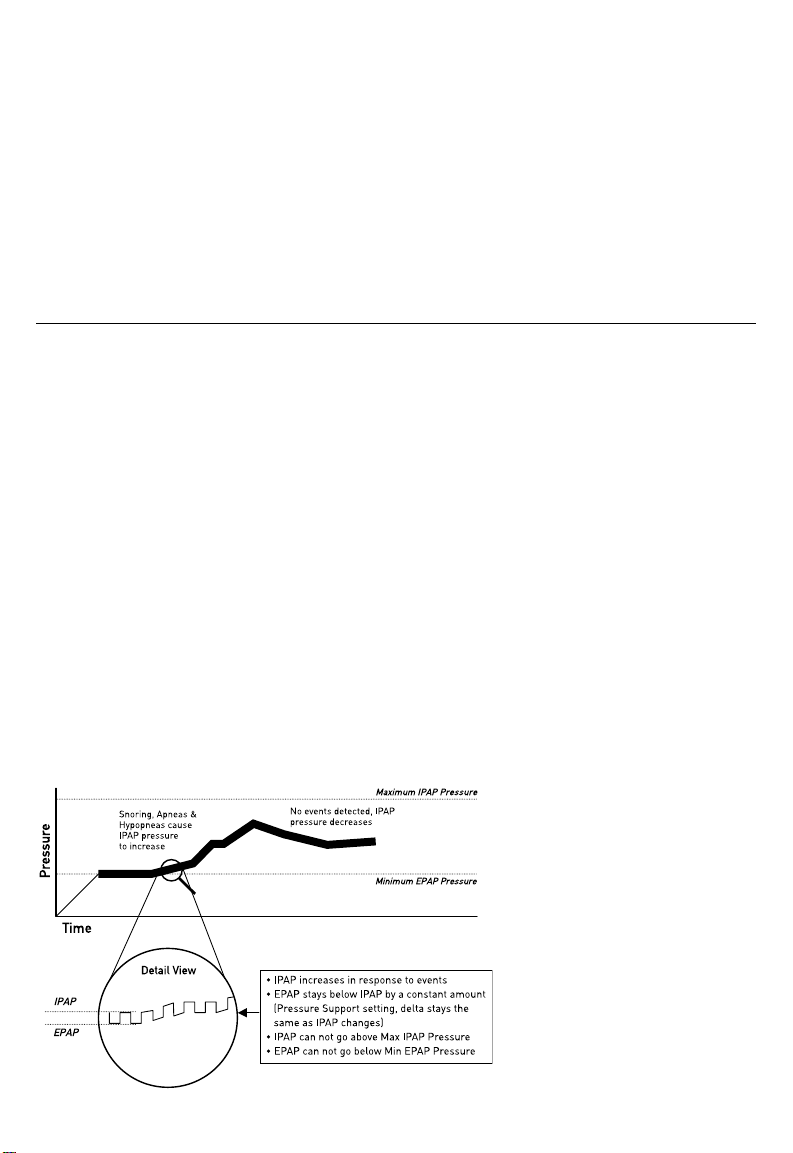
Comfort Delay Feature in AutoBilevel Mode
WhenyouusethecomfortdelayfeaturewhileyourSleepCubeisoperatinginAutoBilevelmode,theairowyoureceiveat
thebeginningofyourtherapyisthedelaypressureprescribedbyyourphysicianwhenthedevicewassetup.Theairow

EN - 9SE-DV57-1
pressure will start at the delay pressure and gradually rise to the prescription setting. In AutoBilevel mode, the IPAP and
EPAP pressures will gradually rise together until EPAP reaches the Min EPAP prescription settings.
Shut Down
Press the ON/OFF button to turn the device off. You may also simply remove your mask. After a few seconds, the device
willdisplaythemessage“MaskOff.Pleasecheckmaskt.”Ifyoudonotputthemaskonagainthedevicewill
automatically turn off in about 20 seconds. Pressing any button will remove the message from the display.
NOTE–If the DeVilbiss SleepCube does not turn off automatically, the Auto-OFF feature may have been disabled. In this
case you must manually turn the device off.
Enable Menu List
The Enable menu is available in all modes and is a sub-menu that allows you to control various functions of your
SleepCube. It is accessed by pressing the down button while “Enable Menu” is shown on the Display.
Display Example Enable Menu Item Description
Auto-OFF
Enabled
ThisoptioncontrolstheAuto-OFFfeature,whichautomaticallystopstheowofair
after taking off the mask. The device will require at least 30 seconds to turn OFF
depending on the kind of mask used. When Auto-OFF is enabled, Auto-ON is also
enabled.Iftheunlockedsymbolisshown,youareabletoadjustthissetting.Ifthe
lockedsymbolisshown,thissettingcanonlybeadjustedbyyourprovider.
Auto-ON
Enabled
ThisoptioncontrolstheAuto-ONfeature,whichautomaticallystartstheowofair
after breathing once or twice into the mask. This is always enabled when Auto-OFF is
enabled.Iftheunlockedsymbolisshown,youareabletoadjustthissetting.Ifthe
lockedsymbolisshown,thissettingcanonlybeadjustedbyyourprovider.
Mask Fit Check
Enabled
ThisoptioncontrolstheMaskFitCheckfeature.Theairowtoyourmaskis
constantlymeasured,andiftheamountofairowexceeds95liters/minuteformore
than10%ofthetimeused,anoticationwillbecreated.Thisnoticationwillbe
displayed the next time you use the SleepCube.
Low Backlight
Enabled
Low Backlight Enabled will keep the backlight dim during operation. Low Backlight
Disabled will turn the backlight OFF during operation.
Exit Menu
Press
Pressing the up key exits the Enable menu.
PATIENT MESSAGES
Your SleepCube will alert you of issues that may require some action on your part in order to make your therapy more
effective. You can press any key or button to clear the message from the display, but the SleepCube will operate normally
evenifthemessageisnotcleared.Twokindsofmessagesaredisplayed:RemindersandNotications.
Reminders
Reminders alert you when parts of your system need to be replaced. Some components of your system wear over time
and may compromise your therapy if not replaced. If you see a message on the display that is not listed below, you may
have the optional DeVilbiss SmartLink Module attached to your device (Fig. F), which provides additional messages. Refer
to the documentation that was provided with the SmartLink Module.
Clean Filter–Theltershouldbecheckedevery10daysforsignsofdirtorwearsothatitcanbecleanedasneeded.
This message helps to remind you to check it regularly.
Notifications
NoticationsidentifyconditionsinyourSleepCubethatmayrequireactionbyyouoryourequipmentproviderinorderto
maintain a high level of therapy. If you see a message on the display that is not listed below, you may have the optional
DeVilbiss SmartLink Module attached to your device (Fig. F), which provides additional messages. Refer to the
documentation that was provided with the SmartLink Module.
Delay Running xx Minutes Left–Whileacomfortdelaysessionisactive,thismessageisashedonthedisplayevery5
seconds to let you know how much time is left in the delay.
Mask Leak–ThismessagemeanstheSleepCubehasdetectedalargeamountofairowduringtherapyforatleast10%
ofthetimeduringyourprevioususesession.Thisnoticationisdisplayedwhenthedeviceisturnedon.Ifthismessageis
displayed,putonthemaskandadjusttheheadgeartoensurethemaskisproperlyttedtoyourface.Followthemask
manufacturer’sdirectionsforadjustingthemaskandheadgearforpropertting.

EN - 10 SE-DV57-1
Mask Off–Thismessageappearsduetoapoormasktoraremovedmask.Checkforleakaroundthemasksealand
makeadjustmentsasnecessaryaccordingtothemaskmanufacturer’sinstructions.Thismessagewillbedisplayeduntil
thehighairowproblemiscorrected.Ifthehighairowconditionpersistsforabout20seconds,thedevicewill
automatically turn off if Auto-OFF is enabled.
Device Fault – If a device fault message is displayed, refer to Troubleshooting for instructions.
SLEEPCUBE TRAVEL INFORMATION
International Power Changes
Your DeVilbiss SleepCube is equipped with a universal power supply. This means that it is automatically capable of
acceptinglinevoltagesof100to240V~50/60Hz.Youdonotneedtomakeanyadjustmentstothedeviceifyouare
traveling to another country where the line voltage is different than your domestic line voltage. Simply contact your
equipment provider for the correct style power cord for the region in which you will be traveling (refer to Accessories/
Replacement Items for the correct part number).
Altitude
Your SleepCube automatically compensates for changes in altitude between sea level and 8500 ft. (2600 m). You do not
needtomakeadjustmentstothedeviceforchangesinaltitude.
SLEEPCUBE DC OPERATION
Battery Power
our SleepCube can be operated from a 12V DC power source in a motor home, boat or other recreational vehicle using
the 12V DC cable. Alternatively you can power your SleepCube using a 12V DC stand-alone (deep-cycle marine) battery
with a DC battery clamp on adapter and 12V DC cable. All cables are available from your equipment provider (refer to
Accessories/Replacement Items for the correct part numbers). The stand-alone battery connection uses clamps that attach
to the terminal connections of the battery.
Approximate Battery Run Time (with fully charged battery) @ 12 cm H2O setting
SleepCube Connected To Vehicle SleepCube Connected To Battery
DC Power
Source/Battery DC Car Power Source (Cigarette Lighter) Deep Cycle Marine Battery
Battery Specs 12 V 12V 12V 80 Amp-Hours 120 Amp Hour 240 Amp Hour
Additional
Equipment Needed
120V~
ModiedSine
Wave Inverter
with 200 Watt
capacity
230V~Modied
Sine Wave
Inverter with
400 Watt
Capacity
120 VAC
ModiedSine
Wave Inverter
with 200 Watt
capacity
230 VAC
ModiedSine
Wave Inverter
with 400 Watt
Capacity
DeVilbiss Cables
Required (refer to
Accessories)
DV51D-619 DV51D-696 DV15D-696 DV51D-619
DV51D-696 DV51D-696 DV51D-696
HeaterHumidier
Powered? NO YES YES NO YES YES
Approximate Run
Time 5 nights 1 night 1 night 7 nights 1 night 1 night
NOTE–Run times are at a breath rate of 20 breaths per minute, standard mask leak, and with heater setting of 8 where
applicable.
NOTE–The heater for the SleepCube’s humidication system will not operate directly from a 12V DC power source. If you
need humidication, non-heated humidication is still available. Alternately, instead of connecting12V DC power directly to
the SleepCube, you can pass the DC power through an inverter that will deliver AC power to the system. This will allow the
heater to function. The power rating of the inverter must be at least 200 watts @ 110V~ / 400 watts @ 220V~.
NOTE–The SleepCube will automatically switch power sources between AC and 12V DC if both sources are available. If
your unit is connected to both AC and 12V DC power sources, it will operate on AC power as long as AC power is present
and automatically switch to 12V DC power if AC power is lost. When AC power is restored, it will return to the AC source.
You do not need to reset or adjust any settings when the power source switches, but remember that your heater will not
operate on 12V DC.

EN - 11SE-DV57-1
SUPPLEMENTAL OXYGEN
WARNING-OXYGEN USE
• Oxygensupportscombustion.Toavoidpossiblephysicalinjury,donotsmokewhileusingthisdevicewith
supplementaloxygen.Donotusethisdevicenearhotobjects,volatilesubstancesorsourcesofopenames.
• Always turn on the SleepCube before turning on the oxygen source. Turn off the oxygen source before turning off the
SleepCube.
• Thisdeviceisnotsuitableforuseinthepresenceofaammableanestheticmixture.
• Ataxedowrateofsupplementaloxygen,theinhaledoxygenconcentrationwillvarydependingonthepressure
setting, patient breathing pattern, mask selection and leak rate. This warning applies to most types of CPAP devices.
• Never allow the oxygen source to run continuously while connected to the SleepCube if the device is not in use. If
theSleepCubeisnotbeingused,turnofftheoxygenow.
CAUTION
• Oxygen is a prescribed gas and should only be administered under the supervision of a physician.
• Theowsettingoftheoxygensourcemustbespeciedbyaphysician.
Supplemental oxygen is sometimes prescribed in addition to a CPAP for treatment of Obstructive Sleep Apnea. If your
physician prescribed oxygen for your sleep therapy, you can add the oxygen in one of two ways:
1. Obtain the optional oxygen adapter (part #7353D-601) from your homecare provider and connect it to the air supply
port on the SleepCube. Connect one end of the air supply tubing to the open end of the adapter and the other end of
the air supply tubing to the mask.
2. If your mask is equipped with an oxygen port, your physician may request that you apply oxygen directly to your mask.
ACCESSORIES/REPLACEMENT ITEMS
Replacement Items
Air-inletlter(4/pk) DV51D-602 Heater connection cover DV51D-605
Fineparticlelter(4/pk) DV51D-603 Oxygen adapter 7353D-601
Air supply tubing (6’) CPAPTUB6-90 Carrying case DV51D-610
Air supply plug DV51D-604 HeatedHumidier DV5HH
HumidierChamber DV5C Chamber Sealing Gasket DV5C-614
Power Items
AC power cord (USA) DV51D-606 AC power cord (Australia) DV51D-609
AC power cord (UK) DV51D-608 DC power cord DV51D-619
AC power cord (EU) DV51D-607 DC battery clamp-on adapter (requires DC
Power Cord DV51D-619) DV51D-696
MAINTENANCE
Expected Service Life:
• CPAPandhumidiercradle=5years
• Humidierwaterchamber=1Year
• Tubingandgrossparticleintakelter=180days
DANGER
Electric shock hazard –Do not attempt to open or remove the cabinet. There are no user-serviceable components
inside. If service is required, contact your equipment provider for instructions on obtaining service. Opening or
attempting to service your device will void the warranty.
WARNING
Disconnect supply before servicing.
Pressure Accuracy–The SleepCube is designed to provide accurate pressure performance from the factory without
additional calibration. No routine service is required provided the device is used in accordance with the manufacturer’s
directions.

EN - 12 SE-DV57-1
NOTE–Some countries require periodic servicing and calibration of this kind of medical device. Contact your equipment
provider for further information.
Standard Air-Inlet Filter–Checkthelterevery10daysandcleanitifnecessary.Replacethelterevery6monthsor
soonerifitisdamaged.Thestandardlterisdesignedtolterparticleslargerthan3.0micronsinsize.TheSleepCube
MUSThavethestandardlterinplaceduringoperation.
Optional Fine Particle Filter–Checkthelterevery10daysandreplaceitifitisdirtyordamaged,otherwisereplacethe
lterevery30days.Theoptionalneparticlelterisdesignedtolterparticlesassmallas0.3micronsinsize.
Maintenance:
Inspection Interval Replacement Interval Specication
Gross Particle Intake Filter 10 days, clean if dirty 6 months > 3.0 micron particles
Fine Particle Intake Filter 10 days, replace if dirty 30 days > 0.3 micron particles
Patient tubing Daily 6 months See tubing spec
Humidierchamber 1 / month 1 year
CLEANING
WARNING
To avoid electric shock, always unplug the power cord from the wall outlet power source before cleaning.
CAUTION–Never rinse or place the device in water. Never allow liquids to get into or around any of the ports, switches or
air lter. Doing so will result in product damage. If this occurs, do not use the device. Contact your equipment provider for
service.
Device Cabinet
1. Unplug the SleepCube from the power source. Wipe the cabinet with a clean, damp cloth every few days to keep the
cabinet dust free.
2. Allow the device to dry completely before plugging it into a power source.
Filters
Air-Inlet Filter
1. Theair-inletltershouldbecheckedevery10daysandcleanedasnecessary.Thelterislocatedintherearofthe
device.
CAUTION–Proper lter function is important for the operation of the device and to protect the device from damage.
2. Toclean,removethedarkouterfoamlterfromtheframe.
3. Washthelterinasolutionofwarmwateranddishwashingdetergentandrinsewithwater.Allowtheltertodry
completely.Ifthelter(part#DV51D-602)isdamaged,contactyourequipmentproviderforareplacement.
4. Ensurethelteriscompletelydrybeforeinstallationanduse.
Fine Particle Filter (Optional)
1. Ifyouhaveanoptionalneparticlelter(part#DV51D-603),inspectthislterandreplaceitifitshowssignsofdirtor
damage. Do not wash.
2. Installtheneparticlelterbehindthestandardlter.
NOTE–If the ne particle lter is not installed rst according to the directions, the life of the lter will be reduced requiring
more frequent replacement.
Optional Heated Humidifier
Water Chamber ‑ Humidier water chamber should be cleaned daily.
1. Press on the chamber release latch and pull out the water chamber from the cradle (Fig 4).
2. Separate the chamber halves by pressing forward on the chamber disassembly lever and lifting the lid of the
chamber (Fig 9).
3. Remove the sealing gasket from the chamber lid (Fig 10).
4. Hand wash the parts in a solution of warm water and mild dishwashing detergent.
CAUTION–Do not use any solutions that contain bleach, chlorine, alcohol, scented oils or other aromatic-based ingredients
to clean the humidier components or tubing. These solutions may reduce the life of the product.

EN - 13SE-DV57-1
5. Allow the parts to dry before reassembly.
CAUTION–Inspect the gasket seal before each use to ensure that it is properly seated in the groove around the entire
chamber.
NOTE– The disassembled chamber may also be washed once per week in a dishwasher on the delicate or glassware
cycle, top shelf only.
Humidier Cradle ‑ The humidier cradle should be cleaned as needed.
1. Turn off the heater and unplug from power source. Allow system to cool for at least 10 minutes.
2. Detachowgeneratorfromthecradlebyremovingthewaterchamber,thenfullydepressingtheowgenerator
release button to separate (Fig 4).
NOTE–Flow generator release button must be pressed completely to separate.
3. Use a soft, damp cloth to clean the surfaces of unit.
Tubing
The air supply tubing should be cleaned daily. Remove the tubing from the device and mask. Use a mild detergent and
water to clean the inside of the tubing. Rinse the tubing and allow to air dry.
Recommended Cleaning Intervals:
Recommended
cleaning interval
Number of cleaning
cycles *
Compatible cleaning agents /
max washing temperature
CPAP outer housing 7 days 261 Water, use only a damp cloth
Tubing Daily 180 Mild dish soap and warm water
Gross Particle Intake Filter 10 days 18 Mild dish soap and warm water
Fine Particle Intake Filter Do not clean, replace if dirty N/A N/A
Humidiercradle 1 / week 261 Water, use only a damp cloth
Humidierchamber 1 / day 365 Mild dish soap and warm water
Humidierchamber 1 / week 52 Dishwasher **, top shelf only
5years@7dayinterval=261 cleaning cycles
* Number of cleaning cycles determined by recommended cleaning interval and expected service life
** Only weekly dishwasher cleaning due to the high temperature of the water and the high concentration of the soap.
Mask and Headgear
Clean the mask and headgear according to the manufacturer’s instructions.
PRODUCT DISPOSAL
The outer packaging is made of environmentally friendly materials that can be used as secondary raw materials. If you no
longer need this packaging, bring it to your local recycling and waste disposal facility according to the applicable
regulations for your location.
The equipment, including accessories and internal components, does not belong in your regular household waste. Such
equipment is manufactured from high-grade materials and can be recycled and reused. The internal motor, PC board,
power supply board and wiring should be removed from the unit and recycled as electronic waste. The remaining plastic
components should be recycled as plastics.
The European Directive 2012/19/EU on Waste Electrical and Electronic Equipment (WEEE) requires that electrical and
electronic equipment be collected and disposed of separately from other unsorted municipal waste, with the aim of
recycling it. The crossed out waste bin symbol indicates that separate collection is required.

EN - 14 SE-DV57-1
TROUBLESHOOTING
WARNING
Electric Shock Hazard - Do not remove the device cabinet. There are no user-serviceable internal components.
The cabinet should only be removed by a qualied DeVilbiss provider.
Issue Possible Cause Remedy
Nothing shows on
the display. 1. Device is not plugged in, or the power cord
is not fully inserted.
1a.Verifythatthepowercordisrmlyconnected
to the SleepCube and the power outlet.
1b. If you are using a DC power source, make
sure the cable connections are secure. Verify that
battery is charged.
2.OptionalHumidier-Theowgeneratoris
notfullyseatedonhumidiercradle. 2. Refer to assembly instructions (Fig. 1-7).
3. There is no outlet power. 3. Locate a suitable functioning power source.
The SleepCube
does not start when
breathing into the
mask.
1. The Auto-ON feature has been disabled. 1. Use the ON/OFF button to start and stop
device.
2. There is no power to the device. 2.Verifythatthepowercordisrmlyconnectedto
the device and the power outlet.
3. Breath is not deep enough for the Auto-ON
feature to detect. 3. Breathe deeply in and out to start the device.
4. You are using a full face mask that has an
anti-asphyxia valve. 4. Auto-ON may not work because your exhaled
breath escapes through the open valve. Use the
ON/OFF button to start and stop the device.
5. The air supply port plug is missing or not
fully inserted. 5. Make sure the air supply port plug is fully
inserted into the unit.
6.Thehumidierchamberisnotfullyengaged
into the cradle or is missing. 6.Slidethehumidierchamberfullyintotheslot.
Verify the latching lever snaps into place.
The airow has
stopped
unexpectedly
during use or
reports mask leak.
1. The Auto-OFF feature has detected large
airowbecauseoflooselyttingmask. 1.Ensureyouhaveagoodmaskt;andadjust
mask and headgear.
2. During use, your mouth opens and you
begin to mouth-breathe. 2. Contact equipment provider for a chin strap or
different mask to prevent mouth-breathing.
3.Theoptionalhumidierchamberisnotfully
engaged or is missing. 3.Slidethehumidierchamberfullyintocradle.
Verify the release latch clicks into place.
4. The air supply port plug is missing from the
back of the CPAP or is not fully inserted. 4. Ensure the air supply port plug is fully inserted
into the back of the CPAP.
The display shows
a device fault. An error has occurred in the device and
requires servicing. Contact your equipment provider for service.
Apnea symptoms
have recurred. 1.Airltermaybedirty. 1.Cleanorreplacetheairlterandrelocate
device away from drapes or other dusty surfaces.
2. Apnea condition has changed. 2. Contact your physician or equipment provider.
Skin becomes
irritated where
mask contacts face.
1. Headgear is too tight or improperly
adjusted. 1. Loosen headgear to reduce contact pressure
on face.
2. Your mask may not be sized properly or is
not the most appropriate shape for you. 2. Contact physician or equipment provider.
Dryness of throat or
nose. Inadequate humidity. 1a.AddaDeVilbissDV5heatedhumidier.
1b.Increasetheheatersettingonthehumidier.
Water condensation
collecting in the
hose causing a
gurgling sound.
1.Humidicationistoohigh. 1.Reducehumidierheatersetting.
2.Roomtemperatureuctuatesfromhigherto
lower levels throughout the night. 2. Increase room temperature.

EN - 15SE-DV57-1
Issue Possible Cause Remedy
Air from ow
generator seems to
be too warm.
1.Airltersaredirty. 1.Cleanlters.
2. Air inlet port is blocked. 2. Unblock air inlet.
3. Room temperature is too high. 3. Lower room temperature.
4. Device is located near a heat source. 4. Locate device away from heat source.
5.Humidier(optional)heatersettingistoo
high. 5. Lower heater setting.
Nasal, sinus or ear
pain, runny nose Youmayhaveareactiontoairowpressure. Discontinue use and contact physician.
Heater setting is
not visible on
display
1.Theowgeneratorisnotfullyseatedonto
thehumidiercradle. 1. Ensure proper contact is made (Fig. 3).
2. Your CPAP device is not equipped with the
optionalhumidier.
Bilevel changes
pressure too early
or too late (not
following breathing)
1. Trigger Sensitivity is not set correctly. 1.Adjusttheinspiratoryandexpiratorytrigger
sensitivitytoadjusttriggeringforthepatient.
2. Backup rate (time) is too high, the patient is
breathing slower than the backup rate. 2. Reduce Backup Rate setting.
SPECIFICATIONS
CPAP
Size........................................................................................................... 4.2”H x 6.5”W x 6.9”D (10.7cm x 16.5cm x 17.5cm)
Weight ............................................................................................................................................................. 1.22 kg (2.7 lbs.)
Electrical Requirements AC......................................................................................................................100-240V~, 50/60 Hz
Electrical Requirements DC ..................................................................................................................10.4 - 15 VDC, 5 Amps
Maximum Power Consumption ......................................................65 watts max from AC power source (flow generator only)
Bilevel Pressure Range...........................................................................................................................................3-25 cmH2O
Operating Temperature Range....................................................................................................... 41˚Fto104˚F(5˚Cto40˚C)
Operating Humidity Range.......................................................................................................0% to 95% RH non-condensing
Operating Atmospheric Conditions..........................................................................................Sea level to 8,500 feet (2600 m)
Storage & Transportation Temperature Range ........................................................................-40˚Fto+158˚F(-40˚Cto70˚C)
Storage & Transportation Humidity Range...............................................................................0% to 95% RH non-condensing
Maximum Limited Pressure...........................................................................................................30 cmH2O under normal use
Sound Pressure Level (tested per ISO 17510)...............................................................................................................26 dBA
Sound Power Level .........................................................................................................................................................38 dBA
SmartCode®Technology is protected under US patent 8649510 and patent HK 1172119
Humidifier
Humidity Output (in the operating flow range): ................................................................................................ ≥10mgH2O/l air
Size:......................................................................................................2.6” H x 6.3” W x 8.4” D (6.6 cm x 16.0 cm x 21.3 cm)
Weight: ........................................................................................................................................................1.75 lbs. (0.794 Kg)
Power Consumption:.................................................................................................................................................... 85 Watts
DV5HH Electrical Requirements ................................................................................................................100-240VAC, 0.95 A
Heater Plate Thermal Cutout:..............................................................................................................................305˚F(152˚C)
Power/Temperature Control: ......................................................................................Setting of 1 (minimum) to 10 (maximum)
Heater Plate Temperature: .................................................................................84˚Fto149˚F(approx.29˚Ctoapprox.65˚C)
Operating Temperature Range:...................................................................................................... 41˚Fto104˚F(5˚Cto40˚C)
Operating Humidity Range:.......................................................................................................0 to 95% R.H. non-condensing
Operating Atmospheric Pressure Range:........................................................................................................70.0 – 106.0 kPA
Filter Specifications
Standard Filter .........................................................................................................................................> 3.0 micron particles
Optional Fine Particle Filter .....................................................................................................................> 0.3 micron particles

EN - 16 SE-DV57-1
Dynamic Short-Term Pressure Accuracy with and without DV5HH Humidifier (Per
ISO 17510-1:2007)
Waveform Volume [mL] Breath Rate [min-1]
Set Pressure
[cmH2O]
Pressure Accuracy
[Pk-Pk cmH2O]
Sinusoidal
cyclewithI:E=
1:1
500 10, 15, 20
3.0 0.5
9.0 0.5
14.0 1.0
20.0 1.0
25.0 1.0
Maximum Flow-Rate (per ISO 17510-1:2007)
Test Pressures
3.0 cmH2O9.0 cmH2O14.0 cmH2O20.0 cmH2O25.0 cmH2O
Measured pressure at the patient
connection port (cmH2O) 3.0 8.9 13.0 19.0 24.0
Averageowatthepatientconnectionport
(l/min) 95.0 160.5 172.2 158.5 139.7
Long Term Static Pressure Accuracy ................................................................................................................. +/-0.5cmH2O
Additional Specifications
Equipment classification with respect to protection from electric shock ........................................................................ Class II
Degree of protection from electric shock ................................................................................................. Type BF Applied Part
Degree of protection against ingress of liquids......................................................................................IPXI Drip-proof vertical
Mode of operation .................................................................................................................................................... Continuous
Equipmentnotsuitableforuseinthepresenceofaammableanestheticmixturewithair,oxygenornitrousoxide.

EN - 17SE-DV57-1
DEVILBISS GUIDANCE AND MANUFACTURER’S DECLARATION
WARNING
Medical Electrical Equipment needs special precautions regarding EMC and needs to be installed and put into
service according to the Electromagnetic Compatibility [EMC] information provided in the accompanying
documents.
Portable and Mobile RF Communications Equipment can affect Medical Electrical Equipment.
The equipment or system should not be used adjacent to or stacked with other equipment. If adjacent or stacked
use is necessary, the equipment or system should be observed to verify normal operation in the conguration in
which it will be used.
NOTE– The EMC tables and other guidelines provide information to the customer or user that is essential in determining
the suitability of the Equipment or System for the Electromagnetic Environment of use, and in managing the
Electromagnetic Environment of use to permit the Equipment or System to perform its intended use without disturbing
other Equipment and Systems or non-medical electrical equipment.
Guidance and Manufacturer’s Declaration – Emissions All Equipment and
Systems
Thisdeviceisintendedforuseintheelectromagneticenvironmentspeciedbelow.Thecustomeroruserofthisdevice
should assure that it is used in such an environment.
Emissions Test Compliance Electromagnetic Enforcement – Guidance
RF Emissions
CISPR 11 Group 1
This device uses RF energy only for its internal function. Therefore, its
RF emissions are very low and are not likely to cause any interference
in nearby electronic equipment.
RF Emissions
CISPR 11 Class B
This device is suitable for use in all establishments including domestic,
and those directly connected to the public low-voltage power supply
network that supplies buildings used for domestic purposes.
Harmonics
IEC 61000-3-2 Class A
Flicker
IEC 61000-3-3 Complies
Immunity Test IEC 60601 Test Level Compliance Level Electromagnetic Environment - Guidance
Electrostatic
Discharge (ESD)
IEC 61000-4-2
±6kV contact
±8kV air
±6kV contact
±8kV air
Floors should be wood, concrete or ceramic
tile.Ifoorsaresynthetic,therelativehumidity
should be at least 30%.
Electrical Fast
Transient/burst
IEC 61000-4-4
±2kV on AC Mains
±1kV for I/O Lines
±2kV on AC Mains
±1kV for I/O Lines
Mains power quality should be that of a typical
commercial or hospital environment.
Surge
IEC 61000-4-5
±1kV Differential
±2kV Common
±1kV Differential
±2kV Common
Mains power quality should be that of a typical
commercial or hospital environment.
Voltage dips, short
interruptions and
voltage variations
on power supply
input lines
IEC 61000-4-11
>95% Dip for 0.5 Cycle
60% Dip for 5 Cycles
30% Dip for 25 Cycles
>95% Dip fo 5 Seconds
>95% Dip for 0.5 Cycle
60% Dip for 5 Cycles
30% Dip for 25 Cycles
>95% Dip for 5
Seconds
Mains power quality should be that of a typical
commercial or hospital environment. If the
user of this device requires continued
operation during power mains interruptions, it
is recommended that the device be powered
from an uninterruptible power supply or
battery.
Power Frequency
50/60Hz Magnetic
Field IEC 61000-4-8
3A/m 3A/m
Powerfrequencymagneticeldsshouldbe
that of a typical location in a typical
commercial or hospital environment.
Conducted RF
IEC 61000-4-6
3 Vrms from
150 kHz to 80 MHz V1=3Vrms
Portable and mobile RF communications
equipment should be separated from the
device by no less than the recommended
separation distances calculated/listed below:
D=(1.2)√
P

EN - 18 SE-DV57-1
Immunity Test IEC 60601 Test Level Compliance Level Electromagnetic Environment - Guidance
Radiated RF
IEC 61000-4-3
3 V/m
80 MHz to 2.5 GHz E1=3V/m
D=(1.2)√
P80 to 800 MHz
D=(2.3)√
P800 MHz to 2.5 GHz
Where P is the maximum power rating in
watts, and D is the recommended separation
distance in meters.
Fieldstrengthsfromxedtransmitters,as
determined by an electromagnetic site survey,
should be less than the compliance levels (V1
and E1).
Interference may occur in the vicinity of
equipment marked with the following symbol:
For transmitters rated at a maximum output power not listed above, the recommended separation distance D in meters
(m) can be estimated using the equation applicable to the frequency of the transmitter where P is the maximum output
power rating of the transmitter in watts (W) according to the transmitter manufacturer.
Note 1: At 80 MHz and 800 MHz, the separation distance for the higher frequency range applies.
Note 2: These guidelines may not apply in all situations. Electromagnetic propagation is affected by absorption and
reectionfromstructures,objectsandpeople.
Recommended Separation Distances Between Portable and Mobile RF
Communications Equipment and this device. This device and system are NOT
Life-Supporting
This device is intended for use in the electromagnetic environment in which radiated disturbances are controlled. The
customer or user of this device can help prevent electromagnetic interference by maintaining a minimum distance
between portable and mobile RF Communications Equipment and the device as recommended below, according to the
maximum output power of the communications equipment.
Maximum Output
Power (Watts)
Recommended Separation Distances for the device (meters)
150 kHz to 80 MHz
D=(1.2)√
P
80 to 800MHz
D=(1.2)√
P
800 MHz to 2.5 GHz
D=(2.3)√
P
0.01 0.12 0.12 0.23
0.1 0.38 0.38 0.73
1 1.20 1.20 2.30
10 3.79 3.79 7.27
100 12.00 12.00 23.00
For transmitters rated at a maximum output power not listed above, the recommended separation distance D in meters
(m) can be estimated using the equation applicable to the frequency of the transmitter where P is the maximum output
power rating of the transmitter in watts (W) according to the transmitter manufacturer.
Note 1: At 80 MHz and 800 MHz, the separation distance for the higher frequency range applies.
Note 2: These guidelines may not apply in all situations. Electromagnetic propagation is affected by absorption and
reectionfromstructures,objectsandpeople.

EN - 19SE-DV57-1
ADVANCED MENU CONTROLS
With the device on, press the “Next” or “Previous” buttons on the keypad to scroll through the items on the display.
PREVIOUS ITEM kPressing this button displays the previous menu option.
NEXT ITEM jPressing this button displays the next menu option.
SETTING CHANGE h�
iThesebuttonsallowyoutoadjustthesettingthatisshownonthedisplay.
Please note that the values displayed are examples only.
CPAP Mode
NOTE: There are 5 levels of SmartCode.
Use up or down key to change
between levels.
Heater setting shown if DV5HH is
attached, FLX shown if SmartFlex
feature is turned on.
Auto-ON
Enabled
Auto-OFF
Disabled
Exit Menu
Press
Mask Fit Check
Enabled
Low Backlight
Enabled
SmartFlex Mode
Full-Time
SmartFlex
3
Exit Menu
Press
SmartFlex IRnd
3
SmartFlex ERnd
3
UP () BUTTON
DOWN () BUTTON
RIGHT () LEFT () BUTTONS
DOWN () BUTTON
UP () BUTTON
RIGHT () LEFT () BUTTONS
P:10.0 FLX CPAP
Heat:5
Set Pressure
10.0 cmH2O
Delay Pressure
4.0 cmH2O
Compliance Meter
123456.7 hours
Serial Number
MD000005
Firmware Version
V0.01 30/11/2010
LCD Contrast Adj
50%
Delay Time
20 minutes
Enable Menu
Press
SmartCode 1-Day
B6CD-37F-35M2
Tubing Length
1.8 m (6 ft)
Adherence Score
83% (25/30)
P:10.0 S–T RR:15
I/E: 1:1.0 (50%)
LK:123 S–S EV:AS
MV:123.4 VT:1234
SmartFlex Menu
Press
Patient Menu Layout
The following charts show, by Mode, each Display
you will scroll through using the Next or Previous
buttons on the keypad. Pressing the Down key at
the Enable Menu Display will allow you to enter
this submenu. Then use Next or Previous buttons
to scroll through it and press the Up button to
returntomainmenu.OncethenalDisplayis
reached, pressing the Next button will return you to
therstDisplay.
NOTE-If the unlocked symbol is shown, you are
able to adjust this setting. If the locked symbol is
shown, this setting can only be adjusted by your
provider.

EN - 20 SE-DV57-1
Bilevel S Mode
NOTE: There are 5 levels
of SmartCode. Use up
or down key to change
between levels.
Heater setting shown if DV5HH
is attached.
AutoBilevel Mode
P:10.0 S
Heat:Off
Compliance Meter
123456.7 hours
Serial Number
MD000005
Firmware Version
V0.01 30/11/2010
LCD Contrast Adj
50%
Enable Menu
Press
Tubing Length
3.0 m (10 ft)
Delay Time
20 minutes
Adherence Score
70% (21/30)
SmartCode 1-Day
B6CD-37F-35M2
P:10.0 S–T RR:15
I/E: 1:1.0 (50%)
LK:123 S–S EV:AS
MV:123.4 VT:1234
IPAP
10.0 cmH2O r5.0
EPAP
5.0 cmH2O r5.0
Delay Pressure
4.0 cmH2O
Exp. Trigger
5
Insp. Trigger
5
EPAP Rounding
3 (1234 ms)
IPAP Rounding
3 (1234 ms)
RIGHT () LEFT () BUTTONS
Auto-ON
Enabled
Auto-OFF
Disabled
Exit Menu
Press
Mask Fit Check
Enabled
Low Backlight
Enabled
RIGHT () LEFT () BUTTONS
P:10.0 Auto S
Heat:Off
Compliance Meter
123456.7 hours
Serial Number
MD000005
Firmware Version
V0.01 30/11/2010
LCD Contrast Adj
50%
Enable Menu
Press
Tubing Length
3.0 m (10 ft)
Delay Time
20 minutes
Adherence Score
70% (21/30)
SmartCode 1-Day
B6CD-37F-35M2
P:10.0 S–T RR:15
I/E: 1:1.0 (50%)
LK:123 S–S EV:AS
MV:123.4 VT:1234
Max IPAP
10.0 cmH2O
Min EPAP
5.0 cmH2O
Delay Pressure
4.0 cmH2O
Exp. Trigger
5
Insp. Trigger
5
EPAP Rounding
3 (1234 ms)
IPAP Rounding
3 (1234 ms)
RIGHT () LEFT () BUTTONS
Auto-ON
Enabled
Auto-OFF
Disabled
Exit Menu
Press
Mask Fit Check
Enabled
Low Backlight
Enabled
RIGHT () LEFT () BUTTONS
Pressure Support
5.0 cmH2O
This manual suits for next models
5
Table of contents
Languages:
Other DeVilbiss Personal Care Product manuals

DeVilbiss
DeVilbiss 525 Series Manual

DeVilbiss
DeVilbiss IntelliPAP DV55 Bilevel S CPAP Series User manual

DeVilbiss
DeVilbiss 306DS Manual

DeVilbiss
DeVilbiss DV53 Standard Plus CPAP Series User manual

DeVilbiss
DeVilbiss DV57 Series User manual

DeVilbiss
DeVilbiss 5650C Manual

DeVilbiss
DeVilbiss Traveler 6910 Series Manual