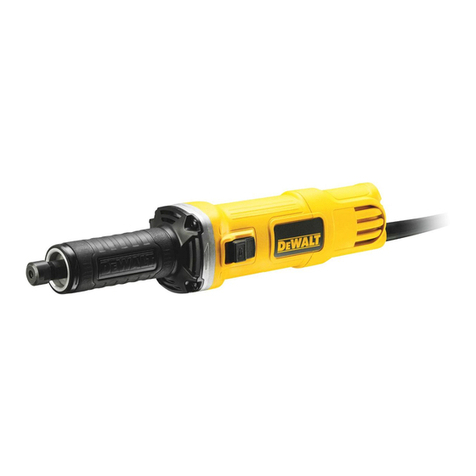
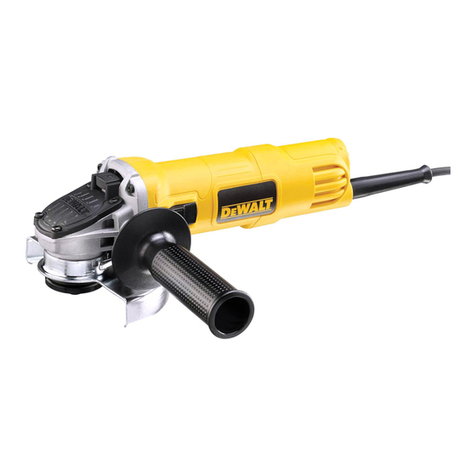
DeWalt DW882 User manual

D®
www.DEWALT.eu DW882

Figure 1
a
b
Figure 2
i
h

Figure3
Figure4

Figure5
Figure6

STRAIGHT GRINDER
DW882
Congratulations!
You have chosen a DEWALT tool. Years of
experience, thorough product development and
innovation make DEWALT one of the most reliable
partners for professional power tool users.
TechnicalData
DW882
Voltage V 230
Type 3
Powerinput W 1,800
Noloadspeed rain_ 5,700
Wheeldiameter mm 152
Spindle 5/8-11-UNC-3B
Wheelwidth mm 25
Bore mm 16
Weight kg 6.7
LpA(soundpressure) dB(A) 91
KpA(soundpressureuncertainty) dB(A) 3
LwA(soundpower) dB(A) 102
KwA(soundpoweruncertainty) dB(A) 3.2
Vibrationtotalvalues(triaxvectorsum)determinedaccordingto
EN60745:
Vibrationemissionvalueahsurfacegrinding
ah,AG= m/s2 18.1
UncertaintyK= m/s2 2.4
The vibration emission level given in this information
sheet has been measured in accordance with a
standardised test given in EN 60745 and may be
used to compare one tool with another. It may be
used for a preliminary assessment of exposure.
_ARNING: The declared vibration
emission level represents the main
applications of the tool However if the
tool is used for different applications,
with different accessories or poorly
maintained, the vibration emission may
diffe_ This may significantly increase the
exposure level over the total working
period.
ENGLISH
An estimation of the level of exposure to
vibration should also take into account
the times when the toot is switched off
or when it is running but not actually
doing the job. This may significantly
reduce the exposure level over the total
working period.
Identify additional safety measures to
protect the operator from the effects of
vibration such as: maintain the toot and
the accessories, keep the hands warm,
organisation of work patterns.
Fuses
Europe 230Vtools 10Amperes,mains
U.K.& Ireland 230Vtools 13Amperes,inplugs
Definitions:Safety Guidelines
The definitions below describe the levelof severity
for each signal word. Please read the manual and
pay attention to these symbols.
_ ANGER: Indicates an imminentlyhazardous situation which, if not avoided,
will result in death or serious injury.
WARNING: Indicates a potentially
hazardous situation which, if not
avoided, could result in death or
serious injury,
CAUTION: Indicates a potentially
hazardous situation which, if not
avoided, may result in minor or
moderate injury,
NOTICE: Indicates a practice not
related to personal injury which, if
not avoided, may result in property
damage,
Denotes risk of electric shock.
Denotes risk of fire.
23

ENGLISH
EC-Declaration of Conformity
MACHINERYDIRECTIVE
DW882
DEWALT declares that these products described
under "technical data" are in compliance with:
2006/42/EC, EN 60745-1, EN 60745-2-3.
These products also comply with Directive
2004/108/EC. For more information, please contact
DEWALT at the following address or refer to the
back of the manual.
The undersigned is responsible for compilation of the
technical file and makes this declaration on behalf of
DEWALT.
Horst Grossmann
Vice President Engineering and Product
Development
DEWALT, Richard-Klinger-StraBe 11,
D-65510, Idstein, Germany
01.03.2010
WARNING: Toreduce the risk of injury,read the instruction manual.
GeneralPowerToolSafetyWarnings
_ARNING! Read all safety warnings
and all instructions. Failureto follow
the warnings and instructions may result
in electric shock, fire and/or serious
injury.
SAVEALL WARNINGSAND INSTRUCTIONS
FORFUTUREREFERENCE
The term "power toot" in the warnings refers to your
mains-operated (corded) power toot or battery-
operated (cordless) power toot.
1) WORKAREASAFETY
a) Keep work area clean and well lit.
Cluttered or dark areas invite accidents.
b) Do not operate power tools in explosive
atmospheres, such as in the presence of
flammable liquids, gases or dust. Power
tools create sparks which may ignite the dust
or fumes.
c) Keep children and bystanders away while
operating a power tool Distractions can
cause you to lose control
2) ELECTRICALSAFETY
a) Power tool plugs must match the outlet.
Never modify the plug in any way. Do
not use any adapter plugs with earthed
(grounded) power tools. Unmodified plugs
and matching outlets wilt reduce risk of
electric shock.
b) Avoid body contact with earthed or
grounded surfaces such as pipes,
radiators, ranges and refrigerators. There
is an increased risk of electric shock if your
body is earthed or grounded.
c) Do not expose power tools to rain or wet
conditions. Water entering a power tool wilt
increase the risk of electric shock.
d) Do not abuse the cord. Never use the
cord for carrying, pulling or unplugging
the power tool Keep cord away from
heat, oil, sharp edges or moving parts.
Damaged or entangled cords increase the
risk of electric shock.
e) When operating a power tool outdoors,
use an extension cord suitable for outdoor
use. Use of a cord suitable for outdoor use
reduces the risk of electric shock.
If operating a power tool in a damp
location is unavoidable, use a residual
current device (RCD) protected supply.
Use of an RCD reduces the risk of electric
shock.
3) PERSONALSAFETY
a) Stay alert, watch what you are doing and
use common sense when operating a
power tool Do not use a power tool while
you are tired or under the influence of
drugs, alcohol or medication. A moment of
inattentionwhile operating power tools may
result in serious personal injury
b) Use personal protective equipment.
Always wear eye protection. Protective
equipment such as dust mask, non-skid
safety shoes, hard hat, or hearing protection
used for appropriate conditions wilt reduce
personal injuries.
c) Prevent unintentional starting. Ensure
the switch is in the off position before
connecting to power source and/or
battery pack, picking up or carrying the
tool. Carrying power tools with your finger
on the switch or energising power tools that
have the switch on invites accidents.
24

d) Remove any adjusting key or wrench
before turning the power tool on. A
wrench or a key left attached to a rotating
part of the power toot may result in personal
injury.
e) Do not overreach. Keep proper
footing and balance at all times. This
enables better control of the power toot in
unexpected situations.
Dress properly. Do not wear loose
clothing or jewellery. Keep your hair,
clothing and gloves away from moving
parts. Loose clothes, jewe//ery or tong hair
can be caught in moving parts.
g) If devices are provided for the connection
of dust extraction and collection facilities,
ensure these are connected and properly
used. Use of dust collection can reduce
dust-related hazards.
4) POWERTOOLUSEANDCARE
a) Do not force the power tooL Use the
correct power tool for your application.
The correct power tool will do thejob
better and safer at the rate for which it
was designed.
b) Do not use the power tool if the switch
does not turn it on and off. Any power
toot that cannot be controlled with the switch
is dangerous and must be repaired.
c) Disconnect the plug from the power
source and/or the battery pack from
the power tool before making any
adjustments, changing accessories, or
storing power tools. Such preventive safety
measures reduce the risk of starting the
power toot accidentally.
d) Store idle power tools out of the reach
of children and do not allow persons
unfamiliar with the power tool or these
instructions to operate the power tool.
Power tools are dangerous in the hands of
untrained users.
e) Maintain power tools. Check for
misalignment or binding of moving parts,
breakage of parts and any other condition
that may affect the power tool's operation.
If damaged, have the power tool repaired
before use. Many accidents are caused by
poorly maintained power tools.
Keep cutting tools sharp and clean.
Properly maintained cutting tools with sharp
cutting edges are tess tikeS/to bind and are
easier to control
g) Use the power tool, accessories and
tool bits etc., in accordance with these
instructions taking into account the
ENGLISH
working conditions and the work to
be performed. Use of the power toot for
operations different from those intended
could result in a hazardous situation.
5) SERVICE
a) Have your power tool serviced by a
qualified repair person using only identical
replacement parts. This will ensure that the
safety of the power tool is maintained,
ADDITIONALSPECIFICSAFETYRULES
Safety Instructions for All Operations
a) This power tool is intended to function
as a grinder. Read all safety warnings,
instructions, illustrations and specifications
provided with this power tool Failure to follow
all instructions listed below may result in electric
shock, fire and/or serious injury.
b) Operations such as sanding, wire
brushing, polishing and cutting-off are not
recommended to be performed with this
power tool. Operations for which the power
toot was not designed may create a hazard and
cause personal inju_
c) Do not use accessories which are not
specifically designed and recommended
by the tool manufacturer. Just because the
accessory can be attached to your power tool,
it does not assure safe operation.
d) The rated speed of the accessory must be at
least equal to the maximum speed marked
on the power tool Accessories running faster
than their rated speed can break and fly apart.
e) The outside diameter and the thickness of
your accessory must be within the capacity
rating of your power tool. Incorrectly sized
accessories cannon be adequately guarded or
controlled.
t) The arbour size of wheels, flanges, backing
pads or any other accessory must properly
fit the spindle of the power tool Accessories
with arbour holes that do not match the
mounting hardware of the power tool wilt run
out of balance, vibrate excessively and may
cause toss of control
g) Do not use a damaged accessory. Before
each use inspect the accessory such as
abrasive wheel for chips and cracks, backing
pad for cracks, tear or excess wear, wire
brush for loose or cracked wires. If power
tool or accessory is dropped, inspect for
damage or install an undamaged accessory.
25

ENGLISH
After inspecting and installing an accessory,
position yourself and bystanders away from
the plane of the rotating accessory and run
the power tool at maximum no-load speed
for one minute. Damaged accessories will
normally break apart during this test time.
h) Wear personal protective equipment.
Depending on application, use face
shield, safety goggles or safety glasses.
As appropriate, wear dust mask, hearing
protectors, gloves and workshop apron
capable of stopping small abrasive or
workpiece fragments. The eye protection must
be capable of stopping flying debris generated
by various operations. The dust mask or
respirator must be capable of filtrating particles
generated by your operation. Prolonged
exposure to high intensity noise may cause
hearing toss.
i) Keep bystanders a safe distance away from
work area. Anyone entering the work area
must wear personal protective equipment.
Fragments of workpiece or of a broken
accessory may fly away and cause injury
beyond immediate area of operation.
j) Hold power tool by insulated gripping
surfaces only, when performing an operation
where the cutting accessory may contact
hidden wiring or its own cord. Cutting
accessory contacting a "live" wire may make
exposed metal parts of the power toot "live" and
shock the operato_
k) Position the cord clear of the spinning
accessory. Ifyou lose control, the cord may be
cut or snagged and your hand or arm may be
pulled into the spinning accesso_
t) Never lay the power tool down until the
accessory has come to a complete stop. The
spinning accessory may grab the surface and
putt the power toot out ofyour control.
m) Do not run the power tool while carrying it at
your side. Accidental contact with the spinning
accessory could snag your clothing, pulling the
accessory into your body.
n) Regularly clean the power tool's air vents.
The motor's fan wilt draw the dust inside
the housing and excessive accumulation of
powdered metal may cause electrical hazards.
o) Do not operate the power tool near
flammable materials. Sparks could ignite these
materials.
p) Do not use accessories that require liquid
coolants. Using water or other liquid coolants
may result in electrocution or shock.
FURTHERSAFETYINSTRUCTIONS
FORALLOPERATIONS
Causesand Operator Prevention
of Kickback
Kickback is a sudden reaction to a pinched or
snagged rotating wheel, backing pad, brush or
any other accessory. Pinching or snagging causes
rapid stalling of the rotating accessory which in turn
causes the uncontrolled power toot to be fomed in
the direction opposite of the accessory's rotation at
the point of the binding.
For example, ff an abrasive wheel is snagged or
pinched by the workpiece, the edge of the wheel
that is entering into the pinch point can dig into the
surface of the material causing the wheel to climb
out or kick out. The wheel may either jump toward
or away from the operato_ depending on direction
of the wheel's movement at the point of pinching.
Abrasive wheels may also break under these
conditions.
Kickback is the result of toot misuse and/or incorrect
operating procedures or conditions and can be
avoided by taking proper precautions as given
below:
a) Maintain a firm grip on the power tool and
position your body and arm to allow you to
resist kickback forces. Always use auxiliary
handle, if provided, for maximum control
over kickback or torque reaction during start
up. The operator can control torque reaction or
kickback fomes, if proper precautions are taken.
b) Never place your hand near the rotating
accessory. Accessory may kickback over your
hand.
c) Do not position your body in the area where
power tool will move if kickback occurs.
Kickback wilt propel the toot in direction
opposite to the wheel's movement at the point
of snagging.
d) Use special care when working corners,
sharp edges etc. Avoid bouncing and
snagging the accessory. Comers, sharp
edges or bouncing have a tendency to snag the
rotating accessory and cause toss of control or
kickback.
e) Do not attach a saw chain woodcarving
blade or toothed saw blade. Such blades
create frequent kickback and toss of control
26

Safety Warnings Specific for
GrindingOperations
a) Use only wheel types that are recommended
for your power tool and the specific guard
designed for the selected wheel Wheels for
which the power tool was not designed cannot
be adequately guarded and are unsafe.
b) The guard must be securely attached to the
power tool and positioned for maximum
safety, so the least amount of wheel is
exposed towards the operator. The guard
helps to protect operator from broken wheel
fragments and accidental contact with wheel.
c) Wheels must be used only for recommended
applications. For example: do not grind with
the side of cut-off wheel. Abrasive cut-off
wheels are intended for peripheral grinding, side
fomes applied to these wheels may cause them
to shatter
d) Always use undamaged wheel flanges
that are of correct size and shape for your
selected wheel. Proper wheel flanges support
the wheel thus reducing the possibility of wheel
breakage. Flanges for cut-off wheels may be
different from grinding wheel flanges.
e) Do not use worn down wheels from larger
power tools. Wheel intended for larger power
tool is not suitable for the higher speed of a
smaller toot and may burst.
Residual Risks
In spite of the application of the relevant safety
regulations and the implementation of safety
devices, certain residual risks cannot be avoided.
These are:
-Impairment of hearing
-Risk of personal injury due flying particles.
-Risk of bums due to accessories becoming hot
during operation.
-Risk of personal injury due to pmtonged use.
-Risk of dust from hazardous substances.
MarkingsonTool
The following pictograms are shown on the tool:
Read instruction manual before use.
Wear ear protection.
ENGLISH
Wear eye protection.
DATECODEPOSITION(FIG.1)
The Date Code (g), which also includes the year of
manufacture, is printed into the housing.
Example: 2011 XXXX
Year of Manufacture
Package Contents
The package contains:
1 Straight grinder
1 Front Handle
1 Guard
1 Grinding wheel
1 Hex key
1 Spanner
1 Instruction manual
1 Exploded drawing
•Check for damage to the toot, parts or
accessories which may have occurred during
transport.
• Takethe time to thoroughly read and
understand this manual prior to operation.
Description (fig. 1)
AWARNING: Never modify the power
toot or any part of it. Damage or
personal injury could result.
a. On/off switch
b. Switch release button
c. Front handle
d. Guard
INTENDEDUSE
Your DW882 straight grinder has been designed for
professional grinding applications.
DO NOT use grinding wheel other than specified
under technical data.
DO NOT use under wet conditions or in presence of
flammable liquids or gases.
These straight grinders are professional power tools.
DO NOT let children come into contact with the
tool. Supervision is required when inexperienced
operators use this tool.
27

ENGLISH
Electrical Safety
The electric motor has been designed for one
voltage only. Always check that the power supply
corresponds to the voltage on the rating plate.
Machine is grounded (class I)in
accordance with EN 60745, therefore
earth connection is required.
If the supply cord is damaged, it must be replaced
by a specially prepared cord available through the
DEWALT service organization.
Mains Plug Replacement
(U.K.&Ireland Only)
If a new mains plug needs to be fitted:
•Safely dispose of the old plug.
• Connect the brown lead to the live terminal in
the plug.
• Connect the blue lead to the neutral terminal
_ARNING: Connect the yellow/green
lead to the earth terminal.
Follow the fitting instructions supplied with good
quality plugs. Recommended fuse: 13 A.
Using an ExtensionCable
If an extension cable is required, use an approved
3-core extension cable suitable for the power
input of this tool (seetechnical data). The minimum
conductor size is 1.5 mm2; the maximum length is
30 m.
When using a cable reel, always unwind the cable
completely.
ASSEMBLYANDADJUSTMENTS
_ARNING: To reduce the risk
of serious personal injury, turn
tool off and disconnect tool from
power source before making any
adjustments or removing/installing
attachments or accessories. Before
reconnecting the toot, depress and
release the trigger switch to ensure that
the toot is off.
Attaching the Side Handle (fig.4)
_WARNING: Before using the toot,
check that the handle is tightened
securely.
Screw the front handle (c) tightly into the hole (I)
Instructions for use.
Mounting an GrindingDisc (fig.2)
1. Slacken the wing nuts (e) and swivel the
bolts (f)to release the cover (g).
2. Open the cover.
3. Hold the spindle by inserting the Allen key
into one of the holes in the inner flange.
4. Loosen the nut (h) using the spanner.
Remove the nut and the outer flange (i).
5. Mount the accessory (i)on the spindle.
6. Replace the flange and securely tighten the
nut.
7. Close the cover and lock it by tightening the
wingnuts.
To remove the accessory, proceed in reverse order.
MountingandRemovingthe Guard
(fig. 3)
1. Remove the accessory as described above.
2. Loosen the bolts (k).
3. Slide the guard onto the tool as shown.
4. Securely tighten the bolts.
To remove the guard, proceed in reverse order.
_ ever operate the toot without the
guard, except when polishing using a
cloth disc.
Priorto Operation
•Install the guard and appropriate disc or wheel.
Do not use excessively worn discs or wheels.
•Be sure the inner and outer flange are mounted
correctly.
•Make surethe disc or wheel rotates inthe
direction of the arrows on the accessory and the
tool.
OPERATION
Instructionsfor Use
_WARNING: Always safety
observe the
instructions and applicable regulations.
_ARNING: To reduce the risk
of serious personal injury, turn
tool off and disconnect tool from
power source before making any
adjustments or removing/installing
attachments or accessories. Before
reconnecting the tool, depress and
release the trigger switch to ensure that
the toot is off.
28

/k
/k
A
WARNING: ALWAYS wear working
gloves while operating this tool
WARNING: The gear case becomes
very hot during use.
WARNING:
•Ensure all materials to be ground are
secured in place.
• Apply only a gentle pressure to the
tool Do not exert side pressure on the
disc.
• Avoid overloading. Should the toot
become hot, let it mn a few minutes
under no toad condition.
Proper Hand Position (fig. 1,7)
,t_ WARNING: Toreduce the risk of
serious personal injury, ALWAYS use
proper hand position as shown.
_WARNING: Toreduce the risk ofserious personal injury,ALWAYS hold
securely in anticipation of a sudden
reaction.
Proper hand position requires one hand on the side
handle (d), with the other hand on the body of the
tool, as shown in figure 7.
Switching Onand Off (fig. 1)
_WARNING: Before using the toot,
check that the handle is tightened
securely.
To run the tool first actuate the switch release button
(b)and then press the on/off switch (a).
For continuous operation hold the trigger switch (a)
down.
To stop the tool, release the on/off switch.
_WARNING: Do not switch the toot on
or off when under load,
MetalApplications
When using the tool in metal applications, make
sure that a residual current device (RCD) has been
inserted to avoid residual risks caused by metal
swarf.
If the power supply is shut off by the RCD, take the
tool to authorised DEWALT repair agent.
,_ WARNING: In extreme working
conditions, conductive dust can
accumulate insidethe machine housing
when worl_'ng with metal This can
result in the protective insulationin the
machine becoming degraded with a
potential risk of an electrical shock.
ENGLISH
To avoid build-up of metal swarf inside the machine,
we recommend to clear the ventilation slots on a
daily basis. See Maintenance.
MAINTENANCE
Your DEWALTpower tool has been designed to
operate over a long period of time with a minimum
of maintenance. Continuous satisfactory operation
depends upon proper tool care and regular cleaning.
_ARNING: To reduce the risk
of serious personal injury, turn
tool off and disconnect tool from
power source before making any
adjustments or removing/installing
attachments or accessories. Before
reconnecting the toot, depress and
release the trigger switch to ensure that
the toot is off.
Pop-off Brushes
The motor will be automatically shut off indicating
that the carbon brushes are nearly worn out and
that the tool needs servicing. The carbon brushes
are not user-serviceable. Take the tool to an
authorised DEWALT repair agent.
Lubrication
Your power tool requires no additional lubrication.
Cleaning
_ARNING: Blow dirt and dust out of
the main housing with dry air as often as
dirt is seen collecting in and around the
air vents, Wear approved eye protection
and approved dust mask when
performing this procedure,
_WARNING: Never use solvents or
other harsh chemicals for cleaning the
non-metallic parts of the tool These
chemicals may weaken the materials
used in these parts, Use a cloth
dampened only with water and mild
soap, Never let any liquid get inside the
too/; never immerse any part of the too/
into a liquid.
29

ENGLISH
OptionalAccessories
_ARNING: Since accessories, otherthan those offered by DEWALT, have
not been tested with this product, use
of such accessories with this toot could
be hazardous. To reduce the risk of
injury, only DEWALT, recommended
accessories should be used with this
product.
Consult your dealer for further information on the
appropriate accessories.
Spare wheel part no.: 403216-00
ProtectingtheEnvironment
Separate collection. This product must
not be disposed of with normal
household waste.
Should you find one day that your DEWALT product
needs replacement, or if it is of no further use to you,
do not dispose of it with household waste. Make this
product available for separate collection.
_{_ eparate collection of used products
and packaging allows materials to be
recycled and used again. Re-use of
recycled materials helps prevent
environmental pollution and reduces
the demand for raw materials.
Local regulations may provide for separate collection
of electrical products from the household, at
municipal waste sites or by the retailer when you
purchase a new product.
DEWALT provides a facility for the collection and
recycling of DEWALT products once they have
reached the end of their working life. To take
advantage of this service please return your product
to any authorised repair agent who will collect them
on our behalf.
You can check the location of your nearest
authorised repair agent by contacting your local
DEWALT office at the address indicated in this
manual. Alternatively, a list of authorised DEWALT
repair agents and full details of our after-sales
service and contacts are available on the Internet at:
www.2helpU.com.
3O
GUARANTEE
DEWALT isconfident of the quality of its
products and offers an outstanding guarantee
for professional users of the product. This
guarantee statement is in addition to and in
no way prejudices your contractual rights as a
professional user or your statutory rights as a
private non-professional user. The guarantee
is valid within the territories of the Member
States of the European Union and the
European Free Trade Area.
• 30DAYNORISKSATISFACTIONGUARANTEE•
Ifyou are not completely satisfied with the
performance of your DEWALTtool, simply
return it within 30 days, complete with all
original components, as purchased, to
the point of purchase, for a full refund or
exchange. The product must have been
subject to fair wear and tear and proof of
purchase must be produced.
• ONEYEARFREESERVICECONTRACT•
Ifyou need maintenance or service for your
DEWALTtool, in the 12 months following
purchase, you are entitled to one service free
of charge. It will be undertaken free of charge
at an authorised DEWALT repair agent. Proof
of purchase must be produced. Includes
labour. Excludes accessories and spare parts
unless failed under warranty.
• ONEYEARFULLWARRANTY•
Ifyour DEWALT product becomes defective
due to faulty materials or workmanship
within 12 months from the date of purchase,
DEWALT guarantees to replace all defective
parts free of charge or - at our discretion -
replace the unit free of charge provided that:
• The product has not been misused;
• The product has been subject to fair
wear and tear;
• Repairs have not been attempted by
unauthorised persons;
• Proof of purchase is produced.
• The product is returned complete with all
original components
Ifyou wish to make a claim, contact your
seller or check the location of your nearest
authorised DEWALT repair agent in the
DEWALT catalogue or contact your DEWALT
office at the address indicated in this manual.
A list of authorised DEWALT repair agents and
full details of our after-sales service is available
on the Internet at: www.2helpU.com

AMOLADORARECTA
DW882
ESPANOL
iEnhorabuena!
Ha elegido una herramienta DEWALT.A_os de
experiencia, innovacbn y un exhaustivo desarrollo
de productos hacen que DEWALT sea una de
las empresas mb,s fiables para los usuarios de
herramientas electricas profesionales.
Datos t6cnicos
DW882
Voltaje V 230
Tipo 3
Potenciaabsorbida W 1.800
Velocidadenvado min_ 5.700
Di_.metrodela rueda mm 152
Aguja 5/8-11-UNC-3B
Anchoderueda mm 25
Carga mm 16
Peso kg 6,7
LpA(presi6nao0stica) dB(A) 91
KpA(incertidumbredela
presi6nac0stica) dB(A) 3
L_A(potenoiaao0stica) dB(A) 102
K_A(inoertidumbredela
potenciaac0stica) dB(A) 3,2
Valorestotalesdevibraci6n(sumadevectoresteniendoen
cuentalostresejes)determinadosdeacuerdocon lanorma
EN60745:
Valordela emisi6ndevibraci6nahamoladode superficie
ah,AG= m/s2 18,1
IncertidumbreK= m/s2 2,4
El nivel de emisiOn de vibraciOn que figura en esta
hoja de informaciOn se ha medido de conformidad
con una prueba normalizada proporcionada en la
EN 60745 y puede utilizarse para comparar una
herramienta con otra. Puede usarse para una
evaluaciOn preliminar de exposiciOn.
_DVERTENCIA: Etnivel de emisiOn
de vibraci6n dec/arado representa
/as principa/es ap/icaciones de/a
herramienta. Sin embargo, si se
uti/iza /a herramienta para distintas
ap/icaciones, con accesorios diferentes
o ma/mantenidos, ta emlslOn de
vibraciOnpuede varia_ Esto puede
aumentar conslderabtemente el nlvel de
exposiciOn durante el perfodo total de
trabajo.
Una vatoraciOn del nivel de exposiciOn
a ta vlbraclOn deberfa tenet en
cuenta tamblen /as veces en que ta
herramlenta est4 apagada o cuando
est4 en funcionamiento peru no
reatizando ningdn trabajo. Esto puede
reduclr conslderabtemente el nlvel de
exposlclOn durante el perlodo total de
trabajo.
Identlfique medidas de seguridad
adicionates para proteger at operador de
los efectos de ta vlbraciOn tales como:
ocuparse del mantenlmlento de ta
herramienta y los accesorios, mantener
tas manos catientes y organizar los
patrones de trabajo.
Fusibles
Europa herramientasde 230V 10Amperios,enla red
Definiciones: Pautas de seguridad
Las definiciones que figuran a continuaciOn
describen el grado de intensidad correspondiente
a cada termino de alarma. Lea el manual y preste
atenciOn a estos sfmbolos.
_PELIGRO: Indica una s/tuaciOn
pe/igrosa inminente que, de no evitarse,
ocasionar# /amuerte o una lesidn
grave.
_DVERTENCIA: Indica una situaciOnpotencia/mente pe/igrosa que, de no
evitarse, podr[a ocasionar /a muerte o
una lesidn grave,
_ATENCIC)N: Indica una situaciOn
potencia/mente pe/igrosa que, de no
evitarse, puede ocasionar una lesidn
de poca omodera gravedad.
AVlSO: Indica una pr4ctica no
relacionada con las lesiones
personales que, de no evitarse, puede
_ocasionar dabos materiales,
Indica riesgo de descarga e/ectrica.
31

ESPANOL
_lndica rlesgo de lncend/o.
Declaraci6n de conformidad CE
DIRECTRIZDELAMAQUINARIA
((
DW882
DEWALT declara que los productos descritos bajo
"datos tecnicos"son conformes a las normas:
2006/42/EC, EN 60745-1, EN 60745-2-3.
Estos productos son conformes tambien a la
Directriz 2004/108/EC. Si desea mb.s informaciOn,
pOngase en contacto con DEWALTen la direcciOn
indicada a continuaciOn o bien consulte la parte
posterior de este manual.
El que suscribe es responsable de la compilaciOn
del archivo tecnico y realizaesta declaraciOn en
representaciOn de DEWALT.
Horst Grossmann
Vicepresidente de Ingenieria y Desarrollo de
Productos
DEWALT, Richard-Klinger-Stral3e 11,
D-65510, Idstein, Alemania
01.03.2010
_ADVERTENCIA: Para reduclr el
rlesgo de teslones, tea el manual de
instrucciones.
Advertenciasdeseguridadgenerales
para herramientasel6ctricas
j_ iADVERTENCIA! Lea todas las
advertencias de seguridad y todas
las instrucciones. Et/ncump//m/ento
de/as advertencias einstrucciones
podrfa pmvocar una descarga electrica,
un lncendio y/o teslones graves.
CONSERVETODASLASADVERTENCIASE
INSTRUCCIONESPARAFUTURASCONSULTAS
Ettermino "herramienta electrica" que aparece en
/as advertenclas se refiere a ta herramlenta electrica
que funclona a traves de ta red electrica (con cable)
o a taherramlenta electrlca que funclona con baterfa
(sin cable).
1) SEGURIDADENELAREADETRABAJO
a) Mantenga el area de trabajo limpia y bien
iluminada. Las 4teas en desorden u oscuras
pueden pmvocar accidentes.
b) No utilice herramientas electdcas en
atmosferas explosivas, como ambientes
donde haya polvo, gases oliquidos
inflamables. Las herramlentas electrlcas
originan chispas que pueden inflamar el
poivo o los gases.
c) Mantenga alejados a los nihos y alas
personas que esten cerca mientras
utiliza una herramienta electrica. Las
distracciones pueden ocasionar que pierda el
control.
2) SEGURIDADELI_CTRICA
a) Los enchufes de/as herramientas
e/ectricas deben corresponderse con
/atoma de corriente. No modifique
nunca el enchufe de ninguna form& No
uti/ice ningQn enchufe adaptador con
herramientas e/ectricas conectadas
atierra. Los enchufes no modificados y
/as tomas de corrlente correspondlentes
reducir4n el riesgo de descarga electrica.
b) Evite el contacto del cuerpo con
superficies conectadas a tierra como
tuberias, radiadores, cocinas econOmicas
y frigorificos. Existe un mayor riesgo
de descarga electrica si tiene el cuerpo
conectado a tierra.
c) No exponga las herramientas electricas
a la Iluvia ni a condiciones hQmedas.
Si entra agua a una herramienta electrica
aumentar4 el rlesgo de descarga electrica.
d) No someta el cable de alimentacion
a presion innecesaria. No use nunca
el cable para transportar, tirar de la
herramienta electrica o desenchufarla.
Mantenga el cable alejado del calor,
aceite, bordes afilados y piezas en
movimiento. Los cables da_ados o
enredados aumentan el riesgo de descarga
electrlca.
e) Cuando este utilizando una herramienta
electrica al aire libre, use un cable
alargador adecuado para uso en
exteriores. La utltlzack_nde un cable
adecuado para el uso en exterlores reduce el
riesgo de descarga electrica.
Si no puede evitar utilizar una herramienta
electrica en un lugar hQmedo, use un
suministro protegido con un dispositivo
de corriente residual. Et uso de un
dispositivo de corriente residual reduce el
riesgo de descarga electrica.
32

3) SEGURIDADPERSONAL
a) Mantengase alerta, este atento a Io que
hace y use el sentido com(m cuando
utilice una herramienta electrica. No
maneje una herramienta electrica cuando
este cansado o bajo los efectos de
drogas, medicamentos o alcohol Un
momento de fa/ta de atenciOn cuando se
manejan /as herramientas electricas puede
ocasionar tesiones personates graves.
b) Use un equipo protector personal. Utilice
siempre protecci6n ocular. Et uso de/
equipo protector como mascarittas antipoivo,
catzado antidestizante, casco o protecciOn
auditiva para condiciones apropiadas
reducir_ /as tesiones personates.
c) Evite la puesta en funcionamiento
involuntaria. AsegQrese de que el
interruptor este en posicion de apagado
antes de conectar con la fuente de
alimentacion y/o la bateria, de levantar o
transportar la herramienta. El transportar
herramientas electricas con el dedo puesto
en el interruptor o herramientas electr/cas
act/vadoras que tengan el/nterruptor
encendido puede provocar accidentes.
d) Saque toda Ilave de ajuste oIlave inglesa
antes de encender la herramienta
electrica. Una /lave /ngtesa u otra /lave que
se deje puesta en una pieza en movimiento
de ta herram/enta electr/ca pueden ocas/onar
tesiones personates.
e) No intente extender las manos
demasiado. Mantenga un apoyo firme
sobre el suelo y conserve el equilibrio
en todo momento. Esto permite un mejor
control de/a herramienta electrica en
s/tuac/ones /nesperadas.
0 Vistase debidamente. No se ponga ropa
suelta o joyas. Mantenga el pelo, la ropa
y los guantes alejados de las piezas
mOviles. La ropa suelta, /as joyas y el pelo
largo pueden quedar atrapados en /as piezas
en mov/m/ento.
g) Si se suministran dispositivos para la
conexion del equipo de extraccion y
recogida de polvo, asegQrese de que
esten conectados y de que se usen
adecuadamente. El uso de equipo de
recogida de po/vo puede reducir los riesgos
relacionados con el poivo.
4) USOf CUIDADODELASHERRAMIENTASELI_CTRICAS
a) No fuerce la herramienta electrica. Use
la herramienta electdca correcta para su
trabajo. La herramienta e/ectrica correcta
funcionar_ mejor y con mayor seguridad si
ESPANOL
se uti/iza de acuerdo con sus caracterfst/cas
tecnicas.
b) No utilice la herramienta electnca si no
puede encenderse y apagarse con el
interruptor. Toda herram/enta electr/ca que
no pueda controtarse con el interruptor es
peligrosa y debe set reparada.
c) Desconecte el enchufe de la fuente
de alimentacion y/o la bateria de la
herramienta electrica antes de realizar
ajustes, cambiar accesorios o guardar las
herramientas electricas. Dichas medidas
de seguridad preventivas reducen el riesgo
de poner en marcha ta herramienta electr/ca
acc/dentatmente.
d) Guarde las herramientas electricas que
no este utilizando fuera del alcance de
los nihos y no permita que utilicen la
herramienta electrica las personas clue no
esten familiarizadas con ella o con estas
instrucciones. Las herramientas electricas
son peligrosas en manos de personas no
capacitadas.
e) OcQpese del mantenimiento de las
herramientas electricas. Compruebe
si hay desalineacion o bloqueo de las
piezas en movimiento, rotura de piezas
y otras condiciones que puedan afectar
el funcionamiento de la herramienta
electrica. Si la herramienta electrica esta
dahada, Ilevela para que sea reparada
antes de utilizarla. Se ocasionan muchos
accidentes pot el ma/ mantenimiento de/as
herramientas electr/cas.
0 Mantenga las herramientas para cortar
afiladas y limpias. Hay menos probabi/idad
de que /as herramientas para cortar con
bordes afitados se btoqueen y son mgs
fgcites de controta_
g) Use la herramienta electdca, los
accesodos y las brocas de la herramienta
etc., conforme a estas instrucciones
teniendo en cuenta las condiciones de
trabajo y el trabajo que vaya a realizarse.
El uso de/a herramienta electrica para
operaciones que no sean /as previstas puede
ocasionar una situaciOn peligrosa.
5) SERVICIO
a) Lleve su herramienta electrica para que
sea reparada por una persona cualificada
para realizar las reparaciones que use
solo piezas de recambio identicas. Asf se
asegurar_ que se mantenga /a seguridad de
taherramienta electr/ca.
33

ESPANOL
NORMASDESEGURIDAD
ESPECIFICASADICIONALES
Instruccionesdeseguridadpara
todaslasoperaciones
a) Esta herramienta e/ectrica se destina a/ uso
como amo/adora. Lea todas /as advertencias
de seguridad, instrucciones, ilustraciones
y especificaciones provi/as con esta
herramienta e/ectrica. Et/ncump//m/ento de
tas/nstrucc/onesque se /ndcan a cont/nuac/6n
podrfa provocar una descarga electrica, un
lncendio y/o teslones graves.
b) Las operaciones como el corte, el Iijado
yel pulido, asi come el cepillado no se
recomiendan con el uso de esta herramienta
electrica. Su uso para operaclones para /as
que taherramienta no ha sido dise_ada puede
ocasionar peligro y tesiones personates.
c) No utilizar accesorios clue no esten
disehados y recomendados especificamente
pot el fabricante de la herramienta. Et
hecho de que el accesorio pueda acop/arse
a ta herramlenta electrlca no garantlza un
funcionamiento sin riesgos.
d) La velocidad prevista del accesorio debe set
como minimo igual a la velocidad maxima
marcada en la herramienta electdca. Los
accesorios que funcionen m_s r_pido que su
velocidad prevista pueden mmperse y satir
votando.
e) El diametro externo y el grosor del accesorio
deben estar dentro de la capacidad de su
herramienta electrica. Los accesorios de
tama_o incorrecto no pueden protegerse o
controtarse adecuadamente.
t) El tamaho del eje de las muelas, las
bridas, platos portadiscos o cualquier otto
accesodo debe acoplarse bien al eje de la
herramienta electrica. Los accesorios con
agujeros para el eje que no se corresponden
con tas piezas de montaje de ta herramienta
electrica se desequitibrar_n, vibrargn
excesivamente y pueden causar perdida de
control.
g) No utilice un accesodo dahado. Antes
de cada uso inspeccione el accesorio,
como por ejemplo la muela abrasiva, para
verificar si tiene muescas o grietas, el plato
portadiscos para verificar si tiene grietas
o roturas o siesta muy desgastado, la
escobilla de alambre para comprobar si
tiene alambres sueltos o agrietados. Si se
cae la herramienta electrica o un accesorio,
inspeccionelos para comprobar si estan
dahados oinstale un accesorio no dahado.
Despues de inspeccionar e instalar un
accesodo, coloquense usted y las personas
presentes alejados del piano del accesorio
en movimiento y ponga la herramienta
electrica en funcionamiento a la velocidad
sin carga maxima durante un minuto. Los
accesor/os da_ados norma/mente se romper_n
durante este periodo de pmeba.
h) Pongase un equipo de proteccion personal.
Dependiendo de la aplicacion, use un
protector facial y galas protectoras. Si
corresponde, pongase una mascadlla
antipolvo, protectores para el oido, guantes
y un delantal de trabajo que pueda detener
pequehos fragmentos abrasivos o de la
pieza de trabajo. La protecck_n ocular debe
poder detener tas partfcutas votantes que se
pmducen con varias operaciones. La mascaritta
antipotvo o el respirador deben poder fittrar tas
partfcutas generadas pot ta operaci6n que este
reatizando. La exposici6n pmtongada at ruido
de intensidad elevada puede causar perdida
audltlva.
i) Mantenga alas personas que esten cerca
a una distancia de seguddad del area de
trabajo. Todos los que entren al area de
trabajo deben Ilevar puesto un equipo de
proteccion personal. Los fragmentos de una
pieza de trabajo o de un accesorlo into pueden
satir votando y ocasionar una tesi6n mas att9del
9rea lnmediata de operaci()n.
j) Sostenga la herramienta electrica solo
en superficies de agarre aisladas cuando
realice una operacion en la cual el accesorio
para cortar pudiera entrar en contacto con
instalaciones electricas ocultas o su propio
cable. Etcontacto de los accesor/os de corte
con un cable cargado, puede cargar /as partes
met_tlcas expuestas de taherramlenta electrlca
y producir una descarga electrica at operado_
k) Coloque el cable lejos del accesorio
giratodo. Si pierde el control, el cable puede
cortarse o engancharse y puede arrastrar a ta
mano o el brazo hacia el accesorio giratorio.
t) No deje nunca a un lado la herramienta
electrica hasta clue el accesodo se haya
parado por completo. Et accesorio giratorio
puede agarrarse a/a superfic/e y hacer que
usted pierda el control de ta herramienta.
m) No ponga en funcionamiento la herramienta
electrica mientras la transporte a su lado. Et
contacto accidental con el accesor/o g/rator/o
podrfa hacer que se enganche taropa y que el
accesorlo toque su cuerpo.
34

n) Limpie periodicamente los orificios de
ventilacion de la herramienta electrica. Et
venti/ador de/motor atraer_ el po/vo dentro de
/a caja protectora y/a acumu/acidn excesiva
del metal en potvo puede ocaslonar riesgos
electrlcos.
o) No utilice la herramienta electdca cerca de
materiales inflamables. Las chispas podrfan
prender fuego a estos materiates.
p) No utilice accesorios que requieran
liquidos refrigerantes. Et utitizar agua u
otros refrigerantes tfquidos puede ocasionar
electrocucidn o descarga.
INSTRUCCIONESDESEGURIDAD
ADICIONALESPARATODASLAS
OPERACIONES
Causasy prevenci6n de rebote por
parte del operador
Etrebote es una reaccidn repentina at quedar
enganchados o atrapados una muela, plato
portadlscos, cepitto u otto accesorio en movlmlento.
AI engancharse o quedar presionado un accesorio
en movimiento, este se detiene r_pidamente y a su
vez causa que ta herramlenta electrlca no controtada
quede forzada en direccidn opuesta a tamtacidn del
accesorlo en el punto del trabado.
Pot ejempto, si una muela abraslva se engancha o
queda presionada pot tapieza de trabajo, el borde
de ta muela que entra en el punto de presidn puede
lncrustarse en ta superficle del material ocaslonando
que tamuela se satga o se trabe. La muela puede
sattar hacia el operador o tejos de d, dependiendo
de ta dlreccidn del movlmiento de tamuela en el
punto de presidn. Las muelas abrasivas pueden
tamblen romperse en estas condlclones.
Etrebote es el resuttado del mat uso de ta
herramienta o de procedlmientos o condlciones
de operacidn incorrectos y puede set evitado si se
toman /as precauclones debldas, enumeradas a
continuacidn :
a) Sujete firmemente la herramienta electrica
y sitQe el cuerpo y el brazo de manera
que pueda resistir la fuerza del rebote.
Para un maximo control del rebote o
reaccion del par motor durante la puesta
en funcionamiento utilice siempre la
empuhadura auxiliar, si la hubiera. Et
operador puede controtar ta reaccidn del par
motor o tafuerza del rebote, si se toman tas
precauciones adecuadas.
ESPANOL
b) No ponga nunca la mano cerca del
accesodo en movimiento. Etaccesorio puede
rebotar/e en /a mano,
c) No se sit(/e en el Area hacia donde vaya a
moverse la herramienta electrica si ocurre
un rebote. Etrebote impu/sar_ a/a herramienta
en /a direccidn opuesta a/movimiento de/a
muela en el momento del enganche.
d) Tenga especial cuidado cuando trabaje
esquinas, bordes afilados, etc. Evite hacer
rebotar o enganchar el accesorio. Las
esquinas, los bordes afitados o los rebotes
tlenen tendencla a enganchar el accesorlo en
movimiento y ocasionar perdida de control o
tensidn de retroceso.
e) No acople una hoja de tallado de madera
de sierra de cadena ouna hoja de sierra
dentada. Dichas hojas ocaslonan frecuentes
rebotes y perdida de control
Advertencias de seguridad
especificasparaoperacionesde
amolado
a) Utilice solo tipos de muela que esten
recomendados para su herramienta electrica
y el protector especifico disehado para la
muela seleccionada. Las mue/as para /as que
/aherramienta electrica no ha sido disefiada no
pueden pmtegerse adecuadamente y no son
seguras.
b) El protector debe estar unido a la
herramienta electrica de forma segura y
posicionado para una seguridad m#xima,
de manera que quede expuesta la menor
cantidad de muela hacia el operador. Et
protector ayuda a proteger at operador de
fragmentos de muela rotos y de un contacto
accidental con tameda.
c) Las muelas deben utilizarse (/nicamente
para las aplicaciones recomendadas. Por
ejemplo: no amole con el lado de una muela
de corte. Las muelas de corte abrasivo est_n
previstas para el amotado periferico, y si se
aptican fuerzas taterates a estas muelas pueden
pmvocar que se mmpan.
d) Use siempre bridas de muela no dahadas
que sean del tamaho y forma correctos
para la muela seleccionada. Las bridas de
muela apropiadas sirven de soporte para ta
muela, reduciendo asf ta poslbitidad de rotura
de ta mlsma. Las brldas de/as muelas de corte
pueden set diferentes de tas bridas de tas
muelas para amotado.
35

ESPANOL
e) No utilice muelas desgastadas de
herramientas electricas mas grandes. Una
mue/a dise#ada para una herramienta e/ectrica
m4s grande no es adecuada para /a mayor
ve/ocidad de una herramienta m4s peque#a y
puede exp/ota_
Riesgosresiduales
A pesar del cumplimiento de las normas de
seguridad pertinentes y del uso de dispositivos de
seguridad, existen determinados riesgos residuales
que no pueden evitarse. Los riesgos son los
siguientes:
-Deterloro audltlvo
-Riesgo de tesidn personal debido a partfcutas
votantes.
-Riesgo de quemaduras debido a los accesorlos
que se catlentan durante el funclonamlento.
-Riesgo de tesidn personal debido at uso
pmtongado.
-Riesgo de poivo de sustancias peligrosas.
Marcas sobre la herramienta
En la herramienta se muestran lossiguientes
pictogramas:
Antes de usarse, lea el manual deinstrucciones.
(_ POngase proteccbn para el ofdo.
(_) POngase proteccbn para los ojos.
POSICIONDELCODIGODEFECHA(FIG.1)
El COdigo de fecha (g), que contiene tambien el aSo
de fabricacbn, viene impreso en la caja protectora.
Ejemplo: 2011 XX XX
A_o de fabricaciOn
Contenidodelembalaje
El embalaje contiene:
1 Amoladora recta
1 Empu_adura frontal
1 Barrade proteccbn
1 Ruedade molido
1 Llave hexagonal
1 Llave
1 Manual de instrucciones
1 Dibujo despiezado
•Compmebe si ta herramienta, piezas o
accesorlos han sufrido atgOn desperfecto
durante el transporte.
• Tdmese el tiempo necesario para leer
detenldamente y comprender este manual
antes de utltlzar taherramienta.
Descripcibn (fig. 1)
_DVERTENCIA: Jam4s a/tere /a
herramienta electrica ni ninguna de sus
piezas. Podrfan pmduclrse teslones
personates o da#os.
a. Interruptor de encendido/apagado
b. BotOn de liberaciOn del interruptor
c. Empu_adura frontal
d. Barra de proteccbn
USOPREVISTO
Su amoladora recta DW882 ha sido dise_ada para
lasaplicaciones de molido profesionales.
NO utilice una rueda de amoladora distinta a la
indicada en el apartado de datos tecnicos.
NO debe usarse en condiciones hOmedas ni en
presencia de Ifquidos o gases inflamables.
Estas amoladoras rectas son herramientas electricas
profesionales.
NO permita que los ni_os toquen la herramienta.
El uso por parte de operadores inexpertos requiere
supervision.
Seguridadel6ctrica
El motor electrico estb. concebido para un
solo voltaje. Compruebe siempre que el voltaje
suministrado corresponda al indicado en la placa de
caracteristicas.
La mbquina estb.conectada a tierra
(clase I)de conformidad con la norma
EN 60745 y por Io tanto, necesita una
conexbn a tierra.
Si el cable de suministro estb.da_ado, debe
reemplazarse por un cable especialmente preparado
disponible a traves de la organizacbn de servicios
de DEWALT.
Usode unalargador
En caso de que sea necesario utilizar un alargador,
use uno de 3 conductores aprobado y apto para
la potencia de esta herramienta (veanse los datos
tecnicos). El tama_o mfnimo del conductor es
1.5 mm2; la Iongitud m&xima es 30 m.
36

Siutilizauncarretedecable,desenrollesiempreel
cablecompletamente.
MONTAJEY AJUSTES
_DVERTENCIA: Para disminuirel riesgo de lesiones personales
graves, apague la herramienta
y desconectela de la fuente de
alimentacidn antes de realizar
ajuste alguno ode poner oquitar
acoplamientos o accesorios. Antes
de vo/ver a conectar /a herram/enta,
apriete y suelte el interruptor de puesta
en mamha para comprobar que ta
herramienta este apagada.
Colocaci6nde la empu_adura lateral
(fig. 4)
_ADVERTENCIA: Antes de ut///zar
/aherramienta, compruebe que /a
empu#adura este bien apretada,
Apriete el asa frontal (c) firmemente en el orificio (i)
Instrucciones de uso.
Montaje del disco de molido (fig. 2)
1. Afloje lastuercas de aleta (e) y gire los pernos
(t) para liberar la cubierta (g).
2. Abra la cubierta.
3. Sostenga el eje introduciendo la IlaveAllen en
uno de los orificios de la pestafla interior.
4. Afloje la tuerca (h) utilizando la Ilave. Saque la
tuerca y la pestafla exterior (i).
5. Monte el accesorio (i)en el eje.
6. Sustituya la pestafla y apriete firmemente la
tuerca.
7. Cierre la cubierta y bloqueela apretando las
tuercas de aleta.
Para retirar el accesorio, proceda en el orden
contrario.
Montajey retiradadelprotector
(fig. 3)
1. Retire el accesorio tal y como se ha indicado
previamente.
2. Afloje los pernos (k).
3. Introduzca el protector en la herramienta tal y
como se indica en la ilustraciOn.
4. Apriete con firmeza los pernos.
ESPANOL
Para retirar el protector, proceda en el orden
contrario.
_o opere nunca con taherramienta
sin el protecto_ salvo cuando puta
utitizando un disco de paso.
Antes de usar la mbquina
•Instaleel protector y el disco o muela
apropiada. No utilice discos o muelas
excesivamente desgastados.
• Compruebe que la brida interior y exterior esten
montadas correctamente.
• Compruebe que el disco o la muela giren en
direcciOn de las flechas en el accesorio y la
herramienta.
FUNCIONAMIENTO
Instruccionesdeuso
_DVERTENCIA: Respete siempre /as
instrucciones de seguridad y/as normas
apticabtes.
_DVERTENCIA: Para disminuir
el riesgo de lesiones personales
graves, apague la herramienta
y desconectela de la fuente de
alimentacidn antes de realizar
ajuste alguno ode poner oquitar
acoplamientos o accesorios. Antes
de vo/ver aconectar /a herramienta,
apriete ysue/te e/ interruptor de puesta
en marcha para comprobar que /a
herramienta este apagada.
_ADVERTENCIA: LLEVE SIEMPRE
los guantes de proteccidn de trabajo
cuando opere con esta herramienta.
_DVERTENCIA: La caja de engranajes
atcanzar_ temperaturas muy attas
durante e/ uso,
ADVERTENCIA:
Compruebe que todos los materiates
que vayan a set amotados esten bien
fijos en su sitio.
•Aptique sdto una presidn suave a ta
herramienta. No ejerza presidn lateral
en el disco.
•Evite/as sobrecargas. Si ta
herramienta se catentase, dejela en
funcionamiento unos minutos sin
carga.
37

ESPANOL
Posicibnadecuadadelasmanos
(fig. 1,7)
_DVERTENCIA: Para reduc/r el
riesgo de lesion personal grave, tenga
SIEMRRE tas manos en una posicidn
adecuada como se muestra.
,_ ADVERTENCIA: Para reducir el
riesgo de lesion personal grave, sujete
SIEMPRE bien en caso de que haya
una reaccidn repentina.
Para tener una posiciOn adecuada de las manos,
ponga una mano en la empuSadura lateral (d)y
la otra en el cuerpo de la herramienta, como se
muestra en la figura 7.
Encendidoy apagado (fig. 1)
_ADVERTENCIA: Antes de ut///zar/aherramienta, compruebe que /a
empu_adura este bien apretada.
Para activar la herramienta, active primeramente
el botOn de liberaciOn del interruptor (b)y a
continuaciOn, pulse el interruptor de encendido/
apagado (a).
Para un funcionamiento continuo, sostenga el
interruptor de activaciOn (a)hacia abajo.
Para detener la herramienta, suelte el interruptor de
encendido/apagado.
_DVERTENCIA: No encienda ni
apague /a herramienta cuando tenga
carga.
Aplicaciones de metal
Cuando utilice la herramienta en aplicaciones de
metal, asegOrese de que se haya insertado un
dispositivo de corriente residual (DCR) para evitar los
riesgos residuales causados por las virutas de metal.
Si el DCR corta el suministro electrico, Ileve la
herramienta a un agente de reparaciones autorizado
de DEWALT.
_ADVERTENCIA: En condiciones de
trabajo extremas, el po/vo conductor
puede acumu/arse dentro de/a caja
protectora de/a m4quina cuando se
trabaja con metal Esto puede dar
como resu/tado que el ais/amiento
protector de/a m4quina se degrade
yse produzca un riesgo potencia/de
descarga electrica.
Para evitar la acumulaciOn de virutas de metal
dentro de la mb.quina, recomendamos limpiar las
ranuras de ventilaciOn a diario. Consulte la secciOn
Mantenimiento.
MANTENIMIENTO
Su herramienta electrica DEWALT ha sido
diseSada para funcionar mucho tiempo con un
minimo de mantenimiento. Que siga funcionando
satisfactoriamente depende del buen cuidado de la
herramienta y de su limpieza periodic&
_DVERTENCIA: Para disrninuir
el riesgo de lesiones personales
graves, apague la herramienta
y desconectela de la fuente de
alirnentacidn antes de realizar
ajuste alguno ode poner oquitar
acoplarnientos o accesorios. Antes
de votver a conectar ta herramienta,
apriete y suelte el interruptor de puesta
en mamha para comprobar que ta
herramienta este apagada.
Escobillasdesmontables
El motor se pararb,automb.ticamente para indicar
que las escobillas de carbon estb.ncasi desgastadas
y que es necesario hacerle el mantenimiento a la
herramienta. Las escobillas de carbon no pueden
ser reparadas por el usuario. Lleve la herramienta a
un agente de reparaciones autorizado de DEWALT.
LubricaciOn
Su herramienta electrica no requiere lubricaciOn
adicional.
Limpieza
_DVERTENCIA: Etimine con aire seco
/asuciedad y el po/vo de/a carcasa
principal tan pronto como se advierta su
acumu/acidn en /as reji//as de venti/acidn
o en sus proximidades, Cuando l/eve
acabo este procedimiento pdngase
una proteccidn ocular aprobada y una
mascaritta antipotvo aprobada.
_DVERTENCIA: Jam4s use dlsotventes
u otros pmductos qufmicos fuertes para
timplar /as piezas no met4tlcas de ta
herramienta. Dichos pmductos qufmicos
pueden debltltar los mater/ates con los
38
Other manuals for DW882
3
Table of contents
Languages:
Other DeWalt Grinder manuals

DeWalt
DeWalt DW821 User manual

DeWalt
DeWalt DWE46102 User manual

DeWalt
DeWalt DW476 User manual

DeWalt
DeWalt DWE4010 User manual

DeWalt
DeWalt DWE4000-XE User manual

DeWalt
DeWalt DWE4100 User manual

DeWalt
DeWalt DW887 User manual

DeWalt
DeWalt DWE4012 User manual

DeWalt
DeWalt DWE4157F User manual

DeWalt
DeWalt XR LI-ION DCG412 User manual

DeWalt
DeWalt DW887 User manual

DeWalt
DeWalt XR LI-ION DCG418 User manual

DeWalt
DeWalt DWE46101 User manual

DeWalt
DeWalt DWE43214 User manual

DeWalt
DeWalt DCG412B User manual

DeWalt
DeWalt DWE4120 User manual

DeWalt
DeWalt D28110 User manual

DeWalt
DeWalt DWE4118 User manual

DeWalt
DeWalt D28000 User manual

DeWalt
DeWalt D28065 User manual