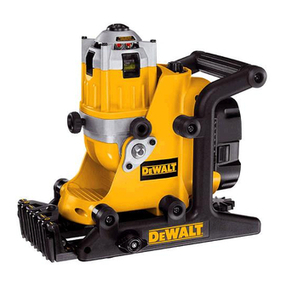
DeWalt DW074 User manual

DW074
Rotary Laser
Laser rotatif
Láser rotativo
INSTRUCTION MANUAL
GUIDE D'UTILISATION
MANUAL DE INSTRUCCIONES
INSTRUCTIVO DE OPERACIÓN, CENTROS DE SERVICIO Y PÓLIZA
DE GARANTÍA.ADVERTENCIA: LÉASE ESTE INSTRUCTIVO ANTES
DE USAR EL PRODUCTO.
If you have questions or comments, contact us.
Pour toute question ou tout commentaire, nous contacter.
Si tiene dudas o comentarios, contáctenos.
1-800-4-DEWALT • www.dewalt.com


English
1
IF YOU HAVE ANY QUESTIONS OR COMMENTS ABOUT
THIS OR ANY DEWALT TOOL, CALL US TOLL FREE AT:
1-800-4-DEWALT (1-800-433-9258).
WARNING! Read and understand all instructions.
Failure to follow all instructions listed below may result
in electric shock, fire and/or serious personal injury.
SAVE THESE INSTRUCTIONS
Safety Instructions for Lasers
• Do not operate the laser in explosive atmospheres, such as
in the presence of flammable liquids, gases, or dust. Power
tools create sparks which may ignite the dust or fumes.
• Use the laser only with the specifically designated batteries.
Use of any other batteries may create a risk of fire.
• Store idle laser out of reach of children and other untrained
persons. Lasers are dangerous in the hands of untrained
users.
• Use only accessories that are recommended by the
manufacturer for your model. Accessories that may be suitable
for one laser, may create a risk of injury when used on another
laser.
• Tool service MUST be performed only by qualified repair
personnel. Repairs, service or maintenance performed
by unqualified personnel may result in injury. To locate
your nearest DEWALT service center call 1-800-4-DEWALT
(1-800-433-9258) or go to http://www.dewalt.com on the Internet.
• Do not use optical tools such as a telescope or transit to
view the laser beam. Serious eye injury could result.
• Do not place the laser in a position which may cause anyone
to intentionally or unintentionally stare into the laser beam.
Serious eye injury could result.
• Do not position the laser near a reflective surface which
may reflect the laser beam toward anyone’s eyes. Serious
eye injury could result.
• Turn the laser off when it is not in use. Leaving the laser on
increases the risk of staring into the laser beam.
• Do not operate the laser around children or allow children
to operate the laser. Serious eye injury may result.
• Do not remove or deface warning labels. If labels are
removed user or others may inadvertently expose themselves to
radiation.
• Position the laser securely on a level surface. Damage to the
laser or serious injury could result if the laser falls.
• Dress properly. Do not wear loose clothing or jewelry.
Contain long hair. Keep your hair, clothing, and gloves away
from moving parts. Loose clothing, jewelry, or long hair can be
caught in moving parts. Air vents often cover moving parts and
should also be avoided.
WARNING: Use of controls or adjustments or performance
of procedures other than those specified herein may result in
hazardous radiation exposure.
WARNING! DO NOT DISASSEMBLE THE ROTARY LASER.
There are no user serviceable parts inside. Disassembling
the rotary laser will void all warranties on the product. Do not
modify the product in any way. Modifying the tool may result in
hazardous laser radiation exposure.
• The label on your tool may include the following symbols.
V .......volts nm..... wavelength in nanometers
mW .....milliwatts IIIa..... Class IIIa Laser
.....laser warning symbol
English
2
FIG. 1 • For your convenience and safety, the following labels are on your
laser (Fig. 1).
AVOID EXPOSURE: LASER RADIATION IS EMITTED
FROM THIS APERTURES.
DANGER: LASER RADIATION. AVOID DIRECT
EYE EXPOSURE.
Laser Information
The DW074 Cordless Rotary Laser is listed as a CLASS IIIA LASER
PRODUCT and complies with the applicable requirement of title 21
of the Code of Federal Regulations set forth by: the Department of
Health, Education, and Welfare; the Food and Drug Administration;
the Center for Devices and Radiological Health.
These devices comply with Part 15 of the FCC Rules. Operation
is subject to the following two conditions: (1) this device may
not cause harmful interference, and (2) this device must accept
any interference received, including interference that may cause
undesired operation.
NOTE: This equipment has been tested and found to comply with
the limits for a Class B digital device, pursuant to Part 15 of the FCC
Rules. These limits are designed to provide reasonable protection
against harmful interference in a residential installation. This
equipment generates, uses and can radiate radio frequency energy
and, if not installed and used in accordance with the instructions,
may cause harmful interference to radio communications. However,
there is no guarantee that interference will not occur in a particular
installation. If this equipment does cause harmful interference to
radio and television reception, which can be determined by turning
the equipment off and on, the user is encouraged to try to correct the
interference by one or more of the following measures:
• Reorient or relocate the receiving antenna.
• Increase the separation between the equipment and receiver.

English
3
• Connect the equipment into an outlet on a circuit different from
that which the receiver is connected.
• Consult the dealer or an experienced radio/TV technician for
help.
These Class B digital devices comply with Canadian ICES-003.
SPECIFICATIONS
Light Source Semiconductor laser diode
Laser Wavelength 630 – 680 nm Visible
Laser Power <5mw, CLASS IIIa LASER PRODUCT
Rotation Speed 0 – 600 rpm
Self-Leveling Range ± 5°
Indoor Visible Range 200' (61 m) diameter
Range with Detector 1500' (450 m) diameter
Level Accuracy ± 1/4" per 100' (± 2 mm per 10 m)
Power Source 2 D-cell batteries
Operating Temperature 23°F to 122°F (-5°C to 50°C)
Storage Temperature -4°F to 158°F (-20°C to 70°C)
Environmental Water resistant
Important Safety Instructions
for Batteries
WARNING: Batteries can explode, or leak, and can cause
injury or fire. To reduce this risk:
• Carefully follow all instructions and warnings on the battery label
and package.
• Always insert batteries correctly with regard to polarity (+ and –),
marked on the battery and the equipment.
• Do not short battery terminals.
• Do not charge batteries.
• Do not mix old and new batteries. Replace all of them at the
same time with new batteries of the same brand and type.
• Remove dead batteries immediately and dispose of per local
codes.
• Do not dispose of batteries in fire.
• Keep batteries out of reach of children.
• Remove batteries if the device will not be used for several
months.
SAVE THESE INSTRUCTIONS
FOR FUTURE USE
LASER OPERATION
• To extend battery life, turn the laser off when it is not in use.
• To ensure the accuracy of your work, check the laser
calibration often. Refer to Field Calibration Check under
Laser Maintenance.
• Before attempting to use the laser, make sure the tool is
positioned on a relatively smooth, secure surface.
• Always mark the center of the laser line or dot. If you mark
different parts of the beam at different times you will introduce
error into your measurements.
• To increase working distance and accuracy, set up the laser in
the middle of your working area.
• When attaching to a tripod or wall, mount the laser securely.
• When working indoors, a slow rotary head speed will produce
a visibly brighter line, a faster rotary head speed will produce a
visibly solid line.
• To increase beam visibility, wear Laser Enhancement Glasses
and/or use a Laser Target Card to help find the beam.
• Extreme temperature changes can cause movement or shifting
of building structures, metal tripods, equipment, etc., which can
effect accuracy. Check your accuracy often while working.

English
4
• When working with the DEWALT Digital Laser Detector, set the
laser’s rotation speed to the fastest setting.
• If the laser is dropped or has suffers a sharp blow, have the
calibration system checked by a qualified service center before
using the laser.
A
B
FIG. 2
Installing and Removing the
Batteries (Fig. 2)
NOTE: This tool is powered by two D-cell batteries.
INSTALLING THE BATTERY PACK
1. Lift up the battery compartment cover (A) as shown in Figure 1.
2. Insert two fresh D-cell batteries in the compartment, placing
the batteries according to embossed icon (B) on the inside of
the compartment.
Laser Control Panel
The laser is controlled by the power button (C), the speed/rotation
button (D) and the standby button (E). The four arrow buttons
(F, G) are used to adjust the bubble vial in vertical mode. The two
LED indicator lights are used to indicate power/low battery (H) and
standby mode (I).
Powering On
Be sure that the batteries are properly installed and the battery door
is securely closed.
CAUTION: The laser will operate even if battery door is not fully
latched. To secure the batteries, always ensure battery door is
closed and latched.
G
F
E
D
CH
FIG. 3
I
TURNING THE LASER ON IN HORIZONTAL MODE
(SELF-LEVELING) (FIG. 3)
1. Gently press the power button (C) to power the laser on. The
power LED indicator light (H) will illuminate.
2. The unit will automatically self-level.
3. When the unit is finished leveling, the laser beam will turn on
and the rotor will operate at the most recent speed setting.
4. Press the speed/rotation button (D) to select a different rotation
speed if desired.
NOTE: The power LED indicator light (H) is used to indicate on
(steady) and low battery (flashing).

English
5
NOTE: The head will begin or resume rotation once the laser is
level.
TURNING THE LASER ON IN VERTICAL MODE
(MANUAL LEVELING)
1. Gently press the power button (C) to power the laser on. The
power LED indicator light (H) will illuminate and the Standby
Mode LED (I) will begin to flash.
NOTE: The unit automatically enters Standby Mode when put
in Vertical Mode.
2. Manually level the unit using the four arrow buttons (F, G).
3. Gently press the standby button (E) or speed/rotation button (D)
to disengage Standby Mode.
4. Press the speed/rotation button (D) to select the desired rotation
speed.
LEVELING THE LASER IN VERTICAL MODE
1. Gently press the standby button (E) to engage Standby Mode.
CAUTION: To reduce the risk of direct eye exposure to the
laser beam, always engage Standby Mode before viewing the
bubble vial.
2. View the position of the bubble vial by sighting straight down
from above the unit.
NOTE: Viewing the bubble from any angle other than straight
down will result in an inaccurate reading.
3. Center the bubble exactly midpoint between the hatchmarks on
the vial. The bubble is adjusted by pressing the up and down
arrow buttons (F, G). The single arrow buttons move the bubble
slowly; the double arrow buttons allow fast adjustment of the
bubble.
4. Gently press the standby button (E) or speed/rotation button (D)
to disengage Standby Mode.
TURNING THE LASER OFF
Gently press the power button (C) to turn the laser off. The power
LED indicator light (H) will no longer be illuminated.
Laser Control Panel Buttons
POWER BUTTON
Press the power button (H) to power the unit on and off.
ARROW BUTTONS
The arrow buttons (F, G) are used to adjust/level the bubble in
the vial. The single arrow buttons (F) move the bubble slowly; the
double arrow buttons (G) allow fast adjustment of the bubble.
SPEED/ROTATION BUTTON
The speed/rotation button (D) is used to adjust the rotation speed
of the laser beam through its 3 preset speeds.
The head speed will cycle through 3 speeds, then repeat the
sequence as the speed/rotation button is pressed.
REMEMBER:
Slow speed = Bright Beam Fast Speed = Solid Beam
STANDBY BUTTON
Press the standby button (E) to engage Standby Mode. This turns
off the laser beam and stops the laser head from rotating. The
standby LED indicator light (I) will flash when the unit is in Standby
Mode.
NOTE: Pressing any of the arrow buttons (F, G) will also engage
Standby Mode.
CAUTION: To reduce the risk of direct eye exposure to the laser
beam, always engage Standby Mode before viewing the bubble
vial.

English
6
LOW BATTERY INDICATION
When the batteries approach end of life, the power LED indicator
light (H) will begin to flash. When this signal is observed, only a
short period of runtime is left before the unit will completely shut
down. The batteries should be replaced with new batteries as soon
as possible.
Using the Laser on a Tripod
1. Position the tripod securely and set it to the desired height.
2. Make sure that the top of the tripod is roughly level. The laser
will self-level only if the top of the tripod is within ± 5˚ of level. If
the laser is set up too far out of level, it will beep when it reaches
the limit of its leveling range. No damage will be done to the
laser, but it will not operate in an “out of level” condition.
3. Secure the laser to the tripod by screwing the threaded knob on
the tripod into the female thread on the bottom of the laser.
NOTE: Be sure that the tripod you are working with has a
5/8"–11 threaded screw to ensure secure mounting.
4. Turn the laser on and adjust the rotation speed and controls as
desired.
LEVEL
MODE
PLUMB
MODE
FIG. 4
Using the Laser on a Floor (Fig. 4)
The laser level can be positioned directly on the floor for leveling
and plumbing applications such as framing walls.
1. Place the laser on a relatively smooth and level surface where
it will not be disturbed.
2. Position the laser for a level or plumb setting as shown.
3. Turn the laser on and adjust the rotation speed and controls as
desired.
NOTE: The laser will be easier to set up for wall applications if the
rotation speed is set to 0 rpms and if the remote control is used to
line up the laser with control marks. The remote allows one person
to set up the laser.
Manual Head Rotation
The laser is designed with a protective roll cage around the rotary
head to prevent accidental damage from work site activities. You
can still access the rotary head and manually direct the beam to
establish or transfer a mark.
Laser Accessories
Recommended accessories for use with your tool are available for
purchase at your factory-owned local service center.
WARNING: Since accessories, other than those offered by
DEWALT, have not been tested with this product, use of such
accessories with this tool could be hazardous. To reduce the risk
of injury, only DEWALT, recommended accessories should be used
with this product.
If you need assistance in locating any accessory, please contact
DEWALT Industrial Tool Co., 701 East Joppa Road, Baltimore, MD
21286, call 1-800-4-DEWALT (1-800-433-9258) or visit our website
www.dewalt.com.

English
7
Laser Enhancement Glasses
Some laser kits include a pair of FIG. 5
Laser Enhancement Glasses (Fig. 5).
These red lens glasses improve the
visibility of the laser beam under
bright light conditions or over long
distances when the laser is used for
interior applications. These glasses
are not required to operate the laser.
CAUTION: These glasses are not ANSI approved safety glasses
and should not be worn while operating other tools. These glasses
do not keep the laser beam from entering your eyes.
DANGER: TO REDUCE THE RISK OF SERIOUS PERSONAL
INJURY, NEVER STARE DIRECTLY INTO THE LASER BEAM,
WITH OR WITHOUT THESE GLASSES.
Target Card FIG. 6
Some laser kits include a Laser Target Card
(Fig. 6) to aid in locating and marking the laser
beam. The target card enhances the visibility of
the laser beam as the beam crosses over the
card. The card is marked with standard and metric
scales. The laser beam passes through the red
plastic and reflects off of the reflective tape on
the reverse side. The magnet at the top of the
card is designed to hold the target card to ceiling
track or steel studs to determine plumb and level
positions. For best performance when using the
Target Card, the DEWALT logo should be facing you.
Digital Laser Detector: DW0742
(Fig. 7, 8)
K
O
J
FIG. 7
N
P
Q
Some laser kits include a DEWALT
Digital Laser Detector. The DEWALT
Digital Laser Detector allows you to
locate a laser beam emitted by a
rotary laser in bright light conditions
or over long distances. The detector
can be used in both indoor and
outdoor situations where it is difficult
to see the laser beam.
The detector is not for use with non-
rotating lasers but is compatible with
most rotary red-beam or infrared
(invisible) beam lasers on the market.
The detector gives both visual signals
through the display window (J) and FIG. 8
M
L
Q
audio signals through the speaker (K)
to indicate the location of the laser
beam.
The DEWALT Digital Laser Detector
can be used with or without the
detector clamp. When used with the
clamp, the detector can be positioned
on a grade rod, leveling pole, stud or
post.
BATTERIES (FIG. 7)
The digital laser detector is powered
by a 9-volt battery. To install the
battery provided, lift up on the battery
compartment cover (L). Place the

English
8
9-volt battery in the compartment, aligning the battery as shown
on the embossed icon (M).
DETECTOR CONTROLS (FIG. 8)
The detector is controlled by the power button (N) and the volume
button (O).
When the power button is pushed once, the detector is turned on.
The top of the display window shows the ON icon and the volume
icon.
The DEWALT Digital Laser Detector also has an auto shut-off
feature. If a rotary laser beam does not strike the beam detection
window, or if no buttons are pressed, the detector will shut itself off
in about 15 minutes.
To turn off the audible signal push the button a third time; the volume
icon will disappear.
Detector Operation (Fig. 9)
1. Set up and position the rotary laser that you will be using
according to the manufacturer’s directions. Turn the laser on
and make sure that the laser is rotating and emitting a laser
beam.
NOTE: This detector has been designed to be used only with a
rotating laser. The detector will not work with a stationary beam
laser level.
2. Turn the detector on by pressing the power button (N).
3. Adjust the volume as desired as described in the Detector
Controls.
4. Position the detector so that the detector window (P) is facing
the laser beam produced by the rotary laser. Move the detector
up or down within the approximate area of the beam, until you
have centered the detector. For information about the display
window indicators and the audible signal indicators, refer to
the table titled Indicators (Fig. 9).
FIG. 9 INDICATORS
Above
Grade
Slightly
Above
Grade On
Grade
Slightly
below
Grade below
Grade
audible
signals
fast beep fast beep steady
tone slow beep slow beep
display
icons
5. Use the marking notches (Q) to accurately mark the position of
the laser beam.
FIG. 10
W
U
SR
T
V

English
9
MOUNTING ON A GRADE ROD (FIG. 10)
1. To secure your detector to a grade rod, first attach the detector
to the clamp by pushing in on the clamp latch (R). Slide the
tracks (S) on the clamp around the rail (T) on the detector until
the latch (U) on the clamp pops into the latch hole (V) on the
detector.
2. Open the jaws of the clamp by turning the clamp knob (W)
counterclockwise.
3. Position the detector at the height needed and turn the clamp
knob clockwise to secure the clamp on the rod.
4. To make adjustments in height, slightly loosen the clamp,
reposition and retighten.
Detector Cleaning and Storage
• Dirt and grease may be removed from the exterior of the
detector using a cloth or soft, non-metallic brush.
• The DEWALT digital laser detector is rain resistant but not
immersible. Do not pour water on the unit or submerge it under
water.
• The best storage place is one that is cool and dry—away from
direct sunlight and excess heat or cold.
Detector Service
Except for batteries, there are no user serviceable parts in the
Digital Laser Detector. Do not disassemble the unit. Unauthorized
tampering with the laser detector will void all warranties.
Detector Troubleshooting
THE DETECTOR WILL NOT TURN ON.
• Press and release the power button.
• Check to see that the battery is in place and in the proper
position.
• If the detector is very cold, allow it to warm up in a heated
area.
• Replace the 9-volt battery. Turn the unit on.
• If the detector still does not turn on, take the detector to a
DEWALT service center.
THE DETECTOR’S SPEAKER MAKES NO SOUND.
• Ensure that the detector is on.
• Press the volume button. It will toggle from high, to low, to
mute.
• Ensure that the rotary laser is spinning and that it is emitting a
laser beam.
• If the detector is still not making any sound, take it to a DEWALT
service center.
THE DETECTOR DOES NOT RESPOND TO A STATIONARY
LASER BEAM.
• The DEWALT Digital Laser Detector has been designed to work
only with rotary lasers.
THE DETECTOR GIVES OFF A TONE BUT THE LCD
DISPLAY WINDOW DOES NOT FUNCTION.
• If the detector is very cold, allow it to warm up in a heated
area.
• If the LCD display window is still not functioning, take the
detector to a DEWALT service center.
Construction Grade Rod
DANGER: NEVER attempt to use a grade rod in a storm or
near overhanging electric wires. Death or serious personal injury
will occur.
Some laser kits include a grade rod. The DEWALT Grade Rod is
marked with measurement scales on both sides and is constructed

English
10
in telescoping sections. A spring-loaded button FIG. 11
actuates a lock to hold the grade rod at various
lengths.
The front of the grade rod has the measurement
scale starting at the bottom.Use this for measuring
from the ground up when grading or leveling
jobs.
The back of the grade rod is designed to measure
the height of ceilings, joists, etc. Fully extend the
top section of the grade rod until the button locks
into the previous section. Extend that section
either until it locks into the adjacent section or until the grade
rod touches the ceiling or joist. The height is read where the last
extended section exits the previous lower section, as shown in
Figure 11.
Using the Laser with a Wall Mount
(Fig. 12)
Some laser kits include a Wall Mount. It can be used for attaching
the tool to track or ceiling angle and to aid in acoustical ceiling
installation. Follow the directions below for using the wall mount.
CAUTION: Before attaching the laser level to wall track or ceiling
angle, be sure that the track or angle is properly secured.
1. Place the laser on the mounting base (X) aligning the hole (Y)
on the bottom of the laser with the hole (Z) in the mounting
base. Place rear rubber foot into the mounting base slot (AA).
Turn the mounting knob (BB) to secure the laser.
2. With the wall mount measuring scale (CC) facing you, push the
clamp lever (DD) in to open the clamp jaws (EE).
3. Position the clamp jaws (EE) around the wall track or ceiling
angle and release the clamp lever (DD) to close the clamp
jaws on the track. Be sure that the wall mount is secure before
proceeding.
CAUTION: Always use a ceiling wire hanger or equivalent
material, in addition to the wall mount clamp locking knob, to help
secure the laser level while mounting it to a wall. Thread the wire
through the handle of the laser level. DO NOT thread the wire
through the protective roll cage. Additionally, screws may be used
to fasten the wall mount directly to the wall as a back up. A screw
holes (FF) is located at the top of the wall mount.
FF
Y
FIG. 12
EE
DD
EE
GG
ZAA
BB
CC
X
4. The tool can be adjusted up and down to the desired offset
height for working. To change the height, loosen the locking
knob (GG) located on the side of the wall mount to move the
laser level up and down to the desired height. Support the
mounting base when adjusting the height.

English
11
5. Use the wall mount measuring scale (CC) to pinpoint your
mark.
NOTE: It may be helpful to turn the power on and turn the
rotary head so that it puts a dot on one of the laser scales. The
DEWALT target card is marked at 1-1/2" (38 mm), therefore, it
may be easiest to set the offset of the laser to 1-1/2" (38 mm)
below the track.
6. Once you have positioned the laser at the desired height,
tighten the locking knob (GG) to maintain this position.
LASER MAINTENANCE
• Under some conditions, the glass lens inside the rotary head
may collect some dirt or debris. This will affect beam quality and
operating range.The lens should be cleaned with a cotton swab
moistened with water as shown in Figure 13.
• The flexible rubber shield can be FIG. 13
cleaned with a wet lint-free cloth
such as a cotton cloth. USE
WATER ONLY — DO NOT use
cleansers or solvents. Allow the
unit to air dry before storing.
• To maintain the accuracy of your
work, check the calibration of
the laser often. Refer to Field
Calibration Check.
• Calibration checks and other maintenance repairs can be
performed by DEWALT service centers. Two free calibration
checks are included under the DEWALT One Year Free Service
Contract.
• When the laser is not in use, store it in the kit box provided.
• Do not store your laser in the kit box if the laser is wet. Dry
exterior parts with a soft, dry cloth and allow the laser to air dry.
• Do not store your laser at temperatures below 0˚F (-18˚C) or
above 105˚F (41˚C).
WARNING: Never use solvents or other harsh chemicals for
cleaning the non-metallic parts of the tool. These chemicals may
weaken the materials used in these parts. Use a cloth dampened
only with water and mild soap. Never let any liquid get inside the
unit; never immerse any part of the unit into a liquid. Never use
compressed air to clean the laser.
Field Calibration Check (Fig. 14–16)
Field calibration checks should be done frequently. This section
provides instructions for performing simple field calibration checks
of your DEWALT Rotary Laser. Field calibration checks do not
calibrate the laser. That is, these checks do not correct errors in
the leveling or plumbing capability of the laser. Instead, the checks
indicate whether or not the laser is providing a correct level and
plumb line. These checks cannot take the place of professional
calibration performed by a DEWALT service center.
LEVEL CALIBRATION CHECK (X-AXIS) FIG. 14 Y-AXIS
X-AXIS
1. Set up a tripod between two walls that
are at least 50 feet (15.3 m) apart.
The exact location of the tripod is not
critical.
2. Mount the laser unit on the tripod so
that the X-axis points directly toward
one of the walls.
3. Turn the laser unit on and allow it to
self-level.
4. Mark and measure points A and B on the walls as shown in
Figure 15.

English
12
BEAM
BA
FIG. 15
L
5. Turn the entire laser unit 180º so the X-axis points directly
toward the opposite wall.
6. Allow the laser unit to self-level, and mark and measure points
AA and BB on the walls as shown in Figure 16.
LASER UNIT ROTATED 180˚
BEAM
L
BBAA
FIG. 16
7. Calculate the total error using the equation:
Total Error = (AA – A) – (BB– B)
8. Compare total error to the allowable limits shown in the following
table.
Distance between walls Allowable Error
L = 50 ft. (15.3 m) 1/4" (6 mm)
L = 75 ft. (22.9 m) 3/8" (9 mm)
L = 100 ft. (30.5 m) 1/2" (12 mm)
LEVEL CALIBRATION CHECK (Y-AXIS)
Repeat the procedure above, but with the laser unit positioned so
the Y-axis is pointed directly toward the walls.
PLUMB ERROR CHECK (FIG. 17) FIG. 17
MARKS
ON
WALLS
1. Using a standard plumb bob as
a reference, mark the top and
bottom of a wall (Be sure to
mark the wall and not the floor
and ceiling.)
2. Position the rotary laser securely
on the floor approximately 1 m
(3 ft.) from the wall.
3. Turn the laser on and level it
using the arrow buttons to center
the bubble. Put the unit in low
speed rotation for maximum vis-
ibility, making sure the beam
passes through the mark on the
bottom of the wall. Recheck the
bubble position to confirm it is
still centered.
4. If the center of the beam lines up with the marks at the bottom
and top of the wall, the laser is properly calibrated.
NOTE: This check should be done with a wall no shorter than the
tallest wall for which this laser will be used.

English
13
Repairs
To assure product SAFETY and RELIABILITY, repairs, maintenance
and adjustments should be performed by a DEWALT factory service
center, a DEWALT authorized service center or other qualified
service personnel. Always use identical replacement parts.
Three Year Limited Warranty
DEWALT will repair, without charge, any defects due to faulty
materials or workmanship for three years from the date of purchase.
This warranty does not cover part failure due to normal wear or
tool abuse. For further detail of warranty coverage and warranty
repair information, visit www.dewalt.com or call 1-800-4-DEWALT
(1-800-433-9258). This warranty does not apply to accessories or
damage caused where repairs have been made or attempted by
others. This warranty gives you specific legal rights and you may
have other rights which vary in certain states or provinces.
In addition to the warranty, DEWALT tools are covered by our:
1 YEAR FREE SERVICE
DEWALT will maintain the tool and replace worn parts caused by
normal use, for free, any time during the first year after purchase.
90 DAY MONEY BACK GUARANTEE
If you are not completely satisfied with the performance of your
DEWALT Power Tool, Laser, or Nailer for any reason, you can return
it within 90 days from the date of purchase with a receipt for a full
refund – no questions asked.
LATIN AMERICA: This warranty does not apply to products sold
in Latin America. For products sold in Latin America, see country
specific warranty information contained either in the packaging, call
the local company or see website for warranty information.
FREE WARNING LABEL REPLACEMENT: If your warning labels
(Fig. 1) become illegible or are missing, call 1-800-4-DEWALT for a
free replacement.

Français
14
POUR TOUTE QUESTION OU COMMENTAIRE RELATIF À
CET OUTIL OU TOUT AUTRE OUTIL DEWALT, COMPOSEZ
GRATUITEMENT LE : 1-800-4-DEWALT (1-800-433-9258).
AVERTISSEMENT ! Lire et comprendre toutes les
directives. Le non-respect des directives suivantes
présente des risques de choc électrique, d’incendie et/ou de
blessure grave.
CONSERVER CES DIRECTIVES
Consignes de sécurité pour les lasers
• Ne pas faire fonctionner le laser dans un milieu déflagrant,
en présence par exemple de poussières, gaz ou liquides
inflammables. Les outils électriques peuvent produire des
étincelles qui pourraient enflammer toute émanation ou poussière
ambiante.
• Utiliser le laser uniquement avec les piles spécialement
conçues à cet effet. L’utilisation de toute autre pile peut
comporter des risques d’incendie.
• Ranger le laser hors de la portée des enfants ou de toute
personne non familière avec cet outil. Les lasers peuvent être
dangereux entre les mains d’utilisateurs inexpérimentés.
• N’utiliser que des accessoires recommandés par le fabricant
de votre modèle particulier. Les accessoires propres à un
modèle de laser peuvent comporter des risques de blessure
lorsqu’utilisés avec un modèle différent.
• L’outil DOIT être entretenu ou réparé exclusivement par du
personnel qualifié. Tout entretien ou maintenance effectué
par une personne non qualifiée comporte des risques de
blessure. Pour trouver le centre de réparation DEWALT le plus
proche, composer le 1-800-4-DEWALT (1-800-433-9258) ou se
rendre sur le site Internet http://www.dewalt.com.
• Ne pas utiliser d’outils optiques comme les télescopes
ou télescopes transit pour observer le faisceau laser. Des
lésions oculaires graves pourraient en résulter.
• Ne pas disposer le laser de façon à permettre à quiconque
de regarder, délibérément ou non, directement le faisceau
laser. Des lésions oculaires graves pourraient en résulter.
• Ne pas disposer le laser à proximité d’une surface
réfléchissante qui pourrait refléter le faisceau laser dans
les yeux d’un individu. Des lésions oculaires graves pourraient
en résulter.
• Arrêter le laser en fin d’utilisation. Le fait de le laisser en
marche augmente les risques que quelqu’un regarde directement
dans le faisceau laser.
• Ne pas utiliser le laser à proximité d’enfants ou permette à
un enfant de l’utiliser. Des lésions oculaires graves pourraient
en résulter.
• Ne pas retirer ou abîmer les étiquettes d’avertissement. Des
étiquettes manquantes pourraient faire que des individus soient
exposés involontairement à des radiations.
• Disposer soigneusement le laser sur une surface plane. En
cas de chute, le laser pourrait être sérieusement endommagé ou
causer des blessures graves.
• Porter des vêtements appropriés.Ne pas porter de vêtements
amples ni de bijoux. Couvrir ou attacher les cheveux longs.
Maintenir cheveux, vêtements, bijoux et gants éloignés des
pièces mobiles, car ils pourraient s’y faire prendre. Prendre des
précautions à proximité des évents car ils cachent des pièces
mobiles.
AVERTISSEMENT : Toute utilisation de commandes ou
réglages ou exécution des procédures non conformes aux
spécifications incluses dans ce document comporte des
risques d’exposition à des radiations laser dangereuses.

Français
15
AVERTISSEMENT ! NE PAS DÉMONTER LE LASER ROTATIF.
Il ne comporte à l’intérieur aucune pièce réparable par
l’utilisateur. Le fait de démonter le laser rotatif annule toute
garantie inhérente à ce produit. Ne modifier ce produit en
aucune façon. Le fait de modifier cet outil comporte des risques
d’exposition à des radiations laser dangereuses.
• L’étiquette apposée sur votre outil peut inclure les symboles
suivants.
V .......volts nm ..... longueur d’onde en nanomètres
mW .....milliwatts IIIa ..... Laser de classe IIIa
.....symbole d’avertissement laser
FIG. 1
• Pour des raisons de fonctionnalité et de sécurité, les étiquettes
suivantes figurent sur votre laser (fig. 1).
SE PROTÉGER CONTRE TOUTE EXPOSITION :
DES RADIATIONS LASER SONT ÉMISES PAR CETTE
OUVERTURE.
DANGER : EXPOSITION À DES RADIATIONS LASER.
ÉVITER TOUTE EXPOSITION OCULAIRE DIRECTE.
Informations relatives au laser
Le laser rotatif sans fil DW074 est classifié PRODUIT LASER
DE CLASSE IIIA, et se conforme aux normes en vigueur du
paragraphe 21 du Code de la Réglementation Fédérale énoncée
par le Département de la Santé, de l’Éducation et de l’Aide Sociale,
l’Administration régissant les aliments et médicament (Food and
Drug Administration) et le Centre des Appareils et Radiologie pour la
SantéCes appareils se conforment au paragraphe 15 du règlement
du FCC. Son utilisation est sujette aux deux conditions suivantes :
(1) Ce dispositif ne doit pas causer d’interférences nuisibles, et (2)
ce dispositif doit accepter toute interférence reçue, y compris toute
interférence pouvant causer un fonctionneme nt indésirable.
REMARQUE : Cet équipement a été testé et jugé conforme aux
limites d’un appareil numérique de Classe B, conformément au
Paragraphe 15 du règlement du FCC. Ces limites sont destinées
à offrir une protection raisonnable contre les interférences nuisibles
d’une installation résidentielle. Cet équipement produit, utilise et
peut émaner des ondes radiofréquences et, s’il n’est pas installé
et utilisé conformément aux directives du fabricant, peut causer
des interférences nuisibles aux communications radio. En fonction
des installations réalisées, il n’est cependant pas garanti que
toute interférence soit exclue. Si cet équipement devait causer
des interférences nuisibles à toute réception radio ou télévision,
ce qui peut être déterminé en allumant et éteignant l’équipement,

Français
16
l’utilisateur est encouragé à tenter de corriger ces interférences en
prenant l’une ou plusieurs des mesures suivantes :
• Réorienter l’antenne de réception ou en changer
l’emplacement.
• Augmenter la distance entre l’équipement et le récepteur.
• Brancher l’équipement à une prise située sur un circuit différent
de celui sur lequel le récepteur est connecté.
• Contacter le détaillant ou consulter un technicien radio/télé
qualifié.
Ces appareils numériques de Classe B se conforment à ICES-003
Canadien.
CARACTÉRISTIQUES TECHNIQUES
Source de lumière Diode laser à semi-conducteur
Longueur d’onde du laser Visible de 630 à 680 nm
Puissance du laser <5 mw, PRODUIT LASER DE
CLASSE IIIa
Vitesse de rotation 0 à 600 r/min (rpm)
Plage d’auto-nivelage ± 5°
Portée de visibilité en
intérieur 61 m (200 pi) de diamètre
Portée avec capteur 450 m (1500 pi) de diamètre
Niveau de précision ± 2 mm par 10 m (± 1/4 po par 100 pi)
Source de courant 2 piles D-cell
Température de
fonctionnement -5 °C à 50 °C (23 °F à 122 °F)
Température de rangement -20 °C à 70 °C (-4 °F à 158 °F)
Environnement Résistant à l’eau
Directives de sécurité importantes
propres aux piles
AVERTISSEMENT : Les piles peuvent exploser ou fuir,
et comportent des risques de blessure ou d’incendie. Pour
réduire ces risques :
• Suivre soigneusement toute instruction ou tout avertissement
inclus sur l’étiquette ou l’emballage des piles.
• Lors de l’installation des piles, toujours respecter la polarité
(+ et –) inscrite sur les piles et l’appareil.
• Ne pas court-circuiter les bornes.
• Ne pas recharger les piles.
• Ne pas mélanger des piles neuves avec des piles usagées. Les
remplacer toutes en même temps par des piles neuves de la
même marque et du même type.
• Retirer toute pile usagée immédiatement et s’en défaire
conformément à la réglementation locale.
• Ne pas jeter de piles au feu.
• Conserver les piles hors de la portée des enfants.
• Retirer les piles lorsque l’appareil n’est pas utilisé pendant
plusieurs mois.
CONSERVER CES CONSIGNES
POUR UTILISATION ULTÉRIEURE
UTILISATION DU LASER
• Pour augmenter la durée de vie des piles, arrêtez le laser en fin
d’utilisation.
• Pour assurer la précision de votre travail, vérifiez souvent le
calibrage du laser. Se reporter au paragraphe Vérification du
calibrage de la section Maintenance du laser.

Français
17
• Avant toute utilisation du laser, assurez-vous que l’appareil est
placé sur une surface relativement uniforme, plane et stable.
• Marquez systématiquement le centre de la raie laser ou point.
Si vous marquez différentes parties du faisceau à différents
moments, des erreurs s’immisceront dans vos mesures.
• Pour accroitre distance frontale et justesse, disposez le laser au
centre de votre zone de travail.
• Assurez-vous de fixer solidement le laser lorsque vous utilisez
un trépied ou un montage mural.
• Pour les travaux à l’intérieur, une vitesse lente de la tête rotative
produira une raie plus lumineuse à l’œil, une vitesse plus rapide
produira à l’œil une raie continue.
• Pour augmenter la visibilité du faisceau, portez des lunettes
de visualisation laser et/ou utilisez une carte de détection de
faisceau pour trouver ce dernier plus facilement.
• Tout changement extrême de température peut causer des
mouvements ou changements au niveau de la structure des
constructions, des trépieds métalliques, de l’équipement, etc.,
pouvant affecter la justesse. Vérifiez souvent le calibrage
pendant le travail.
• Lorsque vous utilisez le capteur laser numérique DEWALT, réglez
la vitesse de rotation du laser au paramètre le plus élevé.
• Si le laser est tombé ou a subi un choc, faites vérifier le système
de calibrage par un centre de réparation qualifié avant toute
réutilisation.
A
B
FIG. 2
Installation et retrait
des piles (fig. 2)
REMARQUE : Cet appareil fonctionne sur deux piles D-cell.
INSTALLATION DU BLOC-PILES
1. Ouvrez le couvercle du compartiment des piles (A) comme
illustré en figure 1.
2. Insérez deux piles D-cell neuves dans le compartiment, en
s’assurant de bien les disposer conformément à l’icône en
relief (B) à l’intérieur du compartiment.
Panneau de contrôle du laser
Le laser est commandé par l’interrupteur (C), le bouton vitesse/
rotation (D) et le bouton veille (E). Les quatre boutons flèche (F, G)
servent à ajuster le niveau à bulle du mode vertical. Les deux
voyants DEL servent à indiquer la faible puissance des piles (H) et
le Mode veille (I).

Français
18
Mise en marche
Assurez-vous que les piles sont installées correctement et que le
clapet de fermeture est bien verrouillé.
ATTENTION : Le laser fonctionnera même si le clapet des piles
n’est pas complètement verrouillé. Pour sécuriser les piles,
s’assurer systématiquement que le clapet est fermé et bien
verrouillé.
G
F
E
D
CH
FIG. 3
I
MISE EN MARCHE DU LASER EN MODE HORIZONTAL
(AUTO-NIVELAGE) (FIG. 3)
1. Appuyez légèrement sur l’interrupteur (C) pour mettre le laser
en marche. Le voyant DEL d’alimentation (H) s’allumera.
2. L’appareil s’auto-nivellera automatiquement.
3. Lorsque l’appareil sera de niveau, le faisceau laser tournera et
le rotor fonctionnera au dernier réglage de vitesse utilisé.
4. Si nécessaire, appuyez sur le bouton vitesse/rotation (D) pour
ajuster la vitesse de rotation.
REMARQUE : Le voyant DEL d’alimentation (H) sert à indiquer
que l’appareil est en marche (constant) ou que les piles sont faibles
(clignotant).
REMARQUE : La tête commencera ou continuera de tourner une
fois que le laser sera de niveau.
MISE EN MARCHE DU LASER EN MODE VERTICAL
(NIVELAGE MANUEL)
1. Appuyez légèrement sur l’interrupteur (C) pour mettre le laser
en marche. Le voyant DEL d’alimentation (H) s’allumera et le
voyant DEL Mode veille (I) se mettra à clignoter.
REMARQUE : L’appareil se mettra systématiquement en Mode
veille lorsqu’il sera mis en Mode vertical.
2. Nivelez manuellement l’appareil à l’aide des boutons flèche
(F, G).
3. Appuyez légèrement sur le bouton veille (E) ou le bouton
vitesse/rotation (D) pour désactiver le Mode veille.
4. Appuyez sur le bouton vitesse/rotation (D) pour ajuster la
vitesse de rotation.
NIVELAGE DU LASER EN MODE VERTICAL
1. Appuyez légèrement sur le bouton veille (E) pour activer le
Mode veille.
ATTENTION : Pour réduire tout risque d’exposition directe
des yeux au faisceau laser, activez systématiquement le Mode
veille avant d’observer le niveau à bulle.
2. Observez la position du niveau à bulle en regardant droit vers
le bas au-dessus de l’appareil.
REMARQUE : Le fait d’observer la bulle à partir de n’importe
quel autre angle donnera une lecture incorrecte.
3. Centrez la bulle exactement au milieu des repères sur le
niveau. On peut ajuster la bulle en appuyant sur les boutons
flèche haut/bas (F, G). Les boutons flèche simple déplacent la
bulle lentement. Les boutons flèche double permettent d’ajuster
la bulle rapidement.
4. Appuyez légèrement sur le bouton veille (E) ou le bouton
vitesse/rotation (D) pour désactiver le Mode veille.
Other manuals for DW074
1
Table of contents
Languages:
Other DeWalt Measuring Instrument manuals

DeWalt
DeWalt DW089K-XJ User manual

DeWalt
DeWalt DW03050 User manual

DeWalt
DeWalt DW03050 User manual

DeWalt
DeWalt DCE089G User manual

DeWalt
DeWalt DW077 User manual

DeWalt
DeWalt DW088LR User manual

DeWalt
DeWalt DW071 User manual

DeWalt
DeWalt DW0300 User manual

DeWalt
DeWalt DCE089G18 User manual

DeWalt
DeWalt DW080LRS User manual

DeWalt
DeWalt DCE080RS User manual

DeWalt
DeWalt DW089 User manual

DeWalt
DeWalt DW03101 User manual

DeWalt
DeWalt DW085LR User manual

DeWalt
DeWalt DW077-XE User manual

DeWalt
DeWalt DW030 User manual

DeWalt
DeWalt DW0822LG User manual

DeWalt
DeWalt DW077 User manual

DeWalt
DeWalt DW089 User manual

DeWalt
DeWalt DCE088G18 User manual