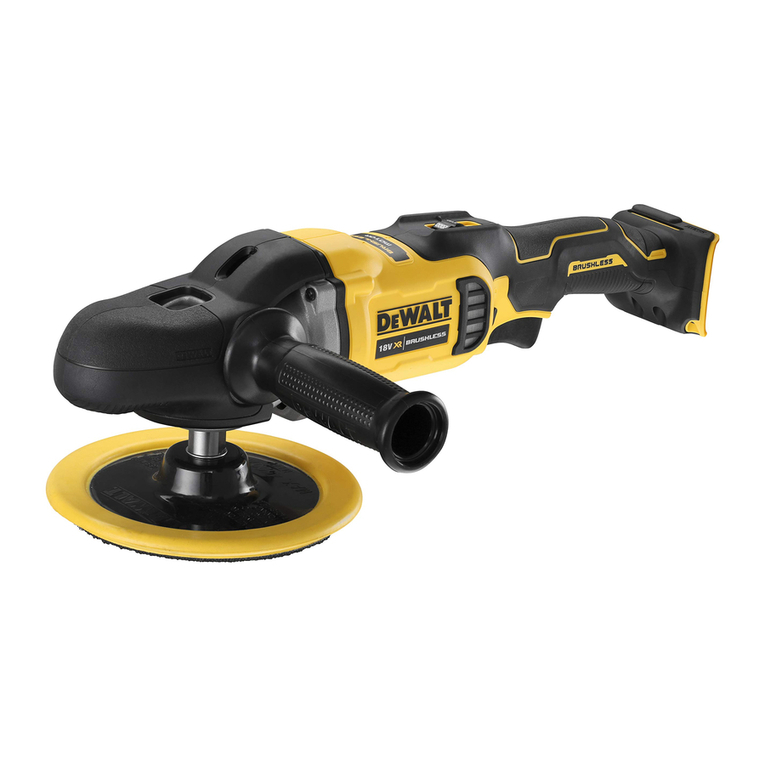
DeWalt DWP849XD User manual

DWP849XD

English(original) 4
13

C
H
E
I
D
G
A
K
J
EA
K
L
FIG. 2 2
FIG. 1 1
2

P
Q
I
E
E
FIG. 3B 3B
3
M
N
O
I
E
FIG. 3A(图3A)

E N G L I S H
4
POLISHERS
DWP849XD
Congratulations!
You have chosen aDEWALT power tool. Years of experience, thorough product development and innovation
make DEWALT one of the most reliable partners for professional power tool users.
Technical data
XD948PWD
Rated voltage VAC 220-240
06/05zHycneuqerfdetaR
0521WtupnirewoP
Rated speed min-1 0-600/0-3500
seYsehsurbffo-poP
41MeldnipS
D-handleeldnahSide
0.3gkthgieW
Definitions: Safety Guidelines
The definitions below describe the level of severity
for each signal word. Please read the manual and
pay attention to these symbols.
DANGER:
will death or serious injury
WARNING:
could death or
serious injury
CAUTION:
may minor or
moderate injury
CAUTION:
may
property damage
WARNING:
Double Insulation
NOTE:
General Power Tool Safety Warnings
WARNING! Read all safety warnings
and all instructions
SAVE ALL WARNINGS AND INSTRUCTIONS
FOR FUTURE REFERENCE.

ENGLISH
5
1) WORK AREA SAFETY
A +EEP¬WORK¬AREA¬CLEAN¬AND¬WELL¬LIT¬
#LUTTEREDåORåDARKåAREASåINVITEåACCIDENTS
Bå $O¬NOT¬OPERATE¬POWER¬TOOLS¬IN¬EXPLOSIVE¬
ATMOSPHERES¬SUCH¬AS¬IN¬THE¬PRESENCE¬OF¬
FLAMMABLE¬LIQUIDS¬GASES¬OR¬DUST¬0OWERå
TOOLSåCREATEåSPARKSåWHICHåMAYåIGNITEåTHEåDUSTå
ORåFUMES
C¬ +EEP¬CHILDREN¬AND¬BYSTANDERS¬AWAY¬WHILE¬
OPERATING¬A¬POWER¬TOOL $ISTRACTIONSåCANå
CAUSEåYOUåTOåLOSEåCONTROL
2) ELECTRICAL SAFETY
Aå 0OWER¬TOOL¬PLUGS¬MUST¬MATCH¬THE¬OUTLET¬
.EVER¬MODIFY¬THE¬PLUG¬IN¬ANY¬WAY¬$O¬
NOT¬USE¬ANY¬ADAPTER¬PLUGS¬WITH¬EARTHED¬
GROUNDED¬POWER¬TOOLS¬5NMODIFIEDåPLUGSå
ANDåMATCHINGåOUTLETSåWILLåREDUCEåRISKåOFå
ELECTRICåSHOCK
Bå !VOID¬BODY¬CONTACT¬WITH¬EARTHED¬OR¬
GROUNDED¬SURFACES¬SUCH¬AS¬PIPES¬
RADIATORS¬RANGES¬AND¬REFRIGERATORS¬4HEREå
ISåANåINCREASEDåRISKåOFåELECTRICåSHOCKåIFåYOURå
BODYåISåEARTHEDåORåGROUNDED
Cå $O¬NOT¬EXPOSE¬POWER¬TOOLS¬TO¬RAIN¬OR¬WET¬
CONDITIONS¬7ATERåENTERINGåAåPOWERåTOOLåWILLå
INCREASEåTHEåRISKåOFåELECTRICåSHOCK
Då $O¬NOT¬ABUSE¬THE¬CORD¬.EVER¬USE¬THE¬
CORD¬FOR¬CARRYING¬PULLING¬OR¬UNPLUGGING¬
THE¬POWER¬TOOL¬2EPLACE¬DAMAGED¬CORDS¬
IMMEDIATELY¬+EEP¬CORD¬AWAY¬FROM¬
HEAT¬OIL¬SHARP¬EDGES¬OR¬MOVING¬PARTS¬
$AMAGEDåORåENTANGLEDåCORDSåINCREASEåTHEå
RISKåOFåELECTRICåSHOCKå
Eå 7HEN¬OPERATING¬A¬POWER¬TOOL¬OUTDOORS¬
USE¬AN¬EXTENSION¬CORD¬SUITABLE¬FOR¬OUTDOOR¬
USE¬5SEåOFåAåCORDåSUITABLEåFORåOUTDOORåUSEå
REDUCESåTHEåRISKåOFåELECTRICåSHOCKå
Få )F¬OPERATING¬A¬POWER¬TOOL¬IN¬A¬DAMP¬
LOCATION¬IS¬UNAVOIDABLE¬USE¬A¬RESIDUAL¬
CURRENT¬DEVICE¬2#$¬PROTECTED¬SUPPLY¬
5SEåOFåANå2#$åREDUCESåTHEåRISKåOFåELECTRICå
SHOCK
3) PERSONAL SAFETY
Aå 3TAY¬ALERT¬WATCH¬WHAT¬YOU¬ARE¬DOING¬AND¬
USE¬COMMON¬SENSE¬WHEN¬OPERATING¬A¬
POWER¬TOOL¬$O¬NOT¬USE¬A¬POWER¬TOOL¬WHILE¬
YOU¬ARE¬TIRED¬OR¬UNDER¬THE¬INFLUENCE¬OF¬
DRUGS¬ALCOHOL¬OR¬MEDICATION¬!åMOMENTåOFå
INATTENTIONåWHILEåOPERATINGåPOWERåTOOLSåMAYå
RESULTåINåSERIOUSåPERSONALåINJURY
B¬ 5SE¬PERSONAL¬PROTECTIVE¬EQUIPMENT¬
!LWAYS¬WEAR¬EYE¬PROTECTION¬0ROTECTIVEå
EQUIPMENTåSUCHåASåDUSTåMASKåNONSKIDå
SAFETYåSHOESåHARDåHATåORåHEARINGåPROTECTIONå
USEDåFORåAPPROPRIATEåCONDITIONSåWILLåREDUCEå
PERSONALåINJURIES
C¬ 0REVENT¬UNINTENTIONAL¬STARTING¬%NSURE¬
THE¬SWITCH¬IS¬IN¬THE¬OFFPOSITION¬BEFORE¬
CONNECTING¬TO¬POWER¬SOURCE¬ANDOR¬
BATTERY¬PACK¬PICKING¬UP¬OR¬CARRYING¬THE¬
TOOL¬#ARRYINGåPOWERåTOOLSåWITHåYOURåFINGERå
ONåTHEåSWITCHåORåENERGISINGåPOWERåTOOLSåTHATå
HAVEåTHEåSWITCHåONåINVITESåACCIDENTS
D¬ 2EMOVE¬ANY¬ADJUSTING¬KEY¬OR¬WRENCH¬
BEFORE¬TURNING¬THE¬POWER¬TOOL¬ON !å
WRENCHåORåAåKEYåLEFTåATTACHEDåTOåAåROTATINGå
PARTåOFåTHEåPOWERåTOOLåMAYåRESULTåINåPERSONALå
INJURY
E¬ $O¬NOT¬OVERREACH¬+EEP¬PROPER¬
FOOTING¬AND¬BALANCE¬AT¬ALL¬TIMES¬4HISå
ENABLESåBETTERåCONTROLåOFåTHEåPOWERåTOOLåINå
UNEXPECTEDåSITUATIONS
F¬ $RESS¬PROPERLY¬$O¬NOT¬WEAR¬LOOSE¬
CLOTHING¬OR¬JEWELLERY¬+EEP¬YOUR¬HAIR¬
CLOTHING¬AND¬GLOVES¬AWAY¬FROM¬MOVING¬
PARTS ,OOSEåCLOTHESåJEWELLERYåORåLONGåHAIRå
CANåBEåCAUGHTåINåMOVINGåPARTSå
G¬ )F¬DEVICES¬ARE¬PROVIDED¬FOR¬THE¬CONNECTION¬
OF¬DUST¬EXTRACTION¬AND¬COLLECTION¬FACILITIES¬
ENSURE¬THESE¬ARE¬CONNECTED¬AND¬PROPERLY¬
USED¬5SEåOFåDUSTåCOLLECTIONåCANåREDUCEå
DUSTRELATEDåHAZARDS
4) POWER TOOL USE AND CARE
A¬ $O¬NOT¬FORCE¬THE¬POWER¬TOOL¬5SE¬THE¬
CORRECT¬POWER¬TOOL¬FOR¬YOUR¬APPLICATION¬
4HEåCORRECTåPOWERåTOOLåWILLåDOåTHEåJOBåå
BETTERåANDåSAFERåATåTHEåRATEåFORåWHICHåITåå
WASåDESIGNED
B¬ $O¬NOT¬USE¬THE¬POWER¬TOOL¬IF¬THE¬SWITCH¬
DOES¬NOT¬TURN¬IT¬ON¬AND¬OFF¬!NYåPOWERåå
TOOLåTHATåCANNOTåBEåCONTROLLEDåWITHåTHEåSWITCHå
ISåDANGEROUSåANDåMUSTåBEåREPAIRED
C¬ $ISCONNECT¬THE¬PLUG¬FROM¬THE¬POWER¬
SOURCE¬ANDOR¬THE¬BATTERY¬PACK¬FROM¬
THE¬POWER¬TOOL¬BEFORE¬MAKING¬ANY¬
ADJUSTMENTS¬CHANGING¬ACCESSORIES¬OR¬
STORING¬POWER¬TOOLS¬3UCHåPREVENTIVEåSAFETYå
MEASURESåREDUCEåTHEåRISKåOFåSTARTINGåTHEå
POWERåTOOLåACCIDENTALLY
D¬ 3TORE¬IDLE¬POWER¬TOOLS¬OUT¬OF¬THE¬REACH¬
OF¬CHILDREN¬AND¬DO¬NOT¬ALLOW¬PERSONS¬
UNFAMILIAR¬WITH¬THE¬POWER¬TOOL¬OR¬THESE¬
INSTRUCTIONS¬TO¬OPERATE¬THE¬POWER¬TOOL¬
0OWERåTOOLSåAREåDANGEROUSåINåTHEåHANDSåOFå
UNTRAINEDåUSERS
E¬ -AINTAIN¬POWER¬TOOLS¬#HECK¬FOR¬
MISALIGNMENT¬OR¬BINDING¬OF¬MOVING¬PARTS¬
BREAKAGE¬OF¬PARTS¬AND¬ANY¬OTHER¬CONDITION¬
THAT¬MAY¬AFFECT¬THE¬POWER¬TOOLS¬OPERATION¬
)F¬DAMAGED¬HAVE¬THE¬POWER¬TOOL¬REPAIRED¬

ENGLISH
6
5) SERVICE
Safety instructions for All
operations

ENGLISH
7
M¬ 2EGULARLY¬CLEAN¬THE¬POWER¬TOOLS¬AIR¬VENTS¬
4HEåMOTORSåFANåWILLåDRAWåTHEåDUSTåINSIDEå
THEåHOUSINGåANDåEXCESSIVEåACCUMULATIONå
OFåPOWDEREDåMETALåMAYåCAUSEåELECTRICALå
HAZARDS
N¬ $O¬NOT¬OPERATE¬THE¬POWER¬TOOL¬NEAR¬
FLAMMABLE¬MATERIALS¬3PARKSåCOULDåIGNITEå
THESEåMATERIALS
O¬ $O¬NOT¬USE¬ACCESSORIES¬THAT¬REQUIRE¬
LIQUID¬COOLANTS¬5SINGåWATERåORåOTHERåLIQUIDå
COOLANTSåMAYåRESULTåINåELECTROCUTIONåORåSHOCK
Further Safety instructions for All
operations
KICKBACK AND RELATED WARNINGS
+ICKBACKåISåAåSUDDENåREACTIONåTOåAåPINCHEDåORå
SNAGGEDåROTATINGåWHEELåBACKINGåPADåBRUSHåORå
ANYåOTHERåACCESSORYå0INCHINGåORåSNAGGINGåCAUSESå
RAPIDåSTALLINGåOFåTHEåROTATINGåACCESSORYåWHICHåINåTURNå
CAUSESåTHEåUNCONTROLLEDåPOWERåTOOLåTOåBEåFORCEDåINå
THEåDIRECTIONåOPPOSITEåOFåTHEåACCESSORYSåROTATIONåATå
THEåPOINTåOFåTHEåBINDINGå
&ORåEXAMPLEåIFåANåABRASIVEåWHEELåISåSNAGGEDåORå
PINCHEDåBYåTHEåWORKPIECEåTHEåEDGEåOFåTHEåWHEELå
THATåISåENTERINGåINTOåTHEåPINCHåPOINTåCANåDIGåINTOåTHEå
SURFACEåOFåTHEåMATERIALåCAUSINGåTHEåWHEELåTOåCLIMBå
OUTåORåKICKåOUTå4HEåWHEELåMAYåEITHERåJUMPåTOWARDå
ORåAWAYåFROMåTHEåOPERATORåDEPENDINGåONåDIRECTIONå
OFåTHEåWHEELSåMOVEMENTåATåTHEåPOINTåOFåPINCHINGå
!BRASIVEåWHEELSåMAYåALSOåBREAKåUNDERåTHESEå
CONDITIONS
+ICKBACKåISåTHEåRESULTåOFåTOOLåMISUSEåANDORåINCORRECTå
OPERATINGåPROCEDURESåORåCONDITIONSåANDåCANåBEå
AVOIDEDåBYåTAKINGåPROPERåPRECAUTIONSåASåGIVENå
BELOW
A¬ -AINTAIN¬A¬FIRM¬GRIP¬ON¬THE¬POWER¬TOOL¬
AND¬POSITION¬YOUR¬BODY¬AND¬ARM¬TO¬ALLOW¬
YOU¬TO¬RESIST¬KICKBACK¬FORCES¬!LWAYS¬USE¬
AUXILIARY¬HANDLE¬IF¬PROVIDED¬FOR¬MAXIMUM¬
CONTROL¬OVER¬KICKBACK¬OR¬TORQUE¬REACTION¬
DURING¬START¬UP¬4HEåOPERATORåCANåCONTROLå
TORQUEåREACTIONåORåKICKBACKåFORCESåIFåPROPERå
PRECAUTIONSåAREåTAKEN
B¬ .EVER¬PLACE¬YOUR¬HAND¬NEAR¬THE¬ROTATING¬
ACCESSORY¬!CCESSORYåMAYåKICKBACKåOVERå
YOURåHAND
C¬ $O¬NOT¬POSITION¬YOUR¬BODY¬IN¬THE¬AREA¬
WHERE¬POWER¬TOOL¬WILL¬MOVE¬IF¬KICKBACK¬
OCCURS¬+ICKBACKåWILLåPROPELåTHEåTOOLåINå
DIRECTIONåOPPOSITEåTOåTHEåWHEELSåMOVEMENTå
ATåTHEåPOINTåOFåSNAGGING
D¬ 5SE¬SPECIAL¬CARE¬WHEN¬WORKING¬CORNERS¬
SHARP¬EDGES¬ETC¬!VOID¬BOUNCING¬AND¬
SNAGGING¬THE¬ACCESSORYå#ORNERSåSHARPå
EDGESåORåBOUNCINGåHAVEåAåTENDENCYåTOåSNAGå
THEåROTATINGåACCESSORYåANDåCAUSEåLOSSåOFå
CONTROLåORåKICKBACK
E¬ $O¬NOT¬ATTACH¬A¬SAW¬CHAIN¬WOODCARVING¬
BLADE¬OR¬TOOTHED¬SAW¬BLADE¬3UCHåBLADESå
CREATEåFREQUENTåKICKBACKåANDåLOSSåOFåCONTROL
Safety Warnings Specific for
Polishing operations
Aå¬ $O¬NOT¬ALLOW¬ANY¬LOOSE¬PORTION¬OF¬THE¬
POLISHING¬BONNET¬OR¬ITS¬ATTACHMENT¬STRINGS¬
TO¬SPIN¬FREELY¬4UCK¬AWAY¬OR¬TRIM¬ANY¬LOOSE¬
ATTACHMENT¬STRINGSå,OOSEåANDåSPINNINGå
ATTACHMENTåSTRINGSåCANåENTANGLEåYOURåFINGERSå
ORåSNAGåONåTHEåWORKPIECE
Bå¬ 7HEN¬ADDING¬LUBRICATING¬OIL¬AND¬CHANGING¬
ACCESSORIES¬PLEASE¬FOLLOW¬THIS¬MANUAL¬
INSTRUCTION
Cå¬ 4HE¬HANDLE¬MUST¬KEEP¬DRY¬CLEAN¬AND¬
WITHOUT¬OIL
Additional Specific Safety
instructions for Polishers
så¬ !LWAYS¬USE¬EYE¬PROTECTIONå!LLåUSERSåANDå
BYSTANDERSåMUSTåWEARåEYEåPROTECTIONåTHATå
CONFORMSåTOå!.3)å:
så¬ #LEAN¬OUT¬YOUR¬TOOL¬OFTEN¬ESPECIALLY¬
AFTER¬HEAVY¬USEå$USTåANDåGRITåCONTAININGå
METALåPARTICLESåOFTENåACCUMULATEåONåINTERIORå
SURFACESåANDåCOULDåCREATEåANåELECTRICåSHOCKå
HAZARD
så¬ $O¬NOT¬OPERATE¬THIS¬TOOL¬FOR¬LONG¬PERIODS¬
OF¬TIME¬6IBRATIONåCAUSEDåBYåTHEåOPERATINGå
ACTIONåOFåTHISåTOOLåMAYåCAUSEåPERMANENTå
INJURYåTOåFINGERSåHANDSåANDåARMSå5SEåGLOVESå
TOåPROVIDEåEXTRAåCUSHIONåTAKEåFREQUENTåRESTå
PERIODSåANDåLIMITåDAILYåTIMEåOFåUSE
så¬ !IR¬VENTS¬OFTEN¬COVER¬MOVING¬PARTS¬AND¬
SHOULD¬BE¬AVOIDED¬,OOSEåCLOTHESåJEWELRYå
ORåLONGåHAIRåCANåBEåCAUGHTåINåMOVINGåPARTSå
åååWARNING:å!,7!93åUSEåSAFETYå
GLASSESå%VERYDAYåEYEGLASSESåAREå
./4åSAFETYåGLASSESå!LSOåUSEåFACEåORå
DUSTåMASKåIFåCUTTINGåOPERATIONåISåDUSTYå
!,7!93å7%!2å#%24)&)%$å3!&%49å
%15)0-%.4
åååWARNING:å!LWAYS¬WEAR¬PROPER¬
PERSONAL¬HEARING¬PROTECTION¬THAT¬
CONFORMS¬TO¬!.3)¬3¬3¬
DURING¬USE¬5NDERåSOMEåCONDITIONSåANDå

E N G L I S H
8
WARNING:
CAUTION:
V..........volts
A..............amperes
Hz........hertz
W............watts
min......minutes
..........alternating current
....direct current
n............rated speed
........Class II Construction
..........safety alert symbol
........earthing terminal
…/min....revolutions per minute
Save These Instructions
Motor
Your DEWALT tool is powered by a DEWALT-built
motor. Be sure your power supply agrees with the
nameplate marking. Voltage decrease of more than
10% will cause loss of power and overheating.
DEWALT tools are factory tested; if this tool does not
operate, check power supply.
Components (fig. 1)
WARNING: Never modify the power
tool or any part of it. Damage or personal
injury could result.
A. Speed control wheel
B. Hook and loop backing pad
C. Variable speed trigger switch
D. Brush inspection cap
E. Spindle lock button
G. Trigger locking button
H. D-handle
I. Spindle
J. Soft rubber gear case cover
K. Wool ingestion shield
L. Screw
INTENDED USE
The DWP849XD heavy-duty polishers are designed
for professional use at various work sites (i.e.,
construction sites). Do not use under humid
conditions or in presence of flammable liquids or
gases.
The DWP849XD heavy-duty polishers are professional
power tools. Do not let children come into contact
with the tool. Supervision is required when
inexperienced operators use this tool.
Variable Speed Trigger Switch (fig. 1)
These tools are equipped with a variable speed
trigger switch that permits speed control from 0 to
3500 RPM. To turn the tool on, squeeze the trigger
switch (C) shown in Figure 1 until the tool starts to
run. The farther you depress the trigger, the faster it
will operate. Releasing the trigger turns the tool off.
Use lower speeds for applying liquid waxes and
polishes and higher speeds for removing dried
liquid. Use the highest speed (fully depress trigger)
for buffing the car to a final lustre.The tool can be
locked on for continuous use by squeezing the
trigger switch fully and depressing the lock button
(G) shown in Figure 1. Hold the lock button in as
you gently release the trigger switch. The tool will

ENGLISH
9
continue to run. To turn the tool off from a locked-
on position, squeeze and release the trigger switch
once. Do not unplug the tool with the switch in
the locked-on condition. Make sure the tool is not
locked on when plugging in. If the tool is plugged
back in with the switch in the locked-on position, the
tool will not run until the lock button (G) is depressed
(no-volt release).
NOTE: The trigger switch can only be locked
on with the tool running at the maximum RPM
designated by the speed control wheel (A).
Speed control Wheel (fig. 1)
The maximum speed of your tool can be changed
by rotating the speed control wheel (A) to the
desired setting. The wheel incorporates detents to
prevent inadvertent wheel movement and to facilitate
speed selection. For added versatility, the trigger
switch may be locked in its full on position and tool
speed changed by means of the speed control
wheel (A) alone.The electronic speed control not
only lets you select the speed to suit the job, but
also helps to maintain that speed as you load the
tool by pressing down. It’s this feature, coupled with
the variable speed trigger switch, that make this tool
such a value.
The speed control wheel (A) can be set for any
speed between 600 and 3500 RPM and the variable
speed switch will then control tool speed from zero
to the wheel setting. For example: A control wheel
setting of 2200 RPM will allow the variable speed
switch to operate the tool between zero and 2200
RPM, depending on how far the trigger switch is
depressed. A wheel setting of 600 RPM would allow
the switch to operate the tool from zero to 600
RPM.
The electronic speed control feature comes into play
whenever the trigger switch is fully depressed and
the tool is running at the selected speed determined
by the setting of the control wheel. As you load the
tool by pushing it down on the work surface, (with
the trigger fully depressed) the electronic circuit
inside the tool will compensate for the loading and
maintain the selected speed. If the speed selected
by the control wheel is 2200 RPM, as in the
example above, the tool will maintain 2200 RPM, as
it is loaded.
It is important to remember two things about
electronic speed control:
1. The electronic speed control operates only
when the trigger switch (C) is fully depressed.
2. The effect of electronic speed control is much
easier to observe at lower speed settings
(2600 RPM and below), than at high speeds.
As the tool approaches 3000 RPM, the effect
is considerably less dramatic.
Keep in mind that, with a conventional polisher
running at a typical no-load speed of 2400 RPM,
the tool slows down to about 2000 RPM under a
polishing load. Your DWP894X will continue to run
at 2400 RPM (or any speed you select with the
control wheel) as a load is applied. Since it doesn’t
slow down, the speed may be greater than you’re
used to, so some extra caution should be observed
until you get the “feel” of your polisher. If you feel the
speed is too great, you can, of course, slow the tool
down with either the trigger switch or the control
wheel.
Spindle Lock Button (fig. 1)
ååWARNING:ååå4O¬REDUCE¬THE¬RISK¬OF¬
SERIOUS¬PERSONAL¬INJURY¬TURN¬TOOL¬OFF¬
AND¬DISCONNECT¬TOOL¬FROM¬POWER¬
SOURCE¬BEFORE¬MAKING¬ANY¬ADJUSTMENTS¬
OR¬REMOVINGINSTALLING¬ATTACHMENTS¬OR¬
ACCESSORIES¬"EFORE¬RECONNECTING¬THE¬
TOOL¬DEPRESS¬AND¬RELEASE¬THE¬TRIGGER¬
SWITCH¬TO¬ENSURE¬THAT¬THE¬TOOL¬IS¬OFF
In order to prevent the spindle of the tool from
rotating while installing or removing accessories, a
spindle lock button (E) has been provided in the gear
head of the machine. To lock the spindle, depress
and hold the lock button. NEVER DEPRESS
THE SPINDLE LOCK BUTTON WITH THE TOOL
RUNNING OR COASTING.
Wool Ingestion Shields (fig. 1, 2)
The wool ingestion shields (K) are designed to
reduce the amount of wool, dust, and debris that
gets ingested by the motor during normal use. The
goal of the ingestion shields is to improve durability
as compared to a unit without the ingestion shields.
Each ingestion shield can be easily removed for
cleaning by removing the mounting screw (L),
followed by sliding the shield back towards the
trigger end of the tool and then lifting it off. The wool
ingestion shields can be cleaned with soap and
water and a soft bristle brush in the event they get
clogged with polish and debris. Clean the shields
as soon as you start to see buildup on the outside.
Your tool may come with a set of wool ingestion
shields. The wool ingestion shields are available
at extra cost from your local dealer or authorized
service center.


ENGLISH
10
Soft Rubber Gear Case Cover (fig. 1)
The soft rubber gear case cover (J) is designed
to eliminate metal gear case scuffs on painted or
polished surfaces.
The soft rubber gear case cover can be removed
if required. To take off the cover, remove the three
mounting screws and lift the cover over the gear
case.
Your tool may come with a soft rubber gear case
cover. The soft rubber gear case cover is available
at extra cost from your local dealer or authorized
service center.
Operation
WARNING:
Attaching And Removing Polishing
Pads (fig. 3B)
WARNING:
NOTE:
TO ATTACH POLISHING PAD WITH HOOK AND LOOP
BACKING PAD (fig. 3B)
1. Attach hook and loop foam or wool pad (P) to
hook and loop backing pad (Q), being careful to
center the backing pad with the foam or wool pad.
2. Screw backing pad (Q) onto spindle (I), while
depressing spindle lock button (E).
TO REMOVE PADS
Turn them by hand in the opposite direction from
normal rotation to allow lock button to engage
spindle, then unscrew pads in normal direction for
right-hand thread.
Polishing
These instructions and suggestions are intended to
familiarize new operators in overall general operation
of power polishing. You will develop your own
techniques which will make the job easier and faster
as you learn power polishing.
You should use utmost care when power
polishing around or over sharp objects and
contours of the car body. It is very important
to use the correct pressure while polishing
various sections of an automobile body. For
example, light pressure should be applied
when polishing over sharp edges of body
panels, or over edges of the rain gutter along
the top.
Since everyone does not use the same type
of power polish, we recommend you clean
and polish a test section on a flat area of the
car first. From this
the strength or cleaning action of your power
polish.
same. Different brands will react differently
on various painted surfaces. Also, you are
now using a power polisher with power
polish. This is entirely different from any
hand application which you may have done
before. Wash the car before power polishing
it. Washing will remove loose dirt, scum, road
salt, etc. which could act as an abrasive and
damage paint. Loose dirt, etc. will also clog
the polishing pad and you will have to clean it
more often.
handles of the tool and pick it up. Keep the
tool away from your body and depress the
trigger switch. Make sure you have a firm
grip on the handles and operate the tool
freely without forced effort or unnecessary
pressure. The side handle can be easily
changed to either side of the tool for left-
handed or right-handed operation.
NOTE:

ENGLISH
11
Maintenance
Your DEWALT power tool has been designed to
operate over a long period of time with a minimum
of maintenance. Continuous satisfactory operation
depends upon proper tool care and regular cleaning.
ååWARNING:åå4O¬REDUCE¬THE¬RISK¬OF¬
SERIOUS¬PERSONAL¬INJURY¬TURN¬TOOL¬OFF¬
AND¬DISCONNECT¬TOOL¬FROM¬POWER¬
SOURCE¬BEFORE¬MAKING¬ANY¬ADJUSTMENTS¬
OR¬REMOVINGINSTALLING¬ATTACHMENTS¬OR¬
ACCESSORIES¬"EFORE¬RECONNECTING¬THE¬
TOOL¬DEPRESS¬AND¬RELEASE¬THE¬TRIGGER¬
SWITCH¬TO¬ENSURE¬THAT¬THE¬TOOL¬IS¬OFF
Cleaning
ååWARNING:åå"LOWåDIRTåANDåDUSTåOUTåOFåALLå
AIRåVENTSåWITHåDRYåAIRåATåLEASTåONCEåAåWEEKå
7EARåPROPERå!.3)å:å#!.#3!å
:åEYEåPROTECTIONåANDåPROPERå.)/3(
/3(!-3(!åRESPIRATORYåPROTECTIONåWHENå
PERFORMINGåTHISå
ååWARNING:åå.EVERåUSEåSOLVENTSåORåOTHERå
HARSHåCHEMICALSåFORåCLEANINGåTHEåNON
METALLICåPARTSåOFåTHEåTOOLå4HESEåCHEMICALSå
MAYåWEAKENåTHEåPLASTICåMATERIALSåUSEDåINå
THESEåPARTSå5SEåAåCLOTHåDAMPENEDåONLYå
WITHåWATERåANDåMILDåSOAPå.EVERåLETåANYå
LIQUIDåGETåINSIDEåTHEåTOOLåNEVERåIMMERSEå
ANYåPARTåOFåTHEåTOOLåINTOåAåLIQUIDå
Lubrication
DEWALT tools are properly lubricated at the factory
and are ready for use. Tools should be relubricated
regularly every sixty days to six months, depending
on usage. (Tools used constantly on production or
heavy-duty jobs and tools exposed to heat may
require more frequent lubrication.) This lubrication
should only be attempted by trained power tool
repairpersons such as those at DEWALT service
centers or other authorized service locations.
Motor Brushes
Be sure tool is unplugged before inspecting brushes.
Carbon brushes should be regularly inspected for
wear. To inspect brushes, unscrew the plastic brush
inspection caps (located in the sides of the motor
housing) and the spring and brush assemblies may
be withdrawn from the tool. Keep brushes clean and
sliding freely in their guides.
ååCAUTION: /NLYåUSEåTHEå$%7!,4å
QUALIFIEDåCARBONåBRUSHåDESIGNEDåFORå
THISåTOOLåCONSULTåYOURåLOCALåDEALERåORå
AUTHORIZEDåSERVICEåCENERåFORåCORRECTå
CARBONåBRUSHåå5SEåOFåCARBONåBRUSHåNOTå
DESIGNEDåFORåTHISåTOOLåORåNOTåQUALIFIEDåBYå
$%7!,4åMAYåDAMAGEåTHEåTOOLåANDåMAYå
RESULTåSERIOUSåINJURY
ACCESSORIES
ååWARNING:ååå3INCEåACCESSORIESåOTHERå
THANåTHOSEåOFFEREDåBYå$%7!,4åHAVEåNOTå
BEENåTESTEDåWITHåTHISåPRODUCTåUSEåOFå
SUCHåACCESSORIESåWITHåTHISåTOOLåCOULDåBEå
HAZARDOUSå4OåREDUCEåTHEåRISKåOFåINJURYå
ONLYå$%7!,4åRECOMMENDEDåACCESSORIESå
SHOULDåBEåUSEDåWITHåTHISåPRODUCT
Recommended accessories for use with your tool
are available at extra cost from your local dealer or
authorized service center. If you need assistance
in locating any accessory, please contact local
DEWALT sales.
Use only accessories having a maximum operating
speed at least as high as the highest “RATED RPM”
marked on the tool’s nameplate. This precaution
applies to any accessory on any tool.
så 2UBBERåBACKINGåPADSåvååCMå1UICKå
Change Super Flexible Rubber Backing Pad
(includes clamp washer)
så vååCMåHOOKåANDåLOOPåBACKINGåPADSå
så 3OFTåRUBBERåGEARåCASEåCOVER
så 7OOLåINGESTIONåSHIELDSå
så !UXILIARYåHANDLEå
så "ALEåHANDLE
Repairs
To assure product SAFETY and RELIABILITY,
repairs, maintenance and adjustments (including
brush inspection and replacement) should be
performed by a DEWALT factory service center, a
DEWALT authorized service center or other qualified
service personnel. Always use identical replacement
parts.

Optional accessories
åååWARNING:å3INCEåACCESSORIESåOTHERå
THANåTHOSEåOFFEREDåBYå$%7!,4åHAVEå
NOTåBEENåTESTEDåWITHåTHISåPRODUCTåUSEå
OFåSUCHåACCESSORIESåWITHåTHISåTOOLåCOULDå
BEåHAZARDOUSå4OåREDUCEåTHEåRISKåOFå
INJURYåONLYå$%7!,4åRECOMMENDEDå
ACCESSORIESåSHOULDåBEåUSEDåWITHåTHISå
PRODUCT
Consult your dealer for further information on the
appropriate accessories.
Accessory maintenance
Accessory maintenance at the right time guarantees
optimal results in application and a long and efficient
accessory life.
Protecting the environment
Separate collection. This product must
not be disposed of with normal
household waste.
Should you find one day that your DEWALT product
needs replacement, or if it is of no further use to you,
do not dispose of it with household waste. Make this
product available for separate collection.
Separate collection of used products
and packaging allows materials to be
recycled and used again. Re-use of
recycled materials helps prevent
environmental pollution and reduces
the demand for raw materials.
Local regulations may provide for separate collection
of electrical products from the household, at
municipal waste sites or by the retailer when you
purchase a new product.
12
ENGLISH

13
220
1250
50
M14
3.0
DWP849XD
0-600/0-3500
D

এѽИކ
14
G
H
I
ٖҀ֪֩
ҐܕٖҀ֪֩ࡍոރш澞ࢌвչ௲֫
֪ѫږՇзݻ澞
Ј֧ބࢺױޥބ䃎Ѽ澝ࠩѼۋ
طࣩࢺЇݒҀࣔԇٖҿ澞ԈٗӀфࣿ
ࢮѫࢵࣆঞظ۪ࡈѽ澞
Ҩۋݳীڏդݒউࣔԇٖҿ澞ӣڶ
ѫ҅҂ݹߠݏӲ澞
G
H
I
J
K
L
ࣔࠩ،ҵ
L
M
૯ڡ澞Љءߠ߆۪҃٫ս澞એ
҂ףՇ澝߆չଓԈୂў澞ءߠ
߆澝۪҃ՇՕѫԲҵԈୂў澞
ױ߈ܶ҇гܭㆌ澝୳طהܯ࣐ࣩ
ӨҐєњܯ؎װЋ࣐҄ڰڡ澞҅
пՕӗصㆼږԮக澞
G
H
I
J
K
M
L
ࣔԇٖҿ࣐҄ոࡉڿж
Јࢃ࣐ࣔԇٖҿߠܨ࣐࣐҄૯ڡࣩࣔ
ԇٖҿ澞ଣଠڢગઋௌؔқԈٗӀ
ѫ҅҂ٗҁ߄ݼ澝؍Ҷ澞
ױ߈ڏһЈৗܯૹۋһݮٖҿࣔࡼӨЈৗ
࣐҄ࣔԇٖҿ澞ЉڐҼߛݏӲԈ
ٗӀީԮகЌڷீғࣲ澞
֧ૡџѽઁৼ澝ޟܦଡ଼ѝۋખࣔԇٖҿ
УӸ ڶஏёࣔࡼІ܄ܫܷעոۋذࣔ࠱
ࣲড়ڏࣔࡼ澞அܔۅݒޑرӗصԈٗ
ӀࣀԈԮக澞
ذ୍ࣔԇٖҿખ֧ҨےՂ֟Уט
ٶЋЈЈ㕎ࣔԇٖҿۋتૠоރЈ
гࣩъݒҀࣔԇٖҿ澞ԈٗӀ֨ߌઐ
ীۯ۴ИީԮக澞
Ґ⠽ࣔԇٖҿ澞ࠒ߲Ԉୂў؍Ҟ۪ٛ
Ԫѻ澝னў݃ەӑչڧրԈٗӀ
ҿ؉ߚў澞ײ߄ְ݃ԈٗӀڷீ֨҅
ӹғࣲױ澞કךзݻܔЉԈٗӀ
ږՇ澞
Ґܕӣӷٖҿ敘Ӯոࡍ澞ґ⡭ױ߄敘
ӯӤӸ⣕ӢӀЉޣԪѻ৲ЌؠޣݏӲ澞
ܘ࣐҄ރЯјՂ࣐ࣩۙ҄ࣔԇٖҿࣩ
ࢤֹࣩࠛ࠭ݱړিҀЎѝոૡ
ࣩҀЎ࣐҄ࣔԇٖҿ澝ଡ଼ѝոٖҿࣩӡע
澞ԈٗӀҁпЊࡌЉঅݱҁՕ
ѫحԮகەӑ澞
G
H
ঢҒ
ذҁࣩࣔԇٖҿ૮рЊЎঢҒъճڶஏ҄
࣐բߞࣩהѝૡޟܦ澞߽ґ۱ғ
ԈٗӀ؍Ҷۅ澞
ঢҒݿԆڶ࣐҄ܗࣩؓକѝٶଇ؋ޯەӅ
Зһиঢ۵Ӣࣩރ澞҅ߌ܅ӕ۪ע
ݼୂўԯ҅ସڲдܔપޢЭՕଭۨ
ઇԮக۪ৱѯ؞澞
ࣔԇٖҿܷעڶஏЉܷچࣼକ澞Јৗјџѽ
ݱړݘܷע澞ݎ֪ԈٗӀЉ҅
ѠѾ݅ݖף澞ߌݷݖףչݖ
ڇرӗصઇԮக澞
ଈұъѼܯܯ֩ױଂ澝ݢ䏣࢜ո
Ӎ澞ײߧ҂૯ѽݎ֪ѫԆઇԮக澞
Јڰذࣔԇٖҿޛ֧୶Зۋ䉦ࡹࢺЗ澞
ࡊҵԈٗӀرԆઇԮக澞
Јڰࢃ࣐ࣔ澞জЈৗ࣐ࣔܿ澝ۿԇࣔ
ԇٖҿۋ܄ӞҾܷע澞Ԯޟܦޥܤࣩ֯
ࣔࡼ澞એԈٗӀଓࢽ澝澝୩ଆ۪
Ԉୂў澞Չ۪݃僸িѫԆઇԮக澞
ڡ֧ېט࣐҄ࣔԇٖҿݿ࣐҄૯՟ېט҄
࣐ࣩטܯࣔ澞ଠՠۯי҅িرӗص
ઇԮக澞
ױ߈ڶஏ֧䉦ࡹ֪՟࣐҄ࣔԇٖҿ࣐҄
ࢆࣔҐ۵֗8)*澞҅8)*ՕѺઇԮ
க澞
G
H
I
J
K
ъા،ҵ
ҐܕڡݒҀࣔԇٖҿݿһࡉےёжࣩ
ݒҀٶҐܕଘ澞Ӥԓ֨߄䡖Қ澝哦࣒澝େ
ত۪࡞ՆځЈݱҁԈٗӀ澞֨ݱҁԈ
ٗӀߊতԃӣށѫحЕ୍ы૯ѯ؞澞
࣐҄،ҵ澞ৄ҃ۮܔ୶澞؍Ҷ
ભײଠڢߚўЈஅظவӀ澝அ࢝؍Ҷ枉澝
؍Ҷٰ澝ծԃஅܔঈӗصы૯ѯ؞澞
ଈұծԇ澞ґڐҼ֨ݖҵݖףޞהй
Ҽލѹ澞۴ܶݹ֨ٝݎପ࢛ڐҼЇ۪ڐ
ҼהйݎପޞݖҵݖףՕѫحԮக澞
֧ࣔԇٖҿܯૹУӸܔܫےޥઁৼଦ⦅ۋ
ۥە澞֨ԈٗӀޔனўЇ܄۴۪
ୗ⦵ѫحы૯ѯ؞澞
ەЈѴڰמେ澞ޞӶࡨ۞Јչ૯ѽٵ澞
߽֨۞יەӑЈڮױ֪ݏӲԈٗӀ澞

এѽИކ
15
G
H
I
J
K
L
N
O
M
ࣔԇٖҿފ࣐иؗࢻ۳үԄৗࣩ澞ஃય
சથԈٗӀݕ҈۱߄؍Ҷઊճ澝પޢ澝
֣આչઁؔ澞Љдઆ▲Ј۱ӧ۱߄પޢرح
Ӡ澝ࢮչ۪Е୍ѯ؞澞
Јܱ࣐ࣔԇٖҿ ૡױ䩴䭍 澝䩴ү澝
ӲүۋӣݮݒҀ澞ԈٗӀЉܷܶؔԅ
ԾݱҁՕѫՇࣿԮகչږы૯ѯ؞澞
Ј࣐ࣩ҄ஂٖҿӱૼܱոЊୈࣩଡ଼
ѝ澞իөથўՕӱ҂ԈٗӀЇ
৲؉Љґચ؍Ҷݱҁ澞
ଡ଼ѝࣩؓૻڅڶஏ২شиࣔԇٖҿІߗ
Ӟࣩޣלૻڅ澞ўљࡁҿௌؔବچםବ
چѫՇࣿࣇչ࢚澞
ଡ଼ѝࣩטګոԻڅڶஏ֧ࣔԇٖҿؓৗԂ
֟УӃ澞Љ࠳ўؾتЉڱӱҭӣ
அܔ۪ݏӲ澞
䩴ૅ澝ࡄҹࣶ澝ஃֺۋџѽҾєଡ଼ѝࣩે
ؽةڶஏ૯՟и،ӰࣔԇٖҿࣩОેІ澞
٫ЊԈٗӀ؍ўЉўر
עଋچ㞦Ԉٷѫږעݏ澞
Ј࣐҄ܤࣩ֯ଡ଼ѝ澞֧ࠠࠊ࣐҄Ӹ߳ߓ
ଡ଼ѝ҅ױ䩴ૅފժޥ࢜ոফஃֺ
ފժޥࣩফ澝ۋڅ䭍ܤଥБӲފ
ժ߁ԇۋଟيБފժݮ澞ױ߈ࣔԇٖҿۋ
ଡ଼ѝ庝г߳ߓފժޥܤ֯ۋ،࠻ޥܤ
ࣩ֯ଡ଼ѝ澞߳ߓո،ଡ଼ѝդ১ٛոݳ
ীࣩѸૢݵૃଡ଼ѝࣩٴٶјࣔԇ
ٖҿޣלૉૻڅSOTְ݃ўପ
ٯ֨થؘޞѫ澞
ۏІ۵࣐ռ澞ߠܨ૯࣐㖊Ӑ࣐҄儺澝
،ҵ۵ࣹۋ،ҵ澞૯࣐ݿۏІط
儺澝խԂҐ۵֗澝ەոৗܛس䭍ݪۋٖ
ѝࣩٖ࢜Ҁ֟娕澞அܔ儺ڷீܺѻ՟
ݱҁфࣿㆼ澞அظவӀ۪Ս儺ڷீଋ
ࢡݱҁфࣿ梂ট澞ߊர֨ڠچ֙ג
Иѫږע৽澞
ݳীЉٖҀԙ־Ґܕ▁،ҵ澞џѽ
ૡҴٖҀԙ־ࣩъڶஏۏІ۵࣐ռ澞ٗў
۪݃ў࣌Օѫӟٷږবழ
P
Q
R
S
T
U
ݱҁԚֿޒৱѯ؞澞ӤԁўઇՃ٫
حিѫ҅ԈٗӀיரًனў٫
ٷ҅ݱҁৱઇ澞
҄ૢݵૃࣩଡ଼ѝ澞ײߧݏӲЉڢ
িՕӤލ۪僸ٷ҅ڱ҂۴۪۴
ՕԲҵޔўИ澞
ࣻӰଡ଼ѝ؎ҵҟࠓԇۖݚЇࣔԇٖҿ澞ޔ
ўՕѫ܍ѻவٷܞԈԈٗӀ৲
એ҂עԾثٗӀݏӲ澞
ڡ݁٪ࣔԇٖҿݿЈڏԇ؈澞۞י֪ઇՃ
ޔўՕѫ僸҂߆৲҅ўѯ؞
૯ѽ澞
কٮࣂࣔԇٖҿࣩૹՌ澞Ԉ۳ѫر
ࢱظ⩽ߑדଋךًঞߍࡘѫح
ࡈԮக澞
Ј֧ބݪଡ଼ѝݒҀࣔԇٖҿ澞ࢮޤՕ
ѫࢵࣆпߕމ澞
Ј࣐࣐҄ӑԯ䃎ࣩଡ଼ѝ澞ࡊ۪ҿѕӒ
䃠Օѫح勵埗۪Ӡ澞
تےޥݒҀࣩૡ▁ࠖ،ҵރ
Յڞոࣼһղ
Նڟީ֜Ԫѻ۪僸ѻޔ䩵澝ழֻ澝ୖВ
ӳ۪ҿѕў৲фࣿࣀՆҁԃ澞Ԫѻ۪僸
ѫږޔўଊବׇசФ҅עݏԈٗ
Ӏ֨ԪѻࢵфࣿЊўޔސէՆԈ澞
҆ײײߧ䩵ٗҁ僸۪ԪѻѵҵԪѻࢵ
䩵ଆՕѫҵߕމவ৲ږ䩵ࣉӟ۪Ն
ڟ澞䩵Օէ۪ݱҁৱՈӐй䩵֨
ԪѻࢵԈސէ澞֨࠴ߚўЈ䩵ЭՕ澞
ՆڟީԈٗӀનչ۪Љ࠳ݱҁٗپ۪ߚў
ৈߧՕљପଋՈљЈোӟଠڢஅݒޑڱ
љହҲ澞
ےޥݒҀࣩ࣐҄ރЯ
ܒҰݱҁ ପ؍Ҷઊճ
G
H
Ґܕܸࣔԇٖҿ҄ҁࣩાѼոەדи
ࠔࢩ㓆јۺ۱ՅڞԂױޥોԈەߍӨ
▁࣐ࣻ҄јҍޣלୡڅܰӱѺફԇݿࣩ
ՅڞԂۋՅԂ澞ײՈՠଠஅݒޑ
ݱҁৱؼՕљݏӲՆԃ۪Նڟԃ澞
জЈৗذەஃݵૃଡ଼ѝ澞ўՕѫՆڟ
ӱ۴澞

16
V .......... A..............
Hz ........ W ............
min ...... ..........
.... n............
........ ..........
........ …r/min ....

17

18

এѽИކ
19
ރ͵ܒҰ儺֨ࡖ૱வବݦݳՕ֨
ߎٗӀًୂӣфࣿல澞ײߧઇՃЗ
ًୂѹՕ߄ளٯૹڳઇ۟ͺ
֨࢘چૻѺמࡈ۟ѫޢު▲п澞
࣫ީ࡚߄Ԯ؞澞ѸОдґચЉީ
ࡈݻஞڏઑرٗӀܳӱڱѭғИڶࠒ߲澞
ղ͵НгୠѹДଜъાѮ؝ࣩ
֧تٖҿૡџѽઁݦۋ۽Բ،џѽ
ଡ଼ѝۋକѝУӸһٖҿٶЋݮڏ
ࣔࡼ澞ଜݰܷІٖҿࣔࡼУӸܘЇ
ٶ߁ڏՆڏһјҐٖҿٜকһ澞
ঢ۵
ߎڱѭԈٗӀગઋতՕљߊ҅юߢ
صܔ澞କڱјыࢠ۞ٗҁݼߧۓ
ҟՠଠґ⡭չؔߊࢎ澞
ղ͵ٴ䓓Թঢ়ࡈ⩾۱߄ࡈՍ
Їঞظչࢱظصյ▲ࠩ澞
▲࠵ޞબ҃ۮଠڢঅՠ'49/
@)'4)9'@߶ӕܔ
וљՃՠଠঅՠ4/59.59.'
39.'ࡌշ⩽ґܔ֘澞
ࡍ
ղ͵Ӥԓ҅䇎ӷ۪ҿ؉ӵࢬۅԗ؆
սߛࢎٗӀளًୂў澞пԗ؆
սՕӸڞனўИ҅⸾މߕމ澞Ց
҅㝔٢垕Иۅ剘䤞ࡊࢎ澞ԓ
҅ѠѾ䃠ѽҵٗӀͺԓ҅ٗӀѠѾ
ୂӣ䂫ҵ䃠ѽИ澞
࣪ޞՕைয֪䃔࢝澞Ԇ䃔࢝ٗ
ҁڷீՉଋઐীғࣲыմ澞҆ײ֨ڱѭ
ғИڶ۪ҿ؉݉ߓғ֪ࢵՉଋઐীыմ澞
䃂ࡾ
ڱѭٗӀ֨ӟԴޞٝଠڢ䃔࢝Օ҈சޞ҅澞
ஜמЗ߃ځ୍ޏ䃔࢝ٗӀޞં
҅ەӑ৲ؔ澞ٯйࣿф澝ٴ୍ࡴ澝۪
ப䬚Ӳ
ࠒ߲䬛ӳӹԇڷܣЈݖף澞ؔߊࠒ߲䬛ӳ䭎
݃ەӑ澞ࠒ߲䬛ӳސࡣ㝲Ј䬛ӳ⸾މࠒٰ߲ѹ
йߑדДҋ䬛ӳুўؼՕљђٗӀЇՈЈ澞
ґܴӳࢎ҅Ф֨حࠤӄ࢝Ԉ澞
ࡉڿ͵юՕ҅ߎٗӀܶؔ澝ڱѭઍ
ચ䬛ӳ澞Ҽй䬛ӳ࠳ֺ՚બջ
તڢ֪ன։۪݉ߓ߆ԇИڶ澞ײߧ҅
ளߎٗӀܶؔ䬛ӳ澝۪҅ளڱѭ
ઍચ䬛ӳѫְ݃ٗӀٷՕحЕ
୍ы૯ѯ؞
ઊճйளڱѭ҈ځў࡚߄ଋ
ߎߑ҅ࡹડ֜࠴҅пўՕ
֨Ԯ؞澞Одӗصы૯ѯ؞க
બ֨ߎٗӀЇю҅ڱѭݐў澞
ݐ҅ў֨ڢ֪୦۪݉ߓғИڶ߄։
ોԥࣞݶՈ澞ײߧ҂֨؍ўޞԣԉબ
չߎ֪ڱѭ୦։ୂ৻澞
ў߂םବچځصଇӱٗӀ政࣎Ї߂
Ȕௌؔବȕ澞ߎઊճଠйѠѾٗӀЇѠѾў澞
କѝ
ș
ș
ș
௸ঔࠨஅܔ
১ࡃஅܔ儺
ૼԉ۴߬
ș
șࠨֻԻজڽବ݅ڟࠨ
ֻԕܬצবֻ֥
Իজ௧ߐݟۻֻ
ঢҒ
Одґߎфս؍ҶۅչՕழۅҿғ澝ܔ
չલԕܬ䬛ӳࠒ߲Њ݅ځڱѭԴ؟澝ڱ
ѭ݉ߓ߆ԇИڶ۪ҿ؉Ӏ߄ૅ߆ԇыմ澞
Ӥઓ҅գ݅ୂў澞
߄Ҽՠଠўદূމબջતڢ֪ன։澞
ղ͵йளڱѭ҈ځў࡚߄ଋ
ߎߑ҅ࡹડ֜࠴҅пўՕ
֨Ԯ؞澞Одӗصы૯ѯ؞க
બ֨ߎٗӀЇю҅ڱѭݐў澞
Քକѝ
Table of contents
Other DeWalt Sander manuals

DeWalt
DeWalt DW443 User manual

DeWalt
DeWalt DCW210 User manual

DeWalt
DeWalt DW849 User manual

DeWalt
DeWalt DCW210N-XJ User manual

DeWalt
DeWalt DWE6423 User manual

DeWalt
DeWalt dwe6411 User manual

DeWalt
DeWalt dwe6411 User manual

DeWalt
DeWalt dwe6411 User manual

DeWalt
DeWalt DWP352VS User manual

DeWalt
DeWalt D26441 User manual

DeWalt
DeWalt dwe6411 User manual

DeWalt
DeWalt DW650 User manual

DeWalt
DeWalt DW849 User manual

DeWalt
DeWalt DCW220 User manual

DeWalt
DeWalt D26480 User manual

DeWalt
DeWalt DW411 User manual

DeWalt
DeWalt DW488 User manual

DeWalt
DeWalt DCM848 User manual

DeWalt
DeWalt dwe6411 User manual

DeWalt
DeWalt DW849 User manual