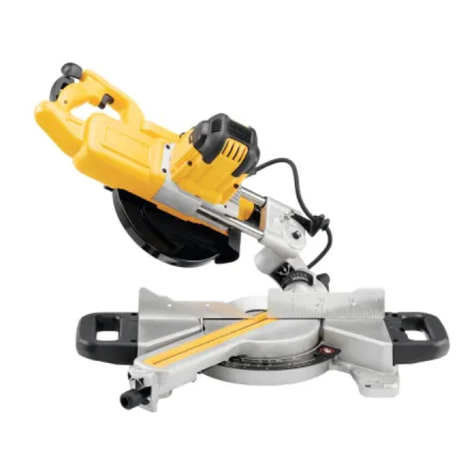
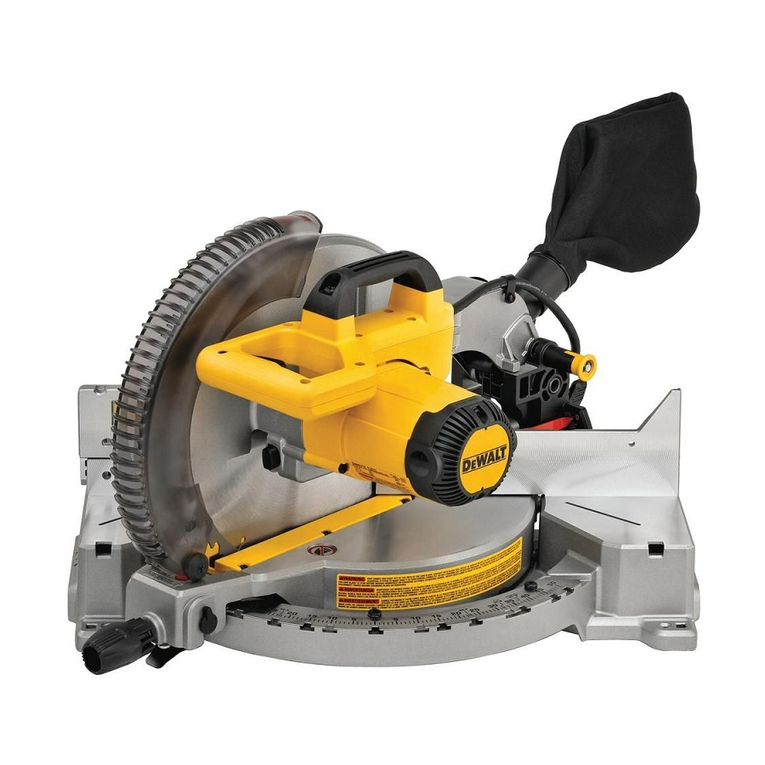
DeWalt D28710 User manual

www. .eu D28710

2
English (original instructions) 5
Français (traduction de la notice d’instructions originale) 13
ﺍﻝﻉﺭﺏﻱﺓ (ﻡﺕﺭﺝﻡ ﻉﻥ ﺍﻝﺕﻉﻝﻱﻡﺍﺕ ﺍﻝﺃﺹﻝﻱﺓ)22
Copyright DEWALT

1
v
f
e
a
b
q
p
o
n
m
l
j
i
h
u
s
t
Figure 1 c
k
g
r
r
d

2
Figure 2
ee
ff
Figure 3B
w
p
o
l
x
y
z
aa
bb
Figure 3A
m
n
i
dd
cc

3
gg hh
Figure 3C Figure 3D
l
i
ii
Figure 4
i
kk
jj
ii
ll
Figure 5
c

4
Figure 6 Figure 7

ENGLISH
5
CHOPSAW
D28710
Congratulations!
You have chosen a DEWALT tool. Years of
experience, thorough product development and
innovation make DEWALT one of the most reliable
partners for professional power tool users.
Technical Data
D28710-B4 D28710-B5
Voltage V 127 220–240
Type 1 1
Power input W 2200 2200
No-load speed min-1 3800 3800
Min. peripheral speed
cutting disc m/s 80 80
Disc diameter mm 355 355
Disc bore mm 25.4 25.4
Disc body thickness mm 3.1 3.1
Type of cutting disc straight, straight,
non-recessed non-recessed
Cross-cutting capacity at 90°
circular mm 130
square mm 120 x 120
rectangular mm 115 x 130
angular mm 137 x 137
Cross-cutting capacity at 45°
circular mm 115
square mm 107 x 107
rectangular mm 115 x 107
angular mm 115 x 115
Weight kg 16.6 16.6
LPA (sound pressure) dB(A)
92.3 92.3
K PA
(sound pressure
uncertainty) dB(A)
3.0 3.0
L WA
(sound power) dB(A)
105.3 105.3
KWA (sound power
uncertainty) dB(A)
3.0 3.0
Vibration total values (triax vector sum) determined according to
EN 61029:
Vibration emission value a
h
a
h
=
m/s²
3.3 3.3
Uncertainty K = m/s²
1.5 1.5
The vibration emission level given in this information
sheet has been measured in accordance with a
standardised test given in EN 61029 and may be
used to compare one tool with another. It may be
used for a preliminary assessment of exposure.
WARNING: The declared vibration
emission level represents the main
applications of the tool. However if the
tool is used for different applications,
with different accessories or poorly
maintained, the vibration emission may
differ. This may significantly increase the
exposure level over the total working
period.
An estimation of the level of exposure to
vibration should also take into account
the times when the tool is switched off
or when it is running but not actually
doing the job. This may significantly
reduce the exposure level over the total
working period.
Identify additional safety measures to
protect the operator from the effects of
vibration such as: maintain the tool and
the accessories, keep the hands warm,
organisation of work patterns.
Definitions: Safety Guidelines
The definitions below describe the level of severity
for each signal word. Please read the manual and
pay attention to these symbols.
DANGER: Indicates an imminently
hazardous situation which, if not avoided,
will result in death or serious injury.
WARNING: Indicates a potentially
hazardous situation which, if not
avoided, could result in death or
serious injury.
CAUTION: Indicates a potentially
hazardous situation which, if not
avoided, may result in minor or
moderate injury.
NOTICE: Indicates a practice not
related to personal injury which, if
not avoided, may result in property
damage.
Denotes risk of electric shock.
Denotes risk of fire.

ENGLISH
6
WARNING: To reduce the risk of injury,
read the instruction manual.
General Power Tool Safety Warnings
WARNING! Read all safety warnings
and all instructions. Failure to follow
the warnings and instructions may result
in electric shock, fire and/or serious
injury.
SAVE ALL WARNINGS AND INSTRUCTIONS
FOR FUTURE REFERENCE
The term “power tool” in the warnings refers to your
mains-operated (corded) power tool or battery-
operated (cordless) power tool.
1) WORK AREA SAFETY
a) Keep work area clean and well lit.
Cluttered or dark areas invite accidents.
b) Do not operate power tools in explosive
atmospheres, such as in the presence of
flammable liquids, gases or dust. Power
tools create sparks which may ignite the dust
or fumes.
c) Keep children and bystanders away while
operating a power tool. Distractions can
cause you to lose control.
2) ELECTRICAL SAFETY
a) Power tool plugs must match the outlet.
Never modify the plug in any way. Do
not use any adapter plugs with earthed
(grounded) power tools. Unmodified plugs
and matching outlets will reduce risk of
electric shock.
b) Avoid body contact with earthed or
grounded surfaces such as pipes,
radiators, ranges and refrigerators. There
is an increased risk of electric shock if your
body is earthed or grounded.
c) Do not expose power tools to rain or wet
conditions. Water entering a power tool will
increase the risk of electric shock.
d) Do not abuse the cord. Never use the
cord for carrying, pulling or unplugging
the power tool. Keep cord away from
heat, oil, sharp edges or moving parts.
Damaged or entangled cords increase the
risk of electric shock.
e) When operating a power tool outdoors,
use an extension cord suitable for outdoor
use. Use of a cord suitable for outdoor use
reduces the risk of electric shock.
f) If operating a power tool in a damp
location is unavoidable, use a residual
current device (RCD) protected supply.
Use of an RCD reduces the risk of electric
shock.
3) PERSONAL SAFETY
a) Stay alert, watch what you are doing and
use common sense when operating a
power tool. Do not use a power tool while
you are tired or under the influence of
drugs, alcohol or medication. A moment of
inattention while operating power tools may
result in serious personal injury.
b) Use personal protective equipment.
Always wear eye protection. Protective
equipment such as dust mask, non-skid
safety shoes, hard hat, or hearing protection
used for appropriate conditions will reduce
personal injuries.
c) Prevent unintentional starting. Ensure
the switch is in the off position before
connecting to power source and/or
battery pack, picking up or carrying the
tool. Carrying power tools with your finger
on the switch or energising power tools that
have the switch on invites accidents.
d) Remove any adjusting key or wrench
before turning the power tool on. A
wrench or a key left attached to a rotating
part of the power tool may result in personal
injury.
e) Do not overreach. Keep proper
footing and balance at all times. This
enables better control of the power tool in
unexpected situations.
f) Dress properly. Do not wear loose
clothing or jewellery. Keep your hair,
clothing and gloves away from moving
parts. Loose clothes, jewellery or long hair
can be caught in moving parts.
g) If devices are provided for the connection
of dust extraction and collection facilities,
ensure these are connected and properly
used. Use of dust collection can reduce
dust-related hazards.
4) POWER TOOL USE AND CARE
a) Do not force the power tool. Use the
correct power tool for your application.
The correct power tool will do the job
better and safer at the rate for which it
was designed.
b) Do not use the power tool if the switch
does not turn it on and off. Any power
tool that cannot be controlled with the switch
is dangerous and must be repaired.
c) Disconnect the plug from the power
source and/or the battery pack from
the power tool before making any
adjustments, changing accessories, or
storing power tools. Such preventive safety
measures reduce the risk of starting the
power tool accidentally.
ENGLISH
7
d) Store idle power tools out of the reach
of children and do not allow persons
unfamiliar with the power tool or these
instructions to operate the power tool.
Power tools are dangerous in the hands of
untrained users.
e) Maintain power tools. Check for
misalignment or binding of moving parts,
breakage of parts and any other condition
that may affect the power tool’s operation.
If damaged, have the power tool repaired
before use. Many accidents are caused by
poorly maintained power tools.
f) Keep cutting tools sharp and clean.
Properly maintained cutting tools with sharp
cutting edges are less likely to bind and are
easier to control.
g) Use the power tool, accessories and
tool bits etc., in accordance with these
instructions taking into account the
working conditions and the work to
be performed. Use of the power tool for
operations different from those intended
could result in a hazardous situation.
5) SERVICE
a) Have your power tool serviced by a
qualified repair person using only identical
replacement parts. This will ensure that the
safety of the power tool is maintained.
Additional Specific Safety Rules for
Chopsaws
• Always wear regular working gloves while
operating this tool.
• Keep hands away from the cutting disc.
Never cut workpieces that require manual
action closer than 15 cm from the rotating
cutting disc.
• Do not cut workpieces less than 1.2 mm
in thickness when using the cutting disc
supplied with this tool.
• Do not operate this tool without guards in
place.
• Do not perform any operation freehand. Use
the material clamp to clamp the workpiece
securely.
• Never reach in the back of the cutting disc.
• Always position the tool on a flat, stable
surface that is well maintained and free of
loose materials, e.g. chips and cut-offs.
• Before using, inspect the cutting disc for
cracks or flaws. Discard the cutting disc if
a crack or flaw is evident or if it is otherwise
defective.
• Make sure the cutting disc is not contacting
the workpiece before the tool is switched on.
• In operation, avoid bouncing the cutting disc
or giving it rough treatment. If this occurs,
stop the tool and inspect the cutting disc.
• Do not operate the tool while standing in line
with the cutting disc. Keep other persons
away from the work area.
• Be aware of cutting chips and the material
being cut. They may be sharp and hot. Allow
cut off parts to cool before handling.
• The spark deflector becomes hot during
use. Avoid touching or adjusting the spark
deflector immediately after operation.
• Switch off the tool and wait for the cutting
disc to stop before moving the workpiece or
changing the settings.
• After switching off, never attempt to stop the
cutting disc by pressing against the side of
the disc.
• Do not use cutting fluids. These fluids could
ignite or cause electrical shock.
• Check that the workpiece is properly
supported.
• Use the cutting discs recommended by the
manufacturer only.
• The max. allowable speed of the cutting disc
must always be equal to or greater than the
no-load speed of the tool specified on the
nameplate.
• Do not use circular saw blades or any other
toothed blades with this tool. Serious injury
may result.
• Do not use cutting discs that do not conform
to the dimensions stated in the technical
data.
• Ensure that the abrasive cutting disc is
correctly fitted and tightened before use.
• Read the operating instructions supplied by
the wheel manufacturer.
• Let the tool run at no-load in a safe
position for at least 30 seconds. If there
is a considerable vibration or if any other
defect occurs, stop the tool and check it to
determine the cause.
• Do not use cutting discs for side grinding.
• Do not cut concrete, brick, tile or ceramic
materials.
• Do not cut wood, plastic or synthetic
materials.
• Do not cut cast-iron materials.
• Never cut magnesium materials.
• Do not cut electrically live material.
• Use this tool in a well-ventilated area. Do
not operate the tool near flammable liquids,
gases or dust. Sparks or hot chips from
cutting or arcing motor brushes may ignite
combustible materials.

ENGLISH
8
• Regularly clear the ventilation slots when
working in dusty conditions. If it should
become necessary to clean the slots,
remember to unplug the tool first.
• Always store cutting discs well-protected and
in a dry place, out of reach of children.
• Faults in the machine, including guards or
cutting discs, should be reported as soon as
they are discovered.
• Only use chop saw wheel of
a max. thickness of 3.1 mm
and a max. diameter of
355 mm.
WARNING: Use of this tool can
generate dust containing chemicals
known to cause cancer, birth defects
or other reproductive harm. Use
appropriate respiratory protection.
• Always secure the workpiece properly
before cutting operation. Workpieces longer
than 1.0m shall be supported by suitable
additional table, buck or roller table.
• Consider that the wheel continues to rotate
after the machine is switched off.
• To prevent loss of control always fix the
machine to a bench using screw-clamps or
bolts of sufficient length and strength.
The following factors are of influence to noise
production:
– The material to be cut.
– The type of the cutting disc.
– The feed force.
WARNING: Take appropriate measures
for the protection of hearing.
Residual Risks
• The following risks are inherent to the use of
these machines:
– Injuries caused by touching the rotating
parts.
– Injuries caused by disruption of the cutting
disc.
• These risks are most evident:
– Within the range of operation.
– Within the range of the rotating machine
parts.
• In spite of the application of the relevant
safety regulations and the implementation of
safety devices, certain residual risks cannot be
avoided. These are:
– Impairment of hearing.
– Risk of accidents caused by the uncovered
parts of the rotating cutting disc.
– Risk of injury when changing the disc.
– Risk of squeezing fingers when opening the
guards.
Markings on Tool
The following pictograms are shown on the tool:
Read instruction manual before use.
Wear ear protection.
Wear eye protection.
Bore Diameter.
DATE CODE POSITION (FIG. 1)
The date code (v), which also includes the year of
manufacture, is printed into the housing.
Example:
2011 XX XX
Year of Manufacture
Package Contents
The package contains:
1 Chopsaw
1 Cutting disc
1 Hex key
1 Instruction manual
• Check for damage to the tool, parts or
accessories which may have occurred during
transport.
• Take the time to thoroughly read and
understand this manual prior to operation.
Description (fig. 1)
WARNING: Never modify the power
tool or any part of it. Damage or
personal injury could result.
a. On/off switch
b. Padlock hole
c. Operating handle
d. Lock-on button
e. Carrying handle

ENGLISH
9
f. Depth stop bolt
g. Lock nut
h. Base
i. Fence
j. Material clamp
k. Cutting table
l. 8 mm hex key
m. Handle
n. Material clamp lever
o. Cutting disc
p. Guard
q. Spindle lock
r. Lock-down hook
s. Spark deflector
t. Spark deflector screw
u. Lock-down chain
v. Date code
INTENDED USE
Your D28710 chop saw has been designed for the
cutting of variously shaped steel materials.
DO NOT use under wet conditions or in presence of
flammable liquids or gases.
The D28710 chop saw is a professional power tool.
DO NOT let children come into contact with the
tool. Supervision is required when inexperienced
operators use this tool.
Electrical Safety
The electric motor has been designed for one
voltage only. Always check that the power supply
corresponds to the voltage on the rating plate.
Your DEWALT tool is double insulated in
accordance with EN 61029; therefore no
earth wire is required.
If the supply cord is damaged, it must be replaced
by a specially prepared cord available through the
DEWALT service organisation.
Using an Extension Cable
If an extension cable is required, use an approved
3–core extension cable suitable for the power input
of this tool (see Technical Data).The minimum
conductor size is 1.5 mm2; the maximum length is
30 m.
When using a cable reel, always unwind the cable
completely.
Connecting to the Mains
The mains supply to be used for this machine must
be equipped with a 16 A cut-out fuse with time delay.
Voltage Drops
Inrush currents cause short-time voltage drops.
Under unfavourable power supply conditions, other
equipment may be affected.
If the system impedance of the power supply is lower
than 0.11 Ω, disturbances are unlikely to occur.
ASSEMBLY AND ADJUSTMENTS
WARNING: To reduce the risk of
injury, turn unit off and disconnect
machine from power source before
installing and removing accessories,
before adjusting or changing set-
ups or when making repairs. Be sure
the trigger switch is in the OFF position.
An accidental start-up can cause injury.
Removing and Fitting a Cutting Disc
(fig. 1, 2)
1. With the arm in the rest position, use the lip (w)
to slide the guard (p) back. Leave the guard
retracted (fig. 2).
2. Press and hold down the spindle lock (q) (fig. 1).
3. Rotate the cutting disc (o) until it locks.
4. Using the hex key (l), remove the bolt (x) by
turning counterclockwise and then remove the
flat washer (y) and the retaining flange (z) (fig. 2).
5. Check that the spacer (aa) is in place against
the flange (bb).
6. Replace the cutting disc (o). Make sure that the
new disc is placed onto the spacer (aa) in the
correct rotational direction.
7. Secure the blade with the retaining flange (z),
the flat washer (y) and the bolt (x).
8. Move the guard back down and release the
spindle lock (q).
9. Adjust the cutting depth as necessary.
ADJUSTING THE CUTTING DEPTH (FIG. 1)
The cutting depth can be adjusted to meet the wear
of the cutting disc.
• Make a dry run with the tool switched off and
check for clearance.
• If adjustment is required, proceed as follows:
– Loosen the lock nut (g) a few turns.

ENGLISH
10
– Turn the depth stop bolt (f) in or out as to
achieve the required cutting depth.
– Tighten the lock nut (g).
WARNING: Always adjust the depth
stop to its original position when
replacing the cutting disc.
Clamping the Workpiece in Position
(fig. 1, 3)
The tool is equipped with a material clamp (j) (fig. 1).
1. Pull the lever (n) toward the handle (m) (fig. 3A).
2. Push the clamp shaft (cc) forward until the jaw
(dd) is almost touching the workpiece.
3. Press the lever (n) toward the jaw (dd) until it
engages with the clamp shaft (cc).
4. Rotate the handle (m) clockwise and clamp the
workpiece securely.
5. To release the workpiece, rotate the handle (m)
counterclockwise.
WARNING:
• To increase the cutting capacity,
place a spacer block (ee) under the
workpiece (ff). The spacer block
should be slightly narrower than the
workpiece (fig. 3B).
• Support long workpieces using a
piece of wood (gg) (fig. 3C). Do not
clamp the cut off end (hh).
QUICK TRAVEL FEATURE (FIG. 3A)
The clamp has a quick travel feature.
To release the clamp, rotate the handle (m) one or
two turns counterclockwise and pull the lever (n)
toward the handle (m).
SETTING THE CLAMPING POSITION (FIG. 3D)
The clamping position can be set to match the
cutting disc.
1. Remove the fence bolts (ii) using the hex key (l).
2. Move the fence (i) as required.
3. Re-fit the fence bolts (ii) and tighten them to
lock the fence (i).
Adjusting the Angle of Cut (fig. 4)
The tool can be used for mitre cuts up to 45°.
1. Loosen the fence bolts (ii) to release the fence (i).
2. Set the fence (i) to the required angle. The angle
can be read on the scale (jj).
3. Tighten the fence bolts (ii) to lock the fence (i).
Checking and Adjusting the Mitre
Scale (fig. 1, 4)
1. Loosen the fence bolts (ii) to release the fence (i)
(fig. 4).
2. Pull down the arm and lock it in this position
using the lock-down chain (u) (fig. 1).
3. Place a square (kk) against the fence (i) and the
left side of the cutting disc creating a perfect 90°
(fig. 4). Check that the 0° marking on the scale
(jj) aligns with the marking on the table (ll).
4. Tighten the fence bolts (ii) to lock the fence (i).
5. Release the lock-down chain (u) and return the
arm to its upper rest position (fig. 1).
Adjusting the Spark Deflector (fig. 1)
1. Loosen the screw (t).
2. Set the spark deflector (s) as appropriate.
3. Tighten the screw (t).
Mounting (fig. 6, 7)
CAUTION: Tool must be supported on
stable, level, non-skid surface to prevent
unexpected movement when operating.
PROCEDURE FOR PERMANENT MOUNTING
1. Drill two holes 8 mm (5/16") through the work
surface (fig. 6).
2. Insert 1/4-20 screws down through the holes
in the base and through holes in mounting
surface. The approximate length of the screws
should be the thickness of the mounting surface
plus 102mm (4").
3. Tighten both screws securely.
CRADLE MOUNTING
1. Cut two boards approximately 508 x 50.8 x
101.6 mm (20" long x 2" high x 4") wide.
2. Place chop saw at desired work location.
3. Place boards tightly along side, and nail to work
surface (fig. 7).
Prior to Operation
• Install the appropriate cutting disc. Do not use
excessively worn discs. The maximum rotation
speed of the tool must not exceed that of the
cutting disc.
• Make sure the disc rotates in the direction of the
arrows on the accessory and the tool.

ENGLISH
11
• Secure the workpiece.
• Always set the spark deflector correctly.
OPERATION
Instructions for Use
WARNING:
• Always observe the safety instructions
and applicable regulations.
• Do not apply excessive pressure to the
tool.
• Avoid overloading. Should the tool
become hot, let it run a few minutes
under no-load condition.
WARNING: To reduce the risk
of serious personal injury, turn
tool off and disconnect tool from
power source before making any
adjustments or removing/installing
attachments or accessories.
Proper Hand Position (fig. 5)
WARNING: To reduce the risk of
serious personal injury, ALWAYS use
proper hand position as shown.
WARNING: To reduce the risk of
serious personal injury, ALWAYS hold
securely in anticipation of a sudden
reaction.
Proper hand position requires one hand on the
operating handle (c), with the other hand guiding the
workpiece.
Performing a Cut (fig. 1)
1. Place the material to be cut against the fence (i)
and secure using the material clamp (j).
2. Turn the tool on and pull down the operating
handle (c) to cut the workpiece. Allow the motor
to reach full speed before cutting.
3. Allow the disc to cut freely. Do not force.
4. After completing the cut, switch off the tool and
return the arm to its upper rest position.
Switching On and Off (fig. 1)
The on/off switch (a) is mounted in the operating
handle (c).
To run the tool, press the on/off switch (a).
Keep the on/off switch depressed while performing
the operation.
To stop the tool, release the switch.
The tool can be locked on for continuous use
by depressing the on/off switch (a) and then by
depressing the lock-on button (d). Hold the lock-on
button (d) as the on/off switch (a) is gently released.
To turn the tool off from the locked on position,
squeeze the on/off switch (a) and the lock-on button
(d) is released.
Do not unplug the tool with the switch locked on.
Make sure the tool is not locked on when plugging
in.
WARNING: Do not switch the tool on
or off when under load.
WARNING: Do not cut magnesium.
Transporting (fig. 1)
The tool is equipped with a lock-down chain (u)
which locks the tool in closed-down position for
carrying.
1. Lower the guard (p) onto the cutting table (k)
and secure the tool in this position by hooking
the chain (u) over the lock-down hook (r).
2. Transport the tool using the carrying handle (e).
To release the tool, depress the operating handle (c)
slightly and release the chain.
MAINTENANCE
Your DEWALT power tool has been designed to
operate over a long period of time with a minimum
of maintenance. Continuous satisfactory operation
depends upon proper tool care and regular cleaning.
WARNING: To reduce the risk of
injury, turn unit off and disconnect
machine from power source before
installing and removing accessories,
before adjusting or changing
set-ups or when making repairs.
Be sure the trigger switch is in the OFF
position. An accidental start-up can
cause injury.
Lubrication
Your power tool requires no additional lubrication.

ENGLISH
12
Cleaning
WARNING: Blow dirt and dust out of
the main housing with dry air as often as
dirt is seen collecting in and around the
air vents. Wear approved eye protection
and approved dust mask when
performing this procedure.
WARNING: Never use solvents or
other harsh chemicals for cleaning the
non-metallic parts of the tool. These
chemicals may weaken the materials
used in these parts. Use a cloth
dampened only with water and mild
soap. Never let any liquid get inside the
tool; never immerse any part of the tool
into a liquid.
Optional Accessories
WARNING: Since accessories, other
than those offered by DEWALT, have
not been tested with this product, use
of such accessories with this tool could
be hazardous. To reduce the risk of
injury, only DEWALT recommended
accessories should be used with this
product.
Consult your dealer for further information on the
appropriate accessories.
Protecting the Environment
Separate collection. This product must
not be disposed of with normal
household waste.
Should you find one day that your DEWALT product
needs replacement, or if it is of no further use to you,
do not dispose of it with household waste. Make this
product available for separate collection.
Separate collection of used products
and packaging allows materials to be
recycled and used again. Re-use of
recycled materials helps prevent
environmental pollution and reduces
the demand for raw materials.
Local regulations may provide for separate collection
of electrical products from the household, at
municipal waste sites or by the retailer when you
purchase a new product.
DEWALT provides a facility for the collection and
recycling of DEWALT products once they have
reached the end of their working life. To take
advantage of this service please return your product
to any authorised repair agent who will collect them
on our behalf.
You can check the location of your nearest
authorised repair agent by contacting your local
DEWALT office at the address indicated in this
manual. Alternatively, a list of authorised DEWALT
repair agents and full details of our after-sales
service and contacts are available on the Internet at:
www.2helpU.com.

FRANÇAIS
13
TRONÇONNEUSE
D28710
Félicitations !
Vous avez choisi un outil DEWALT. Des années
d’expertise dans le développement et l’innovation
de ses produits ont fait de DEWALT, le partenaire
privilégié des utilisateurs professionnels d’outils
électriques.
Caractéristiques techniques
D28710-B4 D28710-B5
Tension V 127 220–240
Type 1 1
Puissance absorbée W 2200 2200
Vitesse à vide min-1 3800 3800
Vitesse périphérique min.
de disque de coupe m/s 80 80
Diamètre du disque mm 355 355
Alésage du disque mm 25,4 25,4
Épaisseur de
corps du disque mm 3,1 3,1
Type de disque de coupe droit, droit,
sans sans
renfoncement renfoncement
Capacité de tronçonnage en travers à 90°
circulaire mm 130
carré mm 120 x 120
rectangulaire mm 115 x 130
angulaire mm 137 x 137
Capacidad de corte transversal a 45°
circulaire mm 115
carré mm 107 x 107
rectangulaire mm 115 x 107
angulaire mm 115 x 115
Poids kg 16,6 16,6
LPA
(pression acoustique)
dB(A)
92,3 92,3
K PA
(incertitude de pression
acoustique)
dB(A)
3,0 3,0
LWA
(puissance
acoustique)
dB(A)
105,3 105,3
KWA
(incertitude de puissance
acoustique)
dB(A)
3,0 3,0
Valeurs du taux de vibrations (somme vectorielle de triaxialité)
déterminées conformément à la norme EN 61029:
Valeur d’émission de vibration a
h
a
h
=
m/s²
3,3 3,,3
Incertitude
K = m/s²
1,5 1,5
Le taux d’émission de vibrations indiqué dans ce
feuillet informatif a été mesuré conformément à une
méthode d’essai normalisé établie par EN 61029, et
peut être utilisé pour comparer un outil à un autre.
Il peut également être utilisé pour effectuer une
évaluation préliminaire de l’exposition.
AVERTISSEMENT : le taux d’émission
de vibrations déclaré correspond
aux applications principales de l’outil.
Néanmoins, si l’outil est utilisé pour
différentes applications ou est mal
entretenu, ce taux d’émission de
vibrations pourra varier. Ces éléments
peuvent augmenter considérablement
le niveau d’exposition sur la durée totale
de travail.
Toute estimation du degré d’exposition
à des vibrations doit également prendre
en compte les heures où l’outil est mis
hors tension ou lorsqu’il tourne sans
effectuer aucune tâche. Ces éléments
peuvent réduire sensiblement le degré
d’exposition sur la durée totale de
travail.
Identifier des mesures de sécurité
supplémentaires pour protéger
l’opérateur contre les effets nocifs des
vibrations telles que : maintenance de
l’outil et des accessoires, maintenir
la température des mains élevée,
organisation du travail.
Définitions : consignes de sécurité
Les définitions ci-après décrivent le degré de risques
associé à chaque balise. Lire soigneusement la
notice d’instructions et respecter ces symboles.
DANGER : indique une situation
de danger imminent qui, si rien
n’est fait pour l’éviter, aura comme
conséquences la mort ou des
dommages corporels graves.

FRANÇAIS
14
AVERTISSEMENT : indique une
situation de danger potentiel qui, si
rien n’est fait pour l’éviter, pourra avoir
comme conséquences la mort ou des
dommages corporels graves.
ATTENTION : indique une situation
de danger potentiel qui, si rien n’est
fait pour l’éviter, pourrait avoir comme
conséquences des dommages
corporels mineurs ou moindres.
AVIS : indique une pratique ne posant
aucun risque de dommages
corporels, mais qui par contre, si rien
n’est fait pour l’éviter, pourrait poser
des risques de dommages matériels.
Indique des risques de décharges
électriques.
Indique des risques d’incendie.
AVERTISSEMENT : pour réduire tout
risque de dommages corporels, lire la
notice d’instructions
Consignes de sécurité générales
propres aux outils électriques
AVERTISSEMENT ! lire toutes les
directives et consignes de sécurité.
Tout manquement aux directives et
consignes ci-incluses comporte des
risques de décharges électriques,
d’incendie et/ou de dommages
corporels graves.
CONSERVER TOUTES CES DIRECTIVES ET
CONSIGNES À TITRE DE RÉFÉRENCE
Le terme « outil électrique » mentionné dans les
avertissements ci-après se rapporte aux outils
alimentés sur secteur (avec fil) ou par piles (sans fil).
1) SÉCURITÉ – AIRE DE TRAVAIL
a) Maintenir l’aire de travail propre et bien
éclairée. Les lieux sombres ou encombrés
sont propices aux accidents.
b) Ne pas utiliser un outil électrique dans un
milieu déflagrant, comme en présence de
liquides, gaz ou poussières inflammables.
Les outils électriques peuvent produire des
étincelles qui pourraient enflammer toute
émanation ou poussière ambiante.
c) Maintenir à l’écart les enfants, ou toute
autre personne, lors de l’utilisation d’un
outil électrique. Toute distraction pourrait
faire perdre la maîtrise de l’appareil.
2) SÉCURITÉ – ÉLECTRICITÉ
a) La fiche électrique de l’outil doit
correspondre à la prise murale. Ne
modifier la fiche en aucune façon. Ne
pas utiliser de fiche d’adaptation avec
un outil électrique mis à la terre (masse).
L’utilisation de fiches d’origine et de prises
appropriées réduira tout risque de décharges
électriques.
b) Éviter tout contact corporel avec des
éléments mis à la terre comme : tuyaux,
radiateurs, cuisinières ou réfrigérateurs.
Les risques de décharges électriques
augmentent lorsque le corps est mis à la
terre.
c) Ne pas exposer les outils électriques à
la pluie ou à l’humidité. Tout contact d’un
outil électrique avec un liquide augmente les
risques de décharges électriques.
d) Ne pas utiliser le cordon de façon
abusive. Ne jamais utiliser le cordon
pour transporter, tirer ou débrancher un
outil électrique. Protéger le cordon de
toute source de chaleur, de l’huile, et
de tout bord tranchant ou pièce mobile.
Les cordons endommagés ou emmêlés
augmentent les risques de décharges
électriques.
e) En cas d’utilisation d’un outil électrique à
l’extérieur, utiliser systématiquement une
rallonge conçue à cet effet. Cela diminuera
tout risque de décharges électriques.
f) Si on ne peut éviter d’utiliser un outil
électrique en milieu humide, utiliser
un circuit protégé par un dispositif de
courant résiduel (RCD). Cela réduira tout
risque de décharges électriques.
3) SÉCURITÉ INDIVIDUELLE
a) Rester systématiquement vigilant et faire
preuve de jugement lorsqu’on utilise un
outil électrique. Ne pas utiliser d’outil
électrique en cas de fatigue ou sous
l’influence de drogues, d’alcool ou de
médicaments. Tout moment d’inattention
pendant l’utilisation d’un outil électrique
comporte des risques de dommages
corporels graves.
b) Porter un équipement de protection
individuel. Porter systématiquement un
dispositif de protection oculaire. Le fait
de porter un masque anti-poussières, des
chaussures antidérapantes, un casque
de sécurité ou un dispositif de protection
auditive, lorsque la situation le requiert,
réduira les risques de dommages corporels.

FRANÇAIS
15
c) Prévenir tout démarrage accidentel.
S’assurer que l’interrupteur est en
position d’arrêt avant de brancher l’outil
sur le secteur et/ou à la batterie, ou de le
ramasser ou le transporter. Transporter un
outil le doigt sur l’interrupteur ou brancher un
outil électrique alors que l’interrupteur est en
position de marche invite les accidents.
d) Retirer toute clé de réglage avant de
démarrer l’outil. Une clé laissée sur une
pièce rotative d’un outil électrique comporte
des risques de dommages corporels.
e) Adopter une position stable. Maintenir les
pieds bien ancrés au sol et conserver son
équilibre en permanence. Cela permettra
de mieux maîtriser l’outil électrique en cas de
situations imprévues.
f) Porter des vêtements appropriés. Ne
porter aucun vêtement ample ou bijou.
Maintenir cheveux, vêtements et gants
à l’écart des pièces mobiles, car ils
pourraient s’y faire prendre.
g) Lorsqu’un dispositif de connexion
à un système de dépoussiérage ou
d’élimination est fourni, s’assurer qu’il est
branché et utilisé correctement. L’utilisation
de ces dispositifs peut réduire les risques
engendrés par les poussières.
4) UTILISATION ET ENTRETIEN DES OUTILS ÉLECTRIQUES
a) Ne pas forcer un outil électrique. Utiliser
l’outil approprié au travail en cours. L’outil
approprié effectuera un meilleur travail, de
façon plus sûre et à la vitesse pour laquelle il
a été conçu.
b) Ne pas utiliser un outil électrique dont
l’interrupteur est défectueux. Tout appareil
dont l’interrupteur est défectueux est
dangereux et doit être réparé.
c) Débrancher la fiche du secteur et/ou
la batterie de l’outil électrique avant
d’effectuer tout réglage, de changer tout
accessoire, ou avant de le ranger. Ces
mesures préventives réduiront tout risque de
démarrage accidentel de l’appareil.
d) Après utilisation, ranger les outils
électriques hors de portée des enfants
et ne permettre à aucune personne non
familière avec son fonctionnement (ou sa
notice d’instructions) de l’utiliser. Les outils
peuvent être dangereux entre des mains
inexpérimentées.
e) Entretenir les outils électriques. Vérifier
les pièces mobiles pour s’assurer qu’elles
sont bien alignées et tournent librement,
qu’elles sont en bon état et ne sont
affectées d’aucune condition susceptible
de nuire au bon fonctionnement de l’outil.
En cas de dommage, faire réparer l’outil
électrique avant toute nouvelle utilisation.
De nombreux accidents sont causés par des
outils mal entretenus.
f) Maintenir tout organe de coupe propre
et bien affûté. Les outils de coupe bien
entretenus et affûtés sont moins susceptibles
de se coincer et sont plus faciles à contrôler.
g) Utiliser un outil électrique, ses
accessoires, mèches, etc., conformément
aux présentes directives et suivant la
manière prévue pour ce type particulier
d’outil électrique, en tenant compte des
conditions de travail et de la tâche à
effectuer. L’utilisation d’un outil électrique
à des fins autres que celles prévues est
potentiellement dangereuse.
5) RÉPARATION
a) Faire entretenir les outils électriques par
un réparateur qualifié en n’utilisant que
des pièces de rechange identiques. Cela
permettra de préserver l’intégrité de l’outil
électrique et la sécurité de l’utilisateur.
Directives de sécurité additionnelles
pour les tronçonneuses à disque
• Portez toujours des gants de travail pour
travailler avec l’outil.
• N’approchez pas vos mains du disque de
coupe. Ne tronçonnez jamais des pièces qui
requièrent une action manuelle à moins de
15 cm du disque de coupe.
• Ne coupez pas des pièces de moins de
1,2 mm d’épaisseur lorsque vous utilisez le
disque de coupe fourni avec cet outil.
• N’utilisez pas l’outil sans les carters.
• N’effectuez aucune opération à la main.
Utilisez l’étau pour assurer le blocage de la
pièce.
• Ne touchez jamais l’arrière du disque de
coupe.
• Placez toujours l’outil sur une surface plane,
stable, bien fixée et libre de tout matériau,
comme par exemple copeaux et chutes.
• Avant l’utilisation, vérifier l’absence de
fissures ou de défauts sur le disque de
coupe. Exclure tout disque de coupe si une
fissure ou un défaut sont évident ou s’il est
tout de même défectueux.
• Assurez-vous que le disque de coupe n’est
pas en contact avec la pièce avant de mettre
l’outil en marche.

FRANÇAIS
16
• Pendant le travail, traitez le disque de coupe
avec soin et évitez les rebonds. Si ceci
arrivait, arrêtez l’outil et vérifiez le disque de
coupe.
• Ne vous placez pas dans l’alignement du
disque lorsque vous utilisez le disque de
coupe. Tenez toutes les autres personnes à
distance de la zone de travail.
• Prenez garde aux copeaux et au matériau
qui est coupé. Ils peuvent être coupants et
chauds. Laissez refroidir les pièces coupées
avant de les manipuler.
• Le déflecteur d’étincelles chauffe en cours
d’utilisation. Évitez de toucher ou de régler le
déflecteur d’étincelles immédiatement après
l’utilisation.
• Éteignez l’outil et attendez que le disque de
coupe s’arrête avant d’enlever la pièce ou de
modifier les réglages.
• Après l’arrêt, n’essayez jamais de freiner le
disque de coupe en exerçant une pression
latérale.
• N’utilisez pas de liquides de tronçonnage.
Ces liquides peuvent s’enflammer ou
provoquer des électrocutions.
• Vérifiez que la pièce de travail est
correctement soutenue.
• Utilisez uniquement les disques de coupe
recommandés par le fabricant.
• La vitesse maximale permise du disque de
coupe doit toujours être égale ou supérieure
à celle à vide imprimée sur la plaque
d’identification de l’outil.
• Ne pas utiliser les lames de scie circulaire
ou les autres lames dentées avec cet outil.
Risque de blessures graves.
• N’utilisez pas des disques de coupe ne
respectant pas les dimensions indiquées
dans les données techniques.
• S’assurer que le disque de coupe abrasif
est correctement monté et serré avant
l’utilisation.
• Lire les instructions d’utilisation fournies par
le fabricant du disque.
• Laissez l’outil tourner à vide dans une
position sûre pendant au moins 30
secondes. Si vous observez une vibration
importante ou autre, arrêtez l’outil et
examinez-le pour déterminer la cause.
• N’utilisez pas de disques de coupe pour le
meulage latéral.
• Ne tronçonnez ni ciment, ni briques, ni tuiles
ni matériaux en céramique.
• Ne coupez pas de bois, de plastique ou de
matériaux synthétiques.
• Ne tronçonnez pas des matériaux en fonte.
• Ne tronçonnez jamais de matériaux en
magnésium.
• Ne tronçonnez pas de matériau porteur
d’une charge électrique.
• Cet outil doit être utilisé dans une zone
bien aérée. N’utilisez pas l’outil à proximité
de liquides inflammables, de gaz ou de
poussières. Les étincelles, les copeaux
chauds provenant du tronçonnage ou
l’arc des charbons du moteur pourraient
enflammer les matériaux combustibles.
• Nettoyez régulièrement les fentes de
ventilation si vous travaillez dans un
environnement poussiéreux. S’il devenait
nécessaire de nettoyer les fentes, n’oubliez
pas de débrancher d’abord l’outil.
• Les disques de coupe doivent toujours être
rangés bien protégés, dans un endroit sec et
hors de portée des enfants.
• Signaler toute panne de la machine, y
compris des carters de protection ou des
disques de coupe, dès leur constatation.
• N’utilisez qu’un disque
abrasif pour scie
circulaire d’une
épaisseur maximum de
3,1 mm et d’un diamètre
maximum de 355 mm.
AVERTISSEMENT : l’utilisation de
cet outil peut produire de la poussière
contenant des substances chimiques
susceptibles de provoquer un cancer,
des malformations ou autres maladies
du ffitus. Portez un protecteur
respiratoire adéquat.
• Toujours fixer l’ouvrage correctement avant
l’opération de coupe. Les pièces supérieure
à 1,0m de long doivent être soutenues par
une table additionnelle adaptée, un croisillon
ou une tableau à rouleaux.
• Tenir compte du fait que le disque continue à
tourner après l’arrêt de la machine.
• Pour éviter toute perte de contrôle, toujours
fixer la machine à un établi en utilisant les vis
de serrage ou des boulons de longueur et de
résistance suffisante.
Les facteurs suivants influent grandement sur
la pollution sonore :
– le matériau à couper
– le type de disque de coupe
– la force d’avance
AVERTISSEMENT : prendre les
mesures nécessaires pour la protection
de l’ouïe.

FRANÇAIS
17
Risques résiduels
• Les risques suivants sont inhérents à l’utilisation
de ces outils :
– blessures si vous touchez les pièces
rotatives ;
– blessures si la lame se détache.
• Ces risques sont plus évidents :
– dans le champ même de l’utilisation ;
– à portée immédiate des pièces rotatives de
l’outil.
• Malgré l’application des réglementations de
sécurité en vigueur et la mise en œuvre de
dispositifs de sécurité, certains risques résiduels
sont inévitables. Il s’agit de :
– déficience auditive ;
– risque d’accidents causés par les pièces non
recouvertes de la lame rotative ;
– risque de blessure lors du remplacement de
la lame ;
– risque de pincement des doigts lors de
l’ouverture du carter de protection.
Étiquettes sur l’appareil
On trouve les diagrammes suivants sur l’outil:
Lire la notice d’instructions avant toute
utilisation.
Porter un dispositif de protection auditive.
Porter un dispositif de protection oculaire.
Diamètre d’alésage.
EMPLACEMENT DE LA DATE CODÉE DE FABRICATION
(FIG. 1)
La date codée de fabrication (v), qui comprend aussi
l’année de fabrication, est imprimée sur le boîtier.
Exemple:
2011 XX XX
Année de fabrication
Contenu de l’emballage
Ce carton comprend:
1 Tronçonneuse
1 Disque de coupe
1 Clé hexagonale
1 Notice d’instructions
• Vérifier que l’appareil et ses pièces ou
accessoires n’ont pas été endommagés
lors du transport.
• Prendre le temps de lire attentivement et
comprendre cette notice d’instructions avant
toute utilisation de l’appareil.
Description (fig. 1)
AVERTISSEMENT : ne modifiez jamais
l’outil électrique ou une de ses pièces sous
peine de provoquer des dégâts matériels ou
des blessures corporelles.
a. Interrupteur marche/arrêt
b. Trou de cadenas
c. Poignée d’utilisation
d. Bouton de verrouillage
e. Poignée de transport
f. Butée de profondeur
g. Écrou de blocage
h. Base
i. Guide
j. Étau
k. Table de coupe
l. Clé hexagonale de 8mm
m. Manivelle
n. Levier de serrage du matériau
o. Disque de coupe
p. Carter de protection
q. Blocage de l’arbre
r. Crochet de verrouillage
s. Déflecteur d’étincelles
t. Vis du déflecteur d’étincelles
u. Chaîne de verrouillage
v. Code de date
UTILISATION PRÉVUE
La scie fendeuse D28710 est conçue pour la
découpe de pièces en acier de différentes formes.
NE PAS les utiliser en milieu humide ou en présence
de gaz ou de liquides inflammables.
La scie fendeuse D28710 est un outil électrique
professionnel.
NE PAS les laisser à la portée des enfants. Une
supervision est nécessaire auprès de tout utilisateur
non expérimenté.

FRANÇAIS
18
Sécurité électrique
Le moteur électrique a été conçu pour une seule
tension. Vérifier si la tension secteur correspond à la
tension indiquée sur la plaque d’identification.
Votre outil DEWALT à double isolation
est conforme à la norme EN61029; un
branchement à la terre n’est donc pas
nécessaire.
Si le cordon fourni est endommagé, le remplacer
par un cordon spécialement conçu à cet effet, et
disponible auprès du service après-vente DEWALT.
CH Toujours utiliser la fiche prescrite lors du
remplacement du câble d’alimentation.
Type 11 pour la classe II
(Isolation double) – outils
Type 12 pour la classe I
(Conducteur de terre) – outils
CH En cas d’utilisation à l’extérieur, connecter les
outils portatifs à un disjoncteur FI.
Utilisation d’une rallonge
Si une rallonge s’avère nécessaire, utiliser une
rallonge à trois fils homologuée et compatible avec
la tension nominale de cet outil (se reporter à la
section Caractéristiques techniques). La section
minimale du conducteur est de 1,5mm2pour une
longueur maximale de 30m.
En cas d’utilisation d’un dévidoir, dérouler
systématiquement le câble sur toute sa longueur.
Branchement au secteur
L’alimentation secteur pour cette machine doit
comporter un fusible coupe-circuit de 16 A avec
retardateur.
Chutes de tension
Les appels de courants provoquent de courtes chutes
de tension. Dans des conditions d’alimentation
électrique peu favorables, d’autres équipements
peuvent être affectés.
Si l’impédance du système d’alimentation électrique
est inférieure à 0,11 Ω, il est peu probable que des
perturbations se produisent.
MONTAGE ET RÉGLAGES
AVERTISSEMENT : pour réduire
tout risque de dommages
corporels, arrêter l’outil et
débrancher l’appareil du secteur
avant d’installer ou de retirer tout
accessoire, avant tout réglage ou
changement de configuration ou
lors de réparations. S’assurer que la
gâchette est bien en position d’ARRÊT.
Tout démarrage accidentel pourrait
causer des dommages corporels.
Retrait et montage du disque de
coupe (fig. 1, 2)
1. Avec le bras en position repos, utilisez la lèvre
(w) pour faire glisser le carter (p) vers l’arrière.
Laissez le carter en retrait (fig. 2).
2. Enfoncez le blocage de l’arbre sans le relâcher
(q) (fig. 1).
3. Faites tourner le disque de coupe (o) jusqu’à ce
qu’il se bloque.
4. Utiliser la clé hexagonale (l) pour retirer le boulon
(x) en tournant dans le sens inverse des aiguilles
d’une montre, puis enlever la rondelle plate (y) et
la bride de retenue (z) (fig. 2).
5. Vérifiez que l’entretoise (aa) est en place contre
la bride (bb).
6. Remplacez le disque de coupe (o). Assurez-
vous que le nouveau disque est placé sur
l’entretoise (aa) dans le sens de rotation correct.
7. Bloquez le disque avec la bride de retenue (z), la
rondelle plate (y) et le boulon (x).
8. Ramenez le carter à sa place et relâchez le
blocage de l’arbre (q).
9. Réglez la profondeur de coupe selon les
besoins.
RÉGLAGE DE LA PROFONDEUR DE COUPE (FIG. 1)
La profondeur de coupe est réglable afin de s’ajuster
à l’usure du disque de coupe.
• Réalisez un essai à vide avec l’outil hors service
et vérifiez l’espacement.
• Si un réglage s’impose, procéder comme suit:
– Desserrez l’écrou de blocage (g) de quelques
tours.
– Tournez le boulon de butée de profondeur (f)
dans un sens ou dans l’autre pour obtenir la
profondeur voulue.
– Serrez l’écrou de blocage (g).
AVERTISSEMENT : réglez toujours
la butée de profondeur en position
originale lors du remplacement du
disque de coupe.
Other manuals for D28710
6
Table of contents
Languages:
Other DeWalt Saw manuals

DeWalt
DeWalt 7730 User manual

DeWalt
DeWalt DW716 User manual

DeWalt
DeWalt DWE305 User manual

DeWalt
DeWalt DC351KL User manual

DeWalt
DeWalt DCS371B User manual

DeWalt
DeWalt DCS397 User manual

DeWalt
DeWalt DCS575B User manual

DeWalt
DeWalt DCS781 User manual

DeWalt
DeWalt DWS535B User manual

DeWalt
DeWalt 12in. (305 mm) compound miter saw User manual

DeWalt
DeWalt DW304PK User manual

DeWalt
DeWalt DW7440 User manual

DeWalt
DeWalt DWE357 User manual

DeWalt
DeWalt DW718 User manual

DeWalt
DeWalt DW745 User manual

DeWalt
DeWalt XR Li-Ion DCG412-XE User manual

DeWalt
DeWalt DW745 User manual

DeWalt
DeWalt DWS713-CA User manual

DeWalt
DeWalt 7740 Type 2 User manual

DeWalt
DeWalt DWE5615 User manual