DF ROBOT FIREBEETLE BOARD-ESP32 User manual

FIREBEETLE
BOARD-ESP32
USER MANUAL
V0.1

Welcome to DFRobot: www.DFRobot.com.cn 2/ 49
CONTENTS
CONTENTS ...................................................................................................................................................2
Chapter1 Introduction................................................................................................................................3
Introduction of FireBeetle ...........................................................................................................................3
Introduction of FireBeetle Board-ESP32.....................................................................................................4
Chapter2: Quick-start ................................................................................................................................7
FireBeetle Board-ESP32 Hardware.............................................................................................................7
Characteristics..........................................................................................................................................7
Specification.............................................................................................................................................8
Arduino IDE for FireBeetle Board-ESP32.....................................................................................................9
STEP1: The way to download Arduino IDE software. ...........................................................................9
STEP2: Language setting of Arduino IDE .............................................................................................11
STEP3: Installation of the core center of the FireBeetle Board-ESP32 development board. .......11
STEP4: Connect FireBeetle Board-ESP32 to computer. .....................................................................13
STEP5: Processing in the Arduino IDE....................................................................................................15
STEP6: Upload codes to FireBeetle-ESP32 motherboard. .................................................................16
Chapter 3: The Basics of Using Peripherals in the FireBeetle Board-ESP32.......................................20
Project1: The experiment of Serial Port ...................................................................................................20
Project2: PWM (Breathing light) ...............................................................................................................22
Project3 ADC ..............................................................................................................................................25
Project4 I2C.................................................................................................................................................28
Project5 SPI..................................................................................................................................................35
Project6: Hall Sensor ..................................................................................................................................39
Project7 DAC ..............................................................................................................................................41
Project8 Touch Sensor ...............................................................................................................................43
Project9 Deep_Sleep (Low power Management)................................................................................45
*Click the top left corner, the community of DFRobot, a pleasant surprise!

Welcome to DFRobot: www.DFRobot.com.cn 3/ 49
Chapter1 Introduction
Introduction of FireBeetle
FireBeetle has been translated to firefly in Chinese. It is a new product range that developed by
DFRobot. The ultralow-power design of external hardware and small compatibility interface can
fast build Internet of Things (IOT) conveniently.
In simple terms, FireBeetle is an easy to use Internet of Things development platform. It is based on
the theme of series of low-power hardware development and designed to work simple for
intelligent hardware enthusiasts, interaction designers and electronic software engineers.
For example, a simple Internet of Things project ── intelligent watering device of real-time soil
moisture monitoring. When the humidity is less than 300(a parameter), it will control the pump
watering and upload data in every 5 mins. Therefore, you can check the real-time data on apps
of mobile phones, such as Blynk. You can also monitor the ambient temperature by the installation
of temperature and humidity sensors on the watering device. See, it’s so easy to build an
intelligent watering device!
There are three categories of FireBeetle, containing Boards (main control), Covers (expansion
boards) and related Accessories. The core controller chips of Boards mainly are MCUs such as ESP32,

Welcome to DFRobot: www.DFRobot.com.cn 4/ 49
Bluno etc. These chips are of high performance, low power consumption and has the function of
wireless transmission. Covers contain LED dot matrixs, I2S audio drivers, GPS/GPRS/SIM etc. They can
provide rich peripherals for the motherboard. Accessories contain 2.54mm pin headers, female
headers, LED lights, buttons and other extensible peripheral hardware.
Caution: A lurry of FireBeetle products are still in development.
Introduction of FireBeetle Board-ESP32
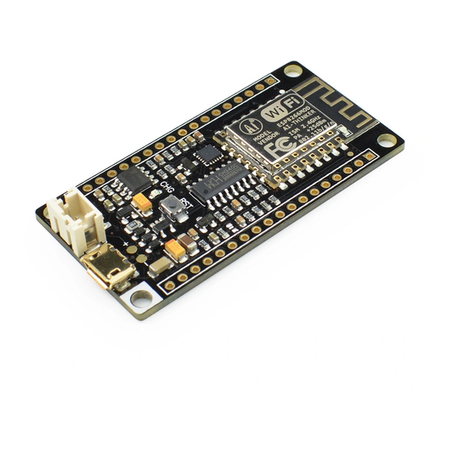
FireBeetle Board-ESP32 is one of the FireBeetle series and the chip of the master control board is
ESP32. Aimed at Internet of Things, the SOC combines Wi-Fi, Bluetooth and MCU. The master
control board uses ultra-low power consumption external hardware design (an actual
measurement of the electricity current under low power consumption mode is 10 μA), supporting
onboard lithium battery charging. The best choice for mobile devices, wearable electronics and
IOT applications. It can directly use to low power consumption projects.
Additionally, FireBeetle Board-ESP32 has abundant peripheral equipment, e.g. ADC,I2C,I2S,
SPI,UART etc. And the programming is completely compatible with Arduino IDE.
Caution: All peripheral equipment of FireBeetle Board-ESP32 control board can be configured to
any pin. When programed with Arduino IDE, all peripheral equipments adopt default profile
except special one. The following image shows default profile and corresponding hardware IO.

Welcome to DFRobot: www.DFRobot.com.cn 5/ 49
IO3/RXD:D0(Arduino), the RX of Serial, connects to IO3 of ESP32
IO1/TXD:D1(Arduino), the TX of Serial, connects to IO1 of ESP32
IO25/D2:D2 (Arduino) of GPIO digital input and output port and PWM output pin, connect to IO25 of ESP32.
IO26/D3:D3 (Arduino) of GPIO digital input and output port and PWM output pin, connect to IO26 of ESP32.
IO27/D4:D4 (Arduino) of GPIO digital input and output port and PWM output pin, connect to IO27 of ESP32.
IO9/ D5:D5 (Arduino) of GPIO digital input and output port and PWM output pin, connect to IO9 of ESP32.
IO10/D6:D6 (Arduino) of GPIO digital input and output port and PWM output pin, connect to IO9 of ESP32.
IO13/D7:D7 (Arduino) of GPIO digital input and output port and PWM output pin, connect to IO13 of ESP32.
IO5/D8:D8 (Arduino) of GPIO digital input and output port and PWM output pin, connect to IO5 of ESP32.
IO2/D9:D9 (Arduino) of GPIO digital input and output port and PWM output pin, connect to IO2 of ESP32.
CLK:Clock pin to IO6 of ESP32
SD0:SD0 port to IO7 of ESP32
SD1:SD1 port to IO7 of ESP32
CMD:CMD port to IO11 of ESP32
GND:Power line ground
AREF:input voltage for reference, here connect to NC.
3V3:3.3V Vo, can provide 600mA current out at most.
VCC:The Vi/Vo is 5V charged by USB and 3.7V charged by lithium battery.
IO36/A0:A0 (Arduino), analog input, connect to IO36 of ESP32.
IO39/A1:A1 (Arduino), analog input, connect to IO39 of ESP32.
IO34/A2:A2 (Arduino), analog input, connect to IO34 of ESP32.

Welcome to DFRobot: www.DFRobot.com.cn 6/ 49
IO35/A3:A3 (Arduino), analog input, connect to IO35 of ESP32.
IO15/A4:A4 (Arduino), analog input, connect to IO15 of ESP32.
NC:Not connected
IO0:Digital interface, connect to IO0 of ESP32.
SCK:Clock pin of SPI, connect to IO18 of ESP32.
MOSI:SPI’s MOSI data-wire, connect to IO23 of ESP32.
MISO:SPI’s MOSO data-wire, connect to IO19 of ESP32.
SDA:I2C’s data-wire, connect to IO21 of ESP32.
SCL:Clock pin of I2C, connect to IO22 of ESP32.
BCLK:Clock pin of I2S, connect to IO14 of ESP32.
MCLK:Clock pin of I2S, connect to IO12 of ESP32.
DO:DO data-wire of I2S, connect to IO4 of ESP32.
DI:DI data-wire of I2S, connect to IO16 of ESP32.
LRCK:LRCK data-wire of I2S, connect to IO17 of ESP32.
RST:Low level reset port.
For master control board of the FireBeetle, we have reserved external DC ports for more
complex projects, supporting other peripheral chargers such as wireless charging module and
solar charging module.
Caution: + should be connected to the positive pole of the external charger;
- should be connected to the negative pole of the external charger.
The input voltage is from 4.7V to 6V.

Welcome to DFRobot: www.DFRobot.com.cn 7/ 49
Chapter2: Quick-start
FireBeetle Board-ESP32 Hardware
In the Chapter1, we have introduced pins and corresponding peripheral default profiles of Arduino
IDE. Please refer to the Chapter1 if you have any enquiry related to the special provision of pins.
Characteristics
Working voltage: 3.3V
Input voltage: 3.3V~5V
Support electric current of low power consumption: 10 μA
Support maximum discharge current: 600mA
Support maximum charge current: 500mA
Support USB charging.
Processer: Tensilica LX6 dual core processer (One for high speed connection; one for
independent programing).
Frequency: 240MHz
SRAM:520KB
Flash:16Mbit
Wi-Fi standard:FCC/CE/TELEC/KCC
Wi-Fi protocol: 802.11 b/g/n/d/e/I/k/r (802.11n, high speed can reach to 150 Mbps),
converge A-MPDU and A-MSDU, supporting 0.4us protecting interval.
Frequency range: 2.4~2.5 GHz
Bluetooth protocol: Comply with BR/EDR/BLE standard of Bluetooth v4.2.
Bluetooth audio: the current under low power consumption of CVSD and SBC is 10μA
Working current: 80mA in average
Frequency range: 2.4~2.5GHz
Support one-key downloading.
Support micropython.
On-chip clock: 40MHz crystal and 32.768 KHz crystal.
Digital I/O: 10 (default setting of arduino)
Simulative input: 5(default setting of arduino)
SPI: 1 (default setting of arduino)
I2C: 1 (default setting of arduino)
I2S: 1 (default setting of arduino)
LED_BUILTIN:D9
Interface: FireBeetle series compatible
Working temperature: -40℃~+85℃

Welcome to DFRobot: www.DFRobot.com.cn 8/ 49
Dimension: 24 ×53(mm)/0.94 x 2.09(inches)
The dimension of mounting hole: inner diameter 3.1mm; outside diameter 6mm.
On-board reset bottom
Hardware vision: V1.0
FireBeetle Board-ESP32 can charged by lithium battery. The port as shown below.
Specification
FireBeetle Board-ESP32 mother board is fully compatible with FireBeetle range, the dimension
parameters of it shown as below.

Welcome to DFRobot: www.DFRobot.com.cn 9/ 49
Distance from pin to pin: 2.54mm.
Distance between two mounting holes: 24mm/53mm.
Dimension of mounting hole: 3.1mm.
Dimension of motherboard: 29.00×58.00mm
Thickness of the board: 1.6mm
Arduino IDE for FireBeetle Board-ESP32
FireBeetle Board-ESP32 is easy for and on its users, even for a novice. The tutorial below present the
way to download and install Arduino IDE software, processing in Arduino IDE.
3 Basic necessities: a FireBeetle Board-ESP32, USB data wire, and a computer that runs with
Windows/Mac OS/Linux system and has network.
The FireBeetle Board-ESP32 and USB data wire that needed, as shown below.
USB data wire FireBeetle Board-ESP32
Arduino IDE for FireBeetle Board-ESP32 let your Arduino IDE support FireBeetle Board-ESP32 control
board. You can set up the development environment quickly by the instruction below.
STEP1: the way to download Arduino IDE software.
The instructions below are based on Windows operating system. It works as a reference to other
operating systems.
Firstly, please download the latest version of Arduino IDE software from the official website.
Our official website: http://arduino.cc/en/Main/Software
Download link: http://arduino.cc/en/Main/Software

Welcome to DFRobot: www.DFRobot.com.cn 10 / 49
Caution: as the tutorial used Arduino IDE 1.8.0, please use Arduino 1.8.0 or later ones for the best
experience.
Please choose the corresponding installation package from the list to the right of the download
page. Windows system users can choose either Windows installer or Windows ZIP to download.
Nonetheless Windows installer is better for freshman. Installing driver by hand is needed for
Windows ZIP. For Windows installer, there is no need for extra manual install drive. You can execute
installation directly and follow the Setup Wizard to accomplish the configuration. The drive will be
installed automatically after the installation.

Welcome to DFRobot: www.DFRobot.com.cn 11 / 49
STEP2: language setting of Arduino IDE
Arduino IDE supports multiple languages itself. We only require choosing the desired language and
restart IDE. E.g. Chinese (China)
Open File->Preferences->Editor Language
STEP3: install the core center of the FireBeetle Board-ESP32.
Arduino IDE installation package does not contain the core center of the FireBeetle Board-
ESP32.Therefore, we need to add it manually. To add FireBeetle Board-ESP32 we should add the
core center of the FireBeetle Board-ESP32 firstly by hand in the Arduino development manager.
A. Open file-> Preferences, Copy the URL below to the Additional Boards Manager URLs
and click OK to complete the setup.
https://git.oschina.net/dfrobot/FireBeetle-ESP32/raw/master/package_esp32_index.json
Caution: If other URL has been put, please click the bottom and add the URL, seen as below.
B. Open tools-> Boards-> Boards Manager

Welcome to DFRobot: www.DFRobot.com.cn 12 / 49
Input FireBeetle and wait for the loading in the board manager.
FireBeetle 0.03 is the right one. You can also choose the latest version and click Install.
It will cost 5 to 10 minutes in average.
The FireBeetle-ESP32 Mainboard will be marked with INSTALLED after the installation as shown
below.

Welcome to DFRobot: www.DFRobot.com.cn 13 / 49
Caution: The network barrier will lead to installation blocking. Then you should restart Addino IDE
forcefully and redo the steps before. Or you should speed up the network with proxy software to
accomplish the installation. Moreover, some key processes may be blocked by the firewall and
antivirus software. That’s why you should authorize it to change and add it to the write page.
STEP4: connect FireBeetle Board-ESP32 to your computer.
When we installed the Arduino IDE and the core center of the FireBeetle Board-ESP32 successfully,
FireBeetle Board-ESP32 can be connected to computer by USB data wire. If the operation is right,
CHG power light of the FireBeetle Board-ESP32 will flash to check whether the lithium battery has
been applied.
You reguire confirming the developing board has been recognized by the computer and which
COM has been connected (for COM to COM interaction).
The following steps will help you to confirm.
Open Control panel-> Device Manager->Ports (COM&LPT).
The COM connects to FireBeetle Board-ESP32 shown in the list as below (Here is COM3)

Welcome to DFRobot: www.DFRobot.com.cn 14 / 49
If the device cannot be recognized, you should download FireBeetle Board-ESP32 driver to the
computer.
Download link: https://github.com/Chocho2017/FireBeetle-Board-ESP32.git
Save the drive file FireBeetle-ESP32.inf to anywhere in your computer, right click on FireBeetle-
ESP32 and choose update driver as below.
Browse the computer to find out the driver software and input file catalog of FireBeetle-ESP32.inf
saved before, click Next to continue, shown as below.

Welcome to DFRobot: www.DFRobot.com.cn 15 / 49
Caution: FireBeetle-ESP32.inf file should be saved into the drivers’ file of Arduino IDE.
And follow the prompts to fulfill the installation of drive file.
STEP5: program in the Arduino IDE.
After the installation of Arduino IDE software, operating it and open the processing window. In this
window, you can edit and upload codes, and use the built-in serial monitor to the communication
between serial and development board. Now let’s check the Arduino IDE interface carefully.
Different from common C language programming, a Arduino programing consists of void setup()
and void loop().
‘void setup()’, provided for initialization programs. It only runs once when the development board
power-on.

Welcome to DFRobot: www.DFRobot.com.cn 16 / 49
‘void loop ()’, provided for repeatable programs. These repeatable programs of the board
contribute to real-time interaction with the externals.
The write area in the iamge is for programing. The black area is information window, shows the
information of uploading/ verifying /compiling.
You can set information related by click File->Page Setup.
STEP6: upload codes to FireBeetle-ESP32.
In this step, an example process Blink of FireBeetle Board-ESP32 will be represented to you. Blink
controls the LED light of D9 flash in every one second. Same as many Arduino boards, FireBeetle
Board-ESP32 has a LED light, D9. Therefore, no other peripheral object is needed. LED’s status
indicator can be found in the mother board of FireBeetle Board-ESP32.
Please confirm the accuracy of the codes in priority before uploading. Please click
verify/compile to confirm.
Caution: the example code of Blink is in File>Examples>Basics>Blink.

Welcome to DFRobot: www.DFRobot.com.cn 17 / 49
A message of Done compiling will be displayed in the information window after few seconds if
your operation is right. The message showed a successful compilation. Please backup to check
whether the processing is completed if any error.
After the programing, please choose Tools->Board-> FireBeetle-ESP32. In general, this step
performs only once on first use if you would not change the board.
Switch to Tools->Port, according to the number of serial port shown in the FireBeetle Board-ESP32,
we should choose COM3 as the communication port. The communication port appears only
when the development board has connected to a computer and been successfully recognized.
We should confirm the communication port carefully before every uploading, for a development
board may occupy different ports after insertion and extraction.
After the choice of COM, the information of board and port shows in the lower right of the
window.

Welcome to DFRobot: www.DFRobot.com.cn 18 / 49
Finally, clicking upload to burn the program onto the FireBeetle Board-ESP32.
If you upload it successfully, message Done uploading would be presented in the information
window. Meanwhile, D9 starts to flash.

Welcome to DFRobot: www.DFRobot.com.cn 19 / 49
In short, there are three steps to upload codes for Arduino.
Compile the code.
Choose the version of development board and port.
Upload
Above are primary methods of how to use FireBeetle Board-ESP32 in the Arduino IDE.
Please feel free to our forum to contact us if you have any enquiry or suggestion.
Caution: developers are the most common users of FireBeetle Board-ESP32 and not all peripherals
have examples for reference, for there is some bugs to be discovered and repaired. IO/I2C/SPI
can be used directly in the Arduino IDE now and we are making efforts to explore more.
Link to the forum: http://www.dfrobot.com.cn/community/forum.php
Welcome to our community! Many detailed tutors and fantastic projects are waiting for you! You
can share your projects and idea with other forum members. Welcome to DFrobot!
Link to the DFRobot: http://www.dfrobot.com.cn

Welcome to DFRobot: www.DFRobot.com.cn 20 / 49
Chapter 3: The Basics of Using Peripherals in the FireBeetle Board-ESP32
This chapter covers the basics of how to use peripherals in the FireBeetle Board-ESP32 by some
example projects. You can also modify the example projects below to finish your own projects.
The FireBeetle Board-ESP32 mainly includes UART; I2C; SPI; ADC; PWM; DAC; and integrated hall
sensor etc.
Project1: The experiment of Serial Port
In the first chapter, we have uploaded Blink, a flash program to test the LED light in the board.
Now, let’s print the timing data in every second with UART pin.
Components in need:
1 x FireBeetle Board-ESP32
Hardware linking method:
No need for other sensor. Please connect FireBeetle Board-ESP32 directly to your computer by USB
data wire.
Enter code
You would better enter the code manually than open Course->Item-1 to be familiar with it.
Sample code:
void setup() {
Serial.begin(115200);
Table of contents
Other DF ROBOT Microcontroller manuals
Popular Microcontroller manuals by other brands
Texas Instruments
Texas Instruments mmWaveICBoost user guide
Texas Instruments
Texas Instruments MSP430F6721 manual
ST
ST STEVAL-STWINBX1 user manual
Renesas
Renesas Synergy DK-S3A7 user manual
Microchip Technology
Microchip Technology megaAVR 0 Series manual
NXP Semiconductors
NXP Semiconductors S12 MagniV MC9S12ZVML128 quick start guide

HANHAA
HANHAA Symbisa HY-000003 user manual
Nuvoton
Nuvoton NuMicro MS51 Series Technical reference manual
ST
ST STM32L496 Series Application note
Littlebits
Littlebits BUBBLE BOT manual
Microchip Technology
Microchip Technology PIC16C62B quick start guide
Silicon Laboratories
Silicon Laboratories C8051F32x-DK user guide
