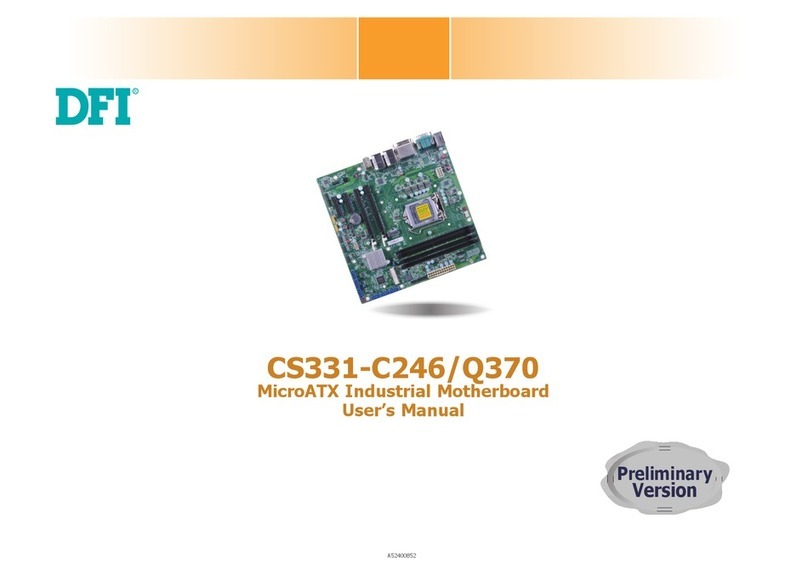
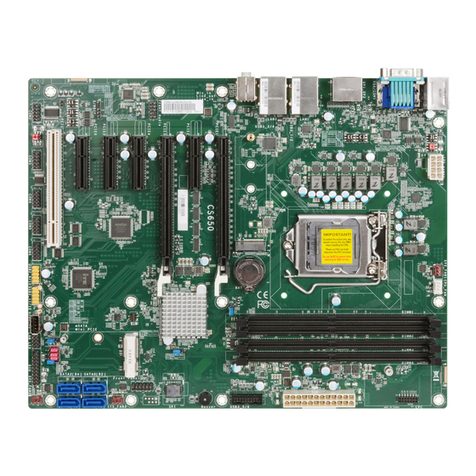
DFI 586ITOX User manual

586ITOX
Rev. B+
System Board
User’s Manual
34070910

Copyright
Thispublicationcontainstheinformationthatisprotectedbycopyright.
Nopartofitmaybereproducedinanyformorbyanymeansorused
to make any transformation/adaptation without the prior written
permissionfromthecopyrightholders.
Thispublication is providedfor informational purposesonly. The
manufacturermakesnorepresentationsorwarrantieswithrespectto
thecontentsoruseofthismanualandspecificallydisclaimsanyexpress
orimpliedwarrantiesofmerchantabilityorfitnessforanyparticularpurpose.
Theuserwillassumetheentireriskoftheuseortheresultsoftheuseof
thisdocument.Further,themanufacturerreservestherighttorevisethis
publicationandmakechangestoitscontentsatanytime,withoutobligation
tonotifyanypersonorentityofsuchrevisionsorchanges.
AllRightsReserved.
Trademarks
Microsoft®MS-DOS®,WindowsTM andWindows®95areregistered
trademarksofMicrosoftCorporation.IntelandPentiumareregistered
trademarksofIntelCorporation.Cyrix,6x86,6x86Land6x86MXare
registeredtrademarksof Cyrix Corporation.AMD,K5and K6 are
registeredtrademarksofAdvancedMicroDevices,Inc. IBMisaregistered
trademarkofInternationalBusinessMachineCorporation.Awardisa
registeredtrademarkofAwardSoftware,Inc.Othertrademarksand
registeredtrademarksofproductsappearinginthismanualarethe
propertiesoftheirrespectiveholders.
Caution:
Danger of explosion if battery incorrectly replaced. Replace only with the
same or equivalent type recommended by the manufacturer. Dispose of
used batteries according to the battery manufacturer’s instructions.

FCC and DOC Statement on Class B
This equipment has been tested and found to comply with the limits
for a Class B digital device, pursuant to Part 15 of the FCC rules.
These limits are designed to provide reasonable protection against
harmful interference when the equipment is operated in a residential
installation. This equipment generates, uses and can radiate radio
frequency energy and, if not installed and used in accordance with
the instruction manual, may cause harmful interference to radio
communications. However, there is no guarantee that interference
will not occur in a particular installation. If this equipment does cause
harmful interference to radio or television reception, which can be
determined by turning the equipment off and on, the user is
encouraged to try to correct the interference by one or more of the
following measures:
•Reorient or relocate the receiving antenna.
•Increase the separation between the equipment and the receiver.
•Connect the equipment into an outlet on a circuit different from
that to which the receiver is connected.
•Consult the dealer or an experienced radio TV technician for
help.
Notice:
1.The changes or modifications not expressly approved by the
party responsible for compliance could void the user's authority
to operate the equipment.
2.Shielded interface cables must be used in order to comply with
the emission limits.

TableofContents
Chapter 1 - Introduction
Features and Specifications.............................................................................
Package Checklist..................................................................................................7
12
Chapter 2 - Award BIOS Setup Utility
The Basic Input/Output System..................................................................
Standard CMOS Setup.....................................................................................
BIOS Features Setup..........................................................................................
Chipset Features Setup.....................................................................................
Power Management Setup..............................................................................
PNP/PCI Configuration.....................................................................................
Load Fail-Safe Settings........................................................................................
Load Optimal Settings.......................................................................................
Integrated Peripherals........................................................................................
Supervisor Password..........................................................................................
User Password.......................................................................................................
IDE HDDAuto Detection.............................................................................
Save & Exit Setup.................................................................................................
Exit Without Saving.............................................................................................
14
14
18
22
24
28
30
30
31
34
35
36
37
37
Chapter 3 - Upgrade Guide
System Memory.....................................................................................................
Cache Memory.......................................................................................................
Processor Upgrade Information..................................................................
Jumper Settings for Modem Ring-on........................................................
Jumper Settings for CMOS Clear...............................................................
Jumper Settings for VGA..................................................................................
Jumper Settings for Software Power-off.................................................
39
43
44
52
53
54
55
Appendix A - Installation Instructions
Preparing theArea..............................................................................................
Handling the System Board............................................................................61
61
Chapter 4 - Desktop Management Interface
Desktop Management Interface..................................................................57
Appendix B - Connecting Cables
Ports and Connectors.......................................................................................65
Appendix C - System Board Layout
System Board Layout.........................................................................................77
Appendix D - DIM and SIM Modules
Types of Modules.................................................................................................79
Appendix F - Driver Installation
Driver Installation..................................................................................................84
Appendix G - Troubleshooting
Troubleshooting.....................................................................................................86
Appendix E - Watchdog Timer
Using the Watchdog Timer Function........................................................82

586ITOX System Board User’s Manual
1
6
Introduction
CHAPTER

1
Introduction
7
Features and Specifications
Processor Upgrade
The system board is equipped with a 321-pin ZIF socket (Intel
Socket 7). This socket is designed for easy removal of an old
processor and easy insertion of an upgrade processor. It is also
equipped with a switching voltage regulator that supports 2.8V, 2.9V,
3.2V, 3.3V and 3.5V core voltage for various processors.
•Intel Pentiumprocessor with MMXTM technology-166/200/
233MHz
•Intel Pentium90/100/120/133/150/166/200MHz
•Cyrix6x86 and 6x86L PR150+/PR166+
•Cyrix6x86MX-PR166/PR200
•AMDK5 PR90/PR100/PR120/PR133/PR166
•AMDK6-166, K6-200, K6-233
Chipset
•Intel82430TX PCIset chipset
System Memory
The system board supports 8MB to 256MB of memory. It is
equipped with two DIMM and four SIMM sockets. The 168-pin
DIMM sockets use x64 EDO (60/70ns), fast page mode (60/70ns),
or SDRAM (10/12/13ns), 3.3V. The 72-pin SIMM sockets use EDO
or fast page mode, 60/70ns, x32 DRAM, 5V.
Cache Memory
•512KB pipeline burst, direct map write-back cache installed on
the system board.
BIOS
•Award BIOS, Windows95 Plug and Play compatible
•Flash EPROM for easy BIOS upgrades
•Supports DMI function

586ITOX System Board User’s Manual
1
8
Energy Efficient Design
•System power management supported
•CPU stopped clock control
•Hardware supports SMI green mode
•Microsoft®/Intel®APM 1.2 compliant
•Soft Power supported - ACPI v1.0a specification
ACPI Specification and OS Directed Power
Management
The system board is designed to meet the ACPI (Advanced
Configuration Power Interface) specification. It has energy saving fea-
tures which enable operating systems to reliably manage and coordi-
nate power planes, PnP (Plug-and-Play) peripherals, and cooling fans.
The system board is PC 97 compliant. Microsoft's PC 97
"OnNow" design allows continual "power on" with reduced energy
consumption.
RTC Timer to Power On the System
The RTC installed on the system board allows your system to
automatically wake up on the set day and time. Set the day and
time you would like your system to power on in the “Resume By
Alarm” field (Power Management Setup) of theAward BIOS.
Modem Wake-up/Ring-on
The Modem Wake-Up feature allows the sleeping (Suspend mode)
PC to wake-up to respond to incoming calls. The Modem Ring-on
feature allows the Soft Power Down (Soft-Off) PC to power on to
respond to incoming calls.
Enable this function in the “Resume By Ring” field (Power
Management Setup) of the Award BIOS and set JP10 to the COM
port where your modem is connected.
Note:
This feature supports external modem only.

1
Introduction
9
Damage Free Intelligence
•Monitors processor temperature and overheat alarm.
If the temperature of the processor is over 85oC, an alarm will
sound and the Green LED will illuminate warning you of system
overheat.
Some of the most common causes leading to high temperature
are:
-The fan is not functioning normally or has stopped. Turn off
your system and replace the fan.
-The space clearance of the processor, fan and heat sink is
inadequate to maintain proper airflow and heat dissipation.
Refer to the Clearance Requirements section in Chapter 3 of
this manual.
-The chassis or cabinet has poor ventilation.
•Monitors 5V and 12V power voltages and failure alarm.
The system board is able to detect the output voltage of your
power supply. If the output voltage is over or under 5V or 12V
(±10%), an alarm will sound warning you of voltage irregularity.
Some of the most common causes leading to unstable output
voltage of a power supply are:
-The power supply is not functioning normally. Turn off your
system and replace the power supply.
-The AC input from the power outlet to your system is
unstable.
•Automatic processor fan control to save energy, prevent system
overheat, prolong fan life and implement silent system.
With the system’s power switched on, the processor’s fan will
rotate only if the temperature of the processor is over 25oC
(±10%).

586ITOX System Board User’s Manual
1
10
Dual Function Power Button
Dual Function Power Button allows two distinct OFF modes. In
Sleep mode, a PC powers down but not off. In Soft-Off, a PC shuts
down but requires a reboot to "awaken" it.
“Soft-Off By PWR-BTTN” in the Power Management Setup of the
Award BIOS allows you to select the method of powering off your
system.
Watchdog Timer
The system board is designed for Industrial PC applications. It
supports the Watchdog Timer function allowing your application to
regularly “clear” the system at the set time interval. If the system
hangs or fails to function, it will reset at the set time interval so
that your system will continue to operate. Refer to “Watchdog
Timer” in the Chipset Features Setup of the Award BIOS.
•8 step counter (0.5/1/2/4/8/16/32/64 sec) controlled by the
BIOS
Onboard Graphics Accelerator
•S3 Trio64V+ accelerated 64-bit graphics controller
•1MB video memory onboard
•Video Playback feature
•VESA DDC2B for Plug and Play monitors
HDD Interface
•Two PCI IDE interfaces support up to four IDE devices
•Ultra DMA/33 supported (Synchronous DMA mode - data
transfer rate up to 33MB/sec.)
•PIO Mode 3 and Mode 4 Enhanced IDE (data transfer rate up
to 16.6MB/sec.)
•Bus mastering reduces CPU utilization during disk transfer
•ATAPI CD-ROM supported

1
Introduction
11
FDD Interface
•One floppy drive interface supports two 360KB, 720KB,
1.2MB, 1.44MB, or 2.88MB floppy drives.
ATX Double Deck Ports
•Two DB-9 serial ports
•One DB-25 parallel port
•One mini-DIN-6 PS/2 mouse port
•One mini-DIN-6 PS/2 keyboard port
•One 15-pin analog VGA port
•Two USB ports
USB Ports
The system board is equipped with two USB ports. USB allows
data exchange between your computer and a wide range of
simultaneously accessible external Plug and Play peripherals.
IrDA Interface
The system board is equipped with an IrDA connector for wireless
connectivity between your computer and peripheral devices.
Expansion Slots
The system board is equipped with one dedicated PCI slots, five
dedicated 16-bit ISA slots and one shared PCI/ISA slot. All PCI
slots are bus masters.
ATX Power Supply Connector
The system board is equipped with an ATX power supply connector.
Using an ATX power supply, you can either shut down your com-
puter by pressing the Power button located on the front bezel of
your computer or by executing the Shut Down command under
the Windows95 operating system. Your system will then enter
the “Soft Off” state.

586ITOX System Board User’s Manual
1
12
To power on your system automatically, enable “Resume By Alarm”
in the Power Management Setup of the Award BIOS. This will
allow you to set the day and time you would like your system to
wake up.
An ATX power supply also provides adequate airflow throughout
the chassis to prevent overheating the processor.
Package Checklist
The 586ITOX package contains the following items:
•The 586ITOX system board
•The 586ITOX user’s manual
•One 40-pin IDE hard disk cable
•One 34-pin floppy disk drive cable
•One VGA port cable (optional)
•One IDE driver diskette
•One VGA driver diskette
•One I/O shield
•Five spare jumpers
If any of these items are missing or damaged, please contact your
dealer or sales representative for assistance.

Award BIOS Setup Utility
CHAPTER

2
14
586ITOXSystemBoardUser’sManual
TheBasicInput/OutputSystem
The Basic Input/Output System (BIOS) is a program that takes care
of the basic level of communication between the processor and
peripherals. In addition, the BIOS also contain codes for various
advanced features found in this system board. This chapter explains
the Setup Utility for the Award BIOS.
After you power up your system, the BIOS message appears on your
screen and the memory count begins. After the memory test, the
following message will appear on the screen:
Press DEL to enter setup
If the message disappears before you respond, restart your system or
press the “Reset” button. You may also restart the system by pressing
the <Ctrl> <Alt> and <Del> keys simultaneously.
When you press <Del>, the main program screen will appear.
StandardCMOSSetup
Use the arrow keys to highlight “Standard CMOS Setup” and press
<Enter>. A screen similar to the one on the next page will appear.
ROM PCI/ISA BIOS
CMOS SETUP UTILITY
AWARD SOFTWARE, INC.
STANDARD CMOS SETUP
BIOS FEATURES SETUP
CHIPSET FEATURES SETUP
POWER MANAGEMENT SETUP
PNP/PCI CONFIGURATION
LOAD FAIL-SAFE SETTINGS
LOAD OPTIMAL SETTINGS
INTEGRATED PERIPHERALS
SUPERVISOR PASSWORD
USER PASSWORD
IDE HDD AUTO DETECTION
SAVE & EXIT SETUP
EXIT WITHOUT SAVING
Esc
F10 : Quit
:Save & Exit Setup ↑↓→←
(Shift) F2 :Select Item
:Change Color

2
AwardBIOSSetupUtility
15
Date
The date format is <day>, <month>, <date>, <year>. Day displays
a day, from Sunday to Saturday. Month displays the month, from
January to December. Date displays the date, from 1 to 31. Year
displays the year, from 1994 to 2079.
Time
The time format is <hour>, <minute>, <second>. The time is based
on the 24-hour military-time clock. For example, 1 p.m. is 13:00:00.
Hour displays hours from 00 to 23. Minute displays minutes from 00
to 59. Second displays seconds from 00 to 59.
Primary Master, Primary Slave, Secondary Master and Secondary Slave
These categories allow you to enter the appropriate specifications for
the type of hard disk drive(s) installed in your system. There are 45
predefined types and 4 user definable types for hard drives. Type 1 to
Type 45 are predefined. Type “User” is user-definable.
Press <PgUp> or <PgDn> to select a numbered hard disk type or
type the number and press <Enter>. The hard disk will not work
properly if you enter improper information for this category.
The settings on the screen are for reference only. Your version may not be
identical to this one.
ROM PCI/ISA BIOS
STANDARD CMOS SETUP
AWARD SOFTWARE, INC.
Date (mm:dd:yy) : Mon, Jul 29 1996
Time (hh:mm:ss) : 13: 27: 50
HARD DISKS
Primary Master
Primary Slave
Secondary Master
Secondary Slave
TYPE
Auto
Auto
Auto
Auto
SIZE
0
0
0
0
CYLS
0
0
0
0
HEAD
0
0
0
0
PRECOMP
0
0
0
0
LANDZ
0
0
0
0
SECTOR
0
0
0
0
MODE
Auto
Auto
Auto
Auto
Drive A : 1.44M, 3.5 in.
Drive B : None
Video : EGA/VGA
Halt on : All Errors
Base Memory : 640K
Extended Memory : 64512K
Other Memory : 384K
Total Memory : 65536K
PU/PD/+/- : Modify
↑↓→← : Select Item
: Change
(Shift)F2
:
:
:
:
Esc
F10 : Quit
: Save & Exit Setup

2
16
586ITOXSystemBoardUser’sManual
You can use Type “User” to define your own drive type manually. This
information should be included in the documentation from your hard
disk vendor.
If the controller of the HDD interface is ESDI, you must select “Type
1”. If the controller of the HDD interface is SCSI, you must select
“None”.
If you select Type ”Auto”, the BIOS will auto-detect the HDD & CD-
ROM drive at the POST stage and show the IDE for the HDD &
CD-ROM drive. If a hard disk has not been installed, select “None”
and press <Enter>.
Drive A and Drive B
These categories identify the types of floppy disk drives installed. The
options for drive A and B are:
NoneNo floppy drive is installed
360K, 5.25 in.5-1/4 in. standard drive; 360KB capacity
1.2M, 5.25 in.5-1/4 in.AT-type high-density drive; 1.2MB capacity
720K, 3.5 in.3-1/2 in. double-sided drive; 720KB capacity
1.44M, 3.5 in.3-1/2 in. double-sided drive; 1.44MB capacity
2.88M, 3.5 in.3-1/2 in. double-sided drive; 2.88MB capacity
Note:
Choosing an incorrect type might cause your system to format the
floppy disk improperly and you cannot access your data.
Video
This category selects the type of video adapter used for the primary
system monitor. Although secondary monitors are supported, you do
not have to select the type in Setup. The default setting is EGA/VGA
(BIOS default, Setup default).
EGA/VGAEnhanced GraphicsAdapter/Video Graphics Array. For
EGA, VGA, SVGA and PGA monitor adapters.
CGA 40Color GraphicsAdapter. Power up in 40-column mode.
CGA 80Color GraphicsAdapter. Power up in 80-column mode.
MonoMonochrome adapter. Includes high resolution
monochrome adapters.

2
AwardBIOSSetupUtility
17
Halt On
This category determines whether the system will stop if an error is
detected during power up. The default setting is All Errors (BIOS
default, Setup default).
No ErrorsThe system boot will not stop for any errors detected.
All ErrorsThe system boot will stop whenever the BIOS detects
a non-fatal error.
All, But KeyboardThe system boot will not stop for a keyboard
error; it will stop for all other errors.
All, But DisketteThe system boot will not stop for a disk error;
it will stop for all other errors.
All, But Disk/KeyThe system boot will not stop for a disk or
keyboard error; it will stop for all other errors.
Memory
The base memory size, extended memory size and the other memory
size cannot be altered; your computer automatically detects and displays
them.
Base MemoryThe POST will determine the amount of base (or
conventional) memory installed in the system. The
value of the base memory is typically 512K for
systems with 512K memory installed on the
motherboard or 640K for systems with 640K or
more memory installed on the motherboard.
Extended MemoryThe BIOS determines how much extended
memory is present during the POST. This is the
amount of memory located above 1MB in the
CPU’s memory address map.
Other MemoryThis refers to the memory located in the 640K to
1024K address space. This is the memory that can
be used for different applications. DOS uses this
area to load device drivers in an effort to keep as
much base memory free for application programs.
The BIOS is the most frequent user of this RAM
area since this is where it shadows the ROM.

2
18
586ITOXSystemBoardUser’sManual
BIOSFeaturesSetup
The BIOS Features Setup allows you to configure your system for basic
operation. Some entries are defaults required by the system board,
while others, if enabled, will improve the performance of your system
or let you set some features according to your preference.
The settings on the screen are for reference only. Your version may not be
identical to this one.
Virus Warning
This category protects the boot sector and partition table of your hard
disk drive. When this item is enabled, the Award BIOS will monitor the
boot sector and partition table of the hard disk drive. If an attempt
is made to write to the boot sector or partition table of the hard disk
drive, the BIOS will halt the system and an error message will appear.
After seeing the error message, if necessary, you will be able to run
an anti-virus program to locate and remove the problem before any
damage is done.
Many disk diagnostic programs which attempt to access the boot
sector table will cause the warning message to appear. If you are
running such a program, we recommend that you first disable this
category. Also, disable this category if you are installing or running
certain operating systems like Windows®95 or the operating system
may not install nor work.
ROM PCI/ISA BIOS
BIOS FEATURES SETUP
AWARD SOFTWARE, INC.
Virus Warning
CPU Internal Cache
External Cache
Quick Power On Self Test
Boot Sequence
Swap Floppy Drive
Boot Up Floppy Seek
Boot Up NumLock Status
Typematic Rate Setting
Typematic Rate (Chars/Sec)
Typematic Delay (Msec)
Security Option
PCI/VGA Palette Snoop
OS Select For DRAM > 64MB
:Disabled
: Enabled
: Enabled
:Disabled
:A, C, SCSI
:Disabled
: Enabled
: On
:Disabled
: 6
: 250
: Setup
:Disabled
: Non-OS2
Video BIOS Shadow
C8000-CBFFF Shadow
CC000-CFFFF Shadow
D0000-D3FFF Shadow
D4000-D7FFF Shadow
D8000-DBFFF Shadow
DC000-DFFFF Shadow
: Enabled
:Disabled
:Disabled
:Disabled
:Disabled
:Disabled
:Disabled
ESC
F1
F5
F6
F7
: Quit
: Help
: Old Values
:Load Fail-Safe Settings
: Load Optimal Settings
↑↓→←
PU/PD/+/-
(Shift) F2
: Select Item
: Modify
: Color

2
AwardBIOSSetupUtility
19
CPU Internal Cache and External Cache
These categories speed up the memory access. The default value
is enabled. Enable the External Cache for better performance.
Quick Power On Self Test
This category speeds up Power On Self Test (POST) after you
power on your system. If it is set to Enabled, the BIOS will shorten
or skip some check items during POST.
Boot Sequence
This category determines which drive to search first for the disk
operating system (i.e. DOS). The default isA, C, SCSI.
The options are:
A,C,SCSI;C,A,SCSI;C,CDROM,A;CDROM,C,A;
D,A,SCSI;E,A,SCSI;F,A,SCSI;SCSI,A,C;
SCSI,C,A;C only;LS/ZIP, C.
Swap Floppy Drive
When this option is enabled and the system is booting from the floppy
drive, the system will boot from drive B instead of drive A. When this
option is disabled and the system is booting from the floppy drive, the
system will boot from drive A. You must have two floppy drives to
use this function.
Boot Up Floppy Seek
When enabled, the BIOS will check whether the floppy disk drive installed
is 40 or 80 tracks. Note that the BIOS cannot distinguish between 720K,
1.2M, 1.44M and 2.88M drive types as they are all 80 tracks. When
disabled, the BIOS will not search for the type of floppy disk drive by
track number. Note that there will not be any warning message if the drive
installed is 360KB.
Boot Up NumLock Status
This allows you to determine the default state of the numeric keypad.
By default, the system boots up with NumLock on wherein the function

2
20
586ITOXSystemBoardUser’sManual
of the numeric keypad is the number keys. When set to Off, the
function of the numeric keypad is the arrow keys.
Typematic Rate Setting
When disabled, continually holding down a key on your keyboard will
cause the BIOS to report that the key is down. When the typematic
rate is enabled, the BIOS will not only report that the key is down,
but will first wait for a moment, and, if the key is still down, it will begin
to report that the key has been depressed repeatedly. For example,
you would use such a feature to accelerate cursor movements with
the arrow keys.
Typematic Rate (Chars/Sec)
This selection allows you to select the rate at which the keys are
accelerated.
Typematic Delay (Msec)
This selection allows you to select the delay between when the key
was first depressed and when the acceleration begins.
Security Option
SystemThe system will not boot and access to Setup will be
denied if the correct password is not entered at the
prompt.
SetupThe system will boot, but access to Setup will be denied
if the correct password is not entered at the prompt.
PCI/VGA Palette Snoop
It determines whether the MPEG ISA/VESA VGA Cards can work with
PCI/VGA or not. The default value is Disabled.
EnabledPCI/VGA working with MPEG ISA/VESA VGA cards.
DisabledPCI/VGA not working with MPEG ISA/VESA VGA cards.
OS Select for DRAM > 64MB
This item allows you to access the memory that is over 64MB in
OS/2. The options are: Non-OS/2 and OS/2.
Table of contents
Other DFI Motherboard manuals