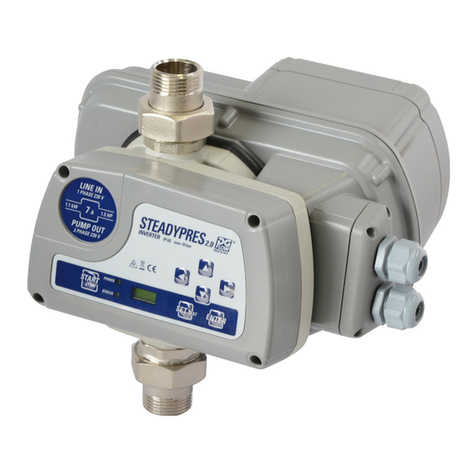
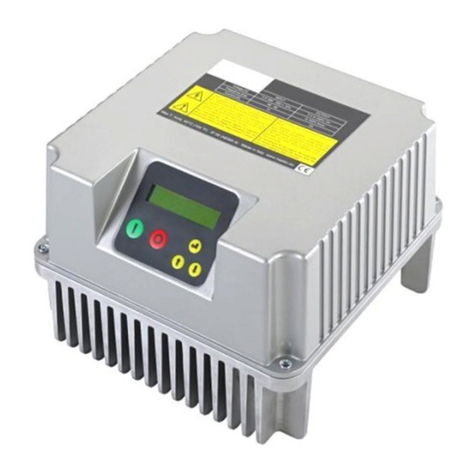
DGFLOW STEADYPRES 2.0 M/M 8.5 User manual

25
SAFETY STANDARDS
Safety important instructions.
This symbol warns that failure to comply with the prescription leads
to a risk of electric shocks.
This symbol warns that failure to comply with the prescription leads to a
risk of injury/damage to persons/objects.
Before installation and use of the product:
- read this manual completely and thoroughly
- Check that the nameplate data are those desired and appropriate to the system,
and in particular that the rated current of the motor is compatible with the rated
current of the inverter
- Installation and maintenance must be carried out by qualified staff, responsible
for performing the hydraulic and electric connections according to the applicable
Standards in force
- The manufacturer declines all responsibility for damage deriving from improper
use of the product and is not liable for damage caused by maintenance or repairs
that are carried out by unqualified staff and/or using non-original spare parts
- The use of non-original spare parts, tampering or improper use, make the
product warranty null and void.
During first installation or when carrying out maintenance make sure that:
- the electric power supply network is not live
- The power supply network is equipped with protections and in particular of high-
sensitivity differential switch (30 mA in class A for domestic application, class
B for industrial applications) and grounding comply with the Standards.
- Before removing the inverter cover or starting interventions on it, the system
must be disconnected from the mains electricity and you must wait for 5 mins
until the intermediate circuit condensers, have the time to discharge via the built-
in discharge resistors.
- do not disconnect the pumps if STEADYPRES is in operation; before you
disconnect the pumps, stop the control and disconnect the power supply.
- WARNING: out of service (flashing red LED) STEADYPRES remains in tension;
prior to any work on the pump or inverter is required, cut off power from the
group.
Emergency stop
An emergency stop can be performed while the inverter is running, by pressing the
START/STOP key.
In parallel inverters installations, only the MASTER inverter stops the whole system.
EN

26
INDEX
- Safety standards …………………………………………………………. 25
PART 1 – QUICK INSTALLATION GUIDE
o
Preliminary checks 27
o
Installation and hydraulic connections 27
o
Power connections 28
o
Signal connections 29
o
Starting-up 30
o
Access to main menu 30
o
Access to parameters 30
o
MENU structure 31
o
BASIC parameters 32
Set pressure quick adjustment 32
o
ADVANCED parameters 33
o
Display the operating parameters 35
o
Test 36
o
Priming and starting up 36
o
Connection of inverter MASTER and SLAVE 36
o
Alarms 37
- PART 2 – OPERATOR’S AND MAINTENANCE MANUAL
o
General remarks 38
o
Working limits 39
o
Technical data 39
o
Dimensions and weight 40
o
Product identification code 40
o
Surge tank 40
oInstallation (for connections see
QUICK INSTALLATION GUIDE
) 41
o
Self-limiting overload 41
o
Connection of the submersible single-phase motor 41
o
Starting up 42
o
Light signals 42
o
Menu inspection (INSP) 42
o
Troubleshooting 43
o
Maintenance 44
Replacement of the pressure sensor 44
Calibration of the pressure sensor 45
Fitting the expansion board 45
o
Spare parts diagram 46
o
Warranty 47
o
Disposal 47
o
Declaration of Conformity 47
EN

27
PART 1 - QUICK INSTALLATION GUIDE
PRELIMINARY CHECKS
During the initial installation and maintenance, make sure that ends of the line wires are not
live.
During the initial installation and maintenance, make sure that the system is not under
pressure
to ACCESS THE DRIVE WIRING, open the front cover as shown on p. 5
DO NOT OPEN INVERTER COVERS, except for the connector cover
Models T / T (three-phase IN / three-phase OUT) do not have the switch on board, for these
models the inverter supply line must be protected in accordance with the regulations
- Install the inverter in a place:
oprotected from the elements
oventilated, free from excessive humidity or excessive dust
oas close as possible to the pump
omake sure that does not receive harmful vibrations or mechanical stress from connected
pipelines
- Control panel:
1- START/STOP button
2- Red LED (power)
3- Green LED (status)
4- Display
5- SET button
6- Confirm button
7- Scrolling UP / DOWN
/ RIGHT / LEFT
INSTALLATION AND HYDRAULIC CONNECTIONS
OUT
IN
OK
Install in a
vertical
position
NO
Do not install
in a horizontal
position
O-RING
NO SEALING
NO CANAPA
NO TEFLON
O-RING
Do not use
sealant in the
three-pieces
joint; are
already
equipped
with O-Ring
The freezing of the
liquid contained in the
inverter body causes
irreversible damage
to the inverter
1
3
4
5
6
7
2

28
POWER CONNECTIONS
Open the side cover
(4 screws)
Wire the cables as indicated in the
diagrams below:
A = inverter supply cable
B = output motor cable
Insert the connector and close
the side cover.
CAUTION : to overcome problems associated with long cables (between Inverter
and pump motor) , evaluate the application of inverter output sinusoidal filter. It aids
smooth running of motors eliminating negative effect of voltage peaks
GND
L
N
GND
V
W
U
LINE
MOTOR
N
L
SINGLE-PHASE IN (line)
SINGLE-PHASE OUT (motor)
( M / M )
Pump supply voltage:
230 V single-phase
(or 115 V single-phase)
GND
N
L
GND
LINE
MOTOR
U
W
V
SINGLE-PHASE IN (line)
THREE-PHASE OUT (motor)
( M / T )
Pump supply voltage:
230/400 V three-phase
Motor connection : DELTA
S
V
U
W
GND
R
LINE
T
GND
MOTOR
THREE-PHASE IN (line)
THREE-PHASE OUT (motor)
( T / T )
Pump supply voltage:
230/400 V three-phase
Motor connection : STAR
A
B

29
SIGNAL CONNECTIONS
Expansion board: is located in the back of the inverter (see fig. below)
1
2
3
4
5
6
7
8
9
10 JP3
JP4
JP5
Terminal clamp operation description:
10: not connected
9: RS 485 +
8: RS 485 -
7: not connected
6: not connected
5: level input
4: GND
3: NC output signal
2: comune C
1: NO output signal
JP3: bridged, no function
JP4: bridged, no function
JP5: no function
- LEVEL SIGNAL CONNECTION
10
9
8
7
6
5
4
3
2
1
(or other input signal)
Connect the signal cable to clamps
4 e 5
In applications with parallel inverters,
the wiring must be carried out on the
MASTER
- RS485 SIGNAL CONNECTION
10
9
8
7
6
5
4
3
2
1
10
9
8
7
6
5
4
3
2
1
10
9
8
7
6
5
4
3
2
1
Connect the terminals
n°8 of the inverters in
parallel (RS 485 –)
Connect the terminals
n°9 of the inverters in
parallel (RS 485 +)
as shown aside.
- ALARM SIGNAL CONNECTION
(In applications with parallel inverters, the wiring must be carried out on the MASTER)
10
9
8
7
6
5
4
3
2
1
Logic NC
(normally
closed)
Connect the
signal cable to
terminals 2 and 3
10
9
8
7
6
5
4
3
2
1
Logic NO
(normally
open)
Connect the
signal cable to
terminals 1 and
2
The maximum load for connection is 2 A at 250 Vac

30
STARTING UP
Switch on
(the switch is
not present
in models
T/T)
and wait the
STARTING
time (ab. 10
sec.)
By pressing
the button
START
STOP
you put
IN SERVCE
OUT OF SERVICE
the inverter.
ACCESS TO MAIN MENU
MAIN MENU
BASIC MENU
parameters
BASIC PARAMETERS for the configuration of the drive.
ADVANCED MENU
parameters
ADVANCED PARAMETERS for the detailed configuration of
the drive.
INSPECTION MENU
parameters
INSPECTION PARAMETERS, display the hours of work, the
number of starts, alarm history, etc..
TEST
mode
(only in
OFF
mode)
TEST mode allows you to start and stop the pump in manual mode (START
/ STOP button) and change the frequency in steps of 1 Hz.
It also allows to control the operating parameters of the motor and inverter.
WARNING: DURING MANUAL OPERATION, AUTOMATIC CONTROLS
ARE EXCLUDED, AND THE OPERATOR MUST AVOID ANY
INCORRECT OPERATION.
ACCESS TO PARAMETERS
BASIC
ADV
INSP
TEST
To ACCESS the
four main MENU
Press the SET
button for 3 sec.
To SCROLL the 4
MAIN MENU
use the buttons
To ACCESS and
EXIT the MAIN
MENU
use the buttons
To MODIFY the
parameters
use the buttons
To SCROLL the
parameters
use the buttons
To ENTER and EXIT
the parameters
use the buttons

31
MENU STRUCTURE
SET
BASIC
P SET PRESSURE
2P SECOND SET PRESSURE
A MOTOR CURRENT
RO MOTOR DIRECTION OF ROTATION (models with three-phase output)
ADV
d DIFFERENTIAL PRESSURE FOR RESTART
MF NOMINAL MOTOR FREQUENCY
LF MINIMUM OPERATION FREQUENCY
HF MAXIMUM OPERATION FREQUENCY
Td STOP DELAY FOR DRY RUNNING
PF MINIMUM POWER FACTOR (only T/T models)
TPF STOP DELAY FOR POWER FACTOR (only T/T models)
TP RESTART INTERVAL FOR DRY RUNNING
TF STOP DELAY FOR NO FLOW
RF INVERTER REACTIVITY
FS MODULE SWITCHING FREQ
US NO GRIP STARTUPS
EI INPUT SIGNAL
EO OUTPUT SIGNAL
AI RECYCLE FUNCTION
AT RECYCLE ACTIVATION TIME
W INVERTER ADDRESS
V MAINS POWER SUPPLY VOLTAGE
Pd iDRY PRESSURE (%)
FM FLAT MODULATION
SET.F RESTORE FACTORY SETTINGS
INSP
WH OPERATING HOURS
TH TOTAL OPERATING HOURS
NS NO. START-UPS
SH AVERAGE NO. START-UPS
E1 LAST FAULT
E1H TIME OF LAST FAULT
……..
E4 FOURTH LAST FAULT
E4H TIME OF FOURTH LAST FAULT
EE ERROR RESET
TEST

32
BASIC PARAMETERS
The basic parameters for the configuration of the inverter must necessarily be set during installation
Param. description m.u.
Default
Min Max
Step
BAS
IC P 3.5 SET
PRESSURE
(bar)
Sets the constant
working pressure in the
system.
bar 3,5 1 10 0,1
psi 50 15 130
1,5
2P 2.5 SECOND SET
PRESSURE
(bar)
Sets a second working
pressure. To activate
configure parameter EI in
ADV. parameters.
bar 2,5 1 10 0,1
psi 35 15 130
1,5
A 6.0 MOTOR
CURRENT
(A)
Sets the motor rated current at the inverter output (rated
current of the motor)
At low supply voltages, the current set should leave a margin
(eg. + 15%) to compensate for the low voltage.
m.u. Default Min Max Step
M/M 8.5
A
8.5
1
8,5
0,1
M/M 11
A
11
1
11
0,1
M/M 16
A
16
1
16
0,1
M/T 7
A
7
1
7
0,1
M/T 12
A
12
1
12
0,1
T/T 6
A
6
1
6
0,1
T/T 8
A
8
1
8
0,1
RO
MOTOR DIRECTION
OF ROTATION ONLY FOR THREE-PHASE OUTPUT - Set the direction
of rotation of the three-phase motor (CW / CCW)
Set pressure quick adjustment
To increase 0,1 bar press
SIMULTANEOUSLY
To decrease 0,1 bar press
SIMULTANEOUSLY
display the firmware version (FW)
To display the FW version of the
CONTROL BOARD (FWI) and the
POWER BOARD (FWP)
Bring
STEADYPRES out
of service (OFF)
Press
simultaneously
P_3.2
P_3.
3
ENTER
P_3.
1
ENTER

33
ADVANCED PARAMETERS
Listed below the ADVANCED PARAMETERS for the configuration of the inverter
Param. description u.m. Default Min Max Step
ADV
d 0.40
DIFFERENTIAL
PRESSURE
FOR RESTART
Sets the difference between the
selected pressure (SETPOINT)
and the effective restart pressure
bar 0,5 0,4 1,0 0,1
psi 6 6 15 1,5
MF 50
NOMINAL
MOTOR
FREQUENCY
Sets the nominal frequency of the
motor
The set value MUST be the same
as the value indicated on the
motor plate
Hz 50 50 60 -
LF30
MINIMUM
OPERATION
FREQUENCY
Sets the minimum operating
frequency
Hz 30 25 40 1
HF 50
MAXIMUM
OPERATION
FREQUENCY
Sets the maximum operation
frequency.
CAUTION!! Increasing the
maximum frequency above the
nominal frequency may cause
significant motor overload.
Hz MF MF-
5
MF
3
1
Td 10
STOP DELAY
FOR DRY
RUNNING
Sets the pump stop delay under
dry running conditions
CAUTION: high values of the stop
delay may damage the pump
sec 10 1 100
1
PF .50
MINIMUM
POWER
FACTOR
(only T/T
models)
Sets the minimum value for the
power factor below which the inverter
stops the pump.
By setting the minimum power factor
value, read the value of the motor
running with closed valves and
deducting 0.03 to it;
- 0.50 0.50 0.99 0.01
TPF 0
STOP DELAY
FOR POWER
FACTOR
(only T/T mod )
Sets the time delay before the
drive will perform the minimum
power factor alarm.
Setting the value to 0 (zero)
disables this feature.
sec 0 0 3 1
TP10
RESTART
INTERVAL
FOR DRY
RUNNING
Sets the interval between two
successive automatic attempts to
restart following stops for "dry
running"
Setting the value to “0” excludes
attempts for automatic restarts
min
10 0 100
1
TF 3 STOP DELAY
FOR NO FLOW
Sets the pump stop delay under
no flow conditions
sec 3 1 15 1
RF 4 INVERTER
REACTIVITY
Sets the inverter response speed
to pressure changes
The response value selected
depends on the characteristics of
the system
- 3 1 5 1

34
Param. description u.m. Default Min Max Step
ADV
FS 10
MODULE
SWITCHING
FREQ
Sets the switchover frequency for the
power module.
In case of long power cable, without a
sinusoidal filter, set this value at the
minimum
kHz 8 4 12 2
US 0 NO GRIP
STARTUPS
Sets the interval between two
consecutive automatic “no grip” start-
ups (When the pump will be inoperative
for a long).
Setting the value to “0” disables the
function.
min 0 0 999
1
EI 0
INPUT
SIGNAL Sets the digital input FUNCTION (clean
contact type)
- 0 0/ 1/ 2/ 3/ 4/ 5
EI = 0: NO FUNCTION; the input state is ignored
EI = 1: WATER LEVEL; Level signal input with NC logic
EI = 2: EXT ENABLE; Start and disabling by external signal (NC)
EI = 3: PRESS SET 2; enabling the second pressure level SETPOINT2 (NC).
EI = 4: EXTERNAL LEVEL SIGNAL INPUT with NC logic; replaces the signal from
the non-ret rn valve.
EI = 5: ALARM RESET SIGNAL INPUT
EO 0 OUTPUT
SIGNAL
Sets the digital output FUNCTION
(clean contact type)
- 0 0/ 1/ 2/ 3
Max 2 A @ 250 Vac
Max 1 A @ 30 Vdc
EO = 0: NO FUNCTION; the state of the output is never activated.
EO= 1: ALARM OUTPUT; condition of stop due to fault.
EO = 2: PUMP OPERATING OUTPUT; there is at least one operating pump.
EO = 3: recirculation; activates the relay output time intervals defined by param. AI
AI 60 RECYCLE
FUNCTION
Sets the output activation interval (clean
contact type) configured as recycle
function (Eo=3)
min 60 1 999
1
AT 10 RECYCLE
TIME
Sets the duration of the activation of the
output signal (clean contact type)
sec 10 1 999
1
W NC INVERTER
ADDRESS
Activates communication between two
or more inverters, defining the function
of each unit: MS (MASTER unit) , S1/S2
(SLAVE unit), NC (operation with a
single inverter)
- NC NC/ MS/ S1/ S2
V 230
MAINS
POWER
SUPPLY
VOLTAGE
Sets the mains power supply voltage.
230 V for single phase power supply
versions
400V for three phase power supply
versions
V
Pd 70 iDRY
PRESSURE
(%)
Sets the minimum pressure value
(expressed as % of the SET pressure)
that must be reached in no flow,
otherwise an alarm of dry running
% 70 10 100
1
FM
FLAT
MODULATI
ON
Enable / disable the FLAT mod lation; FLAT
mod lation red ces the heating of the
power components of the inverter
- 1 0 1 1
SET.F RESTORE
FACTORY
SETTINGS
Base and Advanced menu will be factory restored. CAUTION: DO NOT USE
THIS FUNCTION in the pumping unit UPV-OS as these models have a
special setting. To reset the factory parameters, press the ENTER key and
hold until "OK" appears on the display (ENTER
****
OK)

35
DISPLAY THE OPERATING PARAMETERS
During
operation To display the parameters on the
display Scroll the
parameters
through the
keys
Pressing the key You go back to the system pressure (only
for MASTER inverter)
Display Description m.u..
P 3.2 SYSTEM PRESSURE
Displays the system pressure (only for MASTER inverter)
bar
F 45 OPERATING FREQUENCY
Displays the motor revolution Frequency.
Hz
A 6.5 ABSORBED CURRENT
Displays the motor absorbed current (RMS value)
CAUTION! Standard ammeter may read input and output current values different
from the one shown by inverter.
A
V 230 DYNAMIC VOLTAGE
It matches to the power supply ‘voltage value’ - only with pump in standby.
V
PF .85 Power factor (COSFI):
Shows the instantaneous value of the power factor (only T/T models)
Tm 50 POWER MODULE TEMPERATURE
Displays the inverter’s electronic module temperature.
°C
Ti 30 INVERTER BOX INTERNAL TEMP.
Displays the box internal Temperature (only T/T models)
°C
Tc 50 INVERTER BOX INTERNAL TEMP.
Displays the box internal Temperature (only T/T models)
°C
In 0 INPUT ACTIVATION STATUS
Displays the input signal activation Status
1= enabled input / 0= input not enabled
Ou 0 OUTPUT ACTIVATION STATUS
Displays the output relay activation Status
1= enabled input / 0= input not enabled
S1-S2 STATUS RS 485 (SLAVE connection)
Displays the status of the inverter SLAVE connected to the inverter MASTER.
The parameter is not displayed in applications STAND-ALONE
(parameter W = NC).
XX-XX = no SLAVE inverter connected
S1-XX = inverter SLAVE1 connected
XX-S2 = inverter SLAVE2 connected
S1-S2 = inverter SLAVE1 e SLAVE2 connected

36
TEST
to start and
adjust the
pump
manually
Enter the
TEST mode
see ACCESS
TO MAIN
MENU
Proceed as
shown below to
start and adjust
the pump speed
During the test you can view all
the operating parameters (see
DISPLAY OF OPERATING
PARAMETERS)
CAUTION: TEST mode is not active on the SLAVE unit; to make a TEST on the SLAVE unit,
switch off temporarily the MASTER unit, so that the SLAVE unit becomes independent and is able to
perform the TEST normally
Key instruction display
in TEST mode the word “TEST” is displayed
start the pump by pressing the START / STOP button, the
pump starts at the minimum frequency
Display the operating frequency by scrolling with the
RIGHT arrow
set the operation frequency by pressing the keys
(step 1 Hz)
display the operating parameters by pressing the keys
To stop the TEST, press the A START / STOP button
PRIMING AND STARTING UP
- Do not run pumps dry
- Before starting the pump, make the filling of all pumps
- In the pressure units, the filling is for single pump by turning off all other pumps
- When the pump is completely filled with water, bring in TEST mode (manual operation) and prime the
pump by opening the discharge valve gradually
- When the pump is primed, stop the manual mode by pressing STOP and switch to automatic mode by
pressing START.
CONNECTION OF INVERTER MASTER AND SLAVE
- set the parameter W (see page 34) of the inverter 1 to MS (will be MASTER)
- set the parameter W (see page 34) of the inverter 2 to S1 (will be SLAVE 1)
- Connect MASTER and SLAVE as shown at page 29
- after the connection only the MASTER takes any set and drives the SLAVE
- the SLAVE only can be put out of service through START/STOP button
F_30
START
P_2.0
F_35
OFF
STOP
A 3.5
TEST

37
ALARMS
OVER
CURRENT % The current exceeded the allowable tolerance on the current set.
The inverter stops the pump, the rearm is only manual.
CURRENT
LIMIT The current exceeded the module current capacity.
The inverter stops the pump, the rearm is only manual.
i DRY
Occurs if, in the absence of flow, the pump cannot reach the SET pressure, but can
reach at least a pre-determined percentage of the SET pressure, defined through
the parameter Pd. The inverter does not stop the pump, which continues to work with
the message “i-DRY” on the display.
DRY RUNNING
Occurs if, in the absence of flow, the pump fails to reach the pressure of the set but
does not even reach a predetermined percentage of the SET pressure, expressed
by the parameter Pd; the inverter stops the pump.
The error is reset after the time TP and the inverter re-starts in automatic mode.
LOW PRESS Occurs if the pump is running at maximum frequency (50/60 Hz), in the presence of
flow, and the pressure doesn’t reach 0.3 bar; the inverter stops the pump.
The error is reset after the time TP and the inverter re-starts in automatic mode.
LOW VOLTAGE a voltage drop has occurred beyond minimum operating threshold. The inverter stops
the pump. The error is reset after one minute, and the inverter re-starts in automatic
mode.
HIGH VOLTAGE a voltage peak has occurred beyond maximum operating threshold. The inverter stops
the pump. The error is reset after one minute, and the inverter re-starts in automatic
mode.
HIGH TEMP.
BOX (only T/T mod.)
The temperature inside the inverter has reached 65 °C; is automatically limited the
maximum frequency of 5 Hz but the drive continues to run, the error is reset below
60 °C
OVER TEMP.
BOX (only T/T mod.)
The temperature inside the inverter has reached 80 °C, the inverter stops the
pump, the error is reset below 60 °C and the drive will restart automatically
HIGH
TEMPERATURE
MOD
The module temperature has reached the first alarm threshold; the maximum
working frequency is automatically limited, but the drive continues to run, the error
is reset when the module temperature returns below 70 °C
OVER TEMP
MOD The module temperature has reached the second alarm threshold, the inverter stops
the pump, the error is reset when the module temperature returns below 70 °C and the
drive will restart automatically
INPUT ERROR There has been a reversal of the power connections / output to the motor. the
inverter is locked, the error is reset by connecting the cables correctly in the terminal
COM ERROR
communication has been interrupted between the control board and the power
board; the causes could be the integrity of the cable and of the connection ports or an
electronic board fault.
PHASE ERROR
(only for models with three-phase output) lack of a phase towards the motor during
operation. The inverter stops the pump ; reset is manual only.
LOW LEVEL this occurs when the digital input EI is configured as “WATER LEVEL” (level signal)
and there is no signal. When the signal returns, the message disappears and the
inverter operates normally again.
EXT OFF this occurs when the digital input EI is configured as “EXT ENABLE” (control
enabled from outside) and there is no signal. When the signal returns (external
enabling) the message disappears and the inverter operates normally again.
OFF It occurs when the supply voltage is disconnected; the capacitors are discharged, for
security reasons, from the discharge resistors. The process takes about 10 sec

38
PART 2
O
OP
PE
ER
RA
AT
TO
OR
R’
’S
S
A
AN
ND
D
M
MA
AI
IN
NT
TE
EN
NA
AN
NC
CE
E
M
MA
AN
NU
UA
AL
L
GENERAL REMARKS
STEADYPRES is a speed controller with the following features:
- Powered by AC single-phase or three-phase
- Output AC single-phase or three-phase
- It maintains the system at constant pressure (VARIABLE SPEED CURVES)
- It carries out continuous controls on electric and functioning parameters, saving the pumping unit from all
common failures (over-currents, dry running, etc)
- It works in stand-alone configuration or in parallel with other units, through serial connection.
- applications in parallel, with a MASTER inverter and SLAVE inverters, controlled by the MASTER.
- The MASTER receives the programming of the parameters and controls the operating data, and activates
and deactivates the SLAVE as needed.
If the MASTER is turned off, the SLAVE becomes independent and will continue to operate independently.
- Adapts to any type of system pressurization, even existing
- Limits the peak currents during starts and operation, energy-saving.
- Allows the selection of the power supply and output voltage.
PART LIST
1- control system
2- removable electric connector
3- I/O power cable bushing
4- power board cover
5- three-piece joint
6- tecnica data plate
7- master switch (not present in T/T
models)
8- fuse (not present in T/T models)
9- non-return valve unit
10- expansion board cover
11- capacitors box
NOTE: master switch and fuse are only
available in versions with single-phase
power supply, while the models with
three-phase power supply (T/T models)
are without.
For the T/T models the inverter supply
line must be protected by suitable
devices in conformity with applicable
standards.
12
3
4
5
5
11
8
IN
OUT
11
6
10
9
7
8
- In applications in parallel, there is a MASTER inverter that controls one or two SLAVE inverter.
The MASTER receives the programming of the parameters and controls the operating data, and
activates and deactivates the SLAVE as needed.
If the MASTER is turned off, the SLAVE goes back to being self-employed and will continue to operate
independently
When working in parallel with other inverters, STEADYPRES controls the alternation of starting to
make the use of the pumps uniform.

39
WORKING LIMITS
- maximum working pressure: 10 bar (140 p.s.i)
- fluids accepted: clean water and liquids that are chemically non-aggressive. If there are
impurities in the liquid, install a strainer upstream
- fire / explosion: inverters STEADYPRES ARE NOT SUITABLE for operation in environments
with risk of explosion.
- Maximum ambient temperature: 40 °c; D
- minimum ambient temperature: 0 °C
- max liquid temperature: 55 °C
- min liquid temperature:: 0 °C
- supply voltage tolerance: + / - 10%
compared to the nameplate data
- flow rates and pressure drops: in side
figure is represented the loss of load (in
mH2O) through the inverter, to vary the
flow rate
TECHNICAL DATA
main voltage
supply
230
+/
-
10%
Vac single-phase (models M/M e M/T) WARNING: IN CASE OF
LOW VOLTAGE
(NOMINAL VALUE -10% )
OVERCURRENTS CAN
OCCUR DURING
STARTING OR FULL
LOAD OPERATION.
400
+/
-
10%
Vac three-phase (models T/T)
output voltage 230 Vac single-phase (models M/M)
230 Vac three-phase (models M/T)
400 Vac three-phase (models T/T)
frequency 50 – 60 Hz
enclosure IP 65
working position vertical, with the liquid inlet from the bottom and top exit.
Current and power table
Model V in V out A out Fuse (A) P2 max (kW) P2 max (HP)
M/M 8.5 1 ~ 230V 1 ~ 230V 8,5 20 1,1 1,5
M/M 11 1 ~ 230V 1 ~ 230V 11 25 1.5 2.0
M/M 16 1 ~ 230V 1 ~ 230V 16 25 2,2 3,0
M/T 7 1 ~ 230V 3 ~ 230V 7 20 1,1 1,5
M/T 12 1 ~ 230V 3 ~ 230V 12 25 2,2 3,0
T/T 6 3 ~ 400V 3 ~ 400V 6 no 2,2 3,0
T/T 8 3 ~ 400V 3 ~ 400V 8 no 3,0 4,0

40
DIMENSIONS AND WEIGHTS
76 135
211
110 167
277
235
1"
1"
Mod.
M/M 8.5
M/M 11
M/T 7
M/T 12
76 165
241
112 167
279
1"1/4 ÷ (1")
1"1/4 ÷ (1")
270 ÷ (235)
Mod.
M/M 16
T/T 6
T/T 8
Model connection weight
(kg) Packaging dimensions
(A x B x H - mm)
M/M 8.5 - M/M 11 – M/T 7 – M/T 12 1” 2,9 260 x 200 x H 260
M/M 16 – T/T 6 1” 3,7 260 x 200 x H 260
T/T 8 1” ¼ 4,1 260 x 200 x H 260
PRODUCT IDENTIFICATION CODE
ST M / T 10 P
SURGE TANK
-accumulates water under pressure to minimize the start-up of the pumps
- it is essential in the presence of small system leakages
- absorbs overpressures from the system
- the minimum tank volume, in liters (for diaphragm models) is approx. equal to 10% of the maximum
capacity of the single pump, expressed in l/min; example in a standard application:
Qmax = 80 l/min
V = 80 x 10% = 8 liters
rounded up to commercial size
- pre-charge: a. 70% of the working pressure: e.g.:
Pset = 4 bar
Ppre-charge = 2,8 bar
PRODUCT FAMILY
INVERTER SUPPLY: M = single-phase, T = three-phase
MOTOR OUTPUT: M = single-phase, T = three-phase
MODEL
Config ration: E = expandable,
P = parallelable

41
INSTALLATION
Before installing and using STEADYPRES:
- read this manual thoroughly and carefully and refer to the Safety Standards.
- Before making the connections, make sure that the ends of the line wires are not live.
- Make sure also that the electric power supply network is protected by thermal magnet and differential
protections according to the applicable Standard in force. The differential switch must be high-
sensitivity type (30 mA in class A for domestic application, class B for industrial applications)
- Ground connections must be in compliance with Standards.
- Check that the plate data is that required and suitable for the system
- The cable section (power supply cable and connection cable between the inverter and the
motor) must be dimensioned according to:
oVoltage (230 V single-phase, 230 V three-phase, 400 V three-phase)
oPump power
oCable lenght
- The power supply cable and the motor cable must be sized to curb any power voltage drop within
3%.
- The power supply cable and the motor cable must be suitably shielded to comply with EMC
standards.
- In case of long cables between Inverter and pump motor, evaluate the application of inverter output
sinusoidal filter. It aids smooth running of motors eliminating negative effect of voltage peaks
For CONNECTIONS see QUICK INSTALLATION GUIDE .
SELF-LIMITING OVERLOAD
If the
current
detected by
the inverter
Or the
temperature
of the
inverter
Exceed
the
safety
limits
STEADYPRES
proceeds to a
progressive reduction
in the frequency of
operation
As long as the
values are
returned within
the limits
While operating in self-limitation, DISPLAY and LED flash to indicate the fault status
CONNECTION OF 4-CABLE SUBMERSIBLE SINGLE-PHASE MOTOR
STARTING UP
- Before running, this Manual must have been carefully read and the instructions followed; wrong
settings and operations are thus prevented that could cause operating faults
- Before starting the system, the pumps must be primed (filling and air bleeding)

42
- After performing the operations described in the INSTALLATION chapter, the inverter can be started.
- When STEADYPRES is switched on, it enters the STARTING phase, which lasts 10 seconds, after
which STEADYPRES returns to the same operating conditions in which it was when it was last
switched off:
oin WORK mode if at the time of the last shutdown was IN SERVICE
oin OUT OF SERVICE mode if at the time of the last shutdown was OUT OF SERVICE
(OFF)
- In case of accidental fall of the power line, if it STEADYPRES was in serivce, when the power returns,
it automatically returns in service
- To put STEADYPRES IN SERVICE / OUT OF SERVICE, beat the START / STOP button.
- In applications with parallel inverters (MASTER / SLAVE) is just the MASTER inverter that receives input
from the keyboard
- SLAVE inverters operate independently only if the MASTER is turned off, in which case they receive input
from its own keyboard.
- In each group can be only one MASTER, one SLAVE 1 and one SLAVE 2.
- In normal operation, you can view the status parameters.
For visualization of the operating parameters see QUICK INSTALLATION GUIDE
LIGHT SIGNALS
keyboard
ON OFF BLINKING
POWER
STATUS
STEADYPRES does not detect power supply. WARNING:
cannot guarantee the absence of power supply, the
electronic board may be faulty, but under tension
POWE
R
STATUS STEADYPRES is live, but the pump is not running (STAND-
BY)
POWER
STATUS
STEADYPRES is live, and the pump is running
POWER
STATUS STEADYPRES is live, but out of serivce; the re-arm is only
manual
POWER
STATUS STEADYPRES is in ALARM mode, re-arm is only manual
INSPECTION MENU
the menu INSP (inspection) allows you to view the history of the inverter: the operating hours,
number of starts, alarm recording.
INSP WH OPERATING HOURS Operating hours with the pump running
TH TOTAL OPERATING HOURS Total No. Hours working
NS NO START-UPS total Number of start-ups
SH AVERAGE NO START-UPS Average number of start-ups per working hour.
E1 LAST FAULT last fault that occurred in chronological order
EH TIME OF LAST FAULT time at which the fault occurred (referred to TH)
EE ERROR RESET to reset the error log press the ENTER key and hold
until "OK" is confirmed on the display
(ENTER
****
OK)

43
TROUBLESHOOTING
- Check that the inverter has been correctly connected to the power line (which is on)
- Check that the motor pumps have been correctly connected to the inverter
- Check that all the cables and connections are operative.
PROBLEM
The pump is not feeded
Message
Ca se
intervention
none
Interr ption of power s pply Replace the power s pply
none
B rned f ses S bstit te the f ses
none
Intervention of the line protections Check the correct protecttions setting
INPUT ERROR
(only mod. T/T) - connections LINE and
MOTOR were reversed
Check the connections LINE and MOTOR and connect
correctly
PROBLEM
The current circuit breaker has tripped to protect the DGBOX power line
Message
Ca se
intervention
none
The resid al c rrent circ it breaker is
inadeq ate for inverter s pply
Replace the resid al c rrent circ it breaker with a model
s itable for the p lsating components and in direct c rrent
(class A)
PROBLEM
The pump fails to start
Message
Ca se
intervention
OFF
The p mp is o t of service (placed man ally
o t of service)
P t the p mp back into service by p shing START
PROBLEM
The p
ump stopped and fails to re
-
start
Message
Ca se
intervention
OVER
CURRENT
overc rrent absorption compared to set
val e (parameter A in BASE PARAMETER)
- check the correct c rrent setting
- check the power voltage nder load at p mp terminals (min -
15%)
- make s re the motor p mp is t rning freely and is not braked
- check the correct direction of rotation
- check the correct sizing of the wires
CURRENT
LIMIT
Serio s overc rrent absorption which
inverter cannot cope with
Make s re the motor p mp is not bl
ocked, red ce the motor
acceleration by means of the ACCELERATION parameter.
DRY
RUNNING
(DRY
RUNNING PF)
-
Lack of water at s ction
- p mp not primed
- s ction blocked
- wrong direction of motor rotation
-
Check correct s ction conditions
- prime the p mp
- check the s ction piping
- check the correct direction of motor rotation
LOW PRESS
The system does not reach the minim m
press re
Check that there are no broken pipes.
LOW
VOLTAGE
Deviation of the s pply voltage higher than
–15% of the plate voltage
Check the s pply voltage and the section and length of the
inverter power cables
HIGH
VOLTAGE
Deviation of the s pply voltage higher than
+15% of the plate voltage
Check the s pply voltage
OVER TEMP
BOX (solo
T/T)
internal overheating d e to overload or
excessive ambient temperat re
Make s re the air cooling channels are free and that the
fans are working, check the p mp load
OVER TEMP
MODULE
Mod le overheating d e to overload check the p mp load
COM ERROR
No comm nication between control board
and power board
Check the integrity of the connection cable and connections;
the power board co ld be damaged
LOW LEVEL
No level signal with level signal inp t on Make s re there is water at s ction or check level signal
operation
EXT OFF
Placing o t of service by means of external
signal
Check the external signal
none
Press re sensor fa lt
Check the display press re with a reference manometer, re
-
calibrate or s bstit te the press re sensor

44
PROBLEM
Pump always running even when not required
Message
Ca se
intervention
None
System leaks greater then 2 l/min Identify the leaks and repair
None
Flow sensor fa lt or locked open Inspect and check the flow sensor
PROBLEM
The pump stops too soon when requested
Message
Ca se
intervention
none
Flow rate sensor fa lt Check the flow rate sensor
Message
Ca se
Message
Ca se
intervention
none
Air inside s ction manifold Bleed the s ction system
none
P mp blocked or damaged Inspect the p mp and eliminate the problem
MAINTENANCE
Replacement of the CONTROL BOARD + PRESSURE SENSOR
- Disconnect the inverter main power supply and wait 2 minutes (capacitors discharge)
- Open the front cover and disassembly the pressure sensor and the control board as shown below
- Install the new control board with pressure sensor in reverse order of removal.
Open the front cover by unscrewing the 4 screws
Before removing the cover, disconnect the
ribbon cable of the display
Disconnect the wire communication with the power
board
Remove FIRST the PRESSURE SENSOR and
THEN the CONTROL BOARD by unscrewing the 5
screws indicated
Re-assemble the new BOARD+SENSOR in the same way but in reverse order:
-FIRST assemble the CONTROL BOARD
-THEN assemble the PRESSURE SENSOR
-connect the wire communication with the power board
-connect the ribbon cable of the display and close the front cover
ATTENTION:
This manual suits for next models
6
Table of contents
Other DGFLOW Controllers manuals
Popular Controllers manuals by other brands
SAMES KREMLIN
SAMES KREMLIN Airmix 120-10/120 instruction manual
AXIOMATIC
AXIOMATIC AX030210 user manual
SOLIS
SOLIS RHI-HV 5G Series user manual
Mitsubishi Electric
Mitsubishi Electric MELSEC iQ-R Series user manual
Mitsubishi Electric
Mitsubishi Electric MELSEC Q Series user manual
Belimo
Belimo SY U24-SR Series Wiring diagram
