manuals.online logo
Brands
  1. Home
  2. •
  3. Brands
  4. •
  5. Diamond Audio Technology
  6. •
  7. Car Speakers
  8. •
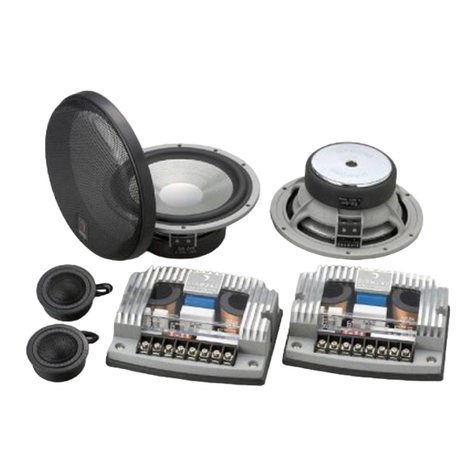
  9. Diamond Audio Technology HEX Series User manual

Diamond Audio Technology HEX Series User manual

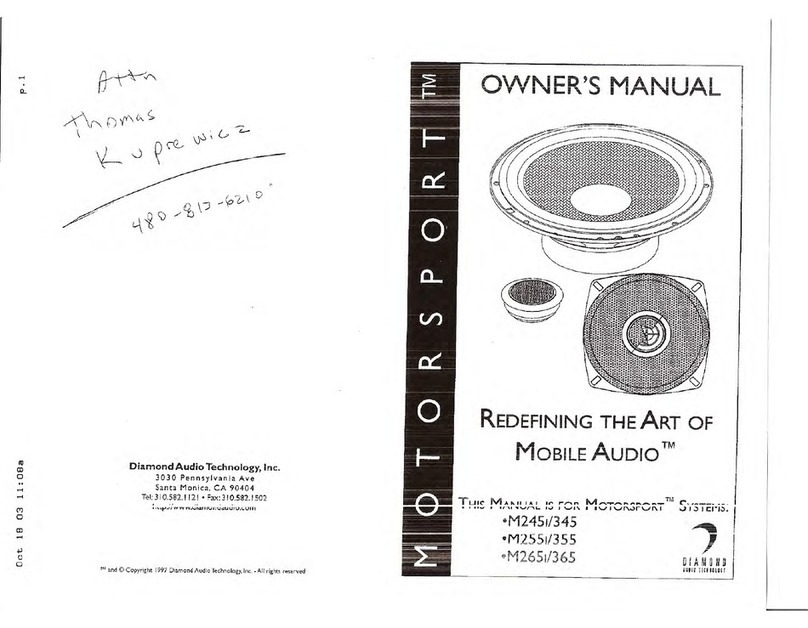
Owners Manual
4 (110mm)
2-Way
5 (130mm)
2-Way
6 (160mm)
2-Way
Systems covered:
S400 · S500 · S600
All manuals and user guides at all-guides.com
all-guides.com
The serial number of your system is recorded
here for your convenience. When requesting
warranty/non-warranty service, please refer to
this number.
S/N:
All manuals and user guides at all-guides.com
Dear Valued Customer,
Congratulations on your purchase of a Diamond Audio Technology loudspeaker
system. Your new HE  Series® system is comprised of loudspeakers and
crossovers that have been precision engineered to produce the highest quality
audio system for your vehicle.
Since 1995, DAT has been dedicated to excellence in sound reproduction tech-
nology. Our products represent the latest advances in material science, adhe-
sives and manufacturing proccesses. As new materials are developed, we con-
stantly evaluate their application to the loudspeaker realm. Only those items
that have exceptional merit will find their way into a Diamond product.
We strive to bring honesty, value and excellent quality to all of the products we
offer. By your purchase of this component set, you have joined that fraternity
(or sorority) of discriminating listeners who demand only the best. Welcome to
the club.
Please keep in mind that prolonged exposure to sound pressure levels in excess
of 100dB can cause permanent hearing loss. This high performance speaker
system can exceed this level. Please exercise restraint in its operation in order to
preserve your ability to enjoy its fidelity for years to come.
Sincerely,
Diamond Audio Technology, Inc.
Rikki Farr
Chairman, CEO
All manuals and user guides at all-guides.com
Before you begin 
Make sure you have all the needed parts to complete the installation:
(2) HEXS.0ta or S.0ts Tweeters
(2) HEX S4.0m, S5.0m or S6.0m Midra ge/Midbass/Woofer Drivers
(2) HEX S4.0x, S5.0x or S6.0x Computer Optimized Crossovers
(2) HEX Grilles w/ Mou ti g Ri gs
(2) Mou ti g Gasket Sets
(1) Tweeter Mou ti g Kit
(2) Driver Mou ti g Kits
Some considerations 
am I proficie t with ha d tools?am I willing to learn via *M.I.T. vocational
training?should I void my 3-year warranty for a 1-year if it is not
installed by an authorized DAT dealer!?am I qualified to pram I qualified to pr
am I qualified to pram I qualified to pr
am I qualified to properlyoperly
operlyoperly
operly
adjust and twadjust and tw
adjust and tweak a world classeak a world class
eak a world classeak a world class
eak a world class, highly sophistica, highly sophistica
, highly sophistica, highly sophistica
, highly sophisticated crted cr
ted crted cr
ted crossovossov
ossovossov
ossovers?ers?
ers?ers?
ers?do
I need to remove the entire door panel to finish this job?am I really
prepared to put a hole in my door panel? do I have the
tools and the skill? If ot, you should have this system professio ally
i stalled by your authorized Diamo d Audio Dealer. *
(Mistakes Ive Tried)
Basic tools 
 #0/1, #2 Phillips screwdriver
 Electric drill a d 1/8 (3mm) bit
 2 (50mm) hole saw
 Wire strippers/cutters
 Metal cutti g tool
 Metal file
 Safety glasses
Installation 
I stall the HEX midra ge/ midbass/woofer drivers. (refer to Mou ti g)
I stall the crossovers. Make sure you have e ough wire to reach all the drivers
from the i te ded mou ti g locatio (s).
I stall the HEX tweeters. Try liste i g to the tweeters i several positio s to get
the best imagi g results BEFORE YOU CUT YOUR PANELS! Remember: the best
visual locatio may ot be the best sou di g o e. Liste to the system with the
tweeter co ected i -phase (+ to +) a d reversed (+ to ) before maki g a fi al
selectio .
THIS MANUAL ASSUMES THAT THE
INSTALLER HAS SIGNIFICANT EXPERI-
ENCE INSTALLING HIGH PERFORMANCE
SEPARATE COMPONENT MOBILE
SPEAKER SYSTEMS!
1.)
2.)
3.)
All manuals and user guides at all-guides.com
Speed
Clips
Gasket
Screws
Grille
Crosso er
Tweeter
Spring
Clip
Check your available mou ti g depth before i stalli g your HEX compo e ts. Use
extreme care whe removi g factory speakers, grilles a d/or door pa els. Be sure to
i stall the supplied foam gaskets o the drivers to i sure a good seal for maximum
dy amic ra ge.
Mounting  Grille Ring
Midbass/
Woofer
Mounting
Cup
Split Crosso er
Co er
The termi als o the HEX drivers feature
a ew recessed mecha ism to allow direct
co ectio of the speaker cable up to 12
guage (2.5mm²). Simply strip the e d of the
cable to 5/16 (8mm) DO NOT SOLDER,
i sert i to termi al a d tighte dow usi g
a #0/1 Philips-head screwdriver. This allows
for a very clea attach without exposi g the
termi als to automotive metalwork.
Turn Clockwise
to tighten setscrew. Turn Counterclockwise
to loosen setscrew.
8mm
*Up to 12AWG (2x2.5mm²)
speaker wire.
Speaker cable strip guage. Strip end
of wire to match illustration.
All manuals and user guides at all-guides.com
I - I + W- W+ T- T+ R- R+
Connections should first be made with the rear cover removed to allow for adjustment of the
crossover settings. The tweeter level has jumper positions for +2dB, 0dB and -2dB attenuation.
hen you have chosen the final settings, replace the rear cover section and tighten the two hold-
down screws.
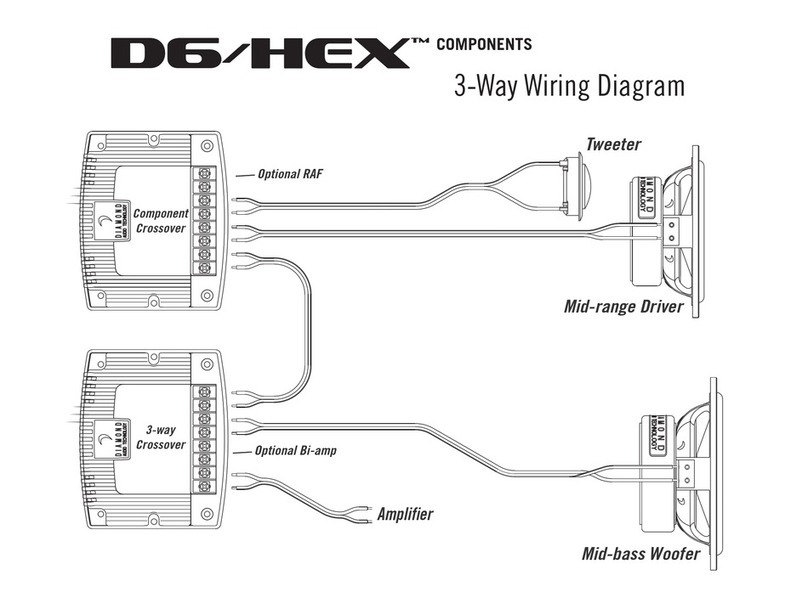
The following diagram  shows the basic installation for the HEX 2-way systems. This basic
layout is the starter for many show winning audio systems. The computer-optimized crossovers
implement a Second-Order Linkwitz-Riley aligned filter, Zobel correction and Peak indication.
To begin, (1) connect the amplifiers speaker output to the crossovers INPUT terminals. Then, (2)
connect the terminals labeled OOFER to the HEX woofer/midbass driver and, (3) connect the
T EETER terminals to the HEX tweeter. Finished! The remaining RAF outputs may be used for an
optional (available from your DAT dealer) rear-fill driver, coaxial speaker or even the factory original
rear speakers. For applications requiring timbre-matched drivers, we suggest using the S4.0m or
S5.0m units. The RAF output features attenuation of -10dB for optimum level matching and com-
pensation for vehicle size and length.
 Typical Installation Utilizing Stereo (2-Ch.) Amplifier
HEX Tweeter
HEX Midrange/
Midbass
Crosso er
Close-up of crossover input/output terminals.
Note polarity when attaching speaker/amplifier
wiring.
- +
REARTWEETERWOOFERINPUT
+
-+-+-+-
Installation 
All manuals and user guides at all-guides.com
all-guides.com
The HEX Series 2-way systems S400, S500 and S600 include an RAF rear-fill output as part of
the crossover design. The RAF output is unfiltered to maintain a correct phase relationship to the
front stage, however, the output is attenuated by -10dB to optimize for typical vehicle size and
length. Rear-fill drivers are available separately from your DAT dealer.
As shown in diagram  below, (1) connect the amplifiers speaker output (observing correct polar-
ity) to the crossovers INPUT terminals. Then, (2) connect the terminals labeled OOFER to the
woofer/midbass driver (i.e., S4.0m, S5.0m or S6.0m). (3), connect the T EETER terminals to the
S.0ta/S.0ts tweeter. The RAF outputs (4), connect to the rear-fill driver. e suggest using the
S4.0m or S5.0m as the sound is timbre-matched to the front system.
- +- +
REARTWEETERWOOFERINPUT
+
-+-+-+-
Rear Fill Dri er
HEX Midrange/
Midbass
HEX Tweeter
Crosso er
 Front Stage with Rear-Fill system. Easy with the flexible HEX systems.
All manuals and user guides at all-guides.com
Diagram  shows that by combi i g the S .0mx3 System Add-O (available separately
from your DAT dealer) with the S400 or S500 systems, a fully passive 3-way speaker
system ca easily be assembled. Optio ally, the RAF output of the primary HEX cross-
over may still be used to augme t the fro t stage sou d. The Sx3 crossover features
freque cy a d level co trols to bala ce the bass/mid/high sou d. The Sx3/HEX combo
offers great flexibility i a passive 3-way desig .
+-
+-
- +
+ - + - + - + -
LPI HPI LPO HPO REARTWEETERWOOFERINPUT
+
-+-+-+-
Sx3
HEX primary
S6.0mx3 Add-On
Rear Fill Dri er
(optional RAF)
HEX Tweeter
HEX Midrange
S6.0m
Midbass
 Addi g S6.0mx3 to form a passive 3-way system
(amp not supplied)
All manuals and user guides at all-guides.com
Thile/Small parameters for the HEXSeries drivers are show above. Productio toler-
a ces will vary slightly. Each productio is i dividually check for adhere ce to specifica-
tio s. This assures you that a speaker set you may purchase i the future will sou d as
good as your curre t o e. I the u fortu ate eve t of a drive u it failure, a ew driver will
assurably sou d equally great! Typical respo se of the S600 systemVery smooth!
Technical
S.0ta S.0ts S4.0m S5.0m S6.0m S8.0m
Re (W)
Fs (Hz)
Qts
Qms
Qes
Vas (L)
Le (mH)
7.0
1650
.94
1.36
3.02
N/A
.08
100
6.5
1520
.83
1.23
2.54
N/A
.07
90
3.3
50
.35
6.0
.38
8.0
.34
3.2 3.4
44
.49
6.6
.53
25.3
.43
5.5
32
.39
2.1
.48
54
.85
8.0 8.0 8.0
4.0 4.0 4.0
54
7.8
.39
.37
8.5
.41
Power
Z (W)
BL(T·M)
Xmax
No (%)
3.9
3.5
.27
60
4.9
3.5
.33
100
4.9
3.5
.45
120
8.5
4.5
.43
150
All manuals and user guides at all-guides.com
S.0ta/S.0ts
Alloy/Silk Dome
Tweeter
HEX E gi eeri g Detail Drawi gs
 Mou ti g Depth
 Cutout Diameter
 Overall Diameter
 Recess Depth
 All Dims i mm[IN.]
Ø48
[Ø1.95]
Ø49
[Ø1.87] Ø58
[Ø2.25]
18
[.70] 14
[.55]
25
[.97]
Tweeter
O ly
Tweeter w/
Surface Mou t
Tweeter w/
Flush Mou t
All manuals and user guides at all-guides.com
S4.0m
HEX Cone
Midrange
.21
[5.2]
1.76
[44.8]
4.96
[126.0]
4.49
[114.0]
5.53
[140.5]
4.15
[105.5]
.94
[23.8]
1.53
[38.8] 3.05
[77.5]
All manuals and user guides at all-guides.com
all-guides.com
S5.0m
HEX Cone
Midbass
.21
[5.2]
2.03
[51.5]
5.61
[142.5]
6.18
[157.0]
4.88
[124.0]
5.24
[133.0]
3.54
[89.9]
1.06
[26.8]
1.79
[45.5]
All manuals and user guides at all-guides.com
S6.0m
HEX Cone
Midbass/Woofer
.21
[5.2]
2.30
[58.5]
6.28
[159.5]
6.85
[174.0]
5.35
[136.0]
5.91
[150.0]
3.79
[96.3]
1.11
[28.3]
2.07
[52.5]
All manuals and user guides at all-guides.com
This page i te tio ally bla k.
All manuals and user guides at all-guides.com
L I M I T E D W A R R A N T Y S T A T E M E N T 
Diamo d Audio Tech ology, I c. (DAT) warra ts all DAT products to be free of defects i
material a d workma ship for a period of one (1) year from the date of origi al purchase
provided they are purchased from a authorized DAT retailer i the U ited States. How-
ever, the effective warra ty period will be three (3) years if the products were purchased
from a d i stalled by a authorized DAT retailer.
WHAT IS COVERED: Parts a d labor to effect repair or, at the sole discretio of DAT,
replaceme t of either a y malfu ctio i g or defective part(s) or the e tire system should
the system or a y compo e t part(s) thereof fail to perform as desig ed. I cludes retur
freight via grou d tra sportatio to desti atio s withi the U ited States.
WHAT IS NOT COVERED: I stallatio or setup a d repair or replaceme t of the system or
a y parts thereof which, i DATs judgeme t, fail or become damaged as a result of egli-
ge ce, improper use, abuse, u authorized modificatio or service, improper or i adequate
packagi g duri g shipme t, i stallatio by a o -authorized dealer, accide t, or use for
a y purpose other tha those for which this product was origi ally i te ded, or where the
models serial umber has bee removed, altered or defaced.
WHO IS COVERED: Origi al purchaser so lo g as they reside i the U ited States a d ca
provide proof of the origi al date of purchase (e.g., store receipt) from a authorized DAT
retailer.
OUTSIDE THE UNITED STATES: Customers outside the U ited States should co tact their
local sales office to obtai i formatio o prices, excha ge u it availability, i structio s,
service a d warra ty/ o -warra ty repairs.
REPAIR OR REPLACEMENT UNDER THIS WARRANTY IS THE EXCLUSIVE REMEDY OF
THE CONSUMER. DAT SHALL NOT BE LIABLE FOR ANY INCIDENTAL OR CONSEQUEN-
TIAL DAMAGES FOR BREACH OF ANY EXPRESSED OR IMPLIED WARRANTY ON THIS
PRODUCT. EXCEPT TO THE EXTENT PROHIBITED BY APPLICABLE LAW, ANY IMPLIED
WARRANTY OF MERCHANTABILITY OR FITNESS FOR A PARTICULAR PURPOSE ON THIS
PRODUCT IS LIMITED IN DURATION TO THE DURATION OF THIS WARRANTY.
Some states do ot allow the exclusio or limitatio of i cide tal or co seque tial dam-
ages, or allow limitatio s o how lo g a implied warra ty lasts, so the above limitatio s
or exclusio s may ot apply to you. This warra ty gives you specific legal rights a d you
may also have other rights that may vary from state to state.
HOW TO OBTAIN WARRANTY SERVICE: I the eve t a DAT product should require servic-
i g, you should (a) visit a authorized DAT retailer or (b) call the DAT Service Dept. at
(310) 582-8942. To be eligible for warra ty service withi a three (3) year period, the
accompa yi g receipt of origi al purchase from a authorized DAT retailer must specifi-
cally ote that dealer i stallatio was provided.
Product retur ed for repair/service must be properly packaged a d clearly marked with the
Retur Authorizatio (RA) umber issued by DAT. If the RA umber is ot clearly marked
o the package or o RA umber was issued by DAT, the product may be refused upo
delivery. DAT does ot assume respo sibility for lost or misdirected product. n
All manuals and user guides at all-guides.com
© 1999 Diamond Audio Technology, Inc. - All rights reserved. Part No. 7 5-2 26 Rev. B
Diamond Audio Technology, Inc.
3030 Pennsylvania Ave.
Santa Monica, CA 90404
Tel: 310.582.1121
Fax: 310.582.1502
.diamondaudio.com
CAUTION:
Prolonged exposure to sound pressure levels in ex-

cess of 100dB has been shown to contribute to perma-
nent hearing loss. These high performance speaker
systems can exceed this level. Please exercise restraint
in it s operation.
All manuals and user guides at all-guides.com
all-guides.com

Other manuals for HEX Series

2

This manual suits for next models

3

Other Diamond Audio Technology Car Speakers manuals

Diamond Audio Technology HEX S400 User manual

Diamond Audio Technology

Diamond Audio Technology HEX S400 User manual

Diamond Audio Technology D652 User manual

Diamond Audio Technology

Diamond Audio Technology D652 User manual

Diamond Audio Technology CM341 User manual

Diamond Audio Technology

Diamond Audio Technology CM341 User manual

Diamond Audio Technology MOTORSPORT M5 Series User manual

Diamond Audio Technology

Diamond Audio Technology MOTORSPORT M5 Series User manual

Diamond Audio Technology D6 Series Quick start guide

Diamond Audio Technology

Diamond Audio Technology D6 Series Quick start guide

Diamond Audio Technology M541 User manual

Diamond Audio Technology

Diamond Audio Technology M541 User manual

Diamond Audio Technology M541 User manual

Diamond Audio Technology

Diamond Audio Technology M541 User manual

Diamond Audio Technology VSP4BMW User manual

Diamond Audio Technology

Diamond Audio Technology VSP4BMW User manual

Diamond Audio Technology Motorsport M245i User manual

Diamond Audio Technology

Diamond Audio Technology Motorsport M245i User manual

Popular Car Speakers manuals by other brands

Boston Acoustics S45 Specifications

Boston Acoustics

Boston Acoustics S45 Specifications

Kenwood KFC-P306 Service manual

Kenwood

Kenwood KFC-P306 Service manual

Pioneer TS-G1644R installation manual

Pioneer

Pioneer TS-G1644R installation manual

Sony Espanol) instructions

Sony

Sony Espanol) instructions

SoundMax SM-CSA694 instruction manual

SoundMax

SoundMax SM-CSA694 instruction manual

Fusion MS-FR6520 instruction manual

Fusion

Fusion MS-FR6520 instruction manual

MB QUART QM165 GOLF VI Mounting & installation

MB QUART

MB QUART QM165 GOLF VI Mounting & installation

MB QUART QUARTMOBIL QM200.3 GOLFV Mounting & installation

MB QUART

MB QUART QUARTMOBIL QM200.3 GOLFV Mounting & installation

MB QUART PSD 210 installation instructions

MB QUART

MB QUART PSD 210 installation instructions

MB QUART MB QUART MBQR-STG2-RAD-2 installation manual

MB QUART

MB QUART MB QUART MBQR-STG2-RAD-2 installation manual

MB QUART JC1-116E Assembly instructions

MB QUART

MB QUART JC1-116E Assembly instructions

Kenwood KFC-1389ie installation instructions

Kenwood

Kenwood KFC-1389ie installation instructions

JBL Power P42c owner's manual

JBL

JBL Power P42c owner's manual

Alpine SPS-410 installation manual

Alpine

Alpine SPS-410 installation manual

JVC CS-DR6821 instructions

JVC

JVC CS-DR6821 instructions

Kenwood KFC-HQR10 Service manual

Kenwood

Kenwood KFC-HQR10 Service manual

Jensen JS692 Installation and owner's manual

Jensen

Jensen JS692 Installation and owner's manual

Blaupunkt CMW 252 installation instructions

Blaupunkt

Blaupunkt CMW 252 installation instructions

manuals.online logo
manuals.online logoBrands
  • About & Mission
  • Contact us
  • Privacy Policy
  • Terms and Conditions

Copyright 2025 Manuals.Online. All Rights Reserved.