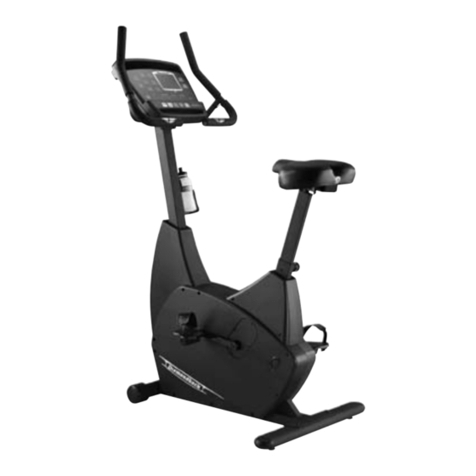
Diamondback 1100 R User manual

1
Table of Contents
• Purchaser’s Reference Information .................. Inside Cover
• Introduction ........................................................................ 2
• Glossary of Terms .............................................................. 2
• Safety Instructions and Warnings ...................................... 3
• 1100U Assembly Drawing.................................................. 4
• 1100U Assembly Instructions ............................................ 5
• 1100R Assembly Drawing .................................................. 6
• 1100R Assembly Instructions ............................................ 7
• 1100ES Assembly Drawing................................................ 8
• 1100ES Assembly Instructions .......................................... 9
• Operation & Comfort Tips ................................................ 10
• Console Layout ................................................................ 11
• Getting Started................................................................. 12
• Exercise Guidelines.......................................................... 13
Maximum Heart Rate & Training Zone ......................... 13
Quantity & Quality ........................................................ 13
Heart Rate Monitoring .................................................. 14
• 1100 Series Programs...................................................... 15
Quick Start ................................................................... 15
Manual.......................................................................... 15
Random........................................................................ 16
METs............................................................................. 17
Fatburner...................................................................... 18
Interval.......................................................................... 19
Strength........................................................................ 20
Fitness Level Test ......................................................... 21
Custom Target .............................................................. 22
• Domestic Warranty Information ....................................... 23
• Maintenance..................................................................... 23
• Specifications................................................................... 24
• Warranty Card ................................................... Back Cover
Owner’s Manual
1100 U/R/ES

2
Introduction
Glossary of Terms
LED’s = The lights on the face of the console.
METs = A measure of energy expenditure. The METs program allows the bike to be
electronically controlled to deliver a specific work rate independent of pedal
rate.As the pedal rate falls, the load on the wheel is increased proportionally.
As the pedal rate intensifies, the load on the wheel is decreased proportionally.
Programs = QuickStart, Manual,Random, METs,Fatburner, Interval,Strength, Test/Fitness
Level, Custom / Target
Stage = Represented by a vertical column of lights on the dot matrix screen.
Watts = The amount of energy currently being expended.
Work = The amount of energy expended during exercise.
Good health is an exercise in common sense.
The basics of good health are really common sense.
Eat right, drink lots of water, get enough sleep, and
exercise at least 3-4 times a week. It may sound
simple, but to achieve the look and vitality most
health-consciousmenand women want,takesmore
discipline than most people are willing to endure.
Having fitness equipment in your home makes it
easier to achieve your goals. And having
Diamondback equipment gives you even more of an
edge.Becausewhen yourequipment is comfortable,
simple and effective, you exercise more. And that
means better results.
A workout that works for you. To maintain
cardiovascular fitness, the American Heart
Association recommends that you exercise 3 to 4
days a week at 60%-75% of your maximum heart
rate.By monitoringyour heartrate whileyou exercise,
you can get the most effective workout in the least
amount of time. It’s the easiest way of determining if
you’re exercising at a safe and effective level. Of
course, if you want to lose weight or reach a higher
levelofathletic conditioning,working out 5to 6 times
a week will help you achieve that goal faster.
Get a smart start on exercising.
1. Always stretch before your workout to loosen
muscles, and afterwards to cool down.
2. The first few minutes of your workout should be
devotedtowarmingupmuscles beforea vigorous
workout, and building your heart rate slowly.
3.After youraerobicworkout ofabout 24-32minutes,
spend 10 minutes gradually reducing your heart
rate with a lower resistance level.
Remember, start slow, with intensity low, until
you build endurance and strength. And always
consult your physician before beginning any
exercise program.

3
Safety Instructions & Warnings
The 1100 series is built for optimum safety and is designed to meet
or exceed all domestic and international standards. However, cer-
tain precautions need to be followed when operating any exercise
equipment. BE SURE TO READ THE ENTIRE OWNER’S MANUAL
BEFORE OPERATING YOUR 1100 SERIES UNIT.
A T T E N T I O N - DO NOT OPERATE THE HEART RATE
MONITOR TRANSMTTER TOGETHER WITH AN ELECTRICAL
HEART PACEMAKER. THE TRANSMITTER MAY CAUSE
ELECTRICAL DISTURBANCES.
C A U T I O N - FOR SAFE OPERATION
1. Keep your hands and feet away from all moving parts.
2. Before beginning any exercise program on the 1100 series equip-
ment,it is importantto consultwith yourphysician if youhave any
of the following: History of heart disease, high blood pressure,
diabetes, chronic respiratory diseases, elevated cholesterol, or if
yousmoke cigarettesorexperience anyotherchronicdiseases or
physical complaints.
3. If over the age of 35 or overweight, consult with your physician
before beginning an exercise program.
4. Pregnant women should consult with their physician before be-
ginning an exercise program.
5. If you experience dizziness, nausea, chest pains or other abnor-
mal symptoms during exercise, stop the exercise session imme-
diately. Consult a physician before continuing.
6. Drink fluids if you exercise for twenty or more minutes on any
1100 series unit.
W A R N I N G - TO REDUCE RISK OF INJURY TO YOURSELF
OR OTHERS
1. To ensure proper functioning of your 1100 series equipment, do
not install attachments or accessories not provided or recom-
mended by Diamondback.
2. Always wear proper clothing and shoes when exercising on any
1100 series unit.
3. User weight is not to exceed 300 pounds / 135 kilograms.
4. Keep children away from 1100 series equipment. Hands and
feet may get caught in the pedals or other moving parts which
could result in serious injury.
5. Place the 1100 series unit in an area that will meet minimum
clearance requirements:
• Front, Back & Sides: 4 feet / 30cm
6. Keep 1100 series equipment away from walls to allow proper
ventilation. Airshould beable tocirculatefreelyaroundthe units.
Keep all air openings free of dirt and dust. Never insert anything
into openings.
7. The 1100 series is intended for indoor use in the home or light
commercial environment. It is not intended for outdoor use.
8. Place your 1100 series unit on a solid, level surface when in use.
9. Use the handlebars or handrails when getting on and off your
1100 series unit.
10.Never operate the unit if it is damaged or broken. Contact your
local authorized Diamondback fitness dealer for service.
11.Make sure all components are fastened securely (i.e. seat post,
saddle, handlebars, pedals) at all times.
12.SAVE THIS OPERATING INSTRUCTIONS MANUAL.
THE NEXT STEP
IN WORKOUT
TECHNOLOGY.
The fitness experts at Diamondback believe that
working out is not just for athletes but for all people.

4
1100U Assembly Drawing

5
Frame Assembly
1. Unscrew two M8 x 20mm bolts from the rear stabilizer bar.
2. Place rear stabilizer bar under rear main frame body and align screw holes.
3. Insert and tighten the two M8 x 20mm screws using a 5mm Allen wrench.
4. Install seatpost by sliding it into seatpost receptor.
Console Mast Assembly
1. Install console mast adapter/cover onto console mast.
2. Insert the main wire harness into the bottom opening of the console mast tube.
Push the harness up the tube until the connector of the harness appears in the
opening at the top of the tube.
WIRING HARNESS INSTALLATION TIP:
Straighten the loops of the wiring harness so that it can slide smoothly into the
console mast. Hold the bottom of the console mast next to the console mast re-
ceptor and point the top of the console mast downward.
3. Install the console mast by sliding it into the console mast receptor while pulling the
wire harness. This will keep the slack out of the harness so the wires will not get
pinched and short out. Insert and tighten two M8 x 40mm screws and washers
using a 5mm Allen wrench.
4. Snap console mast adapter/cover into top of sidecase.
Handlebar
1. Assemble the handlebar onto the mount and insert and tighten the four M8 x 13mm
screws using a 5mm Allen wrench.
Console Assembly
1. Connect the main wiring harness plug to the plug receptor on the backside of the
console taking care to install correctly (see plug alignment marks). WIRING HAR-
NESS INSTALLATION HINT: Any excess wiring must be carefully inserted (“stored”)
back into the console mast before installing the console onto the console mounting
plate.
2. Fasten the console to the console mounting plate with the four M5 x 12mm screws
and washers using a Phillips screwdriver.
Saddle Assembly
1. Assemble saddle onto seatpost.
2. Tighten the affixing nut and washer using a 17mm open-end wrench. SADDLE
ANGLE ADJUSTMENT HINT: Hold the rear of saddle in the optimum comfort posi-
tion and tighten the nut at the same time.
Pedals
1. Use a 15mm open-end wrench to firmly affix the pedals to the cranks.
2. The left and right pedals are different and are denoted as right or left on the bottom
of each pedal. NOTE: Left pedal threads counter-clockwise.
Waterbottle
1. Place the bottle holder on the console mast. Insert and tighten the two M5 x 12mm
screws using a screwdriver.
2. Snap the waterbottle into the bottle holder.
1100U Assembly Instructions
Other manuals for 1100 R
1
This manual suits for next models
1
Table of contents
Other Diamondback Fitness Equipment manuals
Popular Fitness Equipment manuals by other brands

G-FITNESS
G-FITNESS AIR ROWER user manual

CAPITAL SPORTS
CAPITAL SPORTS Dominate Edition 10028796 manual

Martin System
Martin System TT4FK user guide

CIRCLE FITNESS
CIRCLE FITNESS E7 owner's manual

G-FITNESS
G-FITNESS TZ-6017 user manual

Accelerated Care Plus
Accelerated Care Plus OMNISTIM FX2 CYCLE/WALK user manual