Sound Sation PMX-8UBT User manual

PMX-8UBT
8-channel powered mixer with BT, effects
and MP3 player
Mixer amplificato 8 canali con BT, effetti e
lettore MP3
USER'S MANUAL
MANUALE D’USO
Please read this manual carefully and proper take care of this manual
Leggere aentamente questo manuale e conservarlo con cura

2
ENGLISH
Dear customer,
First of all thanks far purchasing a SOUNDSATION® product. Our mission is to sasfy all possible
needs of musical instrument and professional audio users oering a wide range of products
using the latest technologies.
We hope you will be sased with this item and, if you want to collaborate, we are looking for a
feedback from you about the operaon of the product and possible improvements to introduce
in the next future. Go to our website www.soundsaonmusic.com and send an e-mail with your
opinion, this will help us to build instruments ever closer to customer’s real requirements.
One last thing: read this manual before using the instrument, an incorrect operaon can cause
damages to you and to the unit. Take care!
The SOUNDSATION Team
TABLE OF CONTENTS
1. INTRODUCTION ......................................................................................... page 5
1.1 General funcons of the mixing console .......................................... page 5
1.2 User’s Manual ................................................................................. page 5
1.3 Before you start ............................................................................... page 5
1.3.1 Shipping ................................................................................ page 5
1.3.2 Geng started ...................................................................... page 5
2. CHARACTERISTICS ..................................................................................... page 6
3. EXAMPLES OF CONNECTION ................................................................... page 12
4. SPECIFICATIONS ...................................................................................... page 13
5. INSTALLATION ..........................................................................................page 13
5.1 Cable Connecons ......................................................................... page 13
5.1.1 Audio connecons ...................................................................... page 13
6. WARRANTY AND SERVICE ....................................................................... page 15

3
ENGLISH
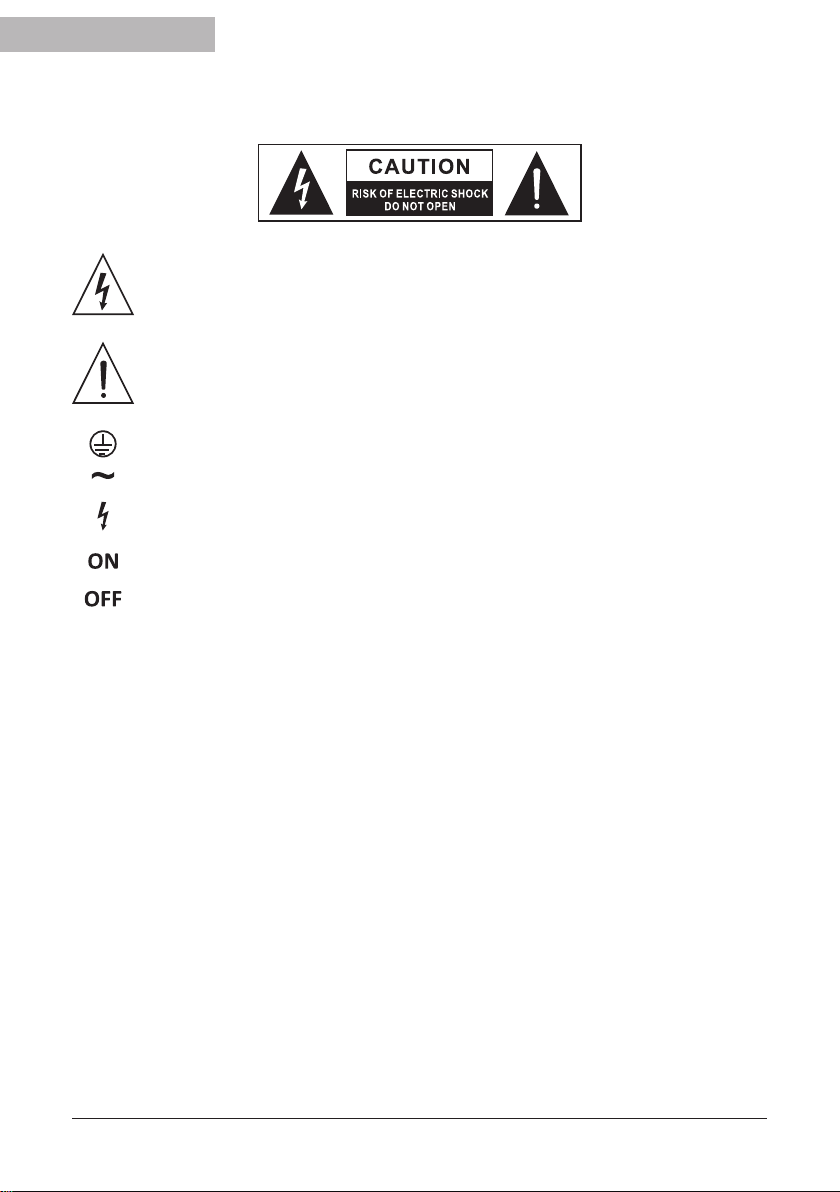
IMPORTANT SAFETY SYMBOLS
The symbol is used to indicate that some hazardous live terminals are in-
volved within this apparatus, even under the normal operang condions,
which may be sucient to constute the risk of electric shock or death.
The symbol is used in the service documentaon to indicate that specic
component shall be replaced only by the component specied in that doc-
umentaon for safety reasons.
Protecve grounding terminal
Alternang current/voltage
Hazardous live terminal
Denotes the apparatus is turned on
Denotes the apparatus is turned o
WARNING: Describes precauons that should be observed to prevent the danger of
injury or death to the operator.
CAUTION: Describes precauons that should be observed to prevent danger of the
apparatus.
IMPORTANT SAFETY INSTRUCTIONS
• Read these instructions
• Keep these instructions
• Heed all warning
• Follow all instructions
Water & Moisture
The apparatus should be protected from moisture and rain and can not be used near
water; for example near a bathtub, a kitchen sink, a swimming pool, etc.
Heat
The apparatus should be located away from heat sources such as radiators, stoves or

4
ENGLISH
PMX-8UBT User’s manual
other appliances that produce heat.
Ventilation
Do not block areas of venlaon opening. Failure to do could result in re. Always in-
stall according to the manufacturer's instrucons.
Object and Liquid Entry
Objects do not fall into and liquids are not spilled into the inside of the apparatus for
safety.
Power Cord and Plug
Protect the power cord from being walked on or pinched parcularly at plugs, conveni-
ence receptacles, and the point where they exit from the apparatus. Do not defeat the
safety purpose of the polarized or grounding-type plug. A polarized plug has two poles;
a grounding-type plug has two poles and a third grounding terminal. The third prong is
provided for your safety. If the provided plug does not t into your outlet, refer to an
electrician for replacement.
Power Supply
In case of external power supply, the apparatus should be connected to the power sup-
ply only of the type as marked on the apparatus or described in the manual. Failure to
do could result in damage to the product and possibly the user. Unplug this apparatus
during lightning storms or when unused for long periods of me.
Fuse
To prevent the risk of re and damaging the unit, please use only of the recommended
fuse type as described in the manual. Before replacing the fuse, make sure the unit
turned o and disconnected from the AC outlet.
Electrical Connection
Improper electrical wiring may invalidate the product warranty.
Cleaning
Clean only with a dry cloth. Do not use any solvents such as benzol or alcohol.
Servicing
Do not implement any servicing other than those means described in the manual. Re-
fer all servicing to qualied service personnel only. Only use accessories/aachments
or parts recommended by the manufacturer.
Warning
Please remember the high sound pressure do not only temporarily damage your sense
of hearing, but can also cause permanent damage. Be careful to select a suitable vol-
ume.

5
ENGLISH
PMX-8UBT User’s manual
1. INTRODUCTION
Congratulaons, by purchasing the PMX-8UBT you have purchased a powered mixing
console whose small size actually hides its versality and audio performance.
Featuring Mic preamps with phantom power, balanced line inputs, DSP secon, Blue-
tooth™ connecon and MP3 player, the PMX-8UBT powered mixing console is well
equipped for any live applicaon. Equipped with high-quality electronics, your mixer
provides an unparalleled warm and analog sound. With the addion of digital tech-
nology, this console combines the advantages of both analog and digital technologies.
1.1 General functions of the mixing console
A mixing console has to perform three main funcons:
▲Signal Processing - Preamplicaon: level adjustment and mixing eects; equal-
izaon of frequencies.
▲Signal distribuon: the master signal with the aux send for eects processing or
monitor mix, distribuon to one or several power amp(s), recording device and
2-track outputs.
▲ Mix: Seng the volume level, distribuon and disposal of the individual signals in
the stereo panorama, level control of the total mix to match the recording devices
/ crossover / power amplier. All other funcons can be included in this main
funcon.
1.2 User’s Manual
The user manual is made to provide both an overview of the controls, as well as infor-
maon on how to use them. In order to help you understand the links between the
various controls, we have gathered in groups according to their funcons.
1.3 Before you start
1.3.1 Shipping
Your PMX-8UBT powered mixer was carefully packed in the factory to ensure safe
transport. Despite this, we recommend that you carefully examine the packaging and
its contents for any signs of physical damage, which can occur during transport.
Always use the original packaging to avoid damage in shipping.
1.3.2 Getting started
Make sure there is enough space around the unit for proper venlaon and prevent
overheang; do not place the unit on top of hot devices such as radiators or power
ampliers. The console is connected to mains through the supplied cable. The product

6
ENGLISH
PMX-8UBT User’s manual
meets the required safety standards. Blown fuses must be replaced with fuses of the
same type and specicaon.
Make sure that all units must be properly grounded. For your safety, you should
never remove any ground connector from electrical devices or power cables, or
make them inoperave.
2. CHARACTERISTICS
(1) LEVEL
It adjusts the level of the channel signal in the main
mix.
(2) PAN
It controls the posion of the signal within the stereo
image. This control provides a constant-power charac-
terisc, which means the signal is always maintained
at a constant level, regardless of the posion in the
stereo.
(3) AUX SEND FX
It sends the audio signal to the internal DSP or exter-
nal eects devices. The AUX SEND FX knob adjusts the
volume level of the signal sent to this auxiliary bus.
If you want to use the internal eect, EFF SEND OUT
and RETURN connectors should not be used.
You can also connect an external eect processor to
the EFF SEND OUT and RETURN connectors; in this
case the internal eects module will be muted.
EQUALIZATION
All input channels have a 2-band equalizer. All bands
provide a boost or a cut of up to 12 dB. In the central
posion, the equalizer has no eect.
The high band (HIGH) and the lower band (LOW) have
“shelving” lters that increase or decrease all frequencies above or below their cut-o
frequency.
(4) HIGH
The HIGH control in the EQ secon controls the high frequency range of the relave
channel, with a boost/aenuaon of ± 12 dB.
1
2
3
4
5
6
9

7
ENGLISH
PMX-8UBT User’s manual
(5) LOW
The LOW control in the EQ secon controls the low frequency range of the relave
channel, with a boost/aenuaon of ± 12 dB.
(6) GAIN
Use the this control to adjust the input gain. It should always be turned fully counter
clockwise whenever you connect or disconnect a signal source to one of the inputs.
(7) Hl-Z
Each channel has a balanced line input on a ¼” TRS
jack, for audio sources such as keyboards, guitars,
bass, etc. Even unbalanced devices (mono jacks) can
be connected to these inputs. Remember that in the
same channel you can use either the microphone and
line input, but only one at a me. You cannot use both
inputs simultaneously!
(8) LOW-Z
Each input channel has a balanced microphone input
with switchable +48V Phantom power for condenser
microphones.
We suggest you to mute your system before you acvate the phantom power in
order to prevent bumps to your speakers. Please also refer to the instrucons in
paragraph (26) +48 Phantom.
(9) PEAK
This LED lights up when the input signal is too high. In this case, turn to the le the
GAIN control and, if necessary, check the EQ seng (HIGH and LOW) of the channel.
(10) DIGITAL MEDIA PLAYER
It manages all selecon and playback
funcons of the compressed audio
les accessible via the USB port. The
controller provides 5 buons (STOP /
SWH, , Next / Vol +, Prev / Vol-, EQ
/ RPT) and a wide LCD to display tles
and me code of the song playing. Fol-
lowing a list of all display features:
A. Play/pause status
7
8
10

8
ENGLISH
PMX-8UBT User’s manual
B. Repeat status
C. Folder and track number
D. EQ mode
E. USB device status
F. Track me elapsed & remaining
G. Track name
H. Playback acve display
To begin using the USB/SD audio player, in-
sert a USB drive with standard compressed
audio les stored on it into the USB type-A connector on the front panel (18). Maxi-
mum capacity 32GB.
Press Play/Pause key to alternately pause or play the current selected track. Pressing
the Stop key will stop playback and return to the start of the track.
To navigate through tracks stored on the USB device, press the Next or Prev keys. Press-
ing and holding these buons adjusts the output volume up or down. The EQ/Rpt key
steps through preset EQ proles for playback, indicated on the LCD display. Holding this
key down toggles the repeat play modes, also indicated on the LCD display.
(11) EFF LEVEL
Controls the output level of the eect.
(12) TAPE
This knob adjusts the volume level of the signal connected to TAPE IN stereo RCA.
(13) DIGITAL MULTI-EFFECT
Digital signal processor with 16 eects. It has three keys (DOWN, UP and ENTER) and
a display for selecng and indicang the number of the selected eect. Following the
list of eects:
Program Eect List
1 Hall 1
2 Hall 2
3 Room 1
4Room 2
5Room 3
6Plate 1
7 Plate 2
8 Plate 3
9Chorus
10 Flanger
11 Delay 1
12 Delay 2
13 Chorus/Room 1
14 Chorus/Room 2
15 Vocal Cancel
16 Rotary Speaker
F
AB C DE
G
H
11
12
13

9
ENGLISH
PMX-8UBT User’s manual
(14) AUX RETURN
Adjust the level of the signal connected to RETURN connector (for example the output
of an external eects processor).
(15) MAIN L
Adjusts the main output signal of the le channel.
(16) MAIN R
Adjusts the main output signal of the right channel.
(17) GRAPHIC EQUALIZER
The PMX-8UBT has two 7-band graphic
equalizers. The upper EQ controls the mon-
itor signal, the lower one the main signal.
Each band operates on a specic frequen-
cy range, respecvely 63Hz, 160Hz, 400Hz,
1kHz, 2.5kHz, 6.3kHz, 16kHz; with a boost /
aenuaon of +/- 12 dB.
(18) USB/INPUT
It accepts a USB storage device containing
MP3 audio les, whose reproducon can be
managed through the DIGITAL MEDIA PLAY-
ER control panel described in paragraph
(10).
(19) TAPE IN
This RCA input allows you to insert an exter-
nal stereo signal, for example a CD player, tape deck or other signal sources with line
level.
(20) REC OUT
This RCA output provides a line-level stereo signal
of the main mix used for sending to a recorder.
WARNING: If the REC OUT is connected
to a recorder whose output signal is sent
to the TAPE IN, a dangerous feedback may
occur when you acvate the recording func-
on. you must unplug the TAPE IN from the
recorder before recording.
18
19
20
17
17
14 15 16
26

10
ENGLISH
PMX-8UBT User’s manual
(21) RETURN
It is used to connect the
output of an external
eects processor.
(22) SEND EFF OUT
It is the output con-
taining the mix coming
from the AUX / SEND,
and can be connected
to an external eects or
a monitor.
(23) PHONE
Headphone output. It
allows you to monitor
the main mix with stereo headphones. The knob adjusts the headphone output level.
(24) LINE OUT
It is a mono line output from the main mix and can be used with other mixers or pow-
ered speakers.
(25) +48 PHANTOM
The + 48V Phantom power is used to power any condenser microphones connected to
the XLR inputs of the channels. It is acvated for all channels with the Phantom switch.
The LED above this switch, when illuminated, indicates that the phantom power is
acve.
(26) POWER LED
When the power LED is on, the mixer is operang normally.
(27) SPEAKER OUTPUTS
These outputs are connected to passive speakers. Dierent combinaons are possible:
2 Speakers - Usually one speaker is connected to one of the two A RIGHT outputs; a
second speaker is connected to one of the two B LEFT outputs. The impedance of each
speaker must be between 4 and 8 ohms.
4 Speakers - When using four speakers simultaneously (two connected to A RIGHT
outputs, two to B LEFT outputs) the impedance of each of them must be between 8
and 16 Ohm.
22 23 24 25
21

11
ENGLISH
PMX-8UBT User’s manual
1 Speaker – In case of only one speaker (connected to one of the four outputs), make
sure that the impedance is between 4 and 8 ohms.
WARNING: The minimum total impedance accepted by the mixer is 4 Ohm. If
the total load is less than 4 ohms you may damage the unit.
(28) POWER
Turns the mixer on and o.
(29) MAINS (IEC)
Connect here the power cord. Make sure the mains is the same as indicated on the rear
panel of the unit (220-230 Vac / 50 Hz) and described in the technical specicaons of
this manual.
(30) FUSE
When replacing the fuse, in order to avoid the risk of re and damaging the unit, please
use only the recommended fuse type as described on the rear panel of the unit (5.0
A). Before replacing the fuse, make sure the device is switched o and unplugged from
the outlet.
27 29 2830

12
ENGLISH
PMX-8UBT User’s manual
3. EXAMPLES OF CONNECTION
13
ENGLISH
PMX-8UBT User’s manual
4. SPECIFICATIONS
Input Impedance Hi-Z 2.2 Kohm
Lo-Z 600 ohm
Mic 600 ohm
Line 2.2 kohm
Tape In 47 kohm
Equalizaon HIGH: +/- 12 dB @ 12 kHz
LOW: +/-12 dB @ 80 Hz
7-Band Graphic EQ +/- 12 dB @ 60, 120, 360, 1k, 2,5k, 7k, 16kHz
Frequency Response 20Hz - 20KHz, +1dB/-3dB @ 1W
Harmonic Distoron (THD) <0.3% 20Hz - 20KHz @ 100W
Aenuaon PAD -20dB
RMS Power 150W + 150W RMS @ 4 Ohm
Peak Power 300W + 300W max. @ 4 Ohm
Output Impedance 4 Ohm min.
Phantom Power +48Vcc
Mains Voltage AC 220-230 Vac / 50 Hz
Dimensions (WxHxD) 440 x 255 x 240 mm - 17.32 x 10.04 x .45 in
Weight 9.0 kg - 19.84 lbs.
5. INSTALLATION
5.1 Cable Connections
You will need several cables for the various connecons to and from the console. See
the pictures below that show the internal wiring of these cables. Be sure to use only
high quality cables.
5.1.1 Audio connections
Use commercial RCA cables to wire TAPE IN and REC OUT.
You can, of course, also connect unbalanced equipment to the inputs / outputs bal-
anced. Use either mono and stereo jack, making sure ring and collar are connected
together (or pins 1 & 3 in the case of XLR connectors).
WARNING! Never use unbalanced XLR connectors XLR (pin 1 & 3 connected) on
MIC input connectors when you are using phantom power.

14
ENGLISH
PMX-8UBT User’s manual
BalanceduseofXLRconnectors
1=Ground/Shield
2=Hot(+Ve)
3=Cold(-Ve)
Input Output
IncaseofunbalancedusePins1and3willbejumped
Fig. 5.1 XLR connector
Unbalanceduseof1/4”jackTSconnector
Strain relief
clamp
Sleeve
Tip
Sleeve
Groundshield
Tip
Signal
Fig. 5.2 ¼” TS Jack connector
Balanceduseof1/4”jackTRSconnector
Headphonesconnectionwith1/4”TRSconnector
Strain relief
clamp
Sleeve
Tip
Sleeve
Groundshield
Ring Ring
Cold(-Ve)
Tip
Hot(+Ve)
Fig. 5.3 ¼” TRS Jack connector

15
ENGLISH
PMX-8UBT User’s manual
6. WARRANTY AND SERVICE
All SOUNDSATION products feature a limited two-year warranty. This two-year warran-
ty is specic to the date of purchase as shown on your purchase receipt.
The following cases/components are not covered from the above warranty:
• Any accessories supplied with the product
• Improper use
• Fault due to wear and tear
• Any modicaon of the product eected by the user or a third party
SOUNDSATION shall sasfy the warranty obligaons by remedying any material or
manufacturing faults free of charge at SOUNDSATION’s discreon either by repair or
by exchanging individual parts or the enre appliance. Any defecve parts removed
from a product during the course of a warranty claim shall become the property of
SOUNDSATION.
While under warranty period, defecve products may be returned to your local
SOUNDSATION dealer together with original proof of purchase. To avoid any damages
in transit, please use the original packaging if available. Alternavely you can send the
product to SOUNDSATION SERVICE CENTER – Via Enzo Ferrari , 10 – 62017 Porto Re-
cana - Italy . In order to send a product to service center you need an RMA number.
Shipping charges have to be covered by the owner of the product.
For further informaon please visit www.soundsaonmusic.com

16
ENGLISH
PMX-8UBT User’s manual
WARNING
PLEASE READ CAREFULLY – EU and EEA (Norway, Iceland and Liechtenstein) only
This symbol indicates that this product is not to be disposed of with your household
waste, according to the WEEE Direcve (2202/96/EC) and your naonal law.
This product should be handed over to a designated collecon point, e.g., on an au-
thorized one-for-one basis when you buy a new similar product or to an authorized
collecon site for recycling waste electrical and electronic equipment (WEEE).
Improper handling of this type of waste could have a possible negave impact on the
environment and human health due to potenally hazardous substances that are gen-
erally associated with EEE. At the same me, your cooperaon in the correct disposal
of this product will contribute to the eecve usage of natural resources.
For more informaon about where you can drop o your waste equipment for recy-
cling , please contact your local city oce , waste authority , approved WEEE scheme
or your household waste disposal service.
This product is imported in EU by
FRENEXPORT SPA – Via Enzo Ferrari, 10 - 62017 Porto Recana - Italy
www.soundsationmusic.com
Soundsaon® is a registered trademark of FRENEXPORT SPA - Italy

17
ITALIANO
Genle Cliente,
grazie per aver scelto un prodoo SOUNDSATION®. La nostra missione è quella di orire ai nostri
uten una vasta gamma di strumen musicali ed apparecchiature audio con tecnologie di ulma
generazione.
Speriamo di aver soddisfao le tue aspeave e, se volessi collaborare, saremmo lie di ricevere
un tuo feedback sulla qualità del prodoo al ne di migliorare costantemente la nostra produz-
ione. Visit ail nostro sito www.soundsaonmusic.com ed inviaci una mail con la tua opinione,
questo ci aiuterà a sviluppare nuovi prodo quanto più vicini alle tue esigenze.
Un ulma cosa, leggi il presente manuale al ne di evitare danni alla tua persona ed al prodoo
derivan da un ulizzo non correo.
Il Team SOUNDSATION
SOMMARIO
1. INTRODUZIONE .................................................................................... pagina 20
1.1 Funzioni generali della console di missaggio ............................... pagina 20
1.2 Manuale d’uso ............................................................................ pagina 20
1.3 Prima di iniziare .......................................................................... pagina 20
1.3.1 Spedizione ....................................................................... pagina 20
1.3.2 Operazioni iniziali ............................................................. pagina 20
2. CARATTERISTICHE ................................................................................ pagina 21
3. ESEMPI DI COLLEGAMENTO ................................................................. pagina 27
4. SPECIFICHE ........................................................................................... pagina 28
5. INSTALLAZIONE .................................................................................... pagina 28
5.1 Collegamen dei cavi .................................................................. pagina 28
5.1.1 Collegamen audio .................................................................. pagina 28
6. GARANZIA E ASSISTENZA ..................................................................... pagina 30
18
ITALIANO
IMPORTANTI SIMBOLI PER LA SICUREZZA
Il simbolo è usato per indicare che in questa apparecchiatura sono presen-
alcuni terminali vivi pericolosi, anche in condizioni di normale funzion-
amento, che possono costuire rischio di scariche eleriche o di morte.
Il simbolo viene ulizzato nella documentazione di servizio per indicare
che uno specico componente può essere sostuito esclusivamente dal
componente specicato nella documentazione per movi di sicurezza.
Terminale di Terra
Corrente/Tensione alternata
Teminale vivo pericoloso
Indica che l’apparato è acceso
Indica che l’apparato è spento
WARNING: Descrive le precauzioni da osservare per prevenire il pericolo di ferimento
o di decesso per l’ulizzatore.
CAUTION: Descrive le precauzioni da osservare per prevenire il danneggiamento
dell’apparecchio.
IMPORTANTI ISTRUZIONI DI SICUREZZA
• Leggere queste istruzioni
• Conservare queste istruzioni
• Rispettare tutte le avvertenze
• Seguire tutte le istruzioni
Acqua e umidità
L’apparecchio deve essere proteo dall’umidità e dalla pioggia, non può essere usato
in prossimità di acqua; ad esempio nei pressi di una vasca da bagno, di un lavandino,
di una piscina, etc.
Calore
L’apparecchio deve essere posto lontano da fon di calore come radiatori, stufe o altri

19
ITALIANO
apparecchi che producono calore.
Ventilazione
Non ostruire le prese d’aria per la venlazione: potrebbe provocare incendi. Installare
sempre secondo le istruzioni del produore.
Introduzione di oggetti e liquidi
Non introdurre ogge o versare liquidi all’interno dell’apparato per ragioni di sicurez-
za.
Cavo di alimentazione e spina
Evitare che il cavo di alimentazione venga calpestato o schiacciato, in parcolare in
prossimità delle spine, delle prese e del punto in cui fuoriescono dall’apparecchio. Non
vanicare la nalità di sicurezza della spina con messa a terra. Una spina normale o
“polarizzata” ha due soli terminali; una spina con messa a terra ha un terzo polo di
terra. Questo ulteriore terminale serve per la vostra sicurezza. Se la spina fornita non si
inserisce nella presa, consultare un elericista per l’eventuale sostuzione.
Alimentazione
L’apparecchio deve essere collegato alla sorgente di alimentazione elerica del po in-
dicato sull’apparecchio o descrio nel manuale. In caso contrario si potrebbero provo-
care danni al prodoo ed eventualmente all’utente. Staccare la spina in caso di tempo-
rale o quando non viene ulizzato per lunghi periodi di tempo.
Fusibile
Per evitare il rischio di incendio e di danneggiare l’unità, si prega di ulizzare solo il po
di fusibile consigliato come descrio nel manuale. Prima di sostuire il fusibile, assicu-
rarsi che l’apparecchio sia spento e scollegato dalla presa di corrente.
Collegamento alla rete elettrica
Il collegamento elerico improprio può invalidare la garanzia del prodoo.
Pulizia
Pulire solo con un panno asciuo. Non ulizzare solven come benzolo o alcol.
Manutenzione
Non eeuare qualsiasi altro intervento al di fuori di quelli descri nel manuale. Per
eventuale assistenza rivolgersi solo a personale qualicato. Ulizzare solo accessori /
componen suggeri dal produore.
Avviso
Si ricorda che l’alta pressione sonora non solo può danneggiare temporaneamente
il senso dell’udito, ma può anche causare danni permanen. Prestare aenzione af-
nchè il volume sia sempre adeguato.

20
ITALIANO
manuale d’uso PMX-8UBT
1. INTRODUZIONE
Congratulazioni, acquistando il PMX-8UBT vi siete procura una console di missaggio
amplicata le cui dimensioni ridoe nascondono la sua versalità e performance au-
dio. Con preamplicatori microfonici dota di alimentazione Phantom, ingressi di linea
bilancia, sezione ee, connessione Bluetooth™ e leore MP3, la console di missag-
gio PMX-8UBT è omamente equipaggiata per qualsiasi applicazione live. Dotata di
un’eleronica di alta qualità, il vostro mixer fornisce un suono caldo e analogico senza
confron. Con l’aggiunta della tecnologia digitale questa console combina i vantaggi di
entrambe le tecnologie, analogica e digitale.
1.1 Funzioni generali della console di missaggio
Una console di missaggio deve assolvere tre funzioni principali:
▲ Processamento del segnale - Preamplicazione, regolazione del livello e missag-
gio degli ee – Equalizzazione delle frequenze.
▲ Distribuzione del segnale: somma dei segnali con le mandate AUX per il processa-
mento con ee e mix monitor, distribuzione ad una o più tracce di registrazione,
amplicatore/i di potenza, control room ed uscite a 2 tracce.
▲ Mix: impostazione del livello dl volume, distribuzione e disposizione dei singoli
segnali nel panorama stereo, controllo del livello del mix totale per adaarlo a dis-
posivi di registrazione/crossover/amplicatori di potenza. Tue le altre funzioni
possono essere incluse in questa funzione principale.
1.2 Manuale d’uso
Il manuale d’uso è fao per fornirvi sia una panoramica dei controlli, sia informazioni
deagliate su come ulizzarli. Allo scopo di aiutarvi a capire i collegamen fra i vari
controlli, li abbiamo riuni in gruppi secondo le loro funzioni.
1.3 Prima di iniziare
1.3.1 Spedizione
Il vostro mixer amplicato PMX-8UBT è stato imballato con cura in fabbrica per ga-
ranre un trasporto sicuro. Nonostante questo, vi raccomandiamo di esaminare con
aenzione l’imballo e il suo contenuto per qualsiasi segno di danno sico, cosa che può
accadere durante il trasporto.
Ulizzate sempre l’imballo originale per evitare danni nelle spedizioni.
1.3.2 Operazioni iniziali
Table of contents
Languages:
Other Sound Sation Music Mixer manuals


Popular Music Mixer manuals by other brands


Studiomaster Professional
Studiomaster Professional AQUA Series instruction manual

Numark
Numark MIXTRACK II user guide

Yamaha
Yamaha PM3500 operating manual

Stanton
Stanton Professional performance mixer SK SIX owner's manual

audiophony
audiophony LIVEtouch20 user guide

Aereco
Aereco AWN ECO+ 111 operating instructions


