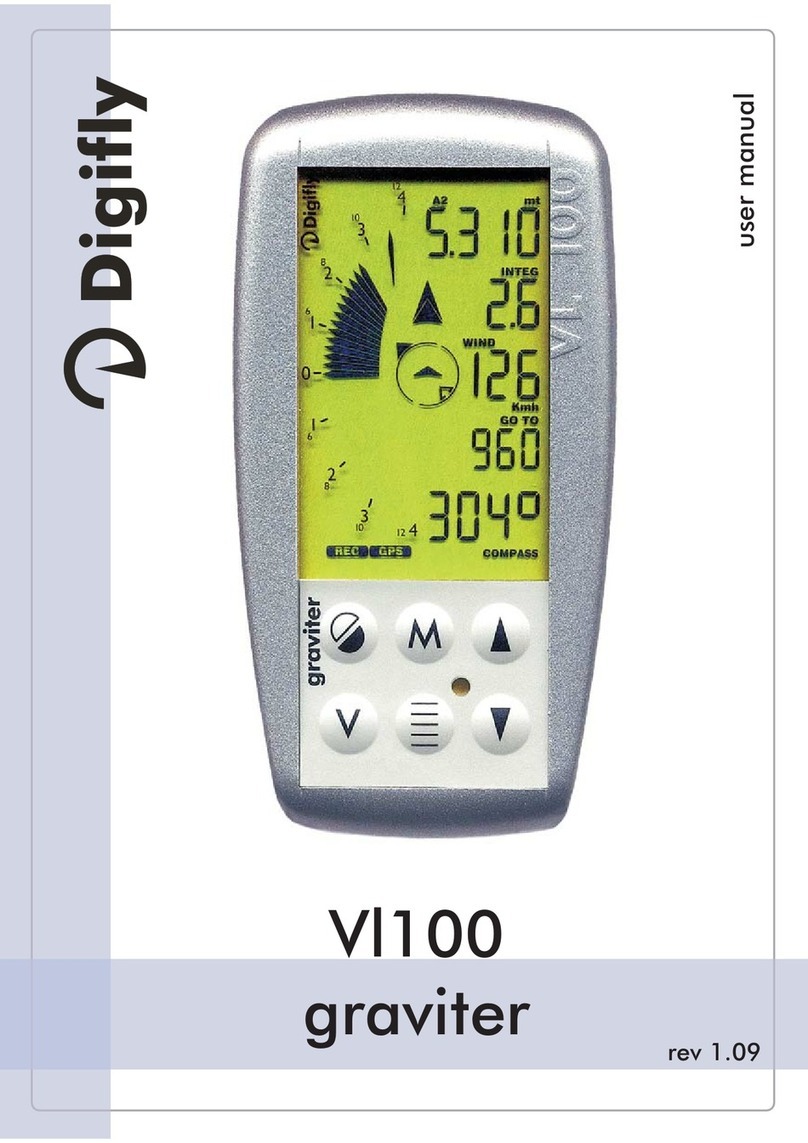
Digifly VL 100 RACER User manual

Italiano English Français Deutsch

Le precedenti
The technical data is
Les précédents Die technischen
caratteristiche
liable to be changed
caractéristiques Eigenschaften
possono essere without previous peuvent être sujettes
können ohne
soggette a modifiche
notice.
à des changements Voranmeldung
senza preavviso. sans préavis. geändert werden.

Vario analogico / Indicatore Speed-to-fly analogico
Schermo 1
altimetro A1
Schermo 2
vario digitale / anemometro / efficientimetro
Schermo 3
altimetro A2 - altimetro A3 - orario - timer - wind
Simboli tastiera
accensione - spegnimento
menu
variometro / anemometro / efficientimetro
vario analogico / STF / wind / volume
altimetri A2, A3, ora e timer di volo
azzeratore A2, A3 e timer
Uso dei tasti durante il volo
I tasti usati durante il volo sono 4.
commuta da modo variometro a modo STF; permette
l' accesso alla funzione Wind.
seleziona sullo schermo 3 A2, A3, ora e timer.
selezionasulloschermo2ilvariometrodigitale,lavelocità
istantanea (quando lo strumento è fornito di apposita
sonda) e l'efficientimetro.
azzera il valore che appare in quel momento sullo
schermo 3 (A2, A3 o timer di volo).
Impostazione volume del variometro sonoro
Premere poi per impostare il volume del variometro
sonoro (spento=1 beep; medio=2 beeps; alto=3 beeps).
Premere ancora per uscire.
NOTES

Impostazione altimetri
Lo strumento è dotato di 3 altimetri: A1 leggibile nello schermo 1,
A2 e A3 leggibili nello schermo 3.
A2 ed A3 sono azzerabili durante il volo premendo .
A strumento acceso premendo il tasto apparirà sul display la
seguente figura:
Schermo 1 Rec
Schermo 2 Alt
Schermo 3 Set1
Premendo si passa a rotazione sui vari sottomenù: posizionarsi
sul sottomenù Alt. Premere sullo schermo 1 apparirà A1. Il
lampeggio indica che tale valore è pronto per essere impostato a
piacere premendo per aumentarlo o per diminuirlo (una
pressione continuata sul tasto velocizza l’operazione). Una volta
impostato il valore desiderato premere per confermare.
A questo punto analoga operazione può essere eseguita per settare
A2 e A3. Quindi premere per uscire dal sottomenù.
Impostazione soglia sensibilita’ variometro sonoro e va-
rio di media
Premere . Premere 2 volte per posizionarsi sul sottomenù
Set1. Premendo il valore sullo schermo 2 lampeggia: tramite
o si aumenta o diminuisce la soglia altimetrica che attiva il
variometro sonoro. Se, per esempio, si imposta il valore 0.3 il
variometro acustico segnalerà solo variazioni altimetriche superio-
ri a 30 cm al secondo. Impostata la soglia prescelta premere
per confermare. Analoga operazione per impostare la soglia di
discesa. Premendo ancora si accede al variometro di media
impostabile per ritardi fino a 30 secondi agendo su o (Es.:
se imposto sec 15 il variometro analogico e sonoro continuerà a
segnalare la variazione altimetrica istantanea, mentre il variometro
digitale indicherà il guadagno o perdita di quota relativa agli ulti-
mi 15 secondi). Impostato il ritardo premere per confermare.
Uscire dal menù con .
Impostazione sistema di misura
Le rilevazioni possono essere espresse in metri o piedi e Km/h o
Mph. Per cambiare il sistema di misura operare in questa maniera:
Premere , 2 volte , 4 volte , quindi o per scegliere
se l’altezza deve essere espressa in metri o piedi. Confermare pre-
Barograf: Prozedur für offizielle FAI Beobachter
1.. Der Beobachter muß sich mit dem Gerät für mindestens 1
Stunde vertraut machen.
2. Am Startplatz muß der Beobachter den Namen des Piloten
und die SerienNr. des verwendeten Gerätes notieren. Er muß
auch kontrollieren, daß das Gerät intakt und nicht beschädigt ist;
dann muß er die Schließung desselben überprüfen.
3. Der Beobachter muß das Gerät einschalten und kontrollieren,
daß die Uhrzeit, das Datum und die Abflug-Höhe korrekt
eingestellt wurden. Wenn einige dieser Werte nicht korrekt sein
sollten, dann muß der Beobachter sie neu eingeben (es ist nicht
erlaubt, Uhrzeit und Datum während des Fluges zu ändern).
4. Der Beobachter muß die Speicherung aktivieren.
5. Der Beobachter muß andauernd den Piloten beaufsichtigen,
solange er nicht gestartet ist und sich vergewissern, daß er mit
dem Gerät startet.Der Beobachter muß die genaue Uhrzeit des
Startes notieren, und eine autonome Stoppuhr verwenden.
6. Nach der Landung muß der Pilot die Speicherung stoppen
und das Gerät ausschalten.
7. Abdrucken: der Beobachter muß feststellen, daß auf dem
Bildschirm des Gerätes die exakte Uhrzeit und das exakte Datum
angegeben werden und jede Abweichung zu den lokalen
laufenden Daten notieren. Der Beobachter muß feststellen, daß
das Gerät intakt ist, muß die Schließung überprüfen und sich
vergewissern, daß sie nicht beschädigt ist; er muß feststellen ob
das Gerät direkt an dem Drucker durch dem entsprechenden
Kabel angeschlossen ist, und auch überprüfen, daß nichts
anderes an dem Drucker angeschlossen ist, d.h. ein weiterer
Kabel oder ein Instrument. Die Verbindung des Druckers mit dem
Versorgungsnetz ist allerdings erlaubt. Der Beobachter muß
überprüfen, daß das zu druckende Papier sauber ist.
8. Der Beobachter startet den Abdruck des gespeicherten Fluges
und kontrolliert, daß die Nummer des gedruckten Gerätes
dieselbe der am Startplatz notierten Nummer ist. Der
Beobachter muß außerdem kontrollieren, daß die Uhrzeit und
das Datum dieselben sind, die er sich notiert hatte. Der
Beobachter muß während der gesamten Abdruck-Prozedur
anwesend sein. Wenn der Abdruck abgeschlossen ist, muß der
Beobachter den gesamten Druck des Druckers entfernen und das
Datum und seine Unterschrift hinzufügen.

mendo . A questo punto premere o per scegliere se la
velocità deve essere espressa in Km/h o Mph. Premere per con-
fermare. Uscire dal menù con .
Impostazione parametri per la funzione Speed-to-fly
Premere , 3 volte (apparirà la scritta "SET 2" lampeggiante).
Premendo si impostano in sequenza:
AUTO STF: tramite o si imposta il valore 0=STF
manuale, 1=STF automatico. Impostando 0 la commutazione in
modo STF avviene solo premendo . Impostando 1 la
commutazione avviene o automaticamente (in modo variometro
dopo 7 sec. di ascendenza, in modo STF dopo 7 sec. di discenden-
za) oppure manualmente, cioè premendo . Tutto questo avvie--
ne in maniera continuativa fino a che non si reimposta 0, cioè STF
manuale.
POL: premendo o si accede alla polare 1 o 2. Della polare
prescelta, tramite il tasto si visualizzano in sequenza i coefficienti
Pol A, Pol B, Pol C impostabili tramite o (si possono quindi
memorizzare 2 diverse polari). I coefficienti della polare potranno
essere calcolati tramite lo specifico software Digifly contenuto nel
dischetto in dotazione.
Vi è un altro parametro impostabile senza accedere al menù:
WIND: la velocità orizzontale della massa d' aria in cui si vola
(con valore negativo se contraria , con valore positivo se
favorevole). Premendo si commuta lo strumento da modo
variometro a modo STF, premendo ancora si entra nella fun-
zione impostazione Wind: lo schermo 3 inizierà a lampeggiare,
premendo o si imposta il valore desiderato (da -50Km/h a
+50Km\h); una volta impostato il valore prescelto premere per
uscire.
N.B. La funzione STF richiede necessariamente l' applicazione del-
la sonda anemometrica.
Impostazione orologio e tempo di registrazione
Premere , 3 volte (lampeggia la scritta "SET2") e 6 volte .
A questo punto, tramite i tasti o per modificare il valore e il
tasto per confermare, si impostano, in sequenza :
- HOUR: l' ora corrente.
- MIN: i minuti correnti.
- DAY: il giorno corrente.
POL eingegebenen Daten ist, ist es notwendig, diese Daten so
genau wie möglich einzutragen). Auf dem Bildschirm werden 3
Striche erscheinen: bei Änderung der anemometrischen
Geschwindigkeit werden diese verschiedene Positionen auf dem
Bildschirm einnehmen. Um die Geschwindigkeit des maximalen
Gleitverhältnisses zu erreichen, muß man die drei Striche in
Korrespondenz der Null halten.
Lesen der Gleitverhältnisanzeige
Das Gleitverhältnis stellt das Verhältnis zwischen der Sink-quote
und der anemometrischen Geschwindigkeit dar. Wenn, zum
Beispiel, der Gleitverhältnisanzeiger 6 angibt, so bedeutet das,
daß man (in ruhiger Luft) für jeden Meter den man gesunken ist,
um 6 Meter vorankommt.
Stromversorgung
Die Stromversorgung erfolgt durch zwei 1,5 V-Batterien. Die Au-
tonomie beträgt um die 200 Stunden.Beim Einlegen der Batterien
auf die Polung achten. Wenn nur noch für 40 Stunden Strom
vorhanden ist, blinkt die Schrift ‘BAT’. Sollte das Instrument für
längere Zeit nicht benutzt werden, empfehlen wir die Batterien zu
entfernen.
Technische Daten
3 Höhenmesser mit einem Anzeigebereich bis zu10.000m.
Analoges Variometer mit Anzeigebereich von+/-15 m/sec.
Digitales Variometer mit Anzeigebereich von +/- 25 m/sec.
Akustisches Variometer mit verschiedenen Tönen für die Steig-
und Sinkwerte.
Durchschnittsvariometer mit einer einstellbaren Verzögerung von
1 bis 30 Sekunden.
Einstellbare Maßanzeige.
Digitale Gleitverhältnisanzeige.
Analogische Sollfahrtanzeige.
Geschwindigkeitsmesser
max 120 Km/h.
Barograf.
Stoppuhr, Uhr, Datum.
Speicher für die Daten der letzten
10 Flüge.
Autonomie von ca. 200 Stunden
Gewicht ca. 200 g mit Batterien
Abmessung 135 x 72 x 37 mm

- MONTH: il mese corrente.
- YEAR: l' anno corrente.
- REC SEC: l' intervallo di registrazione del barografo,
impostabile da 1 a 30 sec. (Sampling Rate).
Come registrare (Barografo e picchi min. - max.)
Entrare nel menù principale e posizionarsi su Rec: la pressione di
avvierà la registrazione, confermata dall’apparizione della scritta
Start Rec. Automaticamente il timer di volo si azzera. Il lampeggio
continuo nello schermo 1 dell’indicatore di unità di misura prescelta
indica al pilota che è in corso la registrazione del volo. Premendo
durante la registrazione questa si interrompe.
Come leggere le registrazioni (picchi min.-max.)
E’ possibile rileggere i voli registrati fino a un massimo di 10,
l’undicesima registrazione cancellerà la prima. Entrati nel menù
principale premendo sullo schermo 2 viene indicato il numero
dei voli registrati fino a un massimo di 999 voli.
Ogni volta che si entra nelle memorie di volo lo strumento si posi-
ziona automaticamente sull’ultimo volo registrato, se si desidera
leggere un volo precedente agire sul tasto (al massimo si può
retrocedere di 10 voli). Scelto il volo da leggere premere per
accedere alla visualizzazione dei valori massimi. Premendo anco-
ra si visualizzano i valori minimi registrati. Premendo si leg--
gerà sullo schermo 2 la velocità massima raggiunta durante il volo
al posto della variazione altimetrica per secondo. Nello schermo 3
appare la durata del volo in ore e minuti (fino a 99h e 59 min).
Come stampare il barogramma
Collegare allo strumento, tramite lo speciale cavo in dotazone,
una stampante seriale così settata: 9600 Baud, 1 stop bit, 7 data
bit, no parity. Con la stampante on line premere e con REC
lampeggiante premere . Premere quindi : sul display appa-
re la scritta "PLOT" fino a che la stampa non è ultimata. Se si desi-
dera interrompere la stampa è sufficiente tenere premuto il tasto
per alcuni secondi. Con il Sampling Rate settato ad 1 sec. la
durata massima della registrazione è pari a 66 min., settandolo a
30 sec. la durata massima è pari a 33h e 20 min.
Come attivare l’ anemometro
Lo strumento è predisposto per la lettura della velocità
anemometrica. Sul lato destro del VL100 Racer vi è il jack nel qua-
le inserire l’apposita sonda (opzionale). Una volta inserita è suffi-
Lesen des Speichers
Es können maximal 10 Flüge wieder gelesen werden; der letzte
Flug überschreibt somit der Ersten aufgezeichneten. Wird im
Hauptmenü die Taste gedrückt, erscheint im Bildschir--
mabschnitt 2 die Zahl der Flüge ; bis zu einem Maximum von
999 Flügen. Beim Wählen dieser Funktion zeigt das Instrument
immer den zuletzt aufgezeichneten Flug. Mit der Taste kann
man auch einen vorhergehenden Flug zur Auswertung anwählen
(bis max. letzten 10 Flüge).Mit der Taste bestätigen, auf der
Anzeige erscheinen nun die Maximalwerte.Bei erneutem Drücken
der Taste erscheinen die Minimalwerte. Die Taste zeigt im
Bildschirmabschnitt 2 (statt der m/s-Anzeige) die im Flug erreichte
Höchstgeschwindigkeit an. Im Bildschirmabschnitt 3 erscheint die
Flugdauer in Stunden und Minuten (bis zu 99h und 59min).
Abdrucken des Barogramms
Dem Gerät mittels dem besonderen beigefügten Kabel einen
serialen Drucker anschließen, der wie folgt eingestellt ist: 9600
Baud, 1 stop bit, 7 data bit, no parity. Nach Einschaltung des
Druckers auf der Taste drücken und während des Blinkens der
Schrift ‘REC’auf drücken. Dann auf drücken: auf dem
Bildschirm erscheint somit die Schrift ‘PLOT’ solange bis der
Abdruck beendet ist. Falls man den Abdruck unterbrechen will,
braucht man nur die Taste einige Sekunden lang gedrückt
halten: Mit Einstellung des Sampling Rates auf 1 Sekunde ist die
maximale Dauer der Speicherung gleich 66 min, mit Einstellung
auf 30 Sekunden ist die maximale Dauer gleich 33 h und 20min.
Einschalten des Geschwindigkeitsmessers
Das Gerät kann auch die Geschwindigkeit anzeigen. Der
Anschluß für die entsprechende Sonde (Zubehör) befindet sich im
VL100 Racer auf der rechten Seite. Mit angeschlossener Sonde
kann man durch Drücken der Taste im Bildschirmabschnitt 2
von der digitalen Variometeranzeige auf die
Geschwindigkeitsanzeige umschalten und umgekehrt.
Lesen der Sollfahrtanzeige
Wenn das Gerät in Sollfahrt-Anzeigeweise funktioniert, schaltet
sich das analogische Vario um auf eine Anzeige mit Strichen, die
die Geschwindigkeit des maximalen Gleitverhältnisses hinsichtlich
der laufenden Flugsituation angibt (dadurch, daß diese Funktion
auch direkte Folge der in der Funktion WIND und in der Funktion

ciente premere il tasto per commutare nello schermo 2 il valore
variometrico in anemometrico e viceversa.
Come leggere l' indicatore Speed-to-fly
Quando lo strumento è in modo STF il vario analogico si trasforma
in indicatore a barre della velocità di massima efficienza relativa
alla situazione di volo corrente (poichè questa indicazione è diretta
conseguenza anche dei valori inseriti nella funzione Wind e nella
funzione POL, è necessario impostare il più correttamente possibi-
le questi valori). Sul display appariranno tre barrette: al variare
della velocità anemometrica esse assumeranno diversa posizione
sul display. Mantenere le tre barre in corrispondenza dello zero
per ottenere la velocità di massima efficienza.
Come leggere l'indicatore di efficienza (efficientimetro)
L' efficienza rappresenta il rapporto di planata, cioè il rapporto tra
il tasso di caduta e la velocità anemometrica. Se, ad esempio,
l' efficientimetro indica 6, significa che, in aria calma, per ogni
metro di quota perso si avanza di 6 metri.
Alimentazione
Lo strumento è alimentato da due pile di tipo "stilo" da 1,5 volt. L'
autonomia è di circa 200 ore usando pile alcaline, quando questa
scende al di sotto delle 40 ore lampeggia "BAT" sul display. Rispet-
tare la polarità delle batterie e rimuoverle se si prevede di non
usare lo strumento per un lungo periodo.
Caratteristiche tecniche
3 altimetri con lettura fino a 10000 mt
Variometro analogico con scala fino a +/- 15 mt/sec
Variometro digitale con scala fina a +/- 25 mt/sec
Variometro sonoro con toni diversi in ascesa e in discesa
Variometro di media con ritardo impostabile da 1 a 30 sec
Sistema di misura impostabile
Efficientimetro digitale
Indicatore Speed-to-fly analogico
Anemometro max 120 Km/h
Barografo
Timer di volo, orario e data
Memoria dati ultimi 10 voli
Autonomia di circa 200 h
Peso circa 200g con batterie
Dimensioni 135x72x37 mm
Pol B, Pol C der ausgewählten Polaren und kann sie einstellen
durch oder (man kann somit 2 verschiedene Polare
einstellen). Die Koeffiziente der Polare können mit dem
spezifischen Digifly-Software berechnet werden, welcher in der
beigefügten Diskette enthalten ist.
WIND:die horizontale Geschwindigkeit der Luftmasse in welche
man fliegt (mit negativen Wert wenn in entgegengesetzter
Richtung, mit positiven Wert wenn in Fahrtrichtung). Durch
Drücken auf schaltet man das Gerät von Variometer--
Anzeigeweise auf Sollfahrt-Anzeigeweise, durch nochmaliges
Drücken auf hat man Zutritt in die Einstellung der WIND--
Funktion: der Bildschirmabschnitt 3 wird blinken, und durch die
Tasten oder gibt man den gewünschten Wert ein (von
-50 Km/h bis +50 Km/h); nach der Einstellung des Wertes, mit
Taste aussteigen.
Bitte beachten: Die Sollfahrtanzeige benötigt notdürftig die
Anlegung der entsprechenden anemometrischen Sonde.
Einstellung der Uhr und der Speicherung
Die Taste drücken, dreimal (die Schrift ‘SET2’ blinkt ) und
sechsmal . Jetzt kann man durch Drücken der Tasten oder
zur Werteinstellung und der Taste zur Bestätigung, die
folgenden Daten nacheinander einstellen:
- HOUR: die laufende Stunde
- MIN: die laufenden Minuten
- DAY: der laufende Tag
- MONTH: der laufende Monat
- YEAR: das laufende Jahr
- REC SEC: das Speicherungs-Intervall des Barografes,
einstellbar von 1 bis 30 Sekunden (Sampling Rate).
Speicherung (Barograf und min.- max.Gipfel)
Das Hauptmenü anwählen und sich auf ‘Rec’ positionieren: die
Taste drücken - die Aufnahme beginnt und wird durch das
Erscheinen der Schrift ‘Start Rec’ auf dem Bilschirm bestätigt. Die
Stoppuhr wird automatisch auf Null gestellt. Das Blinken der
Maßeinheit im ersten Bildschirmabschnitt zeigt dem Piloten, ob
die Aufnahme während des Fluges aktiviert ist. Mit der Taste
wird die Aufnahme unterbrochen.

Barografo : procedura per osservatori ufficiali FAI
1. L'osservatore deve familiarizzare con lo strumento per un
periodo di almeno un' ora.
2. Nel luogo di partenza l'osservatore deve prendere nota del nome
del pilota e del n. di serie dello strumento che sarà usato.Deve
inoltre verificare che lo strumento sia intatto e non danneggiato;
deve quindi ispezionare la chiusura dello stesso.
3. L'osservatore deve accendere lo strumento e controllare che
l' ora, la data e l'altitudine di partenza siano settati correttamente.
Se qualcuno di questi valori non è corretto l'osservatore dovrà cor-
reggerlo (non è consentito combiare orario e data durante la regi-
strazione).
4. L'osservatore deve attivare la registrazione.
5. L'osservatore deve continuamente osservare il pilota fintantochè
il pilota non parte e verificare che il pilota parta con lo strumento.
L' osservatore deve annotarsi l'esatto tempo di partenza usando un
cronometro indipendente.
6. Dopo l' atterraggio, il pilota deve fermare il registratore e spe-
gnere lo strumento.
7. Stampa: L'osservatore deve verificare che il display dello stru-
mento indichi l'ora e la data corrette e annotare ogni discrepanza
rispetto all'orario locale. L'osservatore deve verificare che lo stru-
mento sia intatto, deve ispezionare la chiusura e assicurarsi che
non sia danneggiato; deve assicurarsi che lo strumento sia
connesso direttamente alla stampante attraverso l' apposito cavo,
deve verificare anche che non ci sia nient' altro connesso alla
stampante, cioè, un cavo addizionale o uno strumento. La connes-
sione della stampante alla rete di alimentazione è tuttavia per-
messa. L'osservatore deve verificare che la carta di stampa sia pu-
lita.
8. L'osservatore fa partire la stampa del volo registrato e verifica
che il n. dello strumento stampato sia uguale a quelllo annotato al
momento del decollo. L'osservatore deve verificare inoltre che l'ora-
rio di decollo e la data stampati siano uguali a quelli che lui si era
annotato. L'osservatore deve essere presente durante l'intera pro-
cedura di stampa. Quando la stampa è finita l'osservatore deve
rimuovere l'intera stampa dalla stampante e aggiungere la data e
la sua firma.
Einstellung des Durchschnittsvariometers. Durch Drücken der
Taste oder kann eine Verzögerung der Wertanzeige von
bis zu 30 Sekunden bestimmt werden.
(z.Bsp.: Bei Eingabe von 15 Sekunden wird das analoge und
akustische Vario weiterhin die momentanen Höhenänderungen
angeben, während das digitale Variometer den Höhengewinn
bzw. - verlust als Mittelwert der letzten 15 Sekunden anzeigt.)
Zur Bestätigung der Einstellung auf drücken. Mit der Taste
aussteigen.
Einstellen der Maßeinheiten
Die Maßeinheiten können in Meter, Km/h oder Fuß und Mph
ausgedrückt werden.
Um die gewünschte Maßeinheit zu wählen, die Tasten wie folgt
betätigen: drücken, zweimal , viermal , und dann mit
den Tasten und die gewünschte Maßeinheit bestimmen.
Mit der Taste bestätigen. Dann mit den Tasten und die
gewünschte Maßeinheit für die Geschwindigkeitsanzeige
bestimmen. Mit der Taste bestätigen. Mit der Taste
aussteigen.
Einstellen der Parameter für die Sollfahrtanzeige-
Funktion (Speed-to-fly)
Die Taste drücken, dann dreimal (es wird die Anzeige
‘SET2’ blinken). Durch Drücken auf stellt man nacheinander
ein:
AUTO STF: durch die Tasten und bestimmt man den Wert
0 =handbediente Sollfahrtanzeige, 1= automatische
Sollfahrtanzeige. Bei Einstellung von 0 erfolgt die Umschaltung
als Zutritt zur Sollfahrtanzeige nur durch Drücken von Taste .
Bei Einstellung von 1 erfolgt die Umschaltung entweder
automatisch ( in Variometer-Anzeigeweise nach 7 Sekunden
Steigen, in Sollfahrt-Anzeigeweise nach 7 Sekunden Sinken) oder
handbedient, und zwar durch Drücken der Taste . Alldies
erfolgt in kontinuirlicher Weise, bis man 0 wieder neu einstellt,
d.h. handbediente Sollfahrtanzeige.
POL:durch Drücken der Tasten oder hat man Zutritt zu
den Polaren 1 oder 2.
Durch die Taste sieht man in Sequenz die Koeffiziente Pol A,,

Einstellung der Lautstärke des akustischen Variometers
Auf drücken, dann um die Lautstärke des akustischen
Variometers einzustellen (aus = 1 Beep; mittel = 2 Beeps; hoch
= 3 Beeps). Nochmal auf drücken, um das Menü zu
verlassen.
Einstellung der Höhenmesser
Das Instrument ist mit 3 Höhenmessern ausgestattet: A1 ist auf
Bildschirmabschnitt 1 zu lesen, A2 und A3 auf Bildschirmabschnitt
3.
A2 und A3 können mit der Taste auch während des Fluges
auf Null gesetzt werden.
Drückt man bei eingeschaltetem Gerät auf die Taste zeigt der
Bildschirm folgende Einstellung:
Bildschirmabschnitt 1 Rec
Bildschirmabschnitt 2 Alt
Bildschirmabschnitt 3 Set1
Drückt man die Taste kommt man durch Rotation zu den
verschiedenen Untermenüs: Untermenü ‘Alt’ wählen. Taste
drücken und auf dem Bildschirmabschnitt 1 erscheint A1. Das
Blinken zeigt an, daß der gegebene Wert mit den Tasten nach
oben oder nach unten abgeändert werden kann (ein
kontinuirlicher Druck auf die gewünschte Taste beschleunigt die
Einstellung).
Zur Bestätigung der Einstellung die Taste drücken.
Der gleiche Vorgang gilt für die Einstellung von A2 und A3. Mit
verläßt man das Untermenü.
Einstellung der Empfindlichkeit des akustischen
Variometers und des Durchschnittsvariometers.
Die Taste drücken. 2 mal die Taste drücken, und sich im
Untermenü auf ‘Set 1’ positionieren. Beim Drücken der Taste
blinkt der Wert im Bildschirmabschnitt 2 : mit den Tasten und
wird die Empfindlichkeitsschwelle des akustischen
Variometers für das Steigen bestimmt. Wenn zum Beispiel die
Wertangabe auf 0.3 gesetzt wird, so wird das akustische
Variometer bei Höhenänderungen von mehr als 30 cm/Sekunde
piepsen. Zur Bestätigung der Einstellung auf drücken. Die
gleiche Vorgangsweise gilt für die Einstellung der akustischen
Anzeige für den Sinkton. Durch die Taste gelangt man zur
Italiano English Français Deutsch

Analogisches Vario / analogischer Sollfahrt-Anzeiger
Bildschirmabschnitt 1
Höhenmesser A1
Bildschirmabschnitt 2
digitales Vario / Geschwindigkeitsmesser /
Gleitverhältnisanzeige
Bildschirmabschnitt 3
Höhenmesser A2 - Höhenmesser A3 - Uhr - Stoppuhr -
Wind
Tastensymbole
Ein/Aus Taste
Menü
Variometer / Geschwindigkeitsmesser /
Gleitverhältnisanzeige
Analogisches Vario / Sollfahrtanzeige / Wind /
Lautstärke
Höhenmesser A2, A3, Uhr und Stoppuhr
Annullieren von Einstellung A2, A3 und Stoppuhr
Verwendung der Tasten während des Fluges
Während des Fluges sind 4 Einstellungen möglich:
Umschaltung von Variometer-Funktion auf
Sollfahrtanzeige-Funktion;ermöglicht Zutritt in Wind-
Funktion.
Wählt auf Bildschirmabschnitt 3 die Funktionen A2,
A3, Uhr und Stoppuhr
Wählt auf Bildschirmabschnitt 2 den digitalen
Variometer, die augenblickliche Geschwindigkeit
(wenn das Gerät mit der entsprechenden Sonde
ausgerüstet ist) und die Gleitverhältnisanzeige.
Bei Knopfdruck wird der Wert, der gerade im
Bildschirmabschnitt 3 angezeigt wird (A2, A3 oder
Flugtimer) auf Null gesetzt.

Analogue variometer
Screen 1
altimeter A1
Screen 2
digital variometer / anemometer / glide ratio indicator
Screen 3
altimeter A2 - altimeter A3 - flight timer
Keyboard symbols
on / off switch ( depress for 4 secs to switch on )
menu
variometer / anemometer / glide ratio indicator
analogue variometer / STF / wind / volume of acoustic
variometer
altimeters A2, A3, clock, flight timer
zero-setter A2, A3 and timer
Use of the keys during the flight
The keys to be used during the flight are 4.
switchesmode(variometer/STF);accessto Windfunction.
selects A2, A3, clock and flight timer on the screen 3.
selects the digital variometer, the instant speed ( when
the instrument is supplied with the speed probe ) or the
glide ratio indicator on the screen 2.
zeroes the value now appearing on the screen 3
(A2, A3 or flight timer).
Setting up of the volume of the acoustic variometer
Press and then to regulate the volume of the acoustic
variometer(Silent=1beep;Medium=2beeps;Loud=3beeps).
Press to exit menu.

Setting up of the altimeters
The instrument is equipped with 3 altimeters:A1 is readable on the
screen 1, A2 and A3 are readable on the creen 3. It is possible to
zero A2 and A3 pressing .
When the instrument has been switched on, press the key and
the following image will appear on the screen:
screen 1 Rec
screen 2 Alt
screen 3 Set 1
Pressing you can enter the various sub-menus in succession:
choose the sub-menu Alt. Press , on screen 1 A1 will appear..
The blinking indicates that this value is ready to be adjusted, pressing
to increase it and pressing to decrease it (a steady pressure
on the key makes this operation faster).
Once you have selected the required value, press to confirm.
Now you can do the same operation for the values A2 and A3.
Then press to exit the sub-menu.
Averager and acoustic variometer sensitivity threshold
setting
Press . Press twice to choose the submenu Set. Pressing
the value on the screen 2 blinks: pressing or you can adjust
the climb rate that the audio will begin to sound at. If you, for
example, select the value 0.3, the acoustic variometer will signal
only altimetric changes higher than 30 cm/sec. After having selected
the requested limit, press to confirm. Do the same operation to
select the descent limit. Pressing again you have access to the
averager, which can be selected for delays up to 30 seconds,
pressing or (Ex.: if I choose sec 15 the analogue and sound-
variometer will continue to signal the instantaneous altimetric
change, while the digital variometer will indicate the altitude gain
or loss over the last 15 seconds).
Once you have selected the delay press to confirm. Escape .
Adjusting the units
The readings can be displayed in metres and Km/h or in feet and
Mph. To change the measurement system you have to operate in
the following way. Press , press twice, then press four
times. Press or to select the height in metres or feet. Confirm
pressing .
Italiano English Français Deutsch

Now press or to choose if the speed has to be expressed in
Km/h or Mph. Press to confirm. Escape .
Setting up of parameters for the Speed-to-fly function
Press , 3 times (you will see the words “SET 2” flashing). By
pressing you cycle through the setting up of:
AUTO STF: by means of or you set it to the values 0=STF
manual, 1=STF automatic. If it is set to 0 you can switch to the STF
mode only by pressing . If it is set to 1 you switch to STF mode
automatically (in variometer mode after 7 sec. of ascent, in STF
mode after 7 sec. of descent) or manually, that is pressing . All
this goes on until you set back to 0, that is manual STF.
POL: by pressing or you access polar 1 or 2. Of the selected
polar, by pressing you can cycle the Pol A, Pol B, Pol C coefficients,
which can be set with or (therefore you can memorize 2
different polars). The polar coefficients can be calculated with the
specific Digifly software you will find in the included floppy disk.
There is another parameter that can be set without accessing the
menu:
WIND: the horizontal speed of the air mass you are flying in (with
negative value if against, with positive value if in favor). By pressing
you toggle between variometer and STF modes, by pressing
again you can access the Wind set-up function: display 3 will start
flashing; by pressing or you can set the desired value
(-50Km/h to +50Km\h); once you have set it, press to quit.
N.B. In order for the STF function to work, the air-speed probe must
necessarily be installed.
Setting up clock and Sampling rate
Press , press three times ("SET 2" will start flashing), press
six times. Now by pressing or to adjust and to confirm,
you can set respectevly:
- HOUR: the current hour.
- MIN: the current minutes.
- DAY: the current day.
- MONTH: the current month.
- YEAR: the current year
- REC SEC: the Sampling rate of the altitude recorder, which can
be set to 1 to 30 sec.
Caractéristiques techniques
3 altimètres avec lecture jusqu’à 10.000 m.
Variomètre analogique avec échelle jusqu’à +/- 10 mt/sec.
Variomètre digital avec échelle jusqu’à +/- 25 mt/sec.
Variomètre sonore avec differents tons en montée et en descente.
Variomètre de moyenne avec retard qu’on peut régler de 1 a 30
secondes.
Système de mesure métrique décimal ou anglo-saxon.
Indicateur de finesse digital
Indicateur STF analogique
Barographe
Anémomètre
Chronomètre, horloge, date
Mémoire des données
des derniers 10 vols.
Autonomie d’environ 200 h.
Poid: 200 gr. environ avec batteries.
Dimension 135x72x37 mm.

How to record (Barograph and min. - max. peaks)
Enter the main menu and choose Rec: pressing you’ll start the
recording, which will be confirmed by the notice: Start Rec. The
flight timer self-zeroes. The constant flashing of the indicator of the
chosen measurement unit on screen 1 tells the pilot during the
flight the recorder is on. Pressing during the recording will
interrupt it.
How to read the recording (min. - max. peaks)
It is possible to re-play up to ten of the recorded flights, the eleventh
recording will cancel the first one. After you have entered the main
menu, pressing the number of the recorded flights will appear
on screen 2, up to a maximum of 999 flights. Every time you enter
the flight memory the instrument goes back automatically to the
last recorded flight: if you want to read the data of a previous flight
press (you can go back up to 10 flights).
When you have chosen which flight to read press to confirm
and to enter the reading of the highest values. If you press
again you read the lowest recorded values.
Pressing you can read the highest speed of the flight on the
screen 2, instead of the alti averager. On the screen 3 you can see
the lenght of the flight in hours and minutes (up to 99 h and 59
min.).
How to print the barogram
Connect the instrument to a serial printer with the specific cable.
The printer must be configured as follows: 9600 Baud, 1 stop bit, 7
data bit, no parity. With the printer on line, press and, when
REC is flashing, press . Then press : you will read “PLOT” on
the display until the printing operation is completed. If you wish to
stop printing, you just have to press and hold for a few seconds.
With the Sampling rate set at 1 sec., the maximum duration of
recording is 66 min., whereas at 30 sec., the maximum duration
of recording is 33 h and 20 min.
How to activate the anemometer
The instrument is calibrated to read speed during the flight. On the
right side of the VL100 there is the jack, in which you can insert the
special probe (optional). After its insertion you have only to press
the key to turn the variometric value into the anemometric one
and vice versa on the screen 2.
Comment imprimer le barogramme
Connecter l’instrument à une imprimante avec le câble spécifique
fourni. L’imprimante doit être configurée comme suit: 9600 bauds,
1 stop bit, 7 data bits, no parity. Une fois l’imprimante connectée
prête, presser et quand REC clignote, presser . Puis presser
: vous lirez “PLOT” sur l’écran jusqu’à ce que l’opération
d’impression soit terminée. Si vous souhaitez arrêter l’impression,
il suffit de presser et maintenir pendant quelques secondes.
Avec un Sampling rate réglé à 1 seconde, la durée maximale
d’enregistrement est de 66 minutes, alors qu’à 30 sec. de réglage,
la durée est de 33 heures 20 minutes.
Comment activer l’anémomètre
L’instrument est preparé pour la lecture de la vitesse maximale
acquise pendant le vol. Sur le coté droit du VL100 Racer il y a le
jack dans lequel mettre la sonde appropriée (facultative). Une fois
la sonde mise, il suffit d’appuyer la touche pour commuter sur
le tableau 2 la valeur variomètrique en anémomètrique et vice
versa.
Lire l’indicateur de vitesse de finesse max (Speed to fly)
Quand l’instrument est en mode STF, le variomètre analogique
devient un barre-graphe de la vitesse d’efficacité maximum pour
la situation de vol en cours (du fait que cette information résulte
aussi directement des valeurs réglées dans le fonctions WIND et
POL, ces valeurs doivent être réglées de façon aussi correcte que
possible). Le display affiche 3 petites barres: avec le changement
de la vitesse de vol, elles bougent à différentes positions sur le
display. Maintenir les 3 barres sur zéro permet d’avoir la meilleure
vitesse de finesse max.
Lire l’indicateur de finesse
La finesse est le ratio entre le taux de chute et la vitesse air. Si par
exemple l’indicateur de finesse affiche 6, ceci signifie qu’en air
calme l’aile parcourt 6m linéaires pour 1 mètre de chute.
Alimentation
L’instrument est alimenté par 2 piles “stylo” de 1.5 volt. L’autono-
mie est de 200 heures environ si on emploie des piles alcalines.
Faire attention à respecter la polarité quand on met les batteries.
Quand il reste environ 40 heures de charge, le clignotement du
mot BATT sur le display indique que l’on approche de l’épuisement
de charge. Si on prévoit de ne pas utiliser l’instrument pour un
certain temps, nous vous conseillons d’enlever les batteries.

Réglage de l’horloge et le temps de référence (sampling
rate)
Presser , presser 3 fois (SET 2 clignote), presser 6 fois.
Maintenant, en pressant ou pour ajuster et pour confirmer,,
vous réglez respectivement:
HOUR: l’heure courante
MIN: les minutes courantes
DAY: le jour en cours
MONTH: le mois en cours
YEAR: l’année en cours
REC SEC: le temps de référence d’enregistrement de l’enregistreur
qui peut être réglé de 1 à 30 secondes.
Méthode d’enregistrement (Barographe et valeurs mini-
maxi)
Entrer dans le menu principal et s’arrêter sur REC: l’enregistrement
commençera en appuyant , cette opération est confirmée par
les mots START REC sur le tableau. Automatiquement le chronomètre
se remet à zéro.
Le clignotement continu sur le tableau 1 de l’indicateur de l’unité
de mesure choisie, indique au pilote que l’enregistrement du vol
est en cours. En appuyant pendant l’enregistrement, on le stop--
pe.
Comment lire les enregistrements (valeurs mini-maxi)
Il est possible de relire les vols enregistrés jusqu’à un maximum de
10, le onzième enregistrement effaçera le premier. En appuyant
sur le tableau 2, dans le menu principal, on indique le numéro
des vols enregistrés jusqu’à un maximum de 999 vols.
Chaque fois qu’on accède aux mémoires du vol, l’instrument s’arrête
automatiquement sur le dernier vol enregistré, si on veut lire un vol
précédent, appuyer sur la touche (on peut reculer au maximum
de 10 vols). Une fois choisi le vol à lire, appuyer pour confirmer
et accéder à la visualisation des valeurs maximales. En appuyant
encore on peut visualiser les valeurs minimales enregistrées.
En appuyant on lira sur le tableau 2 la vitesse maximale acquise
pendant le vol à la place de la variation altimètrique par seconde.
Le tableau 3 montre la durée du vol en heures et minutes (jusqu’à
99 h et 59 minutes).
Reading the Speed-to-fly indicator
When the instrument is in STF mode, the analog vario becomes an
bar indicator of the maximum-efficiency speed for the current flight
situation (because this information also results directly from the
values entered in the Wind and POL functions, these values must
be set as correctly as possible). The display will show three small
bars: with every change in air-speed, they will move to a different
position on the display. Keep the three bars on zero to obtain the
maximum-efficiency speed.
Reading the efficiency indicator (efficiency meter)
Efficiency is the gliding ratio, that is the ratio between fall ratio and
air-speed. If, for example, the efficiency meter reads 6, it means
that, in calm air, the aircraft goes 6 meters forward for each meter
of height loss.
Power
The instrument is powered by two 1,5 volt pen light batteries. The
working life is of about 200 hours, using alkaline batteries.
Be careful to insert the batteries with the correct polarity. When
there are about 40 hours of power left, the flashing notice Batt on
the display tells you that the batteries are nearly exhausted.
Technical data
3 altimeters readable up to 10000 mt
Analogue variometer with a scale up to +/- 10 mt/sec
Digital variometer with a scale up to +/- 25 mt/sec
Audio variometer with different tones for ascent and descent
Average variometer with a delay which can be set from 1 to 30 sec
Variable units of measure
Digital glide-ratio indicator
Analogue Speed-to-fly indicator
Anemometer max. 120 Km/h
Barograph
Flight timer, clock and date
10 flight memory
Battery working life of about 200 h
Weight: about 200 g with the batteries
Measures: 135x72x37 mm

Barograph: Procedure for official FAI observers
1. The observers must familiarize himself with the instrumentat for
a period of al least 1 hour.
2. At the take-off, the observer must note the pilot's name and the
type and serial number of instrument to be used. He must verify
that the case is intact and undamaged. He must inspect the seal on
the back of the unit.
3. The observer must switch the instrument on and check that the
time, the date and the take-off altitude have been set correctly. If
any of these values are incorrect, the observer must set them to the
correct value. Change to set mode by pressing the desired key for
approx. 4 seconds.
Attention: The real time clock and the date con no longer be altered
when the barograph recording has been activated.
4. The observer must switch the barograph on.
5. The observer must continuously observe the pilot until take-off
and verify that the pilot takes off with the instrument. The observer
must note the exact time of take-off using an independant timepiece.
6. After landing, the pilot must set the recorder and the instrument
OFF.
7. Printout: The observer must verify that the instrument displays
the correct time and date and note any discrepancies with respect
to local time. The observer must verify that the instrument is intact.
He must also inspect the seal. He must ensure that the instrument is
connected directly to the printer by a single cable. The observer
must also verify that nothing else is connected to the printer, e.g. an
additional cable or instrument. Connection of the printer to the
electrical mains is, however, permissible. The observer must verify
that the printer paper is blank
8. The observer starts the printout of the flight record and verifies
that the instrument number printed out is identical with the number
noted at take-off. The observer must also verify that the time of
take-off and the date in the printout agree with his records. The
observer must be present during the entire printout procedure. When
the printout is finished, the observer must remove the entire printout
from the printer and add the date and his own signature.
Pour changer le système de mesure, procéder aux opérations
suivantes:
appuyer sur la touche , puis sur la touche 2 fois, appuyer sur
la touche 4 fois, puis sur ou pour choisir si la hauteur
doit être exprimée en mètre ou pieds.
Confirmer en appuyant . Ensuite, appuyer sur la touche ou
pour choisir si la vitesse doit être exprimée en miles ou en
Km/h. Appuyer sur la touche pour confirmer..
Sortir du menu en appuyant .
Réglage des paramètres pour la fonction Speed to fly
Presser , puis 3 fois (vous verrez les mots SET2 clignoter).
Presser pour faire apparaître successivement:
AUTO STF: par les touches ou vous réglez les valeurs
0= STF manuel, 1= STF automatique.
Si vous réglez sur 0, vous pouvez afficher le mode STF uinquement
en pressant . Si vous réglez sur 1, vous réglez le mode STF
automatiquement (en mode variomètre après 7 secondes
d’ascendance, en mode STF après 7 secondes de descendance)
ou manuellement en pressant .
Ceci a lieu tant que le mode automatique (1) est activé.
POL: en pressant ou vous accédez aux polaires 1 et 2. Une
fois la polaire sélectionnée, presser permet d’afficher
successivement les coefficients Pol A, Pol B, Pol C qui sont réglés
par les touches et (ainsi vous pouvez mémoriser deux
polaires). Les coefficients de polaire peuvent être calculés grâce au
software spécifique Digifly fourni sur la disquette. Il y a un autre
paramètre qui peut être réglé sans accéder au menu:
WIND: la vitesse horizontale de la masse d’air dans laquelle vous
volez (avec les valeurs négatives si contre et valeurs positives si en
votre faveur). En pressant vous changez entre le mode variomètre
et STF, en pressant à nouveau, vous accédez à la fonction réglage
Wind: le tableau 3 clignote; en pressant ou vous pouvez
régler les valeurs désirées (-50 Km/h à +50 Km/h). une fois réglées,
presser pour sortir..
NB: afin d’avoir la fonction STF active, le capteur de vitesse doit
être nécessairement installé.

Réglage de l’altimètre
L’instrument est équipé de 3 altimètres: A1 lisible sur le tableau 1,
A2 et A3 lisible sur le tableau 3.
A2 et A3 sont mis à zéro pendant le vol en appuyant .
Avec l’instrument allumé, en appuyant la touche les informations
suivantes apparaîtront sur le display:
tableau 1Rec
tableau 2Alt
tableau 3Set1
En appuyant on passe successivement dans les différents sous--
menus: s’arrêter sur le sous-menu ALT. Appuyer sur et sur le
tableau 1 apparaîtra A1. Le clignotement indique que vous pouvez
alors procéder au réglage.
Appuyer sur pour augmenter et sur pour diminuer (en
maintenant la pression sur la touche, le réglage s’accélère).
Après avoir obtenu le réglage voulu, appuyer sur pour confirmer..
Pour régler A2 et A3, procéder de la même façon.
Appuyer sur la touche pour sortir du sous-menu.
Réglage du seuil de sensibilité du variomètre acoustique
et du variomètre de moyenne
Appuyer . Ensuite appuyer 2 fois et s’arrêter sur le sous--
menu Set. En appuyant le tableau 2 clignote: en pressant
ou on peut augmenter ou diminuer le seuil de varation
altimètrique déclachant l’avertisseur acoustique. Si, par exemple
le niveau réglé est 0.3, le variomètre acoustique signalera seulement
les variations altimètriques supérieures à 30 cm par seconde. Après
avoir réglé le seuil choisi, appuyer pour confirmer. La même
opération doit être faite pour régler le seuil de descente. En
appuyant encore sur la touche vous pouvez ajuster la moyenne
du variomètre, laquelle peut être réglée jusqu’à 30 secondes de
délai en utilisant la touche ou (Ex: si je régle 15 sec. le
variomètre analogique et sonore continuera à signaler la variation
altimètrique instantanée, tandis que le variomètre digital indiquera
le bénéfice ou la perte de hauteur relative aux dernières 15
secondes). Après avoir ajusté ce délai, appuyer pour confirmer..
Sortir du menu en appuyant .
Réglage des unités de mesure.
Les mesures altimètriques peuvent être exprimées en système
métrique (km/h et métre) ou bien en miles (Ft et Mph).
Italiano English Français Deutsch

Variomètre analogique/Indicateur Speed to fly
Tableau 1
altimètre A1
Tableau 2
variomètre digital/anémomètre/indicateur de finesse
Tableau 3
altimètre A2 - altimètre A3 - chronomètre - horloge - wind
Symboles clavier
on-off (appuyer 4 secondes)
menu
variomètre/anémomètre/indicateur de finesse
variomètre analogique/indicateur de vitesse de finesse
max (STF)/ wind/volume
altimètre A2 - A3, horloge, chronomètre
remise à zéro A2, A3 et chronomètre
Comment utiliser les touches pendant le vol
Les touches utilisées pendant le vol sont au nombre de 4:
change le mode variomètre / STF; permet l’accès à la
fonction wind.
sélectionne sur le tableau 3 A2, A3, horloge et
chronomètre.
sélectionne sur le tableau 2 le variomètre digital, la
vitesse instantanée ( quand l’instrument est equipé de
la sonde appropriée) ou l’indicateur de finesse.
remet à zéro les informations qui apparaîssent à ce
moment là sur le tableau 3 (altimètre A2 - altimètre
A3 - chronomètre).
Réglage du volume du variomètre acoustique
Appuyer et ensuite pour régulerlevolumesilencieux=1
beep,son moyen=2 beeps, son fort=3 beeps).
Appuyer pour sortir de ce menu.
Other Digifly Measuring Instrument manuals
