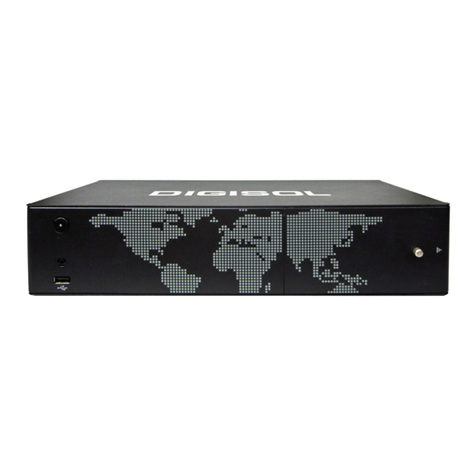
Digisol DG-SR2004 User manual

DG-SR2004
4 channel 2 Bay Network Video Recorder
(without HDD)
User Manual
V1.0
2012-06-12
As our products undergo continuous development the specifications are subject to change without prior notice

DG-SR2004 User Manual
2
COPYRIGHT
Copyright © 2011 by this company. All rights reserved. No part of this publication may
be reproduced, transmitted, transcribed, stored in a retrieval system, or translated into
any language or computer language, in any form or by any means, electronic,
mechanical, magnetic, optical, chemical, manual or otherwise, without the prior
written permission of this company
This company makes no representations or warranties, either expressed or implied,
with respect to the contents hereof and specifically disclaims any warranties,
merchantability or fitness for any particular purpose. Any software described in this
manual is sold or licensed "as is". Should the programs prove defective following their
purchase, the buyer (and not this company, its distributor, or its dealer) assumes the
entire cost of all necessary servicing, repair, and any incidental or consequential
damages resulting from any defect in the software. Further, this company reserves the
right to revise this publication and to make changes from time to time in the contents
thereof without obligation to notify any person of such revision or changes.
Trademarks:
DIGISOL™ is a trademark of Smartlink Network Systems Ltd. All other trademarks
are the property of the respective manufacturers.
Safety
This equipment is designed with the utmost care for the safety of those who install and
use it. However, special attention must be paid to the dangers of electric shock and
static electricity when working with electrical equipment. All guidelines of this and of
the computer manufacturer must therefore be allowed at all times to ensure the safe use
of the equipment.

DG-SR2004 User Manual
3
Federal Communication Commission
Interference Statement
FCC Part 15
This equipment has been tested and found to comply with the limits for a class B
digital device, pursuant to Part 15 of the FCC Rules. These limitations are designed to
provide reasonable protection against harmful interference in a residential installation.
This equipment generates, uses and can radiate radio frequency energy and, if not
installed and used in accordance with the instructions, may cause harmful interference
to radio communications. However, there is no guarantee that interference will not
occur in a particular installation. If this equipment does cause harmful interference to
radio or television reception, which can be determined by turning the equipment off
and on, the user is encouraged to try to correct the interference by one or more of the
following measures:
• Reorient or relocate the receiving antenna.
• Increase the separation between the equipment and receiver.
• Connect the equipment into a different outlet from that to which the receiver is
connected.
• Consult your local distributors or an experienced radio/TV technician for help.
• Shielded interface cables must be used in order to comply with emission limits
Changes or modifications to the equipment, which are not approved by the party
responsible for compliance could affect the user's authority to operate the equipment.

DG-SR2004 User Manual
4
FCC Caution
This equipment must be installed and operated in accordance with provided
instructions and a minimum 20 cm spacing must be provided between computer
mounted antenna and person’s body (excluding extremities of hands, wrist and feet)
during wireless modes of operation.
This device complies with Part 15 of the FCC Rules. Operation is subject to the
following two conditions: (1) this device may not cause harmful interference, and (2)
this device must accept any interference received, including interference that may
cause undesired operation.
Any changes or modifications not expressly approved by the party responsible for
compliance could void the authority to operate equipment.
Federal Communication Commission (FCC) Radiation Exposure
Statement
This equipment complies with FCC radiation exposure set forth for an uncontrolled
environment. In order to avoid the possibility of exceeding the FCC radio frequency
exposure limits, human proximity to the antenna shall not be less than 20cm (8 inches)
during normal operation.
The antenna(s) used for this transmitter must not be co-located or operating in
conjunction with any other antenna or transmitter.
The equipment version marketed in US is restricted to usage of the channels 1-11 only

DG-SR2004 User Manual
5
INDEX
1. Product Information................................................................................................7
1-1 Product Introduction.........................................................................................7
1-2 Safety Information ............................................................................................8
1-3 System Requirements......................................................................................9
1-4 Package Contents............................................................................................9
1-5 Get Familiar with your new Network Video Recorder...............................10
1-6 Installation of the Network Video Recorder................................................13
2. Using Network Video Recorder by Web Interface...........................................20
2-1 Locate the IP address of Network Video Recorder...................................20
2-2 Connect to Network Video Recorder’s Web User Interface ....................22
2-3 Selecting and Controlling Camera...............................................................27
2-4 Setup Wizard...................................................................................................30
2-5 Camera Setup.................................................................................................36
2-6 Network Setup.................................................................................................40
2-7 Recording Setup.............................................................................................44
2-7-1 Recording Setup................................................................................................. 45
2-7-2 Storage Setup..................................................................................................... 49
2-8 Video Playback ...............................................................................................52
2-9 System Setup..................................................................................................55
2-9-1 General Setup Page .......................................................................................... 56
2-9-2 Maintenance setup page................................................................................... 58
2-9-3 Config Backup setup page................................................................................ 60

DG-SR2004 User Manual
6
2-10 Server Setup .................................................................................................61
2-11 User Management........................................................................................64
2-12 Device Information .......................................................................................67
3. Appendix.................................................................................................................70
3-1 Specification....................................................................................................70
3-2 Troubleshooting..............................................................................................71
3-3 Glossary...........................................................................................................72

DG-SR2004 User Manual
7
1. Product Information
1-1 Product Introduction
DG-SR2004 is a 4-Channel 2-Bay Network Video Recorder that manages video from
up to 4 IP cameras in the network. It allows viewing up to 4 cameras simultaneously
using a single web GUI interface. This NVR is capable of recording excellent high
quality images using the latest H.264 technology. Thus users can stream high quality
video at low bandwidth and storage capacity requirements.
Other features of this network video recorder include:
Compact size
2 SATA hard drive bays provide maximum storage capacity and stability.
USB interface for External Storage.
H.264/ MPEG-4 multi format support.
Continuous, Schedule and Motion Detection based recording.
High speed 10/100/1000 Gigabit Ethernet port provides maximum network access
speed.
User-friendly WEB interface for configuration and video management.

DG-SR2004 User Manual
8
1-2 Safety Information
In order to keep the safety of users and your properties, please follow the safety
instructions as mentioned below. The warranty will become void if you disobey these
safety instructions.
This network video recorder is a sophisticated electronic device; DO NOT drop
it from a height.
DO NOT place this NVR at hot / humid places, and avoid direct sunlight.
Accessories of this NVR like power supply are dangerous to small children.
KEEPTHIS NVR OUT OF REACH OF CHILDREN.
Place the NVR at a safe and secure place when you’re using it, and never move it
when it’s powered on. Hard drives may fail and there might be a malfunction if
you try to move the NVR when it’s working.
DO NOT pull any cord that is connected to this NVR by force.
If the NVR falls into water when powered, DO NOT attempt to retrieve it back
yourself. Find a qualified electrical technician for help.
DO NOT pull the hard drive out when NVR is powered ON, or the data stored
on the hard drive will be damaged.

DG-SR2004 User Manual
9
1-3 System Requirements
Windows XP, Vista or Win 7 operating system (both 32 or 64 bits version)
2GB of system memory
1GB of Display card memory
20GB of available hard disk space on system drive
At least one SATA Hard Disk for recording the video
1-4 Package Contents
Before you start using this IP camera, please check if there’s anything missing in the
package, and contact your dealer of purchase to claim for missing items:
DG-SR2004 - 4 channel 2 Bay Network Video Recorder (1 No.)
Power Adapter
Power Cord
HDD enclosure (Inserted into NVR’s HDD bay 1 & 2) (2 Nos.)
Installation Guide CD (includes User Manual & QIG)

DG-SR2004 User Manual
10
1-5 Get Familiar with your new Network Video Recorder
Front View
Table of contents
Other Digisol Network Hardware manuals
Popular Network Hardware manuals by other brands

Matrix Switch Corporation
Matrix Switch Corporation MSC-HD161DEL product manual

B&B Electronics
B&B Electronics ZXT9-IO-222R2 product manual

Yudor
Yudor YDS-16 user manual

D-Link
D-Link ShareCenter DNS-320L datasheet

Samsung
Samsung ES1642dc Hardware user manual

Honeywell Home
Honeywell Home LTEM-PV Installation and setup guide


