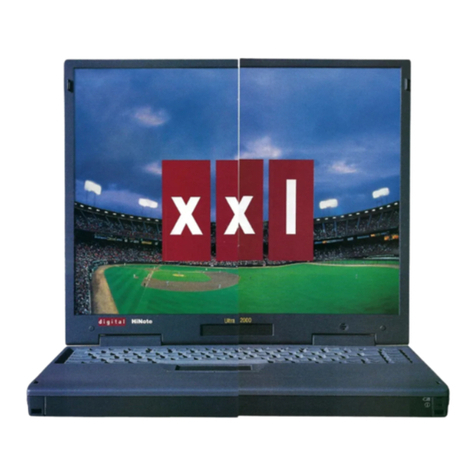
Digital Equipment HiNote Ultra 2000 User manual

DIGITAL HiNote Ultra 2000
User's Guide
Part Number: ER-PF1WW-UA. A01
Digital Equipment Corporation
Ma
y
nard, Massachusetts

April 1997
The information in this document is subject to change without notice and should not be construed as a
commitment by Digital Equipment Corporation.
Digital Equipment Corporation assumes no responsibility for any errors that might appear in this document.
The software described in this document is furnished under a license and may be used or copied only in
accordance with the terms of such license. No responsibility is assumed for the use or reliability of software or
equipment that is not supplied by Digital Equipment Corporation or its affiliated companies.
Restricted Rights: Use, duplication, or disclosure by the U.S. Government is subject to restrictions as set forth in
subparagraph (c) (1) (ii) of the Rights in Technical Data and Computer Software clause at DFARS 252.227-7013.
© Digital Equipment Corporation 1997. All Rights Reserved.
DEC, ThinWire, RoamAbout and the DIGITAL logo are trademarks of Digital Equipment Corporation.
DIGITAL HiNote is a trademark of Digital Equipment Corporation.
ESS is a registered trademark of ESS Corp.
Pentium is a registered trademark of Intel Corporation.
MS-DOS and Windows are registered trademarks of Microsoft Corporation.
Sound Blaster is a registered trademark of Creative Labs Corporation.
Adobe Acrobat Reader is a registered trademark of Adobe Systems.
The ENERGY STARemblem does not represent EPA endorsement of any product or service.
All other trademarks and registered trademarks are the property of their respective holders.

The FCC wants you to know...
This equipment has been tested and found to comply with the limits for a Class B digital
device, pursuant to Part 15 of the FCC rules. These limits are designed to provide
reasonable protection against harmful interference in a residential installation.
Any changes or modifications made to this equipment may void the user's authority to
operate this equipment.
This equipment generates, uses, and can radiate radio frequency energy and, if not installed
and used in accordance with the instructions, may cause harmful interference to radio
communications. However, there is no guarantee that interference will not occur in a
particular installation. If this equipment does cause harmful interference to radio or
television reception, which can be determined by turning the equipment off and on, the user
is encouraged to try to correct the interference by one or more of the following measures:
•Reorient or relocate the receiving antenna.
•Increase the separation between the equipment and receiver.
•Connect the equipment into an outlet on a circuit different from that to which the
receiver is connected.
•Consult the dealer or an experienced radio/TV technician for help.
All external cables connecting to this basic unit must be shielded. For cables connecting to
PC cards, see the option manual or installation instructions.
Canadian DOC Statement
This Class B digital apparatus meets all requirements of the Canadian Interference-Causing
Equipment Regulations.
Cet appareil numérique de la classe B respecte toutes les exigences du Règlement sur le
matériel brouilleur du Canada.

v
Table of Contents
1 Getting to Know Your Computer
Features.......................................................................................................................................1-1
Components, Controls, and Indicators........................................................................................1-2
Front and Right Side Components.......................................................................................1-2
Front and Left Side Components.........................................................................................1-4
Back Components................................................................................................................1-6
Bottom Components ............................................................................................................1-7
LCD Status Display .............................................................................................................1-8
Keyboard Hot Keys.....................................................................................................................1-9
Controlling Power.....................................................................................................................1-11
Using the Touch pad.................................................................................................................1-12
Zoomed Video Support.............................................................................................................1-13
2 Getting Started
Installation and Initial Setup .......................................................................................................2-1
Plugging In and Turning On................................................................................................2-1
Windows Software...............................................................................................................2-4
Installing Optional Software .......................................................................................................2-4
Documentation, Applications, and Enhancements...............................................................2-4
Drivers and Utilities.............................................................................................................2-4
Creating a Comfortable Working Environment..........................................................................2-5

vi
3 Power and Your Computer
LiIon Battery...............................................................................................................................3-2
Smart Battery Operation ......................................................................................................3-3
Replacing the Battery...........................................................................................................3-3
Power Management Modes..................................................................................................3-6
Standby Mode...............................................................................................................3-6
Suspend Mode...............................................................................................................3-7
Power Management.....................................................................................................................3-8
Good Power Management Habits ........................................................................................3-8
The Standby/Resume Feature .......................................................................................3-8
The Suspend/Resume Feature.......................................................................................3-8
Screen Brightness..........................................................................................................3-8
The CD-ROM/Diskette Drive.......................................................................................3-8
PC Cards .......................................................................................................................3-8
AC Power......................................................................................................................3-9
A Power Management Example...........................................................................................3-9
Power Management Summary...........................................................................................3-11
4 Configuring Your Computer
Running System Setup................................................................................................................4-1
System Setup Utility ............................................................................................................4-1
Updating Your Notebook Computer's Configuration .................................................................4-2
Helpful Hints........................................................................................................................4-3
Power Features.....................................................................................................................4-4
Advanced Power Features....................................................................................................4-5
System Features ...................................................................................................................4-6
Device Features....................................................................................................................4-7
Security Features..................................................................................................................4-8
Notebook Computer Security......................................................................................................4-9
User Password......................................................................................................................4-9
Setting/Changing the User Password............................................................................4-9
Deleting the User Password........................................................................................4-10
Supervisor Password..........................................................................................................4-10
Setting/Changing the Supervisor Password ................................................................4-11
Deleting the Supervisor Password ..............................................................................4-11
Dock Security.....................................................................................................................4-11
Default Features.................................................................................................................4-12
Exit Features ......................................................................................................................4-12

vii
5 Peripherals
Connecting an External Keyboard or PS/2 Mouse......................................................................5-2
Connecting a Monitor .................................................................................................................5-3
Connecting a Printer....................................................................................................................5-5
Connecting a Serial Device.........................................................................................................5-6
PC Cards .....................................................................................................................................5-7
Installing a PC Card.............................................................................................................5-7
Removing a PC Card............................................................................................................5-8
Connecting a Phone Line to the Internal Modem .......................................................................5-9
Connecting External Audio Devices.........................................................................................5-10
Connecting Speakers/Headphones.....................................................................................5-10
Connecting an External Microphone .................................................................................5-10
6 Expansion Devices and Options
Optional Expansion Devices.......................................................................................................6-1
Optional Memory........................................................................................................................6-2
Installing Optional Memory.................................................................................................6-3
Removing Memory..............................................................................................................6-5
Replacing the Removable Hard Disk Drive................................................................................6-5
Removing the Hard Drive....................................................................................................6-5
Installing the Hard Drive......................................................................................................6-9
CD-ROM/Diskette Drive Module......................................................................................6-12
DIGITAL HiNote Ultra Enhanced Port Replicator...................................................................6-13
Connections and Controls..................................................................................................6-14
Connecting the DIGITAL HiNote Ultra Enhanced Port Replicator ..................................6-16
Removing the DIGITAL HiNote Ultra Enhanced Port Replicator....................................6-17
Charging a Battery Using the DIGITAL HiNote Ultra Enhanced Port Replicator............6-18
DIGITAL HiNote Ultra Multimedia Dock ...............................................................................6-20
Connections and Controls (Left Side)................................................................................6-20
Connections and Controls (Right Side)..............................................................................6-22
Connections and Controls (Bottom)...................................................................................6-24
Connecting the DIGITAL HiNote Ultra Multimedia Dock...............................................6-25
Removing the DIGITAL HiNote Ultra Multimedia Dock.................................................6-26
7 Troubleshooting
Notebook Computer Troubleshooting.........................................................................................7-2
LCD Troubleshooting .................................................................................................................7-5
PC Card Troubleshooting............................................................................................................7-5
Audio and IR Troubleshooting....................................................................................................7-7

viii
A Technical Specifications
System Specifications.................................................................................................................A-1
Environment...............................................................................................................................A-2
B Environmental Information

ix
About This Guide
This guide describes how to operate, configure, and troubleshoot the DIGITAL HiNote
Ultra 2000 notebook computer. This guide, along with the on-line help that can be installed
from the DIGITAL HiNote System CD, should familiarize you with all aspects of the
notebook computer.
Audience
This guide is written for anyone using or configuring the DIGITAL HiNote Ultra 2000
notebook computer.
Organization
This guide contains the following:
•Chapter 1: Getting To Know Your Computer – This chapter introduces you to the
controls and indicators of your notebook computer. It also describes the function of the
different hot keys, power controls, and information on creating a comfortable working
environment.
•Chapter 2: Getting Started – This chapter provides the information needed to perform
installation and initial setup of your notebook computer. It also provides directions on
how to install the application software that comes on the DIGITAL HiNote System CD.
•Chapter 3: Power And Your Computer – This chapter provides information on using
and maintaining your notebook computer’s Battery Pack. It also provides information
on your notebook computer’s power management features for extending the life of the
Battery Pack.
•Chapter 4: Configuring Your Notebook Computer – This chapter provides information
on how to configure your notebook computer and its security features using the System
Setup utility.

x
•Chapter 5: Peripherals – This chapter provides information on connecting peripheral
devices to your notebook computer.
• Chapter 6: External Devices and Options – This chapter describes how to connect
external devices and options to your notebook computer.
•Chapter 7: Troubleshooting – This chapter provides you with troubleshooting solutions.
•Appendix A: Technical Specifications – This appendix lists your notebook computer’s
operating specifications.
•Appendix B: Environmental Information – This appendix provides environmental
information related to the materials used in your notebook computer.

xi
Acronyms
Acron
y
ms Meanin
g
APM Advanced Power Management
ASTN Active Scan Technology (Dynamic Matrix)
BIOS Basic Input/Output System
CMOS Complementary Metal Oxide Semiconductor
DIMM Dual In-line Memory Module
DMA Direct Memory Access
DSTN Dual Super Twisted Nematic
DRAM Dynamic Random Access Memory
EDO Extended Data Out
FDD Floppy Disk Drive
HDD Hard Disk Drive
IDE Integrated Drive Electronics (internal hard disk drive interface)
FIR Fast Infrared
ISA Industry Standard Architecture
k 1k = 1000
KB 1Kilobyte=1024bytes
LCD Liquid Crystal Display
LED Light Emitting Diode
LiIon Lithium Ion
MB Megabyte
MS-DOS Microsoft Disk Operating System
MIDI Musical Instrument Digital Interface
NTSC National Television System Committee
PC Card Personal Computer Card (PCMCIA card)
POST Power On Self-Test
ROM Read Only Memory
SO-DIMM Small Outline Dual In-line Memory Module
SVGA Super Video Graphics Array
TFT Thin Film Transistor
USB Universal Serial Bus
VGA Video Graphics Array
XGA Extended Graphics Adapter

xii
Special Notices
Three kinds of special notices are used in this guide to emphasize specific information.
________________________ WARNING __________________________
Warning: Indicates the presence of a hazard that can cause
personal injury if the hazard is not avoided.
____________________________________________________________
_________________________ Caution ___________________________
Caution: Indicates the presence of a hazard that might cause damage to
hardware or that might corrupt data.
____________________________________________________________
___________________________Note ____________________________
Note: Provides additional information.
____________________________________________________________
_________________________ Caution ___________________________
Mobile computers contain components which can be damaged if not
handled with care.
____________________________________________________________

xiii
Related Documentation
AQuick Setup Guide is available as a supplement to the information provided in this User's
Guide.
An On-line version of this user’s guide can be installed from the DIGITAL HiNote System
CD.
Using Your DIGITAL HiNote Ultra 2000 Notebook Computer is an on-line document that
can be installed from the DIGITAL HiNote System CD.
On-line versions of application documentation is available on the DIGITAL HiNote System
CD.
README files come with your factory installed software. The information contained in
these files can help you setup, configure, and operate your notebook computer.
Additionally, these files might contain warning or caution statements. It is important to read
these statements.
DIGITAL Web Site
Please visit the DIGITAL Windows Enterprise Computing Center Web site to download the
latest DIGITAL HiNote Ultra 2000 Series operating system drivers and on-line User
information. To navigate to the Drivers/User Information location:
1. Type in the Web site address: http//www.windows.digital.com/
2. Click on the [Service and Support] hot spot.
3. Scroll down to the Firmware and Drivers bullet and change [Select Library] to Intel-
based systems. Click on the [Go] button.
4. Scroll to the HiNote Portables Table of Contents and click on HiNote Ultra 2000
notebook.
Click on the desired Driver or User Information to download the data to your hard drive.
The HiNote Ultra 2000 Series User Guide Information can be browsed by using Adobe
Acrobat Reader (available on the DIGITAL HiNote System CD).

1-1
Getting to Know Your Computer
This chapter identifies and describes the features, components, controls, and indicators of
your DIGITAL HiNote Ultra 2000 notebook computer. It also describes the function of the
different hot keys and provides suggestions for creating a comfortable work environment.
Features
The DIGITAL HiNote Ultra 2000 is a high-performance notebook computer designed for
the mobile professional. It offers the best-in-class features for a notebook computer.
• Intel Pentium Processor 133 MHz or
g
reater.
Selected models incor
p
orate cuttin
g
-ed
g
e
MMX CPU technology.
• 256KB or 512KB Level 2
p
i
p
elined s
y
nc-
burst cache.
• Removable Hard Drive - 1.44GB or lar
g
er
(latest 12.7mm drive).
• 16MB or
g
reater onboard EDO memor
y
-
ex
p
andable to 144 MB or
g
reater usin
g
3.3V
EDO SO-DIMMs.
• 12.1 inch ASTN (active scan) SVGA or
12.1 inch TFT SVGA or XGA or
14.1 inch TFT XGA Color LCD Display.
• External monitor support up to 1280 x 1024.
• CardBus slots - Two T
yp
e I or T
yp
e II cards
or one Type III card.
• Zoomed Video su
pp
ort usin
g
lower CardBus
slot.
• Modular ba
y
for Diskette or CD-ROM
drive.
• LCD Status dis
p
la
y
p
rovides o
p
eratin
g
status of the computer.
• Integrated Touch pad pointing device.
• Internal 33.6kb
p
s Data/FAX/Voice modem
with s
p
eaker
p
hone su
pp
ort, software
u
pg
radeable to 56kb
p
s. Modem available
on selected models.
• 16-bit Stereo Audio - internal micro
p
hone
and stereo s
p
eakers with connections for
an external micro
p
hone and stereo head-
phones, speakers, or an amplifier.
• Smart Lithium Ion (LiIon) battery.
• Advanced Power Mana
g
ement -
customizes s
y
stem
p
ower usa
g
e based on
y
our needs. Works with Microsoft’s APM
software.
• Fast Infrared (FIR) Interface - allows the
transfer of information with devices that
have an infrared or fast infrared (FIR)
interface.
• Su
pp
orts PCI hot dockin
g
to DIGITAL
HiNote Ultra Enhanced Port Re
p
licator or
DIGITAL HiNote Ultra Multimedia Dock.
• Full sized 85 ke
y
Windows ke
y
board with
integral wrist rest.

Getting to Know Your Computer
1-2
Components, Controls, and Indicators
This section shows the locations and provides a description of the different components,
controls, and indicators on your DIGITAL HiNote Ultra 2000 notebook computer.
Front and Right Side Components
Component Description
➊Power LED
Battery Charging LED The
g
reen Power LED (lower) li
g
hts when the notebook is On.
The amber Batter
y
Char
g
in
g
LED (u
pp
er) li
g
hts when the
battery is charging.
➋Lid Release One of two lid releases. Push in both releases at the same time
to open the LCD panel.
➌Speaker Ri
g
ht stereo s
p
eaker used to hear sound files and s
y
stem
sounds.
➍CD-ROM/Diskette
Drive Bay Supports a CD-ROM drive or a Diskette Drive module.
➎Microphone In
Input connection for external microphone.
➏Audio Out
Connection for headphones or external speakers.
➐Suspend/Resume
Button
Turns the notebook com
p
uter On, and Sus
p
ends or Resumes
the s
y
stem. Press and hold the [fn] + [Sus
p
end/Resume] for
four seconds to turn the notebook Off.
➑Internal Microphone Used to record voice, music, and sound files.
➒Status Display Provides system operating status.
➓Contrast Control
(ASTN only) Controls the contrast of the LCD display.
Reset button Resets the notebook com
p
uter. All unsaved data will be lost.
Refer to Fi
g
ure 6-3 for instructions on how to lift the ke
y
board
to gain access to the reset button.

Getting to Know Your Computer
1-3
DEC01156
Figure 1-1 Front and Right Side View

Getting to Know Your Computer
1-4
Front and Left Side Components
Component Description
➊Lid Release One of two lid releases. Push in both releases at the same time to
open the LCD panel.
➋Speaker Left stereo speaker used to hear sound files and system sounds.
➌PC Card Ejectors Ejects a PC Card. Top button releases a PC Card from the top
slot; the bottom button releases a PC Card from the bottom slot.
➍PC Card Slots Support two Type I or II cards or one Type III card.
Zoomed Video cards are supported in the lower slot only.
➎Keyboard Releases These latches release the keyboard to allow access to the
removable hard drive and the system Reset button.
➏Removable Hard Drive Located under the keyboard, the hard drive is easily removable
and upgradeable.
➐Security Lock Attach a security locking device , such as a Kensington lock, to
this port.

Getting to Know Your Computer
1-5
DEC01154
Figure 1-2 Front and Left Side View

Getting to Know Your Computer
1-6
Back Components
Component Description
➊AC In
Input connection for Universal AC adapter
➋External Keyboard/
Mouse Port
An external keyboard or PS/2 mouse connects to
this port.
➌RJ11 Modem Port An analog telephone line connects to this port
(modem functionality on selected models only).
➍Serial Port
A serial device connects to this port.
➎Parallel Port
A parallel device, such as a printer, connects to
this port.
➏Video Port
An external monitor connects to this port.
➐I/O Connector Cover
and Keyboard Support Covers I/O connectors. Can be flipped down to
support the keyboard at a comfortable typing
angle.
➑Fast IR Port Fast IR interface allows wireless data transfer
between the notebook and another device with an
IR interface.
DEC01151
Figure 1-3 Back View

Getting to Know Your Computer
1-7
Bottom Components
Component Description
➊Battery Release Releases the LiIon battery from the notebook computer for
removal.
➋LiIon Battery Provides power to your notebook computer.
➌CD-ROM/Diskette
Drive Module Release Releases either a diskette or CD-ROM Drive module from the
Diskette/CD-ROM Drive Bay.
➍Memory Door Provides access to notebook computer’s memory.
➎Docking Connector
Door Provides access to the docking connector when using the
DIGITAL HiNote Ultra Multimedia Dock or the DIGITAL
HiNote Ultra Enhanced Port Replicator.
DEC01152
Figure 1-4 Bottom View

Getting to Know Your Computer
1-8
LCD Status Display
Indicator Shows...
AC Power – The computer is connected to and operating from its
external AC power supply.
Standby – The computer is in Standby Mode. Any system activity
such as, pressing a key on the keyboard, touch pad, mouse, or other
system activity resumes normal operation.
Hard Drive/CD-ROM Activity – The hard drive or CD-ROM is
being accessed.
A
The Caps Lock function is enabled..
NUM Lock – The NUM Lock function is enabled.
Monitor/Scroll Lock – The external monitor port is enabled and/or
the Scroll Lock function is enabled.
– External Monitor port enabled
– Scroll Lock function enabled
– External monitor and Scroll Lock enabled
Embedded Numeric Key pad – The keyboard’s embedded key pad
is enabled by a keyboard hot key.
Other manuals for HiNote Ultra 2000
1
Table of contents
Other Digital Equipment Laptop manuals

Digital Equipment
Digital Equipment HiNote VP 550-575 Series User manual

Digital Equipment
Digital Equipment HiNote VP 500 Series User manual

Digital Equipment
Digital Equipment HiNote Ultra 2000 Installation and operating instructions

Digital Equipment
Digital Equipment HiNote VP 700 Series User manual

Digital Equipment
Digital Equipment HiNote VP 500 Series User manual

Digital Equipment
Digital Equipment HiNote VP 500 Series User manual

Digital Equipment
Digital Equipment HiNote VP 700 Series User manual