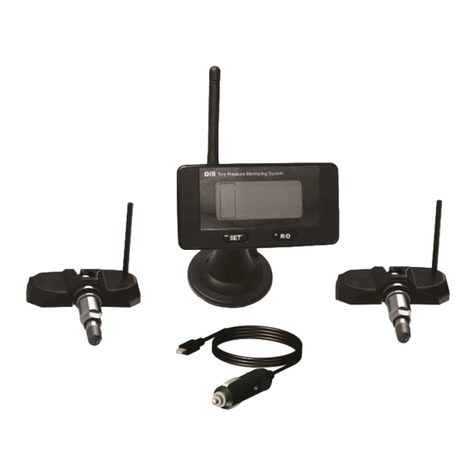
Dill Retrofit TPMS User manual

Thank you for purchasing a Dill Retrofit TPMS Kit. Properly inflat-
ed tires increase fuel economy, reduce tire wear and improve han-
dling. A warning system that notifies you of an underinflated tire
will provide you time to respond prior to potentially damaging your
tire, vehicle, or trailer.
For more information visit our website at http://www.trailertpms.com or
http://www.dillvalves.com
Alerts when tire pressure is too low
Alerts when tire pressure is too high
Alerts when tire temperature is too high
1500 -
BAND
Retrofit
TPMS Kit
Key Features:
Visual and audible warnings
Set desired PSI level
Mounts to windshield or
dashboard

Table of Content Page
1. Setting Up the System 2
1.1 Transmitter Installation 2
1.2 Install the Display 2
1.3 Setting the Baseline (Cold Inflation) Pressure 2
1.4 Using the External Antenna—RF Interference 3
2. Transmitter Installation: 5
3. System Overview 6
3.1 System Components 6
3.2 How the System Works 6
3.3 Normal Monitoring 7
3.4 Warnings 8
3.5 Display Indicator and Controls 10
3.6 Transmitter Components 10
3.7 Tire Rotation 11
3.8 Changing Number Of Wheel Positions 12
4. Frequently Ask Questions 13
5. Specifications 15
5.1 Transmitter (Part Number = 9300) 15
5.2 Display (Part Number = 1900) 15
5.3 Alternate Valve Part Numbers 15

2
1.0 Setting Up the System
1.1 Transmitter Installation
Have a professional tire retailer install the bands with transmitters in the
wheels. See section 2 for details. Each transmitter has a unique ID and
needs to be installed in the same corresponding position as noted in
Figure on page 11.
1.2.4 If your tire cold inflation pressure is 35 psi, you are done. If it is
something besides 35 psi, complete section 1.3.
1.3 Setting the Baseline (Cold Inflation) Pressure
1.3.1 Set the pressure in all tires to the recommended cold inflation
pressure.
1.3.2 Plug in the display using either provided power cord.
1.3.3 Hold down the “R/D” button until
you hear a beep then release.
1.3.4 Press and release the “SET” button.
The display will show “dd” in place
of the pressure readings.
NOTE:
For hardwired connection, black wire is ground and red is positive.
1.2 Install the Display
1.2.1 Install the supplied antenna to your display unit located at the back of
the unit.
1.2.2 Use the display mount to affix the display unit on the windshield or
dashboard. Do not block the driver’s view. If necessary, adjust the
viewing angle of the display.
1.2.3 Plug the power cord into the display unit and plug the adapter into
auxiliary power supply or hardwire to vehicle electrical system.
FIGURE 1
FIGURE 2

3
The display is now in LEARN MODE and will store the cold inflation
pressure of each tire once it receives a signal from the transmitter. The
process may take up to 8 minutes. If all pressures are not received in 8
minutes, the display will shift back to the monitoring mode. The tire
positions that did not register will display 00. You will need to repeat
section 1.3.2 until a signal is received from all tire positions. Driving the
vehicle will speed up the process. When rotating, the transmitters send
a signal more frequently than when the vehicle is stationary.
If any or all tires positions do not register after performing the
Baseline Pressure setting process at least twice, or if transmitter
signals are intermittent, experimentation with an external antenna
and/or signal booster will be necessary to get the unit to function.
1.4 Using the External Antenna - RF Interference
The system has been tested to work 40 feet, along line-of-sight path
ways. However, tire construction, vehicle construction, electronic
interference and low temperatures all reduce this distance. RF signals
are subject to interference from many types of signals and products,
which can cause errors in the operation of the product. As with cell
phones and other types of electronics using RF signals, signal
interruption can occur and cause lost signal transmission.
19’ COAXIAL
WIRE
DISPLAY/RECEIVER
CONNECTOR
MAGNET NOTE: THE MAGNET’S
STRENGTH IS VERY
STRONG AND WILL ADHERE
QUICKLY TO ANY STEEL OR
IRON OBJECT. KEEP FIN-
GERS AWAY FROM THE
BOTTOM OF THE MAGNET.
ANTENNA
FIGURE 3

4
External Antenna Installation
Remove the original antenna from the back of the display unit and replace it
with the coaxial wire antenna via display connector.
Install the magnet/antenna underneath the rear of the vehicle, which will give
it the nearest proximity to the transmitters. Thus, increasing signal reception
between the display/receiver and transmitters.
Do not install the magnet/antenna directly on the trailer.
It is the installer/end user’s discretion how to install the antenna and coaxial
wire from the exterior and interior of the vehicle cabin.
Installing the external antenna involves a small degree of experimentation
for maximum signal reception. Temporarily connect the antenna cable to the
display, passing the cable through the vehicle’s door or window. This
temporary connection allows you to test the antenna’s location. If the
location you have selected for the antenna has difficulty in picking up signals
from all tire locations, change the antenna’s location slightly and continue to
test. When signals from all tire locations report, install the antenna
permanently in the vehicle.
Caution: Stay away from transmission, oil and exhaust lines avoiding the
inherent heat from those locations which can melt the coaxial cable.
If proper reception is not achieved with the external antenna, a signal boost
will be required.
A signal booster (part number = 1905) is an optional part for RV’s, fifth
wheels and tow-vehicles and trailers. It enhances the signal from the
transmitters. A signal booster is recommended to effectively receive the
signals from each transmitter, when there may be interference from
electronics, RV construction, length, etc.

5
2.0 Transmitter Installation
The transmitter comes pre-installed in the mounting cradle. No adjustments
need to be made to the transmitter or its mounting nut.
It is recommended to install the transmitter/cradle at the location of the
wheel’s valve hole so its location is always known during tire mounting, tire
dismounting, and if the need arises, to scan the transmitter.
2.1 Peel off the adhesive paper from the bottom of the transmitter’s cradle.
The adhesive on the cradle prevents the assembly from rotating around
the wheel barrel.
2.2 Adhere the transmitter’s cradle to the left or right of the wheel’s valve
stem. The transmitter can point inward or outward.
2.3 Insert the band through the lowest slot of the cradle.
2.4 Cut off excess band with tin-snips before tightening the worm-drive clamp.
2.5 Tighten the band’s screw to 40 inch pounds using a 7mm ratchet or
Phillips-head driver.
2.6 Lock the wheel on the tire changer. Apply lubricant on both tire beads .
Mount the lower tire bead on the rim. Ensure that the tire bead does not
touch the electronic module during mounting.
2.7 Mount the upper tire bead the same way and inflate the tire to standard
cold inflation pressure. Avoid damaging the transmitter’s antenna.
2.8 Apply soap suds or commercial leak detection solution around the wheel’s
valve to check for leaks.
2.9 Dynamically balance the wheel before it is put back on the vehicle.
ADHESIVE
BACKING
FIGURE 4 FIGURE 5
WHEEL’S VALVE

6
3.2 How the System Works
A banded transmitter assembly is installed in each wheel, which
monitors pressure and temperature conditions inside each tire of the
vehicle. This data is wirelessly sent to the receiver that is installed on
the vehicle. The receiver displays the pressure and temperature for
each tire position. When an abnormal condition is detected, the display will
alert the driver.
3.0 System Overview
The Retrofit TPMS kit monitors tire pressure and temperature. It will pro-
vide warnings about abnormal conditions such as low pressure, high pres-
sure, and high temperature.
3.1 System Components
FIGURE 6
ANTENNA
DISPLAY MOUNT
12V DC POWER
CORD & HARD-
WIRE
CONNECTION
EXTERNAL
ANTENNA
(IF NEEDED)
DISPLAY
UNIT TRANSMITTER
WITH BAND
DISPLAY
FIGURE 7

7
The display is preprogramed to provide a warning if the pressure drops 20% below or
30% above the cold inflation pressure. It will also give a high temperature warning if
the temperature exceeds 176°F. The high temperature warning point is not adjustable.
The system is shipped with the baseline (cold inflation) pressure set at 35 psi. At this
setting, the display will provide a low pressure warning at 28 psi and a high pressure
warning at 46 psi. You can set the baseline pressure (see Setting the Baseline (Cold
Inflation) pressure in Setting up the System on page 2) up to 144 psi and the display
will automatically provide a low pressure warning at 20% below and 30% above the
baseline setting.
Examples:
Cold Inflation
Pressure
Low Pressure
Alarm
High Pres-
sure Alarm
45 psi 36 psi 59 psi
65 psi 52 psi 85 psi
90 psi 72 psi 117 psi
3.3 Normal Monitoring
3.3.1 Stationary State:
The transmitter will transmit tire pressure and temperature data to the
display at 2-minute intervals. As the data is received, the display will
refresh.
3.3.2 Moving State:
The inertial switch in the transmitter turns on when the speed ex-
ceeds 16mph.
The transmitter will transmit tire pressure and temperature data to the
display at 30-second intervals. As the data is received, the display
will refresh.

8
3.4 Warnings
3.4.1 Low Pressure Warning
If the pressure in a tire is 20% lower than the cold inflation pressure
setting, then the following will occur:
1. The display will show the pressure of the abnormal tire and the dig-
its will flash.
2. An audible alert warning sound will be heard.
3. The abnormal icon will show up.
4. The system will only display the abnormal tire. By pressing “SET”
or “R/D”, you can temporarily view other tires.
The system will not return to normal monitoring until the
problem(s) is corrected.
3.4.2 High Pressure Warning
If the pressure in a tire is 30% higher than the cold inflation pressure
setting, then the following will occur:
1. The display will show the pressure of the abnormal tire and the dig-
its will flash.
2. An audible alert warning sound will be heard.
3. The abnormal icon will show up.
4. The system will only display the abnormal tire. By pressing “SET”
or “R/D” you can temporarily view other tires.
The system will not return to normal monitoring until the
problem(s) is corrected.
3.4.3 High Temperature Warning
When the temperature in a tire exceeds 176°F, the following will oc-
cur:
1. The display will show the temperature of the abnormal tire and the
digits will flash.
2. An audible alert warning sound will be heard.
3. The abnormal icon will show up.
4. The system will only display the abnormal tire. By pressing “SET”
or “R/D” you can temporarily view other tires.
The system will not return to normal monitoring until the prob-
lem(s) is corrected.

9
3.4.4 Monitor System Malfunction will occur if the display does not receive
a signal from a transmitter(s) in the tire(s) for more than 30 minutes*,
the display screen will display as dashed lines “- - -” .
NOTE:
When the dash lines ”- - -” appears, it will not be dismissed from
the display even if you restart the unit. When the receiver
(display unit) receives an updated signal from the transmitter(s),
the dashed lines will disappear.
If you are not receiving a signal from the transmitter(s), verify the
following conditions.
1. Power off the display unit and restart the system. The system will
return to normal monitoring after properly receiving signals from
the transmitter(s).
2. Check your antenna connection. Verify the center coax pin has not
become dislocated from the antenna.
If the display unit is working properly and it still does not receive
a signal from the transmitter(s), then the transmitter(s) and ID
chip(s) must be replaced simultaneously.
3. “Er” indicates there is no chip in the position, the chip is not
correctly inserted into the display or the chip is not functioning.

10
3.6 Transmitter Components
CRADLE
(P# 1025-U) ELECTRONIC
TRANSMITTER
SCREW
3.5 Display Indicator and Controls
R/D BUTTON
Used to learn tire cold inflation
pressure
SET BUTTON
Used to set number of wheel positions
Wheel
Positions
High Temp
Icon
>176°
Temperature
Pressure
FIGURE 8
FIGURE 9
BAND
(P# 1194)
MOUNTING
NUT

11
3.7 Tire Rotation
Every transmitter has a unique 8 character ID that is associated with a chip
in the display. An alpha label is also added to each transmitter and chip as
an additional identifier. As tires are rotated, the chips are moved to the
corresponding position in the display. No reprogramming is necessary. For
example if you move the right front tire (RF) to the rear (R1) you would move
the chip in the back of the display from RF to R1 and move R1 to RF.
LF
L1
L3
L4
L2
RF
R1
R3
R4
R2
B
D
H
K
F
A
C
G
E
J
ID MODULE COVER
MODULE CHIP CLIP ORIENTATION
Chip I.D.
Location
1101143
Transmitter I.D.
Location
1101134
Pressing the restore key, resets the baseline to 35 PSI
FIGURE 12

12
3.8 Changing Number Of Wheel Positions
The number of wheels in the vehicle can be set as 4, 6a, 6b, 8 or 10 as
not ed in Figure 13. Use the 4 position if monitoring a 2-wheel trailer (“Err”
or “NA” will display in the unused locations). The number of wheel position
is pre-set. However, if you add positions use the following procedure to
change it. To change the number of wheels, perform the following:
3.9.1 Press and hold the “SET” button for 5 seconds to enter the wheel
number configuration setting, a ‘beep’ will sound and the current wheel
configuration will appear on the screen.
3.9.2 Press the “R/D” button to select among 4, 6a-wheel, 6b-wheel, 8-wheel
or 10-wheel configuration. The position and the number of the wheels
will appear on the screen.
3.9.3 Press and hold the “SET” button for 5 seconds to complete the
selection. A ‘beep’ will sound when it’s complete.
6a Wheels
B
(RF)
E
(L2)
F
(R2)
C
(L1)
D
(R1)
A
(LF)
6b Wheels 8 Wheels
C
(L1)
D
(R1)
E
(L2)
F
(R2)
G
(L3)
H
(R3)
A
(LF)
B
(RF)
10 Wheels
B
(RF)
C
(L1)
D
(R1)
E
(L2)
F
(R2)
H
(R3)
J
(L4)
G
(L3)
K
(R4)
A
(LF)
B
(RF)
C
(L1)
D
(R1)
E
(L2)
F
(R2)
A
(LF)
B
(RF)
C
(L1)
D
(R1)
A
(LF)
2 or 4 Wheels
FIGURE 13

13
4.0 Frequently asked questions.
Can this system be used on a passenger car?
Yes
Can this system be used on a 6-wheel pickup?
Yes
Can this system be used on an RV?
Yes
Can this system be used on a 2-wheel motorcycle?
No
Can this system be used on an ATV or UTV?
The answer is dependent on the application's recommended tire
pressure. We do not recommend installing this system on any
application that requires a cold inflation tire pressure of less than 25 psi.
Can I install the Dill Retrofit TPMS kit myself with a basic set of
hand tools?
It is not recommended. While the Dill Retrofit TPMS tire pressure display
unit can be installed in a vehicle with no tools, the process required to
install the internally-mounted tire pressure sensors should be performed
by a trained tire technician using tire servicing equipment.
Can my trusted tire shop install your system?
Most likely, yes. If your tire shop is familiar with factory Tire Pressure
Monitoring Systems on 2008+ model year vehicles, then installing the
Dill tire pressure sensors will not be a challenge.
Can the Dill Trailer TPMS monitor the original factory sensors on
my tow vehicle?
No, the tire pressure display unit can only be used to monitor the Dill
Retrofit TPMS tire pressure sensors included in the kit. However, Dill
Retrofit TPMS tire pressure sensors can be mounted in your tow
vehicle's wheel using a band if tire pressure monitoring is desired.
Please call for more info.
Will the Dill Trailer TPMS kit cause problems with my vehicle’s
factory TPMS?
No
Can my vehicle's factory TPMS read the Dill Trailer TPMS tire
pressure sensors?
No

14
Can the Dill tire pressure display monitor multiple tires that require
different recommended cold inflation pressures?
Yes. During the initial setup of the system, each Dill Retrofit TPMS tire
pressure sensor-equipped position can be programmed to monitor a
different baseline cold inflation pressure. For example, the Dill system can
accurately monitor the front and rear tires of a tow vehicle (60 psi front, 75
psi rear) and the tires on a trailer (50 psi).
Are the pressure warning levels adjustable?
No. The Low Tire Pressure Warning is preset to 20% below the user-set
baseline tire pressure. The High Tire Pressure Warning is preset to 30%
above the user-set baseline tire pressure.
Are the tire pressures monitored while the vehicle/trailer is parked?
Yes, but visual and audible warnings to the user can only happen when the
display receiver is powered on.
Can I monitor a spare tire?
Yes, but keep in mind the tire pressure display unit only shows an even
number of tire positions (2, 4, 6, 8, or 10). If you add a single spare, there
will be one position that will not be used and when the display unit cycles to
that position "Err" will display, but there will not be an audible warning.
Can the Dill Trailer TPMS detect a tire blowout?
No. Tire pressure sensors can only transmit freely when they are under
pressure.
Will I need the long magnetic antenna?
The Dill Retrofit TPMS has a radio frequency range of 40ft line-of-sight. With
various materials in between the monitored tire and dash-mounted display
unit, interference is possible. If reception is intermittent when using the short
antenna, we recommend installing the long magnetic antenna or purchasing
the Dill Retrofit TPMS Signal Booster.
Where should the long magnetic antenna be installed if my application
requires it?
We recommend attaching the magnetic antenna to the bottom of the rear
bumper hitch which would keep it in line with the sensors/tires.
Can I use the system with two different trailers?
Yes, but the process of setting up the display unit to work on multiple
trailers will depend on several factors. Please call us if this is a
requirement.

15
5. Specifications
5.1 Transmitter (Part Number = 9300)
Weight: 1.25 oz. (35g)
Dimensions: 0.59” x 2.50” x 1.11” (1.5 x 2.8 x 6.4 cm)
Operating Temperature Range: -40°F to 257°F (-40°C to 125°C)
Pressure Accuracy: ±2PSI (±.14Bar)
Temperature Accuracy: ±5.4°F (±3°C)
Battery life: 5 to 7 years
Maximum Sensing Pressure: 188PSI (12.96Bar / 1296Kpa)
Maximum Cold Inflation Pressure: 144PSI (9.93Bar / 993Kpa)
Frequency: 433.92MHz
5.2 Display (Part Number = 1900)
Power Consumption: 130mW (regular) / 230mW(Max)
Power Supply: DC12 Volt
Weight: 1.06oz. (30g)
Dimensions: 3.35” x 1.97” x 0.79” (8.5 x 5 x 2 cm)
Pressure resolution: 1PSI (.07Bar / 7Kpa)
Temperature resolution: 2°F (1°C)
5.3 Alternate Valve Part Numbers
None are compatible with OEM Sprinter van wheels
TP 416
WHEEL RIM
HOLE SIZE: .453”
TP 501
WHEEL RIM
HOLE SIZE: .625”
TP 555
WHEEL RIM
HOLE SIZE: .390”
1500 Williamsboro Street Oxford, North Carolina 27565
Dill Air Controls Products
~ Quality Automotive Products Since 1909 ~
E07357
www.dillvalves.com or www.trailertpms.com
TP 572
WHEEL RIM
HOLE SIZE: .625”
Table of contents
Other Dill Control System manuals
