Dinstar C81 User manual

C81 SIP Door phone User
Manual

Contents
C81 SIP Door phone User Manual 1
1 Overview 4
1.1 Introduction 4
1.2 Features 4
1.3 Hardware Introduction 5
Chapter 2 Installation 8
2.1 Check the contents of the package 8
Contents 9
2.2 Installation steps 9
Chapter 3 Feature 10
3.1 Dial 10
3.3 Enter the password to open the door(Note:Only C88 has this function) 11
Chapter 4 Web configuration 12
4.1 Status->Basic 12
4.2 Account->Basic 13
4.3 Account-Advanced 15
4.4 Network-Basic 17
4.5 Network-Advanced 18
4.6 Door Phone-Door Phone 20
4.7 Call Feature 27
4.8 Door Phone-Time/Lang 28

1 Overview
1.1 Introduction
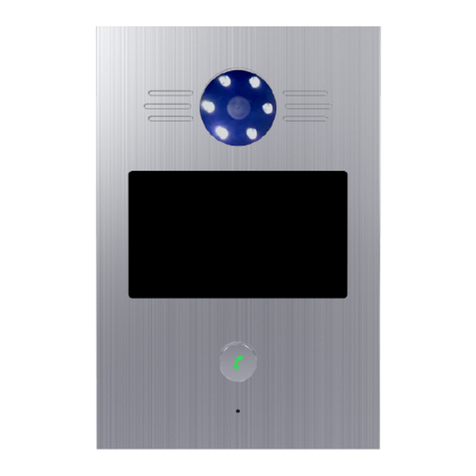
C81 is a one-key SIP access control phone with advanced audio system with echo
cancellation. you can talk to visitors at any time through the access control camera.
C81 provides users with keyless control and convenient, supports a variety of ways to
open the door without keys. As long as it is an electronic door lock, it can be opened
remotely. It can ideally control communication and security through the network, and
can be well applied in areas such as commerce, institutions and residences.
1.2 Features
❖Access control
▪One SIP line, two SIP servers
▪SIP Door phone function:
▪Full two-way
▪Auto answer by default
▪Remote control via URL / URI
▪Speed dial
❖ Management Function
▪Automatic configuration: FTP / TFTP / HTTP / HTTPS / PNP
▪ Configuration via HTTP / HTTPS web
▪SNMP/TR069
▪Time synchronization service / Daylight saving time
▪Network upgrade firmware
▪System log
▪ Configuration backup / restore
❖Audio Function
▪HD audio

C81 SIP Door phone User Manual
▪Two-way audio streaming
▪Wideband codec: G.722
▪Narrowband codec :PCMA, PCMU,G.729, G723_53, G723_63, G726_32
▪Echo cancellation of G.168
▪Voice Activity Detection (VAD)
▪Comfort noise generator (CNG)
▪Built-in micro speaker
▪Acoustic echo cancellation audio output
❖Protocol and network
▪SIP v1 (RFC2543), v2 (RFC3261)
▪SIP based on TLS, SRTP
▪RTSP
▪TCP/IPv4/UDP
▪RTP/RTCP, RFC2198, 1889
▪HTTP/HTTPS/FTP/TFTP
▪ARP/RARP/ICMP/NTP
▪DNS SRV/ A Query/NATPR Query
▪Primary and secondary DNS
▪Private network penetration protocol, session timer
▪802.1p/q, DSCP
▪DHCP/Static/PPPoE
▪DTMF MODE: In-Band, RFC2833 and SIP INFO
1.3 Hardware Introduction
❖ Front view and description

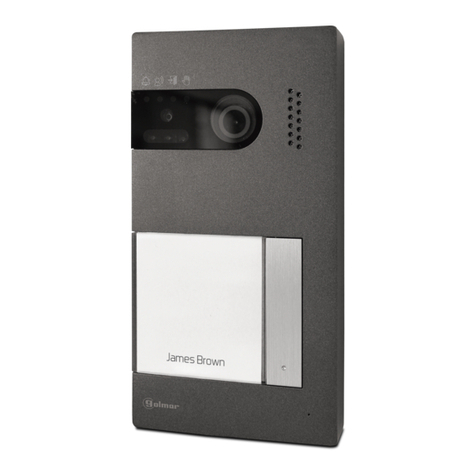
camera:1080p HD camera
❖Rear view and panel description

C81 SIP Door phone User Manual

Appellation
Description
(DC 12V/1A)
DC 12V/1A power adapter connector
Internet
LAN port for network connection, 10 /
100M, RJ45 interface
VCC+(IN)
VCC- (IN)
The interface connected to the engineering
terminal block needs to provide 12V / 1A
power supply
N.O1--N.C1
Connect a certain logic control circuit, and
then control the action or operation of the
controlled object through the output device
Door
Generally used for input of opening and
closing doors

C81 SIP Door phone User Manual
Chapter 2 Installation
2.1 Check the contents of the package
Please refer to the packing list below to check the integrity of the packing.
2.2 Installation steps
Step 1 – Power on
Connect the supplied power adapter to the power port, and then plug the adapter into
an available power outlet.
Step 2 – Connect Network
Connect one end of the Ethernet cable to the Internet port on the back of the
communication C81, and the other end to the wall network jack.
Step 3 – Connect to computer
Connect one end of the Ethernet cable to the port on the back of the communication
C81, and the other end to the Ethernet port on the computer.
Step 4 – Configure the device
Start a web browser on the computer and enter the phone's IP address into the
address bar. If the address is correct, a login screen will appear, enter the user name
and password to log in to the web console to log in to the phone webpage.
Notice: Each phone has one certain IP address; You can short-circuit the external electrical
interface pin 7 and pin 11 to hear the IP address prompted by the device in voice mode.
Contents
Amount
C81 SIP Door Phone
1
Power Adapter
1
Ethernet cable
1

Chapter 3 Feature
3.1 Dial
You can use the following three methods to make calls:
1. One-touch dial:
Click "Door Phone-Door Phone" in the left navigation bar to enter the phone phone
configuration page;
In the Call Button configuration item, you can set 4 commonly used indoor unit
numbers, of which Call Button Day 1 ~ 3 is the outgoing number during the day, Call
Button Night is the outgoing number at night, the number is a one-touch dial button
The dialed number (C81 phone can directly press the "Dial" button to dial the number);
Round Robin Time Out is the time-out period of the carousel. If a number times out
and does not answer, the access control will automatically dial the next number (Call
Button Night number at night);
In Day Night Setting, you can configure the day and night start time to determine
the number dialed at the current time;
Click on Submit Button.
2. Speed Dial:
Click "Door Phone-Door Phone" in the left navigation bar to enter the phone

C81 SIP Door phone User Manual
configuration page;
(note: Only C88 has this function)
In Speed Dial Code you can set up to 10 (phone 0-9 numeric keypad) commonly
used numbers, press the corresponding numeric key + "Dial" key on the numeric
keypad to dial;
After setting, click Submit button.
3.3 Enter the password to open the door(Note:Only C88 has this function)
1. Click "Door Phone-Door Phone" in the left navigation bar to enter the phone
configuration page;
2. You can configure the door unlock setting at Door. You can select a number at
Door Digit as the DTMF button to open the door of the indoor unit (when talking to
the indoor phone, the indoor phone can open the door with this number key);
3. The door opening time can be set at the Door Open Time, and the door lock will
open the door within this time;
4. You can set a door opening password at the Open Password, enter this password
on the access control machine + "dial key" button to open the door, the default
initial password is 1234;
5. After setting, click Submit button.

Chapter 4 Web configuration
The web user interface is used for administrators to check or change the phone
configuration.
❖You can short-circuit the external electrical interface pin 7 and pin 11 to hear the IP
address prompted by the device in voice mode
Open the browser on the PC, enter the phone IP address, such as http://172.31.2.229,
enter the user name and password to log in to the phone web interface, the default
user name and password: admin / admin.
4.1 Status->Basic
1. First, you need to open a browser (such as IE browser).
2. Enter the IP address of the phone in the address bar of the browser, and then
press Enter.
3. If successfully connected to the IP phone, it will enter the login page. On this page,
enter the correct username and password. The default username and password
are as follows:
User Name:admin
Password:admin
4. After successful login, it will automatically locate to Status-> Basic page, as shown
below:

C81 SIP Door phone User Manual
4.2 Account->Basic
Section
Description
Product Information
Display the basic information of the settings, such as Model,
MAC Address (physical address of the IP device), Firmware
Version, and Hardware Version.
Network Information
Display the set network status,Ex:LAN Port Type(
DHCP/Static IP/PPPoE)、LAN Link Status、LAN IP Address、
LAN Subnet Mask、LAN Gateway、LAN DNS1、LAN DNS2、
Primary NYP and Secondary NTP(NTP server is used to
automatically synchronize the time from the Internet).
Account Information
Display device account information and registration status
(account user name, registration server address and
registration result).
Section
Description
SIP Account
Display and configure basic account information:
❖Status:Display account registration results;
❖Display Label:The label displayed on the
screen;
❖Display Name: Send to another caller for
display;
❖Register Name:Assigned by SIP server
provider,For authentication;
❖User Name:Extension name assigned by SIP
server;

❖Password:For authentication;
SIP Server 1
Display and configure master server information:
❖Server IP: SIP server address can be a domain
name or an IP address;
❖Registration Period:The IP phone will
automatically re-register within the registration
period;
SIP Server 2
Display and configure secondary server information:
If registration fails on the primary SIP server, the IP
phone will go to the secondary SIP server for
registration. Notice:The secondary SIP server is used
for backup, if the user environment does not have a
backup SIP server, it can be left blank;
Outbound Proxy Server
Display and configure proxy server settings。The proxy
server is used to receive all activated request messages
and route them to the designated SIP server.
Notice:If configured, If a proxy server is configured, all
SIP request messages from IP phones will be sent to the
proxy server forcibly.
Transport Type
Display and configure the transmission type of SIP
messages:
❖UDP:UDP is an unreliable but very effective
transport layer protocol;
❖TCP:Reliable but less efficient transport layer
protocol;
❖TLS:Safe and reliable transport layer protocol

C81 SIP Door phone User Manual
4.3 Account-Advanced
;
❖DNS-SRV:Is a type of DNS record used to
specify the server address;
NAT
Display and configure NAT (Network Address Translator)
:
❖STUN:Simple traversal of UDP on NATS is the
solution to all NAT problems.
Notice:By default, NAT is disabled.
Section
Description
SIP Account
Display the current account settings or select the
account to display.
Audio Codecs
Display and configure a list of available / unavailable
codecs. A codec refers to a codec used to convert
analog signals into digital signals or digital signals into
analog signals. Familiar codecs are PCMU (G711U),
PCMA (G711A), G722 (broadband codec), G729,
G723_53, G723_63, G726_16, G726_24, G726_32,
G726_40.
DTMF
1、Type:Options, default RFC2833, optional Inband,
RFC2833, Info, Info + Inband, Info + RFC2833;
2、How To Notify DTMF:Option, when Type is Inband
and RFC2833, this item is Disabled by default and is not
editable; when Type is Info, Info + Inband, Info +
RFC2833, it is Disabled by default, and you can choose
Disabled, DTMF, DTMF-relay, Telephone- event;

3、DTMF Payload:Cannot be empty, default is 101,
[1,63] characters, only integers within [96,127] can be
filled;
Call
Function Overview: Set the configuration items
related to the call, set the phone SIP port, automatic
answering, phone ringtone, anonymous call, etc.
❖1、Max Local SIP Port:cannot be empty,
Account 1-Account 6 respectively default
5062-5067,[1,63]characters,Only integers
within [1024,65535] can be filled;
❖2、Min Local SIP Port:cannot be empty,
Account 1-Account 6respectively default
5062-5067,[1,63]characters,Only integers
within [1024,65535] can be filled;
❖3、Invite with user=phone:options,default
Disabled,Optional Enabled and Disabled;
❖4、PTime:options,default 20,can choose
10、20、30、40、50、60;
❖5、Prevent SIP Hacking:options,default
Disabled,can choose Enabled and Disabled;
NAT
IP phones can send valid data packets that keep the
communication port open to the NAT server;
❖UDP Keep Alive Messages:options,default
Enabled,can choose Enabled and Disabled;
❖UDP Alive Msg Interval:When UDP Keep Alive
Messages is Enabled, it cannot be empty, the

C81 SIP Door phone User Manual
4.4 Network-Basic
default is 30, [1,63] characters, only integers
within [5,60] can be filled; when UDP Keep Alive
Messages is Disabled, this item is not available
Edit status
❖RPort:optiond,default Disabled,can
choose Enabled and Disabled;
Section
Description
LAN Port
Display and configure LAN port settings:
❖DHCP: If checked, the IP phone will automatically
obtain the IP address, subnet mask, default gateway
and DNS server address from the DHCP server;
❖Static IP: If selected, you must manually set the IP

Address, Subnet Mask, Default Gateway, and DNS
Server;
❖PPPoE: Use PPPoE User Name / Password to
connect to PPPoE server.

C81 SIP Door phone User Manual
4.5 Network-Advanced
Sections
Description

LLDP
To display and configure LLDP settings.
❖LLDP Active: To enable or disable LLDP feature.、
❖Packet interval: To configure the interval for LLDP admin message.
Note: LLDP stands for Link Layer Discovery Protocol, it’s used to
exchange device information between any two directly-connected
devices. LLDP is often used to configure Voice VLAN automatically for IP
phone.
Local RTP
To display and configure Local RTP settings.
❖Max RTP Port: Determine the maximum port that RTP stream can
use.
❖Min RTP Port: Determine the minimum port that RTP stream can
use.
SNMP
To display and configure SNMP settings.
❖Active: To enable or disable SNMP feature.
❖Port: To configure SNMP server's port.
❖Trusted IP: To configure allowed SNMP server address, it could be
an IP address or any valid URL domain name.
Note: SNMP(Simple Network Management Protocols) is
Internet-standard protocol for managing devices on IP networks.
VLAN
To display and configure VLAN settings.
❖LAN Port/PC Port: You can configure VLAN setting for both ports
respectively.
❖Active: To enable or disable VLAN feature for designated port.
❖Vid: To configure VLAN id for designated port.
❖Priority: To select VLAN priority for designated port.
Note: Please consult your administrator for specific VLAN
settings in your networking environment.
QoS
To display and configure QoS settings.
❖SIP QoS: To configure QoS value for all SIP message.
❖Voice QoS: To configure QoS value for all audio stream(RTP
streams).
Table of contents
Other Dinstar Intercom System manuals

