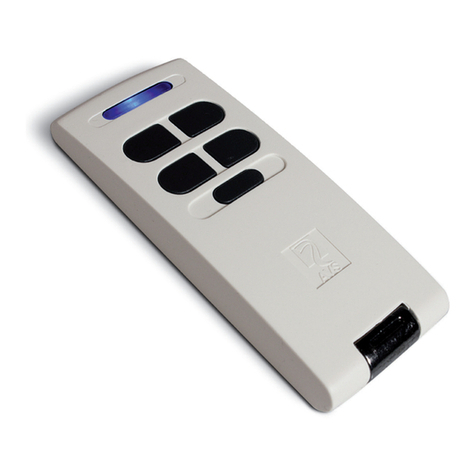
DINUY CO REG R05 User manual

CONTROL REMOTO IR PARA LOS
SISTEMAS DE REGULACIÓN
CONSTANTE
CO REG R05
Alimentación: 1 batería x 3V CR2032 (incluída)
Duración batería: 4 años con 100 puls/día
Infrarrojos: Emisión focalizada y de poco alcance (2 - 3m máx.)
Compatible con: RE DMS 001, RE DMS 003, RE DMS 004,
RE DMS DA1, RE DMS DA3 y RE DMS DA4
Protección ambiental: IP51
Temperatura funcionamiento: 0ºC ~ +45ºC
Dimensiones: 105 x 50 x 12mm
ESPECIFICACIONES TÉCNICAS
MANUAL DE INSTRUCCIONES
FUNCIONAMIENTO
Este mando permite realizar la programación de los Sistemas de
Regulación Constante, sin necesidad de acceder al techo, y de forma más
precisa, así como realizar una regulación manual en un determinado
momento.
Dispone de 3 modos de funcionamiento:
· Modo Programación “Prog”: permite configurar los puntos de referencia
del sistema (Día y Noche).
· Modo Automático “Auto”: establece el funcionamiento automático en el
sensor (Auto o Reg).
· Modo Manual: permite realizar un control manual de las luminarias.
MODO AUTOMÁTICO
En este modo, el LED del sensor solamente se encenderá una vez que
detecte movimiento.
Las lámparas se autorregularán en función del nivel fijado de iluminación y
el aporte de luz natural del exterior.
MODO MANUAL
En este modo, el LED del sensor se mantiene encendido constantemente.
Se dispone de varias teclas para control manual: Regular hacia arriba,
Regular hacia abajo, Encendido Permanente (ON), Apagado Permanente
(OFF) y Encender al Máximo (MAX).
Al desbloquear el mando, éste no indica el modo en el que se encuentra el
sensor. Es necesario pulsar la tecla del modo que se desea activar.
MODO PROGRAMACIÓN
Ajuste punto Noche (luminarias encendidas):
Sin aporte de luz natural (de noche o con las persianas totalmente
bajadas):
1º - Encender las luminarias con la tecla “ON” del mando. El LED rojo del
sensor se mantendrá encendido.
2º - Regular las luminarias al nivel requerido hasta obtener el nivel de
luz deseado en el puesto de trabajo. Este nivel será el máximo al
que se encencenderán las luminarias.
3º - Esperar 30 segundos sin obstaculizar la luz recibida por el sensor.
4º - Pasar a modo Programación pulsando la tecla “Prog” en el mando. Al
pulsar esta tecla, el LED del mando se encenderá, indicando que se
encuentra en este modo.
5º - Pulsar la tecla “ ” del mando apuntando hacia el sensor. Las
luminarias parpadearán 3 veces como confirmación.
6º - Pulsar la tecla “Auto” apuntando al sensor. Así, el sensor volverá al
modo de funcionamiento normal. Si el aparato no se encuentra en
modo TEST (potenciómetro TIME al mínimo), necesitará un tiempo de
inercia (de 1 a 4min) hasta alcanzar el nivel de regulación establecido.
Ajuste punto Día:
Con aporte de luz natural suficiente para alcanzar el nivel de luz deseado:
1º - Apagar las luminarias con el mando presionando la tecla OFF. El
LED rojo del sensor se mantendrá encendido.
2º - En caso de no ser suficiente el aporte de luz natural, encender las
luminarias con la tecla ON y regularlas al nivel requerido para
obtener la iluminación deseada en el puesto de trabajo.
3º - Esperar 30 segundos sin obstaculizar la luz recibida por el sensor.
4º - Pulsar la tecla PROG del mando. Se encenderá su piloto.
5º - Pulsar la tecla “ ” apuntando al sensor. Las luminarias
parpadearán 3 veces indicando que se ha capturado el punto Día.
6º - Pulsar la tecla AUTO apuntando al sensor y volverá al modo de
funcionamiento normal. Si el aparato no se encuentra en modo TEST
(potenciómetro TIME al mínimo) necesitará un tiempo de inercia (de 1 a
4min) hasta alcanzar el nivel de regulación establecido.
NOTA: El Sensor no permitirá ajustar el punto Día con un nivel de luz
natural inferior a la del punto Noche, ni viceversa, no realizando la triple
intermitencia de confirmación de punto de luz capturado.
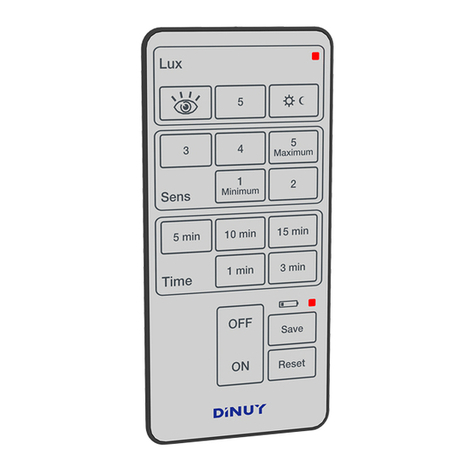
TECLA FUNCIÓN
Bloqueo del mando
El mando pasa a estado "Bloqueo", y no responderá a
las pulsaciones realizadas posteriormente. De esta
forma, se evitan pulsaciones involuntarias y se
contribuye, también, al ahorro de batería.
Desbloqueo del mando
El mando pasa a estado “Desbloqueo", respondiendo
a las pulsaciones de teclas que se realicen
posteriormente. En caso de no pulsar ninguna tecla
durante 30seg, el mando pasa a estado de Bloqueo.
Regulación Manual
Manteniendo pulsadas estas teclas, se produce la
regulación manual de la iluminación hacia arriba y
hacia abajo.
Ajuste Noche
Se captura el nivel de luz de noche o sin aporte de
luz natural.
Encendido al máximo
Permite encender las lámparas al máximo.
Modo Automático
Se selecciona el modo automático. Las lámparas se
autorregulan en función del nivel de luz deseado y la
iluminación actual existente.
Modo Programación
Permite entrar en modo de programación y configurar
los puntos de iluminación de día y noche.
Ajuste Día
Se captura el nivel de luz con el máximo aporte de
luz natural.
ON / OFF Manual
Se fuerza el encendido o apagado permanente de las
luminarias manualmente.
Reset
Permite preajustar nuevamente los valores de fábrica
de iluminación día y noche.
Indicador Batería
Este piloto permanece encendido mientras el teclado
esté desbloqueado y parpadeará de forma constante
para indicar que la batería está a punto de agotarse.
SUSTITUCIÓN DE LA BATERÍA
C/Auzolan 2, 20303 Irún (Guipúzcoa)

IR REMOTE CONTROL FOR
DAYLIGHT CONTROL SENSORS
CO REG R05
Supple: 1 battery x 3V CR2032 (included)
Battery lifetime: 4 years @ 100 puls/day
Infrared: Focused and short-range transmission (max. 2 - 3m)
Compatible with: RE DMS 001, RE DMS 003, RE DMS 004,
RE DMS DA1, RE DMS DA3 & RE DMS DA4
Environmental protection: IP51
Working temperature: 0ºC ~ +45ºC
Dimensions: 105 x 50 x 12mm
TECHNICAL SPECIFICATIONS
INSTRUCTIONS MANUAL
OPERATION
This remote control allows programming of the Dayligh Control Systems,
without access to the ceiling, and more precisely, as well as manual
dimming.
There are 3 different operation modes:
· Programming Mode “Prog”: for setting the brightness target values (Day
and Night).
· Automatic Mode “Auto”: sets the operation mode on the Sensor (Auto or
Reg).
· Manual Mode: allows switching and dimming manually the light fixtures.
AUTOMATIC MODE
In this mode, the sensor’s LED will only light once it detects movement.
The lamps are automatically dimmed according to the brightness fixed level
and the daylight.
MANUAL MODE
In this mode, the sensor´s LED will keep constantly on.
Several keys are available for manual control: Dim up, Dim down, Swith on,
Switch off and Switch on at maximum.
When the remote control is unlocked, it does not indicate the mode in which
the sensor is. It is necessary to press the key of the mode that is wanted to
activate.
PROGRAMMING MODE
Night Setpoint setting:
Without daylight (at night or with the blinds lowered):
1º - Switch the lighting fixtures on with the remote control (ON key). The
red LED of the sensor will be switched on.
2º - Dim the luminaires to the necessary level to obtain the desired
brightness level. This level will be the maximum at which the
luminaires will be switched on.
3º - Wait for 30 seconds without hindering the light received by the sensor.
4º - Press the PROG key. Its LED will be switched on.
5º - Press the “ ” key pointing to the sensor. The luminaires will
The luminaires will flash 3 times indicating that the Night point has
been saved.
6º - Press the AUTO key pointing to the sensor.
Day Setpoint setting:
With enough natural light to reach the desired light level in the workplace:
1º - Switch the luminaires off by pressing the OFF key. The red LED on
the sensor will keep switched on..
2º - In case of insufficient natural light, turn the luminaires on with the
ON button and dim them to the required level to obtain the desired
brightness at the workplace.
3º - Wait for 30 seconds without hindering the light received by the sensor.
4º - Press the PROG key. Its LED will be switched on.
5º - Press the “ ” button pointing to the sensor. The luminaires will
will flash 3 times indicating that the Day point has been saved.
6º - Press the AUTO button pointing to the sensor.
NOTE: The Sensor indicates that the set points (day and night) have been
stored by the triple flashing of the lamps after capturing the light value.
BATTERY REPLACEMENT
C/Auzolan 2, 20303 Irún (Spain)
KEY FUNCTION
Lock
The remote control switches to "Lock" mode, and will
not respond to the next pressings. In this way, casual
pulsations are avoided and also contribute to the
battery saving.
Unlock
The remote control switches to "Unlock" mode, and
will respond to any press. If no key is pressed for
30sec, the remote control goes into Lock mode.
Manual Dimming
Keeping these keys pressed, the lighting is
dimmed manually.
Night setpoint
It saves the light level at night or without natural
light.
ON at Maximum
The luminaires are switched-on at its maximum level.
Automatic mode
Automatic mode is selected. The luminaires are
automatically dimmed depending on the desired light
level and the daylight.
Programming mode
Enters into programming mode to set the Day and
Night setpoints.
Day setpoint
It saves the light level with enough natural light.
Manual ON / OFF
The luminaires are permanently switched on or off
manually.
Reset
Allows to reset the factory settings (day and night
setpoints).
Battery LED
This light stays on while the keypad is unlocked and
constantly flashes to indicate that the battery is
running low.
YES
Table of contents
Languages:
Other DINUY Remote Control manuals
