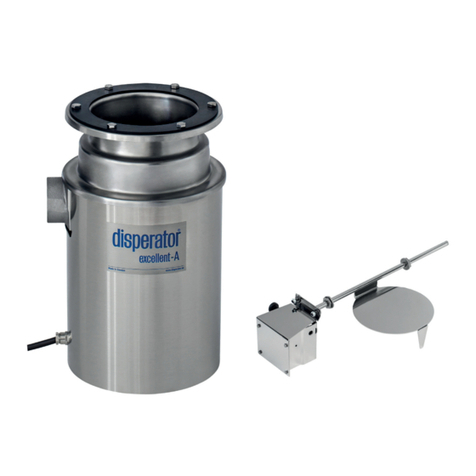
disperator 500A-GKF User manual

GLASS CHRUSHER
550A-GKF EXCELLENT SERIES
Product Descripon Installaon Safety Operaon Service
USER MANUAL
User Manual in Original
Dok. ref: 550A_GKF_am_en_230306
DISPERATOR AB Tel: 08-724 0160 E-mail: info@disperator.se
Mälarvägen 9, 141 71 Segeltorp Web page: www.disperator.se


User Manual in Original
Dok. ref: 550A_GKF_am_sv_230306
DISPERATOR AB Tel: 08-724 0160 E-mail: info@disperator.se
Mälarvägen 9, 141 71 Segeltorp Web page: www.disperator.se

User Manual in Original
Dok. ref: 550A_GKF_am_sv_230306
DISPERATOR AB Tel: 08-724 0160 E-mail: info@disperator.se
Mälarvägen 9, 141 71 Segeltorp Web page: www.disperator.se
Table of Content
1. Safety Precauons _______________________________________________________ 6
1.1. Safety Signs __________________________________________________________ 6
1.2. Personnel Qualicaons and Training______________________________________ 7
2. Company Prole _________________________________________________________ 8
3. Product Descripon and Technical Specicaon _______________________________ 8
3.1. Glass Crusher Model 550A-GKF __________________________________________ 8
3.2. Technical Specicaon _________________________________________________ 9
4. Storage and Displacement _________________________________________________ 10
4.1. Storage of the Machine_________________________________________________ 10
4.2. Displacement of the Machine____________________________________________ 10
5. Included in Delivery ______________________________________________________ 11
5.1. Documentaon _______________________________________________________ 11
5.2. Food Waste Disposer___________________________________________________ 11
6. Installaon Descripon for the Machine _____________________________________ 13
6.1. Assembly of the Machine _______________________________________________ 13
6.2. Electrical Connecon___________________________________________________ 13
6.1.1. Deployment of the Machine ___________________________________________ 13
6.2.1. Supply Voltage_____________________________________________________ 13
6.2.2. Mains Fuses _______________________________________________________ 13
6.2.3. Wall/Bulkhead Mounted Electrical Security Breaker _______________________ 13
6.2.4. Cable Dimension ___________________________________________________ 13
6.2.5. Cable Protecon ___________________________________________________ 13
6.2.6. Earth Wire ________________________________________________________ 13
6.2.7. Direcon of Rotaon for the Disposer __________________________________ 13
6.2.8. Check of the funcon of the Safety Interlock Switch _______________________ 14
6.3. Start Up and Final Tesng _______________________________________________ 14
6.3.1. Check before Start Up _______________________________________________ 14
6.3.2. Checks during Start-up ______________________________________________ 14
6.3.3. Final Measures ____________________________________________________ 14
7. Safety Instrucons _______________________________________________________ 15
8. Driinstrukoner ________________________________________________________ 16
8.1. Start and Stop ________________________________________________________ 16
8.2. Daily Cleaning ________________________________________________________ 16
8.3. Trouble Shoong _____________________________________________________ 17
8.3.1. The Machine Reduces Speed, Stops or does not Start ______________________ 17
8.3.2. The Machine does not Start and makes no Sound _________________________ 17

User Manual in Original
Dok. ref: 550A_GKF_am_sv_230306
DISPERATOR AB Tel: 08-724 0160 E-mail: info@disperator.se
Mälarvägen 9, 141 71 Segeltorp Web page: www.disperator.se
5 / 35
9. Service Instrucons ______________________________________________________ 18
9.1. Authorizaon_________________________________________________________ 18
9.2. Exploded Views and Spare Parts List for the Disposer _________________________ 18
9.3. Overhaul of the Machine _______________________________________________ 21
9.3.1. Funcon Checks of the Interlock Switch (3/28 och 6/1)_____________________ 21
9.3.2. Check of the Automac Funcon for Collecon of Glass Dust________________ 21
9.3.3. Other Checks ______________________________________________________ 21
9.4. Dismantling of the Machine _____________________________________________ 22
9.5. Assembly of the Machine _______________________________________________ 26
9.6. Intervals for Overhaul and Maintenance ___________________________________ 30
9.7. Spare Parts___________________________________________________________ 31
9.7.1. Service Packages ___________________________________________________ 31
9.7.2. Spare Parts and Accessories not included in Service Package ________________ 32
9.7.3. Idencaon Guide for 550A-GKF EXCELLENT-Series Spare Parts _____________ 33

User Manual in Original
Dok. ref: 550A_GKF_am_sv_230306
DISPERATOR AB Tel: 08-724 0160 E-mail: info@disperator.se
Mälarvägen 9, 141 71 Segeltorp Web page: www.disperator.se
6 / 35
This manual contains instrucons for installaon, operaon and maintenance of the food waste disposer
(below also called the machine). It is therefore essenal for the installer, union representaves and
users of the machine to read the manual thoroughly prior to installaon, commissioning, operaon and
overhaul & maintenance.
This manual must always be at hand where the machine is being used.
It is not only the general safety instrucons in this secon that need to be considered, but also the other
special safety instrucons given in this manual.
1. Safety Precautions
1.1. Safety Signs
The following safety signs are used in this manual and on the machine. Failure to comply with the safety
regulaons contained in this manual as well as on the machine may cause personal injury or damage the
machine.
Read this User Manual before use
Use protecve goggles
Use ear protecon
Warning for electric voltage
General personal danger
Warning for mechanically caused damage (rotang parts)
Warning plates located on or close to the machine must always be observed and kept legible.

User Manual in Original
Dok. ref: 550A_GKF_am_sv_230306
DISPERATOR AB Tel: 08-724 0160 E-mail: info@disperator.se
Mälarvägen 9, 141 71 Segeltorp Web page: www.disperator.se
7 / 35
6 / 35
1.2. Personnel Qualications and Training
All personnel managing the below tasks for the machine as described in this manual, must have the
necessary qualicaons to carry out this work. Areas of responsibility, scope of authority and sta
supervision must be carefully dened by the machine owner. If the personnel do not have the necessary
qualicaons for this, they must receive training and instrucons. Such training can be provided by the
manufacturer / supplier. Moreover, it is the responsibility of the machine owner to make sure that all
users read and understand the content of this User Manual.
Moving the Machine
Sta responsible for moving the machine must have knowledge about the handling of the liing gear
and stopping devices and have knowledge of applicable safety regulaons for these. If they lack this
knowledge, they must receive the required training.
Installaon
Personnel responsible for the installaon of the machine must have knowledge equivalent to educaon
in industrial mechanics/technician. The electric connecon must be performed by trained and cered
electrician.
Commissioning and Maintenance
Personnel responsible for commissioning, overhaul and maintenance of the machine must be familiar
with all funcons, and how to operate these funcons. Furthermore, they must know of all safety
precauons in this manual, and which in other respects also are valid where the machine is used.
Operaon
All persons who operate and maintain the machine must be aware of the risks that may occur with its use
and as described in this manual.
Service and Repair
Responsible personnel for service and repair of the machine must have knowledge equivalent to
educaon in industrial and design mechanics, and also know and understand the technical data of the
machine described in this manual. Assisng personnel for these jobs must be trained and performed
repair work must be checked by the machine owner.

User Manual in Original
Dok. ref: 550A_GKF_am_sv_230306
DISPERATOR AB Tel: 08-724 0160 E-mail: info@disperator.se
Mälarvägen 9, 141 71 Segeltorp Web page: www.disperator.se
8 / 35
3. Product Description and Technical Specication
3.1. Glass Crusher Model 550A-GKF
A Disperator glass crusher makes the work of handling empty boles, jars and other glass containers
easier by grinding them into small parcles of gravel size. Most kitchens, galleys and bars have problems
with the volume of glass containers, which also gets sharp if it breaks uncontrollably.
Collecng and transporng glass waste is me consuming due to the large volume. Floor space that could
be used beer is occupied by a mountain of empty boles. These problems diminish when a Disperator
glass crusher is used.
Model 550A-GKF is easy to install in a kitchen, galley or waste room. Alternavely, the glass crusher can
be installed on a lower oor near the waste collecon area, and fed with empty boles through a tube
from bar or kitchen on the oor above.
Disperator glass crusher 550A-GKF is designed to provide long service life in environments where
reliability and eciency are essenal.
2. Company Prole
Disperator’s business idea is to provide innovave and adapve equipment for kitchens on land as well
as galleys at sea, and for the food processing industry, which enables ecient collecon of communited
food leovers for anaerobic digeson or composng in subsequent stages, which is of benet to society.
With over 70 years of experience in the development and producon of such equipment, our devoon
to this has resulted in the unique operaonal reliability required for the extreme condions prevailing in
the marine industry. Furthermore, our innovaveness has provided commercial kitchens on land with an
alternave approach to handle food waste separaon at source, complying with modern demands and
being economically aordable.
Our product assortment is unique! Disperator can as the only manufacturer of such equipment oer
all types of installaon possibilies needed in a kitchen. Our basic range of ve dierent series of
water-based food waste disposers, consisng of three to six dierent sizes in each serie, which may be
combined with as many as 13 dierent mounng assemblies. Furthermore, the advantage of the basic
model’s design is that the waste disposers may easily be integrated into other kitchen manufacturer’s
mounng assembly or furniture. Thereby, each workplace in a kithen or galley can be designed to its
specic requirements regarding funcon, ergonomics and economy. To all this there is also the dierent
series of water-saving processor technology for collecon and storage of grinded food waste in a tank, as
well as disposers that grinds food waste without any ushing water at all.

User Manual in Original
Dok. ref: 550A_GKF_am_sv_230306
DISPERATOR AB Tel: 08-724 0160 E-mail: info@disperator.se
Mälarvägen 9, 141 71 Segeltorp Web page: www.disperator.se
9 / 35
8 / 35
3.2. Technical Specication
616
82
1166
1318
848
365
365
145
455
295
89
35
1347
295

User Manual in Original
Dok. ref: 550A_GKF_am_sv_230306
DISPERATOR AB Tel: 08-724 0160 E-mail: info@disperator.se
Mälarvägen 9, 141 71 Segeltorp Web page: www.disperator.se
10 / 35
4. Storage and Displacement
4.1. Storage of the Machine
If the machine will be stocked before installaon and use the following applies:
• The machine should be stored in a dry and clean room where the relave humidity may not
exceed 60%.
• Recommended storage temperature of -20 °C to + 60 °C.
4.2. Displacement of the Machine
For land use the glass crusher is delivered with two wheels which are mounted at the back of the
boom plate. Upon delivery, the glass cross can be moved by gently liing its inlet feeding tube so
that the front of the machine is lied from the oor, whereupon the machine can be rolled to its nal
installaon site.
For marine installaon of the glass crusher, foot xtures or vibraon insulators are available (as
alternave to the wheels) to x the machine in the oorboard. Please see secon 3.2, Technical
Specicaon above. In this case, the machine should not be lied or moved by hand. During
installaon, we recommend using a pallet jack or forkli, and during service a liing trolley for
component parts (like the crusher placed inside the cabinet).

User Manual in Original
Dok. ref: 550A_GKF_am_sv_230306
DISPERATOR AB Tel: 08-724 0160 E-mail: info@disperator.se
Mälarvägen 9, 141 71 Segeltorp Web page: www.disperator.se
11 / 35
10 / 35
Glass crusher for connecon voltage
according to the supplied delivery note. For a
detailed descripon of the machine, see also
secon 3.2 on page 8 of this manual.
Complete control system according to the
aached electrical wiring diagram and
component layout diagram. Start/stop unit
including contactor with zero voltage release,
reseable motor overload protector, and
control coil.
Including interlock switch that closes the
control circuit if the inlet feeding tube for
glass waste is in place.
Jam release wrench for release of glass
crusher grinding unit, if a non-grindable
object by mistake happens to fall therein.
Bag, 1 pc. for the container of the automac
glass dust collector.
5. Included in Delivery
5.1. Documentation
• This User Manual
• Safety Instrucon (laminated),
• Operang Instrucon (laminated),
• Electric documentaon (connecon & wiring diagram and component layout diagram)
5.2. Food Waste Disposer

User Manual in Original
Dok. ref: 550A_GKF_am_sv_230306
DISPERATOR AB Tel: 08-724 0160 E-mail: info@disperator.se
Mälarvägen 9, 141 71 Segeltorp Web page: www.disperator.se
12 / 35
Reinforced plasc bag (start package of 10
pcs.) for connecon to the machine’s outlet
for collecon of crushed glass.

User Manual in Original
Dok. ref: 550A_GKF_am_sv_230306
DISPERATOR AB Tel: 08-724 0160 E-mail: info@disperator.se
Mälarvägen 9, 141 71 Segeltorp Web page: www.disperator.se
13 / 35
12 / 35
Move the machine to its installaon place as described in secon 4.2. above.
6. Installation Description for the Machine
6.1.1. Deployment of the Machine
6.1. Assembly of the Machine
6.2. Electrical Connection
The electrical connecon of the delivered machine must be done by an authorized
electrician and in accordance to valid local regulaons.
The wiring made at the factory, and the electrical connecons to be done during
installaon, are shown in the electrical wiring diagram aached to this manual. The
machine’s specic electrical data are given in this manual, secon 3.2 above, as well
as on its serial number plate located on its outer cover (in cabinet assemblies there
is also an addional plate inside the cabinet).
6.2.1. Supply Voltage
Check that the supply voltage to be connected corresponds to the specied voltage on the
machine’s serial number plate.
6.2.2. Mains Fuses
Check that the supply voltage for the delivered machine is fused and protected as specied in
secon 3.2 of this manual.
6.2.3. Wall/Bulkhead Mounted Electrical Security Breaker
A separate wall / bulkhead mounted main electrical security breaker (circuit breaker) must be
connected in the incoming power line to the machine. The electrical security breaker is not
included in standard delivery but is available as an opon from Disperator.
6.2.4. Cable Dimension
Use connecon cable having 1.5 mm² wires for machines having a rated current up to 14A. For
machines having a rated current above 14A, use 2.5 mm² wires. The rated voltage and current is
specied on the machine’s serial number plate.
6.2.5. Cable Protection
All electrical cables must be protected against damage by being securely
fastened, for example to kitchen furniture or wall/bulkhead. If there is a risk
that the cables can be damaged, for example by passing trolleys, then the cables
must be protected by a exible sleeve or conduit. The cables must never be kept
on the oor/oor plate.
6.2.6. Earth Wire
a) The earth wire must be longer than the main voltage wires, when connecng to the cable
terminal block. This gives earth protecon in case the voltage wires become unxed in the
cable nipple, allowing them to be pulled from their terminals.
b) The machine must not be connected via residual current device, RCD (also
called earth leakage circuit breaker). The reason is that the currents in all
3-phase motors during start-up are out of balance unl the motor comes
up to speed, why the RCD without intended reason will trip. Note also that
when the machine’s electrical connecon is permanently installed through
a wall / bulkhead mounted electrical security breaker (see item 6.4.3.
above), usually under current rules in most countries no RCD is required.
6.2.7. Direction of Rotation for the Disposer
The disposer operates correctly irrespecve of the motor’s rotaonal direcon. It is therefore
irrelevant in which sequence the electrical phases are connected to the disposer motor.

User Manual in Original
Dok. ref: 550A_GKF_am_sv_230306
DISPERATOR AB Tel: 08-724 0160 E-mail: info@disperator.se
Mälarvägen 9, 141 71 Segeltorp Web page: www.disperator.se
14 / 35
6.3. Start Up and Final Testing
6.3.1. Check before Start Up
Loosen the knob and li o the inlet feeding tube from the front panel of the machine.
Check that the rotary shredder in the inlet opening of the machine turns freely in both direcons
by hand, and make sure that no foreign object has been dropped into the grinding unit during
installaon.
Ret the inlet feeding tube.
6.3.2. Checks during Start-up
6.3.3. Final Measures
1. Aach a collecon bag to the glass crusher outlet using the pre-mounted elasc cord (see
photo in secon 5.2. above). Make sure the bag closes ghtly against the O-rings on the
outlet.
2. Start the glass crusher to determine that the rotary shredder is spinning.
3. While the glass crusher is running, check its automac funcon for collecng glass dust by
placing a thin at paper over the enre opening of the inlet feeding tube. The paper should
then remain on the tube by the created under-pressure in the crusher. If the paper drops
from the tube, it leaks somewhere along the O-ring between the inlet feeding tube and the
crushing unit. Then check:
a) that this O-ring is correctly mounted on the tube,
b) that this O-ring is undamaged,
c) that this O-ring´s sealing funcon is not disturbed by foreign objects.
4. Make sure that the safety interlock switch works properly according to secon 6.2.8 above.
If the machine fails to operate, see secon 8.3. ”Trouble shoong” in this manual.
Before the documentaon and the jam release wrench for the crushing
unit are handed over to the personnel responsible for the machine, instruct
this personnel about the operaon and daily maintenance of the machine,
especially about what is said under secon 7 and 8 of this manual.
6.2.8. Check of the function of the Safety Interlock Switch
The inlet feeding tube is xed with a knob against the front panel of the glass crusher.
a) Check the funcon of the safety interlock switch (the key switch) by loosening the knob so
that the inlet feeding tube is released. The electrical connecon must be broken when there
are a number of threads turns le on the knob, i.e. before the inlet feeding tube is released.
Check that the machine idle run stops before the inlet feeding tube can be released and
removed.
b) If necessary, ne-tune the posioning of this switch and make sure it is properly xed.
c) Ensure that the key mounted on the inlet feeding tube can easily move in and out of this
switch.
d) Also make sure that the important O-ring on the inlet feeding tube, that will seal against the
crushing unit and protect the switch from crushed glass, is in place and in good condion.
Fasten the laminated operang and safety instrucons (included in delivery)
in a place on the wall / bulkhead where they are easily seen by the operator
before the start of the machine.

User Manual in Original
Dok. ref: 550A_GKF_am_sv_230306
DISPERATOR AB Tel: 08-724 0160 E-mail: info@disperator.se
Mälarvägen 9, 141 71 Segeltorp Web page: www.disperator.se
15 / 35
14 / 35
7. Safety Instructions
1. There is a rotating disc under inlet feeding
tube. Do not insert hands into the tube when
glass crusher is running.
2. Even if there in the inlet feeding tube are a
number of protective covers with sluices that
protect against glass splinters, do not hold
your face in front of the tube opening.
3. Immediately press the red stop button if e.g.
metal caps or other non-crushable materials
accidentally are dropped into the crusher, or if
unfamiliar noises are heard. See section 8.3.
“Trouble shooting” in this manual.
4. If the glass crusher is running even though
the inlet feeding tube above the crusher is
removed, press the red stop button, switch-off
and lock the main electrical safety switch and
call for service.
5. The main electrical safety switch on the wall/
bulkhead must be locked in the OFF-position,
with a padlock during all maintenance and
service work.
6. The glass crusher emits noise of more than
70 dB (A). Therefore, the operator must have
hearing protection when using the machine.
Read these safety instructions
before using the machine!

User Manual in Original
Dok. ref: 550A_GKF_am_sv_230306
DISPERATOR AB Tel: 08-724 0160 E-mail: info@disperator.se
Mälarvägen 9, 141 71 Segeltorp Web page: www.disperator.se
16 / 35
8. Driftinstruktioner
The machine is only intended for crushing pure glass!
8.2. Daily Cleaning
DISPERATOR AB
Mälarvägen 9, 141 71 Segeltorp
Tel: 08-724 0160
info@disperator.se, www.disperator.se
Doc. ref:
Opera� ng Instruc� on
550A-GKF_di_sv+en_210409
OPERATING INSTRUCTION
FOR GLASS CRUSHER
Disposer Control Panel Daily Cleaning of Disposer
1. Attach a collection bag of strong
plastics to the machine outlet.
Use the pre-mounted elastic cord,
and make sure the bag ts tightly
against the seals on the outlet.
2. Press the green button (1) - the
glass crusher starts.
3. Depending on size, feed the
bottles one by one into the inlet
tube at every 5 - 10 sec.
4. When the crushing is completed
only the machine’s idle sound is
heard.
5. Press the red button (0) - the
glass crusher stops within 5 sec.
1. Use protective gloves.
2. Remove the bag with crushed
glass, and instead place a bucket
under the machine outlet.
3. Start glass crusher with green
button (1).
4. Insert a hose in the inlet tube
opening, and rinse with warm
water to remove beverage
residue and prevent bad odors.
5. If needed, empty the bucket and
repeat item 4 above.
6. Press the red button (0) - the
glass crusher stops within 5 sec.
7. Use the main electrical safety
breaker (placed on the wall/
bulkhead) to disconnect
electrical supply. Lock the
breaker with a padlock if you
need to leave the machine
temporarily before item 11 below
is completed.
8. Loosen the knob and lift off the
inlet tube from the machine
front panel. Make sure that the
area around the O-ring seal
on the tube, and also the area
around the front panel opening
to the interlock switch, is clean
and free from crushed glass.
9. Remove any foreign objects
(e.g. bottle caps, plastics etc.)
that may remain in the glass
crushing unit of the machine.
10. When the inlet tube is reted
and xed with the knob on the
front panel, also check that the
O-ring seal is intact and that the
key on the tube easily slides into
the interlock switch.
11. See section 9.3.2 of the user
manual, and check that the
machine´s automatic function for
collecting glass dust works.
12. Use the main electrical safety
breaker to connect the electrical
supply
The glass crusher is intended for crushing pure glass only
• What can be crushed: wine, beer, champagne bottles, jars and containers of glass
• What cannot be crushed: materials that can cause explosion, spread infection or
chemical pollution (e.g. lamps containing mercury)
• Non-crushable materials: metal, stone, wood, plastic, rubber, strings and the like
• What can be crushed: wine, beer, champagne bottles, jars and containers of
glass
• What cannot be crushed: materials that can cause explosion, spread infection or
chemical pollution (e.g. lamps containing mercury)
• Non-crushable materials: metal, stone, wood, plastic, rubber, strings and the like
8.1. Start and Stop

User Manual in Original
Dok. ref: 550A_GKF_am_sv_230306
DISPERATOR AB Tel: 08-724 0160 E-mail: info@disperator.se
Mälarvägen 9, 141 71 Segeltorp Web page: www.disperator.se
17 / 35
16 / 35
8.3. Trouble Shooting
8.3.1. The Machine Reduces Speed, Stops or does not Start
A humming sound might be heard from the motor of the machine.
1. Press the red stop buon (0).
2. Use main electrical safety switch on wall/bulkhead to disconnect electrical supply. Lock the
switch with a padlock if you temporarily leave the machine before the measure of this error
has been completed as per item 14 below.
3. Use protecve gloves.
4. Loosen the knob and li o the inlet feeding tube from the front panel of the machine.
5. Check if any foreign object blocks the crushing unit so that the rotary shredder cannot be
turned by hand. If something is jammed, place the jam release wrench on the center washer.
See picture below.
6. Release by rotang the wrench backwards and forwards unl the shredder
rotates freely a whole lap in both direcons. If needed, extend the bar on
the wrench and hit the bar with a hammer.
7. Remove the jam release wrench.
8. Remove any non grindable objects from the crushing unit, e.g. metal caps.
9. Make sure that the area around the O-ring on the inlet feeding tube, and
also the area around the front panel opening to the safety interlock switch is clean and free
from crushed glass.
10. Ret the inlet feeding tube and x it by turning the knob. At the same me ensure that the
key mounted on the tube can easily slide into the safety interlock switch in the front panel
and connect.
11. Check wall fuses/automac breakers. Change/reset these if needed.
12. Reset motor protector by pressing in the red buon on the start & stop unit.
13. Connect the electrical supply on the main electrical safety switch on the wall/bulkhead.
14. Press the green buon (1) to start and empty the machine.
Grinder and jam release
wrench from above
8.3.2. The Machine does not Start and makes no Sound
1. Is the inlet feeding tube correctly mounted and xed with the knob so that the interlock
switch is closed?
2. Check that the main electrical safety switch on the wall/bulkhead is in ON-posion.
3. Make sure the wall fuses/automac breakers are funconing and switched on.
4. Check that the motor protector is reset by pressing the red stop buon.
If the fault cannot be remedied please contact authorized service personnel
or Disperator AB / local representave. Always provide the machine’s serial
number when contacng Disperator.

User Manual in Original
Dok. ref: 550A_GKF_am_sv_230306
DISPERATOR AB Tel: 08-724 0160 E-mail: info@disperator.se
Mälarvägen 9, 141 71 Segeltorp Web page: www.disperator.se
18 / 35
Picture 1
9. Service Instructions
9.1. Authorization
9.2. Exploded Views and Spare Parts List for the Disposer
Disconnecon and reconnecon of the machine to incoming water & sewer service
and electricity may only be carried out by authorized personnel and in accordance
with valid local regulaons.
Upon delivery of the machine, its electrical documentaon is aached to this user
manual.

User Manual in Original
Dok. ref: 550A_GKF_am_sv_230306
DISPERATOR AB Tel: 08-724 0160 E-mail: info@disperator.se
Mälarvägen 9, 141 71 Segeltorp Web page: www.disperator.se
19 / 35
18 / 35
Picture 2
When ordering spare
parts always state the
machine serial number.
NOTE! All screws and
nuts must have the
correct quality and
strength. Disperator
cannot guarantee the
safety if other screws
and nuts are used than
those supplied by us.
-01 Staonary shredder
-02 Rotary shredder
-03/00 Washer for V-ring seal
-03/01 V-ring seal
-03/02 Axle seal, 2 pcs. with stainless spring
-03/03 Locking ring, SgH
-06 Axle washer
-07 Axle screw
-10 Key for carrier
-13G End shield
-14 Motor with drained upper ange
-14/01 Axle seal, 1 pc. motor drive end, 1 pc.
motor non-drive end
-14/02 Bearing, 1 pc. motor drive end,1 pc.motor
non-drive end
-14/03 Key for motor axle
-18 Carrier
-23 Screw for mounng end shield, 4 pcs.
Not depicted parts (instead see photos on page 31 below):
-04 Special grease for seals and carrier
-09 Rubber sealing mass

User Manual in Original
Dok. ref: 550A_GKF_am_sv_230306
DISPERATOR AB Tel: 08-724 0160 E-mail: info@disperator.se
Mälarvägen 9, 141 71 Segeltorp Web page: www.disperator.se
20 / 35
1. Top cover
2. Seal for staonary shredder, spare part No. -05
3. Screw M8x35 and washer (4pcs.), s.p. No. -25
4. Spacer (4pcs.) spare part No. -25
5. Screw M8x16 (4pcs.), spare part No. -25
6. Cover for inlet feeding tube
7. Gasket for cover for inlet feeding tube
8. Lower protecve cover
9. Upper protecve cover
10. Rubber protecve cover
11. Inlet feeding tube
12. O-ring seal for inlet feeding tube
13. Outlet connecon
14. O-ring seal for outlet/outlet connecon
15. Outlet
16. Screw M5x10 (4pcs.) for outlet
17. Seal rings (2pcs.) for outlet
18. Elasc cord for aachment of collecon bag
19. Cover for dust collecng bag
20. Dust collecng bag
21. Inlet pipe for dust collecng bag
22. Dust hose
23. Toeboard rubber
24. Wheel (2pcs.), spare part No. -240/12
25. Power supply cable and cable gland in boom
plate
26. Vibraon damper (4pcs.)
27. Start/stop-unit incl. contactor and motor
protector, spare part No. -38
28. Safety interlock switch (key switch), s.p. No. -39
29. Key for safety interlock switch
Picture 3
This manual suits for next models
1
Table of contents
Other disperator Commercial Food Equipment manuals

disperator
disperator 500A-BAS EXCELLENT Series User manual
disperator
disperator 500A-DRR-K EXCELLENT Series User manual
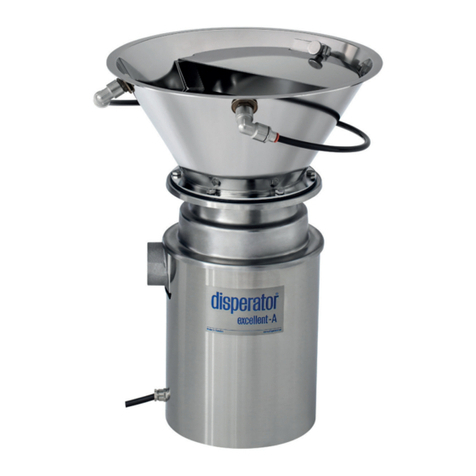
disperator
disperator 500A-HK User manual
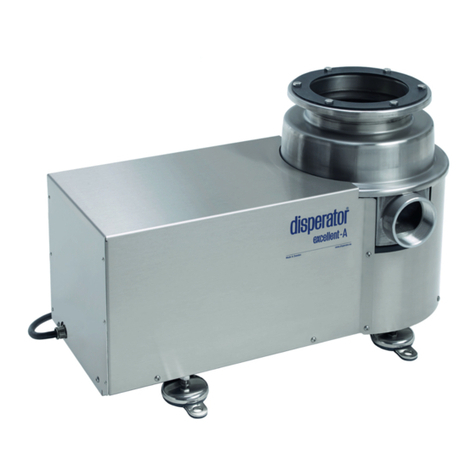
disperator
disperator EXCELLENT Series User manual

disperator
disperator 500A-UK User manual

disperator
disperator 500A-MI EXCELLENT Series User manual
