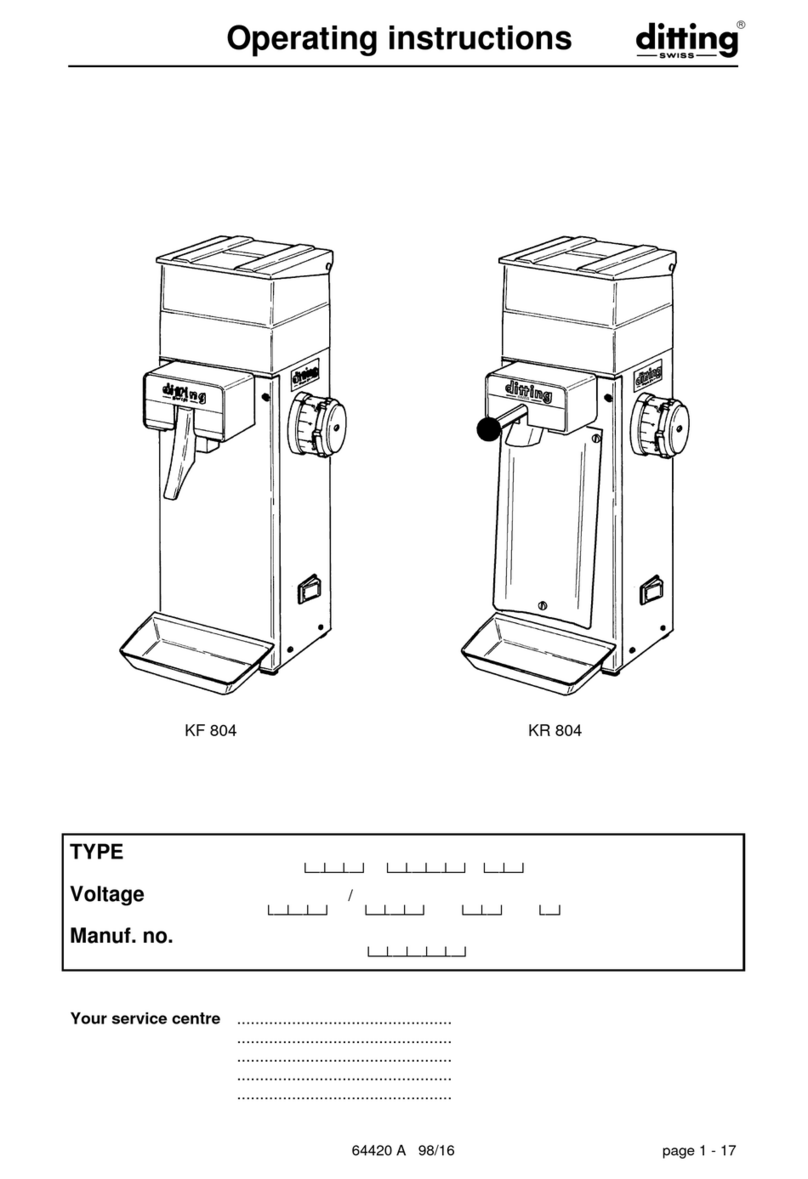
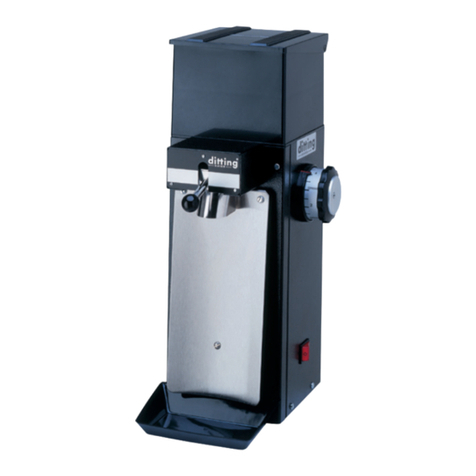
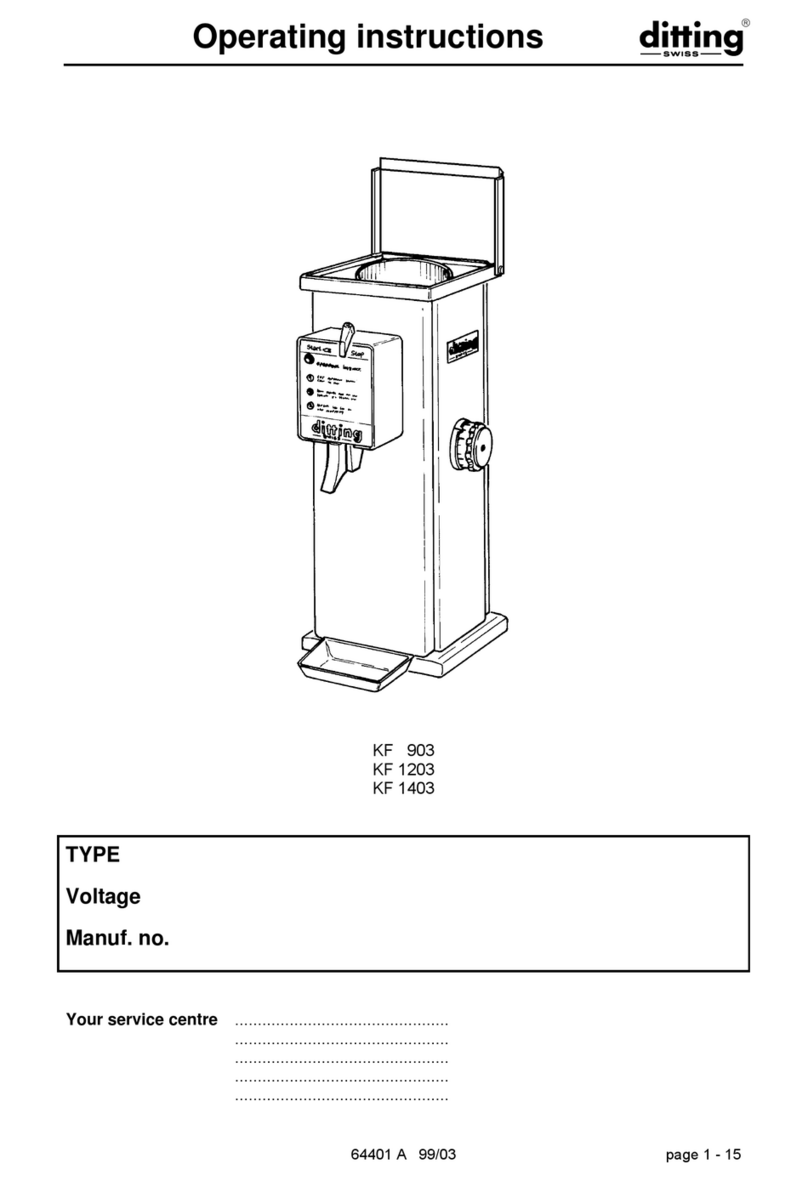
DITTING 804 Series Assembly instructions

U.S. Distribution Center
8801-B Smiths Creek Rd, Wales, MI 48027
Tel 810-367-7125 Toll-Free 800-835-5992
Fax 810-367-7130
Serving the Whole-Bean
Coffee Market Since 1968
www.ditting.com
Ref. Models:
804 Series
805 Series
903 Series
1203 Series
1403 Series
1800 Series
Page 1 of 4
SERVICE TIP #R1
TROUBLESHOOTING DITTING COFFEE GRINDERS
DO NOT TAKE THE GRINDER APART BEFORE READING THE FOLLOWING:
1. Grinder is Clogged (The red light comes on and the motor hums. Then you hear a “click” and
the red light goes off). Or Grinder Cannot Be Turned On (red lamp does not come on).
a. Check whether the power cable is properly connected.
b. Check the circuit breaker UNDER the base of the grinder in the right rear corner.
Newer model 1403 3-phase grinders have a rocker breaker switch on the lower right
side of the machine. Older model KFA1403 does not have a circuit breaker.
i. Follow these steps when attempting to reset the grinder:
1. Turn the switch to the “Off” position.
2. Check for coffee grounds clogged in the discharge tube. See Paragraph
#2 for instructions.
3. Place a bag under the discharge tube.
4. Adjust the grind setting on the right side to #9 to allow more space
between the discs.
5. Carefully lean the grinder towards you to feel for the circuit breaker
under the machine. You will have to press hard to engage the breaker.
You will not necessarily feel the breaker moving when you press it, but
you will hear a “click” when it has been engaged.
6. Start the grinder and let it continue to run until everything in the grinding
chamber is ground and discharged from the grinder.
7. If the grinder starts but then the circuit breaker is tripped again after a
moment, you may need to open the grinder and clean out the grinding
chamber. See Paragraph #3 for instructions.
ii. Try another electrical appliance in the same outlet to make sure that there is
power in the outlet. (110 volt grinders only).
iii. If another appliance plugged into the same outlet does not work, check the
main circuit panel in the store.
2. Clogged Discharge Tube:
Switch the grinder OFF and unplug the power cable.
Four basic problems will cause clogging of the grinder:
a. Full coffee bag under the discharge tube, blocking the exit of ground coffee.
b. Worn grinding discs which can no longer cut the beans.
c. Worn wings on the lower rotating plate, unable to push out the ground coffee from the
grinding chamber.
d. Dislodged transition tube between the grinding chamber and the discharge tube,
blocking the flow of coffee out of the grinding chamber. The transition tube should be
perfectly round and free of crimps and tears.

Page 2 of 4
As you perform the following steps, watch for clues as to the cause of your problem.
a. Clear out all ground coffee packed in the discharge tube by inserting a wooden pencil
in the opening and gently stirring it. If the discharge tube is full of coffee, you
obstructed the flow of ground coffee by having a coffee bag smaller than the amount of
coffee being ground. Use a larger bag and be sure the grounds are being packed to
the bottom of the bag by tapping on the bag while grinding the last 3rd of the beans.
b. Do not lift the hopper (funnel) while it contains coffee beans.
c. Remove the coffee beans from the hopper, using a vacuum cleaner if necessary.
d. Remove the 4 corner screws holding the lid/cover assembly and remove it with the
hopper.
i. On 804 model grinders, loosen the right rear STOP lock.
ii. Hold the hopper assembly, twist it 30° counter-clockwise and lift.
e. Dismantle the stationary disc flange by removing the 4 cheese head screws. Pull out
the stationary disc and set it aside. If the stationary disc does not come out easily, tap
the circumference where the bolts are located with the handle of your screwdriver. This
should loosen any coffee grinds that may be wedged between the disc and the
grinding housing.
f. Check whether the lower grinding disc (on the rotating plate) is spinning freely. (Use a
socket wrench on the center bolt of the rotating plate to turn it easier). If the rotating
plate does not turn freely, your problem is a frozen bearing or a bad felt seal around
the rotating plate that needs to be changed. This could be caused by extended use of
flavored coffee.
g. As you turn the rotating plate, see if the wings along its circumference are wiping all
the coffee out of the exit hole. Is there a thick layer of coffee along the outer wall of the
grinding area? An easy measurement of the rotating plate is to use 3 standard-size
business cards:
i. Clean away the coffee between the end of each wing and the outer wall.
ii. Check if you can fit the 3 business cards between each wing and the wall. You
should have to push the cards into place. If they slide in easily or if you can fit
more than 3 cards in between any of the wings and the outer wall, the rotating
plate is worn and should be changed to avoid further clogging.
h. Clear the obstruction in the exit hole towards the discharge housing with a small
screwdriver or pencil. Be careful not to dislodge the rubber transition tube. The
transition tube between the grinding chamber and the discharge tube must be perfectly
round. Any crimp or tear in the tube will result in clogging.
i. If the discharge tube was not full, nor was the inside edge of the grinding chamber
around the rotating plate’s wings, then the clogging was due to a foreign particle in the
grinding chamber or worn out grinding discs. If you cannot find foreign matter and
everything else looks good, you need to change the grinding discs.
To reassemble the grinder, see Paragraph 4 on the following page.

Page 3 of 4
3. Foreign Matter in the Grinding Chamber:
a. Set the adjusting knob on the right side to #9 and start/stop the grinder a few times.
50% of the time, the problem might clear itself out. If the grinder still does not run,
proceed as follows.
b. Switch the grinder off and unplug the power cable.
c. Do not lift the hopper (funnel) while it contains coffee beans.
d. Remove the coffee beans from the hopper, using a vacuum cleaner if necessary.
e. Remove the 4 corner screws holding the lid/cover assembly and remove it with the
hopper.
i. On 804 model grinders, loosen the right rear STOP lock.
ii. Hold the hopper assembly, twist it 30° counter-clockwise and lift.
f. Dismantle the stationary disc flange by removing the 4 cheese head screws. Pull out
the stationary disc and set it aside. If the stationary disc does not come out easily, tap
the circumference where the bolts are located with the handle of your screwdriver. This
should loosen any coffee grinds that may be wedged between the disc and the
grinding housing.
g. Remove any foreign matter and vacuum the grinding chamber. Inspect the grinding
discs and rotating plate for possible damage or wear.
4. Reassembling the Coffee Grinder:
a. Cleanliness is a must to get a good, uniform grind. All mating parts have to be very
clean to get Turkish fine grind with your grinder. Your grinder parts are precision
machined. Even the smallest amount of coffee particles between parts would nullify
the precision quality work.
b. The circumference of the grinding chamber where the 4 cheese head screws attach,
as well as the mating surface on the stationary disc flange (top plate) must be perfectly
clean.
c. Replace the stationary disc flange and the 4 cheese head screws, and tighten the
screws.
d. Replace the cover with the plastic funnel.
e. Set the adjustment on #1 (Turkish) and grind 10-15 beans. The output should be a
very fine powder. If the output is not satisfactory, adjust the grinder as in Paragraph #5
below.
5. Adjusting the Grinder for the Proper Grind
a. Turn the grinder on with no coffee in it.
b. Turn the adjustment setting on the side to #1.
c. Loosen the center screw of the adjusting knob about 3/16th of an inch. You need to be
able to pull the adjusting knob away from the machine to disengage the gear.
d. Pull out the knob and, while still in the pulled position, turn it until the #5 is in front of
the red arrow. Release the adjusting knob.
e. Turn the adjusting knob slowly towards #1 until you hear metal scraping (the grinding
discs touching). If they do not touch, repeat step #5 above.
f. When you hear the metal, turn the adjusting knob back the distance on one line.
(Counter clockwise).

Page 4 of 4
g. Pull out the adjusting knob and, while in the pulled position, place the #1 against the
red arrow and release the knob. The knob will engage the internal gear.
h. Position the aluminum cover on the adjusting knob to fit in the groove, and tighten the
center screw.
i. Your grinder should now be adjusted properly, and all settings should match the
proper grinds.
Testing the grind: Place 10-15 beans in the hopper and grind on the #1 setting. The
output must be pulverized (powder).
Notes: If on the #1 setting the coffee comes out slowly or in small balls, the setting is too
close. Repeat the above procedure. If the grinding is still too slow, replace the grinding
discs.
6. Uneven Grinding or Excessive Dust Particles:
a. Indication of badly worn grinding discs. Replace the grinding discs as soon as
possible.
7. Coffee Grinds Very Slowly, and the grinding housing heats up.
a. The grinding discs are worn out. Instead of grinding the coffee, they are chewing the
beans. Replace the grinding to return the quality back into your grinder and prolong the
life of the motor.
8. Metal Noise After Stopping the Grinder on #1 Turkish setting:
a. The discs are not adjusted properly and are too close. Follow the Adjusting instructions
in Paragraph #5 above. If you continue to use your machine with the grinding discs
adjusted too close together so that they are touching, you will wear your discs down
very quickly, and they will not be resharpenable.
CAUTION: If coffee beans have fallen inside the grinder, you MUST clean out the base of
the grinder to prevent future problems, including the possibility of fire. You need the airflow
to keep the motor cool. Accumulation of beans at the base can restrict airflow and overheat the
motor and/or cause a fire.
a. UNPLUG THE GRINDER.
b. Place the grinder on its back on the table. Make sure the grinder is forward enough so
that the cable is not crimped and can hang freely.
c. Remove the 4 corner screws holding the base onto the grinder. Be sure to have a firm
hold on the base so that it does not fall away from the machine.
d. Gently pull the base away from the housing, making sure not to pull out any of the
wires from the base terminals.
e. Vacuum the fallen beans at the base.
f. Replace the screws to hold the base in place.
g. Stand the grinder upright, plug in, and test.
Additional Troubleshooting Notes for 1403 220 Volt / 3 Phase Grinders are Available.
Visit our website at www.ditting.com for this and other service tips.

U.S. Distribution Center
8801-B Smiths Creek Rd, Wales, MI 48027
Tel 810-367-7125 Toll-Free 800-835-5992
Fax 810-367-7130
Serving the Whole-Bean
Coffee Market Since 1968
www.ditting.com
Ref. Models:
1403 Series
1800 Series
SERVICE TIP #R2
TROUBLESHOOTING ALL DITTING
220 VOLTS, 3 PHASE GRINDERS…1403 AND 1800 SERIES
Our motors do not burn out easily. Look for simple problems. Never assume that the motor is bad because the
grinder is doing something unusual.
PROBLEM
CHECK FOR
POSSIBLE SOLUTION
NO OUTPUT
Coffee does not come out
DIRECTION OF ROTATION:
Looking into the hopper, when
the grinder comes to a stop, it
should be turning counter-
clockwise.
REVERSE ANY TWO OF THE HOT
WIRES (DO NOT CHANGE THE YELLOW
OR YELLOW-GREEN GROUND WIRE) IN
THE PLUG. This needs to be done when
the grinder is first installed or plugged into a
new outlet.
GRINDER CHANGES
DIRECTION OF
ROTATION EVERY TIME
IT IS TURNED ON
ONE OF THE THREE
PHASES IS NOT
DELIVERING POWER TO
THE MOTOR
THE PROBLEM IS ONE OF:
BAD SWITCH (KFA1403 version)
BAD WIRE IN THE PLUG OR OUTLET
(any model)
BAD CONTACTOR (KFR/KR model)
GRINDER STOPS UNDER
LOAD
Runs okay without beans
but stops when beans are
added
ONE OF THE THREE
PHASES IS NOT
DELIVERING POWER TO
THE MOTOR
THE PROBLEM IS ONE OF:
BAD SWITCH (KFA1403 version)
BAD WIRE IN THE PLUG OR OUTLET
(any model)
BAD CONTACTOR (KFR/KR model)
GRINDER STAYS ON
BAD CONTACTOR
KFR OR KR1403
Replace contactor
BREAKER KEEPS
TRIPPING OFF
SHORT CIRCUIT
LOOK FOR BURNED OUT WIRE
SHORTING TO THE GRINDER HOUSING
EITHER AT THE BASE OF THE MACHINE
OR IN THE SWITCH AREA, OR LOOK
FOR A CRIMPED WIRE AT THE BASE.
GRINDING TOO
SLOWLY and/or
OVERHEATING
WORN OUT GRINDING
DISCS, or worn out/broken
fins on the lower rotating plate
REPLACE THE GRINDING DISCS, and/or
REPLACE THE LOWER ROTATING
PLATE.
Visit our website at www.ditting.com for this and other service tips.

U.S. Distribution Center
8801-B Smiths Creek Rd, Wales, MI 48027
Tel 810-367-7125 Toll-Free 800-835-5992
Fax 810-367-7130
Serving the Whole-Bean
Coffee Market Since 1968
www.ditting.com
Ref. Models:
804 Series
805 Series
903 Series
1203 Series
1403 Series
1800 Series
SERVICE TIP #R3
DIRECTION OF ROTATION
ditting grinders MUST TURN COUNTER-CLOCKWISE. If the grinder turns clockwise, the
ground coffee will not come out and WILL CLOG the grinder.
To check for direction, turn the machine on for a moment and then turn it off. As the motor is
slowing down, look down through the hopper base opening at the turning nut, and make sure that
it is turning counter-clockwise. If it is not, do the following BEFORE GRINDING ANY COFFEE.
MODELS 804 / 805 / 903 / 1203 –120 volt grinders: This is needed ONLY if a service person
worked on the base wiring and did not wire the motor properly.
1. You must have an Ohmmeter to check the resistance of the pairs of wires.
2. From the motor, there are two sets of wires going to the terminal block on the base.
a. One color with the lower resistance is the primary winding.
b. The other color wires with the higher resistance are the secondary motor winding.
3. Swap the two secondary wires, and your rotation will be reversed.
This needs to be done only once for proper wiring of the grinder.
MODEL 1403 –220 volt, 3 Phase grinders: This is needed ANYTIME you plug the grinder into a
new outlet.
The electrical configuration of the outlet depends on the wires coming from the power
company transformer, and you must check and correct for rotation every time you move
the grinder into a new 3 phase outlet.
1. Unplug the grinder.
2. Open the electric plug of the grinder. You will have 4 wires: a green (ground), and 3 other
wires, normally 1 black, 1 red, and 1 white. (The factory may change the color of the wires
without notice)
3. You can take any two of the wires EXCEPT THE GROUND WIRE and swap them.
4. Make sure the screws are tight over the changed wires.
5. Close the plug and install the screws.
6. Check the grinder for rotation.
If you have any problems or questions, consult Ditting USA at 810-367-7125.
Visit our website at www.ditting.com for this and other service tips.

U.S. Distribution Center
8801-B Smiths Creek Rd, Wales, MI 48027
Tel 810-367-7125 Toll-Free 800-835-5992
Fax 810-367-7130
Serving the Whole-Bean
Coffee Market Since 1968
www.ditting.com
Ref. Models:
804 Series
805 Series
903 Series
1203 Series
1403 Series
1800 Series
SERVICE TIP #R4
CLEANING THE GRINDER
The grinding discs and grinding chamber should be cleaned at least once a week, or every day for
stores grinding extremely oily coffee. For a store using oily, dark roast coffee, without regular and
frequent cleaning, the grinder may eventually jam until the grinding chamber has been cleaned.
The coffee grinder must only be cleaned with a dry cloth.
Do not use an alkaline cleaning agent.
Do not spray coffee grinder with water and/or steam.
Using anything other than a dry cloth can result in a short-circuit and may
damage the unit. The use of alkalis can affect the flavor of the coffee.
1. Unplug the grinder.
2. Clean the body of the grinder.
a. Use a paper towel and mild dishwasher detergent to clean the body shell, cover lid and
the inside of the hopper.
3. Clean the discharge tube.
a. Use a brush and paper towel to clean in and around the discharge tube. Be gentle
when inserting a brush into the discharge tube so as not to dislodge the rubber
transition tube joining the grinding chamber to the discharge tube.
4. Loosen the screws holding the cover lid and hopper, and remove them.
a. Use a paper towel or towel to wipe down the hopper of any accumulated oils.
b. Use a brush to clear the built-in magnet on the underside of the hopper.
5. Remove the screws that hold the top stationary plate and pull the plate up. One of the grinding
discs is installed on the bottom of this plate.
a. Use a vacuum with an extension hose to vacuum up any coffee particles that may be
in the grinding chamber.
b. Use a paper towel and a brush to clean the grinding chamber and grinding discs of any
leftover coffee particles. The teeth of both grinding discs and the “wings” of the rotating
plate (to which the second grinding disc is installed) must be completely free of coffee
and oils. Do not remove the grinding discs from their positions.
c. Once the grinding chamber has been thoroughly cleaned and there is no more coffee
dust or oil visible, reassemble the grinder, making sure all screws are replaced and
tightened.
Note: For the KF1800 light industrial model, the hopper will remain on the stationary plate.
Remove the bolts from the stationary plate, remove the hopper and the stationary plate as
one unit and place the hopper upside down on a clean surface, and the grinding chamber
will be exposed.
Visit our website at www.ditting.com for this and other service tips.

U.S. Distribution Center
8801-B Smiths Creek Rd, Wales, MI 48027
Tel 810-367-7125 Toll-Free 800-835-5992
Fax 810-367-7130
Serving the Whole-Bean
Coffee Market Since 1968
www.ditting.com
Ref. Models:
KF1800
SERVICE TIP #LI1
GRINDER ADJUSTMENT / CALIBRATION
This simple procedure is for adjusting or calibrating the grinding discs. If you remove or change
the grinding discs, you will need to calibrate the grinder.
Initial visual inspection:
Inspect the two wings on the rotating plate. If the wings are worn out at the outer edge, they
need to be replaced. The wings push the ground coffee out of the grinding chamber, and
when the output increases due to the sharpness of new discs, worn out wings will not be able
to push the grounds out of the chamber fast enough. This will result in the grinder re-grinding
the coffee particles that are trapped in the chamber, and you will lose your particle uniformity.
The condition of these wings is very critical for the performance of your grinder.
Calibration:
6. Loosen the two screws holding the adjustment wheel onto the gear. (When it is loosened,
you will be able to continuously turn the wheel).
7. Turn the wheel and line up to #40 on the dial at the arrow. Tighten one screw on the
wheel.
8. Turn the grinder on, and slowly turn the wheel towards a smaller setting until you hear the
metal chirping of the discs just touching. If you do not hear metal chirping, repeat Steps 1
and 2 again.
9. Once you hear the discs touching, back the discs up 20-25 numbers on the dial.
10. Loosen the screw on the wheel and line up the #1 setting on the arrow.
11. Tighten the two screws.
12. Grind a test sample on the #1 setting.
Testing the grind: Place a cup of beans in the hopper and grind on the #1 setting. The output
must be fine grind. If you need to grind a finer particle size, repeat Step 4 but back up only 15-
20 numbers.
Notes: If on the #1 setting the coffee comes out slowly or in spurts, the discs are too close to
each other. Repeat Step 4, and back up 30-35 numbers.
Special Note: If you installed new or resharpened discs, the teeth on the grinding discs are
very sharp and the grinder will grind faster than the coffee coming out of the spout. The
grinder could choke. Close the gate half way for the first 1,000 pounds of coffee until the discs
break in. You can slowly open the gate more until the flow matches the grinding speed. If you
do not regulate the flow of beans into the grinding chamber, some of the ground coffee will
spin around in the grinding chamber and get reground, and your output will be finer, non-
uniform particles.
Visit our website at www.ditting.com for this and other service tips.

U.S. Distribution Center
8801-B Smiths Creek Rd, Wales, MI 48027
Tel 810-367-7125 Toll-Free 800-835-5992
Fax 810-367-7130
Serving the Whole-Bean
Coffee Market Since 1968
www.ditting.com
Ref. Models:
KF1800
SERVICE TIP #LI2
ROTATING DISC REPLACEMENT
1. UNPLUG THE GRINDER.
2. Use a wrench to remove the bolts holding on the hopper and stationary plate (one piece).
3. Loosen the two screws on the aluminum portion of the adjusting knob and slowly remove the
adjusting gear.
4. Remove the center bolt holding the lower rotating disc. You need to place the soft handle of a
pair of pliers in the opening of the grinding chamber where the coffee goes out to the
discharge tube to prevent the rotating disc from moving.
a. Take out the washer behind the bolt and replace the bolt in the hole (finger tight).
5. Take a large wood dowel (or a piece of hard wood), place it on the head of the center bolt and
hit it with a hammer (hard, if need be) to push away the cone tipped shaft from the lower
rotating plate. The rotating disc is press-fit on the motor shaft.
6. Remove the rotating plate and replace it with the new one.
7. Remove the center bolt, replace the washer that you had taken out, and tighten the bolt back
in place. Place the handle of the pliers back into the outlet hole and tighten the center bolt.
8. Reinstall the adjusting gear/cone in the grinder and turn it clockwise until the rotating plate’s
wings clear the grinding housing and the lower plate spins freely.
9. Clean the mating surfaces free from dirt and coffee, replace the top stationary disc and
hopper.
10. Plug the grinder into the outlet.
11. CALIBRATE AND ADJUST THE GRINDER FOR PROPER GRIND.
Ask for the KF1800 GRINDER ADJUSTMENT/CALIBRATION service tip
or see our website at www.ditting.com for this and other service tips.
Other manuals for 804 Series
1
This manual suits for next models
5
Other DITTING Coffee Grinder manuals
DITTING
DITTING KS 3 User manual
DITTING
DITTING KE640 2.0 User guide

DITTING
DITTING KE640 VARIO User manual
DITTING
DITTING KR 805 User manual
DITTING
DITTING KE640 VARIO User manual
DITTING
DITTING KR 1203 User manual

DITTING
DITTING KE640 2.0 User guide

DITTING
DITTING KE 640 Vario User manual
DITTING
DITTING 807 User manual

DITTING
DITTING ProD User manual
