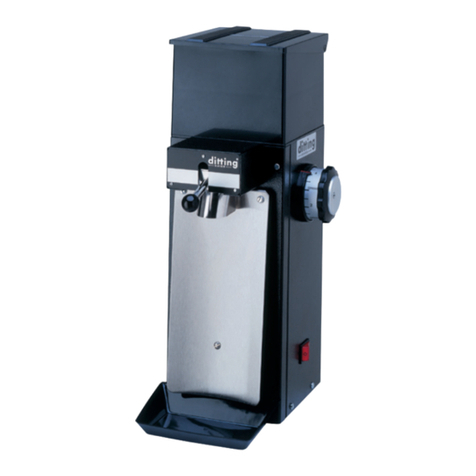
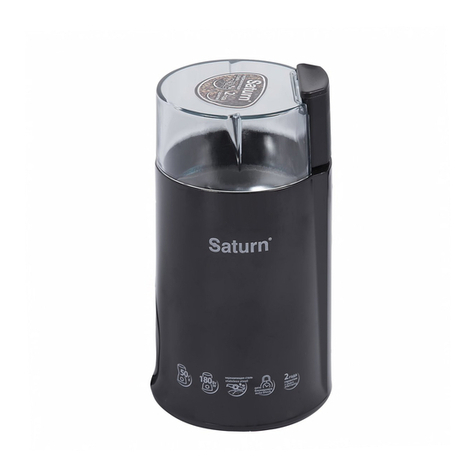
DITTING KS 3 User manual

Operating instructions
64426 A 03/35 page 1 - 14
KS 1 / KS 3
TYPE
Voltage
Manuf. no.
Your service centre ...............................................
...............................................
...............................................
...............................................
...............................................

Operating instructions
64426 A 03/35 page 2 - 14
Contents
page
1 General
1.1 Warranty information 3
1.2 Transfer declaration 4
1.3 General safety instructions 5
1.3.1 Information and safety symbols 6
2 Description and Safety Device 6
2.1 Safety devices 6
3 Setting up and Basic Adjustment
3.1 Setting up area 7
3.2 Initial Set-up 7
3.3 Installation 7
3.4 Basic Setting 7
4 Operation
4.1 Operating controls 8
5 Care / Maintenance / Adjustment
5.1 Cleaning of the coffee grinder 9
5.2 Maintenance and repair 10
5.3 Spare parts 10
5.4.1 Setting scale (adjustment) 10
5.4.2 Changing the scale setting 11
5.5 Replacing the grinding discs 12
6 Faults / action
6.1 Action in event of a fault 13
6.2 Table with possible malfunctions 13
6.3 Thermal protector 14
7 Customer service 14

Operating instructions
64426 A 03/35 page 3 - 14
1 General
Dear Customer,
We congratulate and thank you for purchasing a quality product. These operating
instructions have been prepared to simplify your use of the coffee grinder. They contain
information, advice and instructions for the best use of your unit.
1.1 Warranty information
ALTHOUGH YOUR COFFEE GRINDER IS DISTINGUISHED BY A HIGH QUALITY AND
SAFETY STANDARD, DAMAGE TO MATERIAL OR RISK OF INJURY CANNOT BE
EXCLUDED IF OPERATED INCORRECTLY, USED IMPROPERLY OR MISUSED.
THE OPERATING INSTRUCTIONS WILL THEREFORE FAMILIARISE YOU WITH
CORRECT USE OF THE COFFEE GRINDER AND ASSIST YOU TO AVOID WRONG
OPERATIONS. IF THE ENCLOSED INSTRUCTIONS ARE FOLLOWED EXACTLY, YOU
WILL AVOID DANGERS, REDUCE REPAIR AND STOPPAGE TIMES AND INCREASE
THE RELIABILITY AND SERVICE LIFE OF YOUR UNIT.
TO ENSURE THAT YOU AND YOUR EMPLOYEES TAKE NOTICE OF THE CONTENTS
OF THE OPERATING INSTRUCTIONS AND FOR YOUR OWN SAFETY, WE WOULD ASK
YOU TO COMPLETE THE TRANSFER DECLARATION PRINTED ON THE FOLLOWING
PAGE, DETACH THIS ALONG THE PERFORATION AND RETURN IT TO YOUR DEALER.

Operating instructions
64426 A 03/35 page 4 - 14
1.2 Transfer declaration
To ensure transfer of the operating instructions to final consumers
Note: The following declaration should be completed by the dealer and the purchaser. The
purchaser undertakes to return this declaration to the dealer. The purchaser thereby certifies
that the dealer has drawn his attention to the contents of operating instructions no. 64426, in
particular to the relevant safety instructions for use of the machine.
64426 A 03/35 page 4 - 14
Transfer declaration
(1) Type Machine no.
(2) Address of customer
(3) The machine specified in (1) was purchased by me. The complete operating
instructions were handed to me with transfer of the machine.
_______________________ _______________________
Signature of customer Place / date
(4) Date of transfer
(5) Address of dealer/importer
__________________________
Company stamp/signature
(6) The machine was handed to the customer in accordance with the guidelines of
the manufacturer.
Company stamp/signature if not identical with (5)
_____________________________ _______________________
Signature of customer service- Date
specialist
✂
✂✂
✂

Operating instructions
64426 A 03/35 page 5 - 14
1.3 General safety instructions
•The operating instructions must be kept permanently at the place of operation of
the machine and if possible attached at the point of installation in the immediate
vicinity of the machine.
•The competent sales and service personnel must have read the operating
instructions before putting the coffee grinder into operation and be familiar with all
functions including action in the event of a fault.
•If customers themselves operate the machine, a notice must be placed clearly
visible in the immediate vicinity of the machine that customers must immediately
call the service personnel responsible in the event of a fault and not try to eliminate
the fault themselves by tampering with the machine.
•The machine must be placed in the sales areas so that the sales personnel
responsible can be reached by the customer without difficulty.
•The model KS 1 / KS 3 was developed and built for intermittent duty only and is
therefore not suitable for continuous operation. The max. grinding time, without
interruption, is 40 minutes. After 40 minutes, the grinder must be switched off and
not be operated for approx. 30 min.
•Only original spare-parts must be used for repairs to the grinder. If spare-parts
from other manufacturers are used, the serviceability of the grinder may be
impaired. In addition, further injury to persons or material damage cannot be
excluded.
•The grinder should be installed out of reach of children. Children and users must
on no account reach into the openings or come into contact with electrical
components.
•Never reach into the hopper opening while the machine is running.
•Never touch electrical components with conducting objects, such as needles, pins,
cutlery, etc. !
•The emission value referred to the workplace is 76 dB(A).
•The machine must be electrically protected by fuses according to the nameplate
and the local regulations.

Operating instructions
64426 A 03/35 page 6 - 14
1.3.1 Information and safety symbols
Two information symbols are used in these operating instructions to emphasise important
comments in the text:
Information
This symbol indicates information containing important data concerning
efficient use. Non-observance can lead to faults.
Safety
This symbol indicates information which if not observed can lead to danger to
persons and/or substantial material damage. The safety instructions must be
followed without fail.
2 Description and Safety Devices
Main Components and Operating Elements
The main components and operating elements
are shown in the Figure.
1. Lid for hopper
2. Grinding degree setting
3. START / STOP
4. Spout with bag detector
5. Bag shaker
6. Rating / Serial no. plate
2.1 Safety Devices
Finger protector / magnet holder
A combined finger protector/magnet holder is
fitted in the hopper of the grinder. It is sup-
posed to prevent the user from reaching into
the running grinding mechanism. At the same
time, it also prevents ferrous objects
from getting into the grinding mechanism.
Every now and then you should clean the
magnet since adhering ferrous objects could
be hanging from the magnet.

Operating instructions
64426 A 03/35 page 7 - 14
3 Setting Up and Basic Adjustment
The KS 1 / KS 3 coffee grinders are suitable for grinding various kinds of coffee. The
grinding fineness can be set from "Turkish fine" to "percolator" with an adjusting knob
provided with a scale. The KS 1 / KS 3 coffee grinders are suitable for use in small food
stores, coffee shops. The simple method of operation enables customers to use the grinder
themselves in self-service stores.
A grinding test run is carried out on each grinder in the manufacturer's factory. This is why
you may find ground material residue in the grinding mechanism!
3.1 Setting-up area
Place the grinder on a level surface free from vibration.
Never operate the grinder in moist, or even worse, in wet surroundings.
3.2 Initial Set-up
Open the top lid. Clear all foreign objects and shipping materials from the hopper
compartment and the entrance to the grind chamber.
3.3 Installation
You have received your grinder in operating condition. Now you only need to connect it to a
power supply system. Proceed as follows:
Determine whether the mains voltage and frequency correspond to the information on
the rating plate.
Protect your grinder with a separate pre-fuse (not included in the scope
of supplies) according to the information provided under Item 2
"Technical data". Make sure that the pre-fuse is not overloaded by other
consuming machines (e.g. fan-forced heaters, deep freezers).
Insert the plug into the available grounded outlet.
3.4 Basic Setting
A grinding test can be conducted when the grinder is ready for
operation.
The basic setting has been set in the factory and the grinding degree is already
set to the finest grind.
For this reason please make no alterations, as this could lead to damage
of the appliance.

Operating instructions
64426 A 03/35 page 8 - 14
4 Operation
Use the KS 1 or KS 3 grinder only in accordance with the instructions listed
under 1.3.
Never place fingers or objects into the grinding gears!
Never exceed the maximum allowable operating time of 40 minutes.
Afterwards, allow the motor to cool off for around 30-40 minutes prior to
switching the grinder on again.
4.1 Operating Controls
Start/Stop Switch
START Pressing the START button initiates grinding only when a bag is in place
behind the spout. The switch will return to this position after a grind cycle has
begun and will remain in this position after grinding has ceased.
STOP pressing the STOP button stops the operation of the grinder.
Grind Selector
Allows the user to vary the grind for each bag of coffee. The grind ranges indicated on the
label allow a very precise grind control. The grinding results may very substantially for
different types and roasts of coffee.
Bag Detector
Prevents the grinder from operating unless the back of a bag is in place behind the spout.
This is also a safety device. Please do not attempt to by-pass the bag detector (not visible).
The grinder must only be installed in dry areas!
Place the coffee grinder on a firm, level and non-slip base. Danger of tipping
and slipping on unstable surfaces. Before connecting the coffee grinder to the
mains supply, ensure that this supply corresponds with the data on the unit
nameplate.

Operating instructions
64426 A 03/35 page 9 - 14
5 Care / maintenance / adjustment
5.1 Cleaning of coffee grinder
The coffee grinder must only be cleaned with a paper towel.
If necessary use suitable mild dish washer detergent.
Do not use an alkaline cleaning agent.
Do not spray coffee grinder with water and/or steam.
Reason: 1- It can result in a short-circuit and therefore damage the unit.
2- The use of alkalis can affect the flavor of the coffee.
The coffee grinder should be cleaned at least once a week and always if soiled.
Before cleaning the coffee grinder, switch off motor AND REMOVE THE
POWER CABLE FROM THE OUTLET.
Always remove the electrical plug from the outlet before conducting
cleaning or repair work on the appliance!
Observe the safety instructions under 1.3!
Avoid allowing foreign objects to fall into the grinding gears!
The use of damp cloth rinsed in any mild, non-abrasive, liquid detergent is recommended for
cleaning all surfaces and interior parts. Regular cleaning is essential to keep your grinder in
a hygienic and workable condition.
Cleaning of grinding discs and grinding chamber
Cleaning of the grinding chamber and grinding discs must only be performed
by persons familiar with the unit after carefully reading the following
instructions.
The grinding discs and grinding chamber should be cleaned at least
once a week.

Operating instructions
64426 A 03/35 page 10 - 14
5.2 Maintenance and Repair
Always pull the plug out of the socket before you perform any
maintenance or clean the grinder.
Always check the grinder regularly for damage, especially damage to the
power cord, plug, finger protector etc.
Any repairs necessary may only be performed by an authorised
specialist. Please contact an authorised service centre or your dealer.
5.3 Spare Parts
Spare parts are usually ordered from your customer service centre or your local dealer. To
ensure quick, correct processing of your order, the following information is absolutely
required:
1. Type designation and serial number of the grinder
(on the rating plate on the rear side of the grinder).
2. An exact description of the part to be replaced or the article number.
Periodic checking of the grinding quality and grinding discs must only be
performed by competent specialists and/or service personnel.
5.4.1 Setting the scale (adjustment)
Setting of the scale (with the adjusting knob) makes the fineness of the ground coffee
correspond with the fineness set on the scale (marked).
Setting of the scale must only be performed by persons familiar with the unit
after carefully reading the following instructions.
Checking the setting:
When turning the adjusting knob from scale position Turkish to French Press
there must on no account be a sound of metal parts rubbing together.
There must be no sound of grinding discs rubbing together at scale position
Turkish = excessive wear of grinding discs.

Operating instructions
64426 A 03/35 page 11 - 14
5.4.2 Changing the scale setting (adjustment
for customer settings)
The purpose of setting the scale on the rotary knob is to ensure that the fineness
of the ground coffee matches the fineness setting shown on the scale. The
machine is supplied complete with a factory setting and is ready for operation.
Alter the scale setting:
if the fineness of the coffee after grinding does not match the scale and is
therefore not as required.
if a setting for a particular grinding fineness is needed.
IMPORTANT
Only the maintenance staff should be allowed to adjust the scale settings!
Procedure
1. Place a bag under the delivery tube for the
ground coffee.
2. Switch the machine on.
3. Turn the rotary knob (1) in a clockwise
direction as far as the catch point.
4. Use the hexagonal Allen key (approx. 3
turns) to release the studs (2).
5. Turn the centre screw head (3)
- for greater grinding fineness:
clockwise
- for coarser grinding: anti-clockwise.
CAUTION
If you hear a slight sound (grinding discs in contact with each other), this
means that the gap between the grinding discs is too small and must be
increased! (Correct by turning anti-clockwise!)
6. Tighten the studs (2) once more.
Checking the setting:
When turning the adjusting knob from scale position Turkish to French Press
there must on no account be a sound of metal parts rubbing together.
There must be no sound of grinding discs rubbing together at scale position
Turkish = excessive wear of grinding discs. If there is a sound, grinding must
be set more coarsely (see 5.5).

Operating instructions
64426 A 03/35 page 12 - 14
5.5 Replacing the grinding discs
Cleaning the grinding mechanism
CAUTION
The grinding discs must not be removed until the machine is completely at
rest! Before beginning this task, switch off the main switch (if fitted), ensure
the machine cannot be switched on by accident and pull out the mains plug
from the mains socket.
1. Remove the adjustment unit (1) by
unscrewing both screws (2).
2. To push off the rotary disc flange, open
the centre screw (3).
3. Pull out the rotary disc flange (4) from
the grinder body chamber (6).
4. Remove any foreign matter that may be
present.
5. Check the grinding discs (5), the rotary
disc flange (4) and the grinder body
chamber (6) for possible damage and
replace faulty parts.
IMPORTANT
All the contact surfaces of the grinding discs (5), the rotary disc flange (4)
and the grinder body chamber (6) must be absolutely clean when
reassembled! This is the only way to ensure completely trouble-free grinding.
6. Reassemble all the parts using the same steps in reverse order.
7. After reassembly, reconnect the machine to the mains.
8. Switch the machine on briefly.
IMPORTANT
If the grinding mechanism jams or if you hear the sound of metal parts
rubbing against each other, you must reset the scale. For this, read the
chapter entitled “Setting the scale”.
Before changing grinding discs switch off motor without fail and disconnect
power cable !
The grinding discs must only be replaced by persons familiar with operation of
the machine according to the following instructions.
- Switch off motor and pull out power cable. Set adjusting knob
(2) to coarse grinding scale position percolator.

Operating instructions
64426 A 03/35 page 13 - 14
6 Faults / action
6.1 Action in event of a fault
When operated by customers, it must be ensured that personnel are notified
in the event of a fault and that customers do not try to repair the machine
themselves.
The grinder must only be opened, inspected and dismantled by persons
familiar with the method of operation of the machine, who have previously
read these operating instructions through carefully.
6.2 Table with possible malfunctions
Fault Result Action (information text) Re.
Grinder cannot be
switched on
Grinder will not shut
off
Grinder starts, but
is not dispensing
Failure of power supply
Circuit breaker
Bag detector
Start/Stop switch
Start/Stop switch
Bag detector
Hopper
Entrance to grind
chamber
Plug-in the grinder, check voltage
at the fuse
The receiving bag must be placed
correctly
Press the switch to the “Start”
position
Press Stop switch
Refer to service – Start/Stop switch
for testing procedures
Remove bag from the dispense
spout
Refer to service – Bag detector for
testing procedures
Coffee must be filled into the
hopper before grinding
Material different than coffee might
be cleared from the grinding
chamber
3.3
4.1
4.1
4.1
4.1
4.1
3
5.5
Grinder jams, motor
does not start
Unblock discharge tube
Unblock grinding unit
5.5
5.5
Irregular grinding Check grinding discs for wear and
replace if necessary
5.5
Increased amount
of dust
Check grinding discs for wear and
replace if necessary
5.5

Operating instructions
64426 A 03/35 page 14 - 14
6.3 Thermal protector
- If the grinder is overheated, the integrated thermal
protector prevents the motor from running
- Let the grinder cool off for half an hour and the coffee
grinder is again ready for operation.
7 Customer service
If it is found during maintenance that the grinding discs must be resharpened/replaced or
other repairs must be made, the nearest service centre (see page 1) should be contacted or
direct connection made with the sales offices mentioned below.
New grinding discs, spare-parts and accessories (also at intermediate times) can be ordered
from our customer service or the relevant agent.
The grinding discs can be resharpened
once or twice
Data such as manufacturing number and type of power supply as specified on the
rating/serial no. plate of the coffee grinder should be stated on orders for grinding discs,
spare-parts and accessories to ensure rapid and efficient advice and delivery.
Subject to technical modification.
Ditting Maschinen AG
Bramenstrasse 11
CH-8184 Bachenbülach
This manual suits for next models
1
Table of contents
Other DITTING Coffee Grinder manuals

DITTING
DITTING ProD User manual

DITTING
DITTING KR 805 User manual
DITTING
DITTING KE640 2.0 User guide
DITTING
DITTING 807 User manual
DITTING
DITTING KR 1203 User manual
DITTING
DITTING KF 804 User manual

DITTING
DITTING KE640 ES User manual

DITTING
DITTING KE640 VARIO User manual

DITTING
DITTING 804 Series Assembly instructions
DITTING
DITTING KF 903 User manual


