17 18
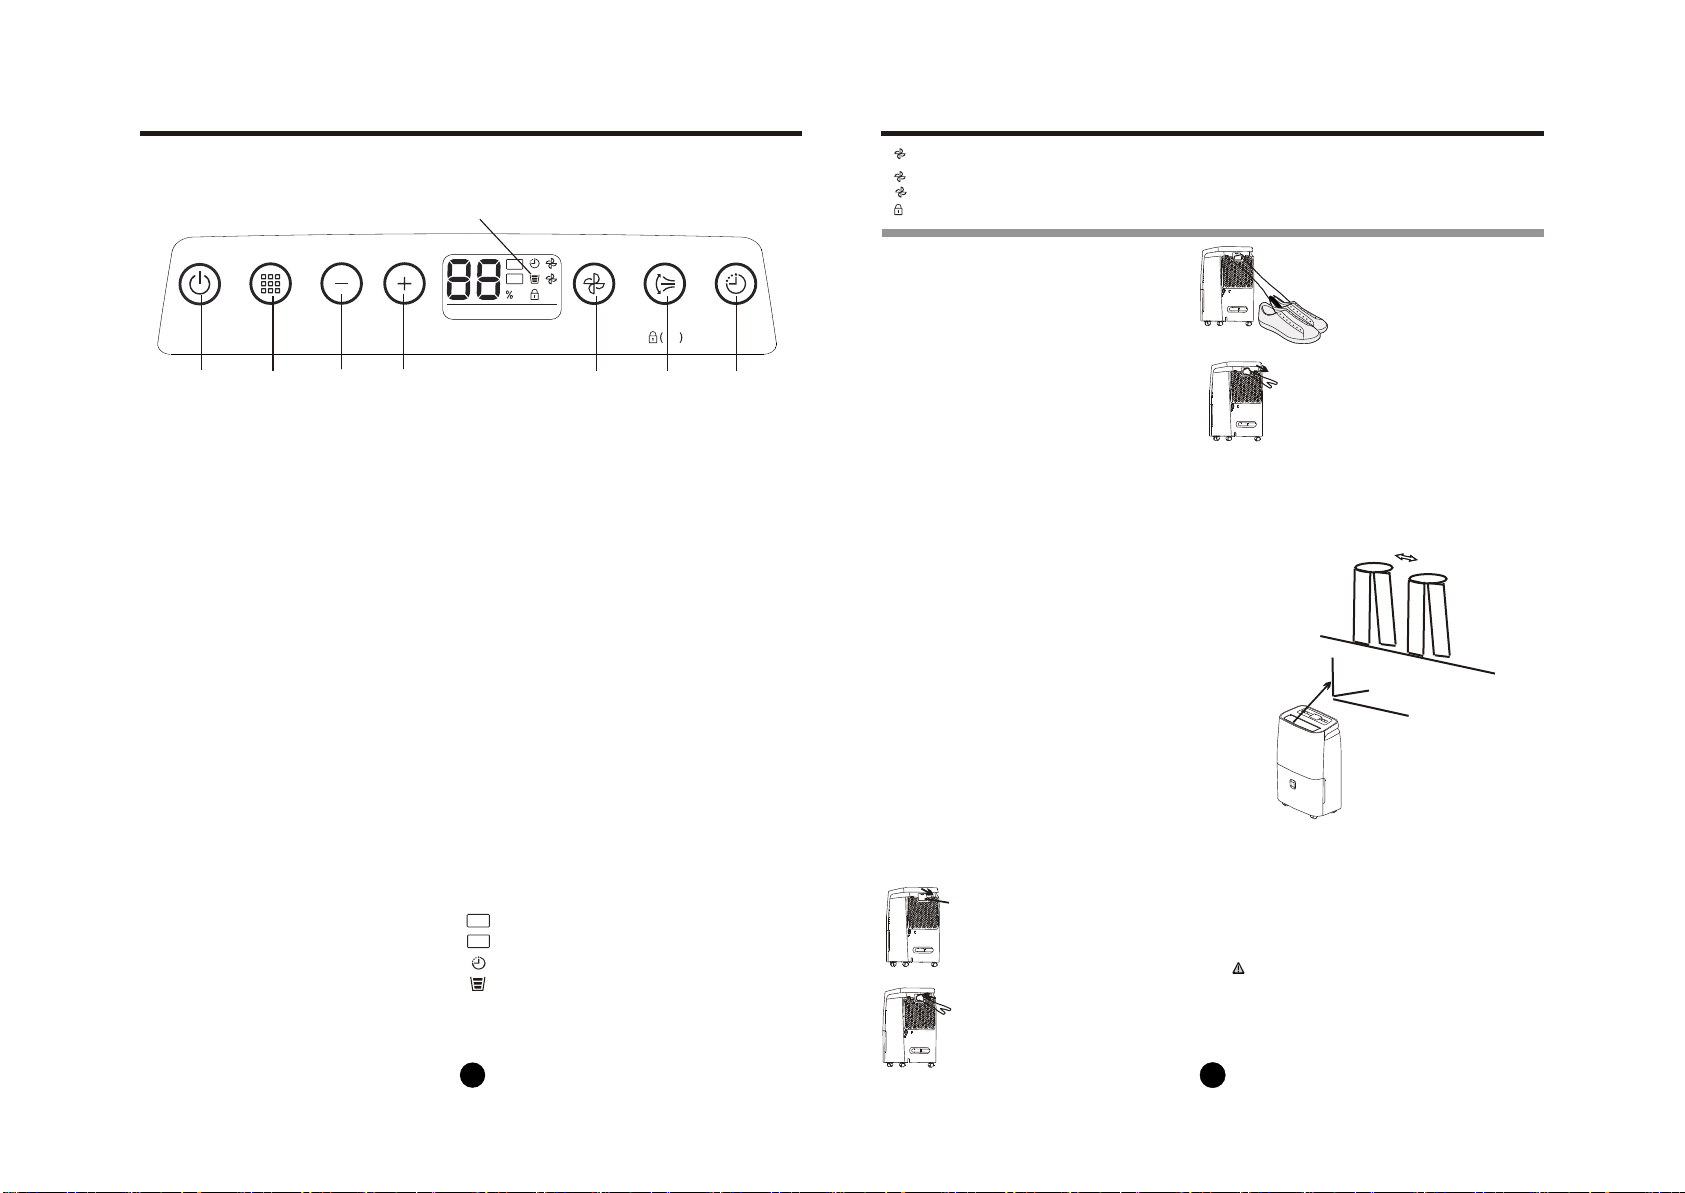
Control Pad
NOTE: The control panel of the unit you purchased may be slightly different according to the
models.
Humidity Set Control Pads
: Down/Up Pads
Other features
Full Water Light
Glows when the bucket is ready to be
emptied, or when the bucket is removed
or not replaced in the proper position.
When frost builds up on the evaporator coils, the
compressor will cycle off and the fan will continue
to run until the frost disappears.
NOTE:When Auto defrosting operation,the unit may
make a voice of refrigerant flowing,it is normal.
Auto Defrost
Wait 3 minutes before resuming operation
After the unit has stopped, it can not be restart
opertation in the first 3 minutes. This is to protect
the unit. Operation will automatically start after
3 minutes.
TIMER Pad
Auto Shut Off
The dehumidifier shuts off when the bucket is full,
or when the bucket is removed or not replaced in
the proper position.When the setting humidity is
reached, the unit will be shut off automatically.
For some models,the fan motor will continue
operating.
Auto-Restart
If the unit breaks off unexpectedly due to the power cut,
it will restart with the previous function setting automa-
tically when the power resumes.
POWER Pad
Press to turn the dehumidifier on and off.
MODE Pad
FAN Pad
SWING Pad
Control the fan speed. Press to select either High
or Low fan speed. Set the fan control to High for
maximum moisture removal. When the humidity has
been reduced and quiet operation is preferred, set
the fan control to Low.
POWER MODE SWING
FAN TIMER
3S
NOW
SET
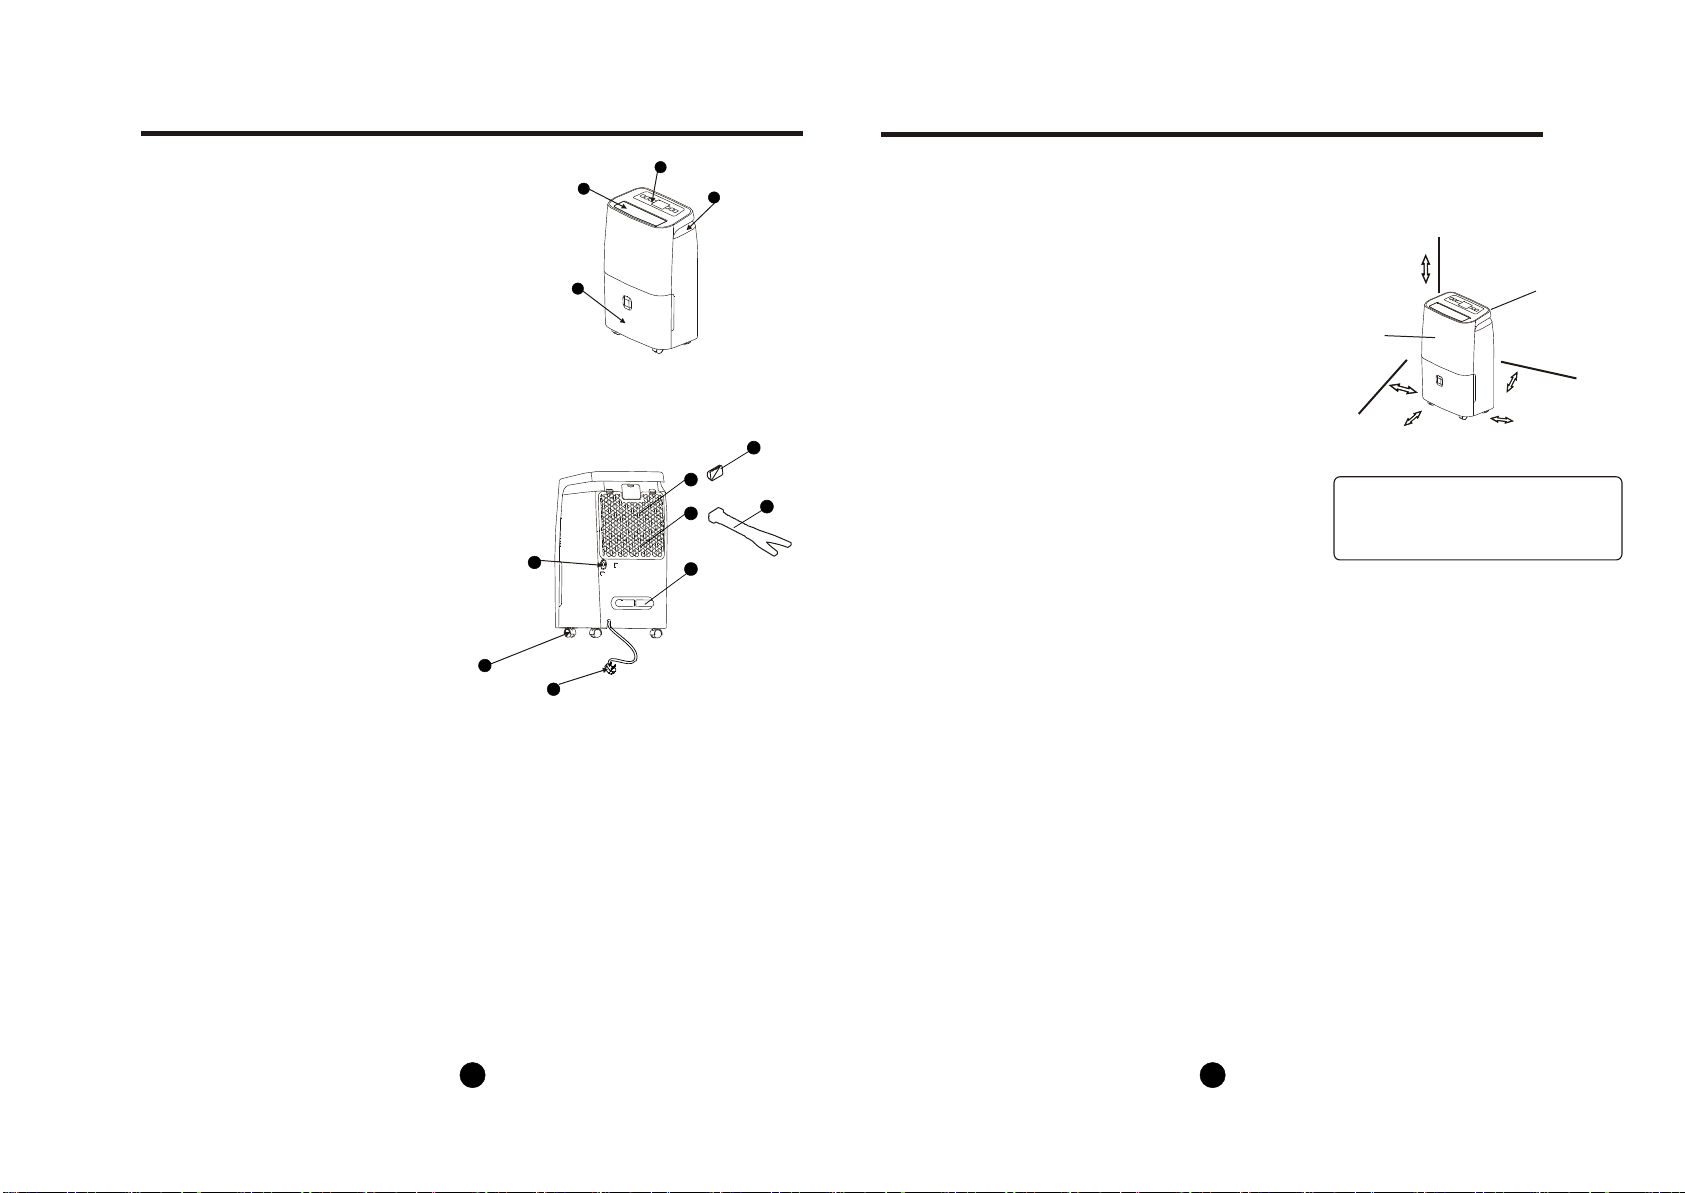
AUTO SHOES CLOTHES
NOTE: The fan speed is High speed in SHOES and
CLOTHES modes automatically.
Display
NOTE: The humdity level can not be set in SHOES
and CLOTHES modes.
NOW
SET
AUTO
SHOES
CLOTHES
AUTO mode
The unit can be set desired humidity level, fan speed
and louver swing feature.
SHOES mode
The unit can make the MAX dehumidification function
when it is under the SHOES mode. The fan speed is fixed
at high fan speed and the louver will stop swing. The unit
will quit SHOES mode after a maximum 2 hours' operation.
COLTHES mode
The unit can make the MAX dehumidification function
when it is under the CLOTHES mode. The fan speed is fixed
at high fan speed and the swing feature can be set.
30~50cm
30~50cm
Airflow
Fig.1
Wet clothes
Allow 30~50cm of distance
on the top and right side of
the unit to the wet clothes.
NOTE:
The Dryer mode must be operated in a close room,do not
open the door and window.
To make the best effective dehumidification ,please first
dehydrate the wet clothes.
Make sure to direct airflow at the wet clothes (See Fig.1 ).
For thick and heavy wet clothes may not get the best
effective dehumidification.
CAUTION
Do not cover the air outlet of the unit with clothes. It may
cause excessive heat, fire or failure of unit.
Do not place the wet clothes on the top of the unit and do
not make the water drop into the unit. It may cause
electric shock,creepage or failure of unit.
Take down the SHOES dryer cover.
Put the SHOES dryer pipe to the shoes
Install the SHOES dryer pipe to the unit.
After using, take down the SHOES dryer pipe.
1.
2.
3.
4.
The humidity level can be set within a range of
“CO” (Relative Humidity) to 70%RH(Relative
Humidity) in 5% increments.
For drier air, press the pad and set to a lower
percent value(%).
For damper air, press the pad and set a higher
percent value(%).
(8)
(1) (2) (3) (4)(5) (6) (7)
(1)
(2)
(4)
(6)
(7)
(5)
(3)
(8)
Press to select the desired operation mode from
ATUO, SHOES and CLOTHES.
NOTE: SHOES mode is optional. Shows the set % humidity level from “CO” to 70% or auto
stop time (0~8) while setting, then shows the actual
( 5% accuracy) room % humidity level in a range of
30% RH(Relative Humidity) to 90%RH(Relative Humidity).
Error Codes :
E122- Tube temperature sensor error--Unplug the unit
and plug it back in. If error repeats, call for service.
E142- Room temperature sensor and humidity sensor
error-- Unplug the unit and plug it back in. If error repeats,
call for service.
E163- Main control board fault parameters error-- Unplug
the unit and plug it back in. If error repeats, call for service.
E554- Refrigerant leakage detection-- With this new
technology, the display area will appear E554 when
the unit detects refrigerant leakage ,call for service.
- actual humidity level indicator light.
- setting humidity level indicator light.
- auto stop indicator light.
- full water indicator light.
- low fan speed indicator light. - AUTO mode indicator light.
- SHOES mode indicator light.
- CLOTHES mode indicator light.
CONTROL PADS ON THE DEHUMIDIFIER CONTROL PADS ON THE DEHUMIDIFIER
- high fan speed indicator light.
- lock feature indicator light.
When you push the button to change operation
modes, the unit will make a beep sound to indicate
that it is changing modes.
Press to initiate the auto swing feature or lock the
lorver at the desired position. Press this pad for 3
seconds to initiate the lock/unlock feature. All other
pads are inavailable under lock feature.
Press to initiate the Auto stop feature. Press the
Timer Pad to set the Auto stop time from 0 to 8 in
1 hour increments.