Dopo t708 User manual

1
User
User
User
User Manual
Manual
Manual
Manual
Model:
Model:
Model:
Model: T
T
T
T -
-
-
- 7
7
7
7 0
0
0
0 8
8
8
8
Android
Android
Android
Android 4.0
4.0
4.0
4.0

2
CONTENTS
CONTENTS
CONTENTS
CONTENTS
1.
1.
1.
1. Welcome
Welcome
Welcome
Welcome 3
3
3
3
2.
2.
2.
2. Important
Important
Important
Important notices
notices
notices
notices 3
3
3
3
3.
3.
3.
3. Keys
Keys
Keys
Keys and
and
and
and functions
functions
functions
functions 4
4
4
4
4.
4.
4.
4. Getting
Getting
Getting
Getting started
started
started
started 5
5
5
5
4.1.
4.1.
4.1.
4.1. Connect
Connect
Connect
Connect to
to
to
to your
your
your
your computer
computer
computer
computer 5
5
5
5
4.2.
4.2.
4.2.
4.2. Turn
Turn
Turn
Turn on
on
on
on /
/
/
/ off
off
off
off 5
5
5
5
4.2.1.Turn
4.2.1.Turn
4.2.1.Turn
4.2.1.Turn on
on
on
on 5
5
5
5
4.2.2.
4.2.2.
4.2.2.
4.2.2. Turn
Turn
Turn
Turn off
off
off
off
4.3.
4.3.
4.3.
4.3. Lock
Lock
Lock
Lock /
/
/
/ unlock
unlock
unlock
unlock the
the
the
the screen
screen
screen
screen (sleep
(sleep
(sleep
(sleep mode)
mode)
mode)
mode) 5
5
5
5
5.
5.
5.
5. Your
Your
Your
Your homescreen
homescreen
homescreen
homescreen 6
6
6
6
5.1.
5.1.
5.1.
5.1. Change
Change
Change
Change wallpaper
wallpaper
wallpaper
wallpaper for
for
for
for homescreen
homescreen
homescreen
homescreen 7
7
7
7
5.2.
5.2.
5.2.
5.2. Add
Add
Add
Add /
/
/
/ delete
delete
delete
delete applications
applications
applications
applications from
from
from
from the
the
the
the homescreen
homescreen
homescreen
homescreen 7
7
7
7
5.3.
5.3.
5.3.
5.3. Add
Add
Add
Add widgets
widgets
widgets
widgets from
from
from
from the
the
the
the homescherm
homescherm
homescherm
homescherm 7
7
7
7
6.
6.
6.
6. Network
Network
Network
Network connection
connection
connection
connection 7
7
7
7
6.1.
6.1.
6.1.
6.1. Wi-fi
Wi-fi
Wi-fi
Wi-fi 7
7
7
7
6.1.1.
6.1.1.
6.1.1.
6.1.1. Turn
Turn
Turn
Turn on
on
on
on Wi-fi
Wi-fi
Wi-fi
Wi-fi 8
8
8
8
6.1.2.
6.1.2.
6.1.2.
6.1.2. Turn
Turn
Turn
Turn off
off
off
off Wi-fi
Wi-fi
Wi-fi
Wi-fi 8
8
8
8
6.1.3.
6.1.3.
6.1.3.
6.1.3. Add
Add
Add
Add a
a
a
a Wi-fi
Wi-fi
Wi-fi
Wi-fi network
network
network
network manually
manually
manually
manually 8
8
8
8
6.2.
6.2.
6.2.
6.2. 3G-netwerk
3G-netwerk
3G-netwerk
3G-netwerk 8
8
8
8
7.
7.
7.
7. Internet
Internet
Internet
Internet Browsing
Browsing
Browsing
Browsing 8
8
8
8
8.
8.
8.
8. Install
Install
Install
Install and
and
and
and manage
manage
manage
manage Apps
Apps
Apps
Apps 10
10
10
10
8.1.
8.1.
8.1.
8.1. Install
Install
Install
Install Apps
Apps
Apps
Apps 10
10
10
10
8.2.
8.2.
8.2.
8.2. Manage
Manage
Manage
Manage Apps
Apps
Apps
Apps 10
10
10
10
8.3.
8.3.
8.3.
8.3. Market
Market
Market
Market 11
11
11
11
9.
9.
9.
9. Multi-media
Multi-media
Multi-media
Multi-media Functions
Functions
Functions
Functions 11
11
11
11
9.1.
9.1.
9.1.
9.1. Music
Music
Music
Music 11
11
11
11
9.2.
9.2.
9.2.
9.2. Video
Video
Video
Video 12
12
12
12
9.2.1.
9.2.1.
9.2.1.
9.2.1. Video
Video
Video
Video Player
Player
Player
Player 12
12
12
12
9.2.2.
9.2.2.
9.2.2.
9.2.2. HDMI
HDMI
HDMI
HDMI Output
Output
Output
Output 12
12
12
12
9.3.
9.3.
9.3.
9.3. Gallery
Gallery
Gallery
Gallery 13
13
13
13
9.4.
9.4.
9.4.
9.4. Camera
Camera
Camera
Camera 13
13
13
13
9.5.
9.5.
9.5.
9.5. E-book
E-book
E-book
E-book reader
reader
reader
reader 14
14
14
14
9.6.
9.6.
9.6.
9.6. E-mail
E-mail
E-mail
E-mail 15
15
15
15
1
1
1
1 0
0
0
0 .
.
.
. Settings
Settings
Settings
Settings 20
20
20
20
10.1.
10.1.
10.1.
10.1. Wireless
Wireless
Wireless
Wireless and
and
and
and networks
networks
networks
networks 20
20
20
20
10.2.
10.2.
10.2.
10.2. Device
Device
Device
Device 20
20
20
20
10.3.
10.3.
10.3.
10.3. Personal
Personal
Personal
Personal 20
20
20
20
10.4.
10.4.
10.4.
10.4. System
System
System
System 20
20
20
20
11.
11.
11.
11. Explorer
Explorer
Explorer
Explorer 21
21
21
21
12.
12.
12.
12. Battery
Battery
Battery
Battery 22
22
22
22
13.
13.
13.
13. Troubleshooting
Troubleshooting
Troubleshooting
Troubleshooting 23
23
23
23

3
1.
1.
1.
1.
WELCOME
WELCOME
WELCOME
WELCOME
Thank you for purchasing th e DOPO tablet.
This tablet offers total convenience for your business (supports Word, Excel, send & receive e-mails...) and
personal entertainment needs (chatting, movie playback, e-books etc.).
Running on Android
Android
Android
Android 4.0
4.0
4.0
4.0 and with a highly responsive capacitive touch screen, it will bring you a wonderful user
experience.
Before you begin, please read this User Manual carefully.
2.
2.
2.
2. IMPORTANT
IMPORTANT
IMPORTANT
IMPORTANT NOTICES
NOTICES
NOTICES
NOTICES
•
Your tablet's battery will reach optimum performance after you have fully charged and discharged the tablet 2-3
times.
•Excessive use of earphones at high volumes may cause hearing impairment.
•
Adjust the volume of the player to a moderate level and limit earphone usage.
•Do not suddenly disconnect the tablet when formatting or uploading and downloading, this can lead to program
errors.
•Do not dismantle the tablet by yourself, and do not use alcohol, thinner or benzene to clean its surface.
•Do not use the tablet while driving or walking.
•The tablet is not moisture/water-resistant. Please do not use it in a damp environment.
•Do not drop the tablet or slam it down on a hard surface as this may damage the screen .
.
.
.

4
3.
3.
3.
3. KEYS
KEYS
KEYS
KEYS AND
AND
AND
AND FUNCTIONS
FUNCTIONS
FUNCTIONS
FUNCTIONS
Front
Front
Front
Front view
view
view
view Side
Side
Side
Side view
view
view
view Backside
Backside
Backside
Backside view
view
view
view
1. Vol + key Press to increase the volume
2. Vol - key Press to decrease the volume
3. Power and lock key Key to switch the tablet on or off
4. ESC key
Tap to return to the previous screen/page. If the keyboard is in use, close the
keyboard.
5. Home key Tap to return the home menu.
6. Menu key
Tap to view the option menu.. Note: When you tap the Menu key from within an
application, you will see the sub- menu for the application.
7. Camera 0.3M camera
8 . Earphone jack To connect your earphone
9 . TF card slot To insert an TF card
10. HDMI
1080P HMDI output
1 1 . Reset hole
Press to reset the tablet. Insert a paper clip or other small object with a narrow tip into
this reset hole.
12. Mini USB port
Connect to a computer via a USB cable to transfer data (e.g. music, videos, photos
and other files).
1 3 . Power jack(DC input) Connect to a 5V output adapter
14. Speaker Speaker

5
4.
4.
4.
4. GETTING
GETTING
GETTING
GETTING STARTED
STARTED
STARTED
STARTED
4.1.
4.1.
4.1.
4.1. Connect
Connect
Connect
Connect to
to
to
to computer
computer
computer
computer
Connect your tablet to your computer with the supplied USB cable to transfer media files when you are running
Windows 7 or Vista.
For Windows XP, please install Windows Media Player 11 before you transfer media files.
Earlier versions of Windows require the MTP Porting Kit.
For Mac please refer to: www.android.com/filetransfer .
4.2
4.2
4.2
4.2 Turn
Turn
Turn
Turn On
On
On
On /
/
/
/ Off
Off
Off
Off
4.2.1.
4.2.1.
4.2.1.
4.2.1. Turn
Turn
Turn
Turn on
on
on
on
To start your tablet, press and hold the power key at the right side of your tablet for about 5 seconds.
After your tablet has booted click and hold the lock and do the following:
Drag the lock on the open lock icon: you will go to the home screen.
Drag the lock on the camera icon: you will go directly to the camera app.
4.2.2.
4.2.2.
4.2.2.
4.2.2. Turn
Turn
Turn
Turn off
off
off
off
To turn off your tablet, press and hold the power button until the “ Would you like to shut down? ” dialog appears
and tap “ OK ” to turn it off.
4.3.
4.3.
4.3.
4.3. Lock/unlock
Lock/unlock
Lock/unlock
Lock/unlock the
the
the
the screen
screen
screen
screen (sleep
(sleep
(sleep
(sleep mode)
mode)
mode)
mode)
To save the battery, place your tablet in sleep mode by turning off the LCD display. To do this, shortly press the
power key. Press it again to wake up the screen.
After you have turned on the screen click and hold the lock and do the following: Drag the
lock on the open lock icon: you will go to the home screen.
Drag the lock on the camera icon: you will directly go to the camera app.

6
5.
5.
5.
5. YOUR
YOUR
YOUR
YOUR HOME
HOME
HOME
HOME SCREEN
SCREEN
SCREEN
SCREEN
a
a
a
a b
b
b
b c
c
c
c
d
d
d
d e
e
e
e f
f
f
f g
g
g
g h
h
h
h I
I
I
I j
j
j
j
a. Google search Tap to enter a Google search
b. Voice search Tap to start a voice search
c. Apps Launcher Tap to view all the applications installed
d. ESC key Tap to return to the previous screen/page
e. Home Tap to return to your home page
f. Recent
Tap to view your most recently opened apps
g. Connect to PC When connected to a PC, this icon will appear.
h. System time Displays the current system time
i. Wi-Fi Wi-Fi-signal when your tablet is connected to a Wi-Fi network
j. Battery status Displays the battery status

7
Click once on the time on the home screen to open the status screen and view the Wi-Fi, battery status and the
current time and date.
If you click again on the time in the status screen a menu will appear enabling a quick way of adjusting the settings of
your tablet.
5.1.
5.1.
5.1.
5.1. Change
Change
Change
Change wallpaper
wallpaper
wallpaper
wallpaper for
for
for
for home
home
home
home screen:
screen:
screen:
screen:
Tap and hold your finger in an empty space on the home screen, you will then see a pop-up screen; you can
choose to select a wallpaper from the Gallery or a pre installed Wallpaper or Live Wallpaper.
5.2.
5.2.
5.2.
5.2. Add/delete
Add/delete
Add/delete
Add/delete applications
applications
applications
applications from
from
from
from the
the
the
the home
home
home
home screen:
screen:
screen:
screen:
You can add frequently used apps on the home page and delete undesired apps. Tap the app launcher in the top
right corner to go to the apps panel, then tap and hold the app you want to add to the home screen. To delete an app
from the home screen, tap and hold it, and then drag the app to the remove icon . The app icon will then
turn red, release the icon to delete it.
5.3.
5.3.
5.3.
5.3. Add
Add
Add
Add widgets
widgets
widgets
widgets to
to
to
to home
home
home
home screen
screen
screen
screen
Tap the Apps launcher and then select Widgets on the top of the screen. Here you will find widgets like an analog
clock, bookmarks, calendar, Email, and many more. Tap and hold the widget you want and drag it to the home
screen.
Tips: Besides your home screen, you can access four other panels by sliding left or right on your home
screen. You can also customize these panels.
6.
6.
6.
6. NETWORK
NETWORK
NETWORK
NETWORK CONNECTION
CONNECTION
CONNECTION
CONNECTION
6.1.
6.1.
6.1.
6.1. Wi-Fi
Wi-Fi
Wi-Fi
Wi-Fi
Wi-Fi can only be used when you are within a range of networks you know or when you are at a free unsecured
Wi-Fi hotpot. Under “ Wireless & networks ” , tap “ Wi-Fi ” to turn it on. After a moment, your Wi-Fi networks list
should populate. If you need to rescan for available networks, tap "Scan".

8
6.1.1.
6.1.1.
6.1.1.
6.1.1. Turn
Turn
Turn
Turn on
on
on
on Wi-Fi
Wi-Fi
Wi-Fi
Wi-Fi
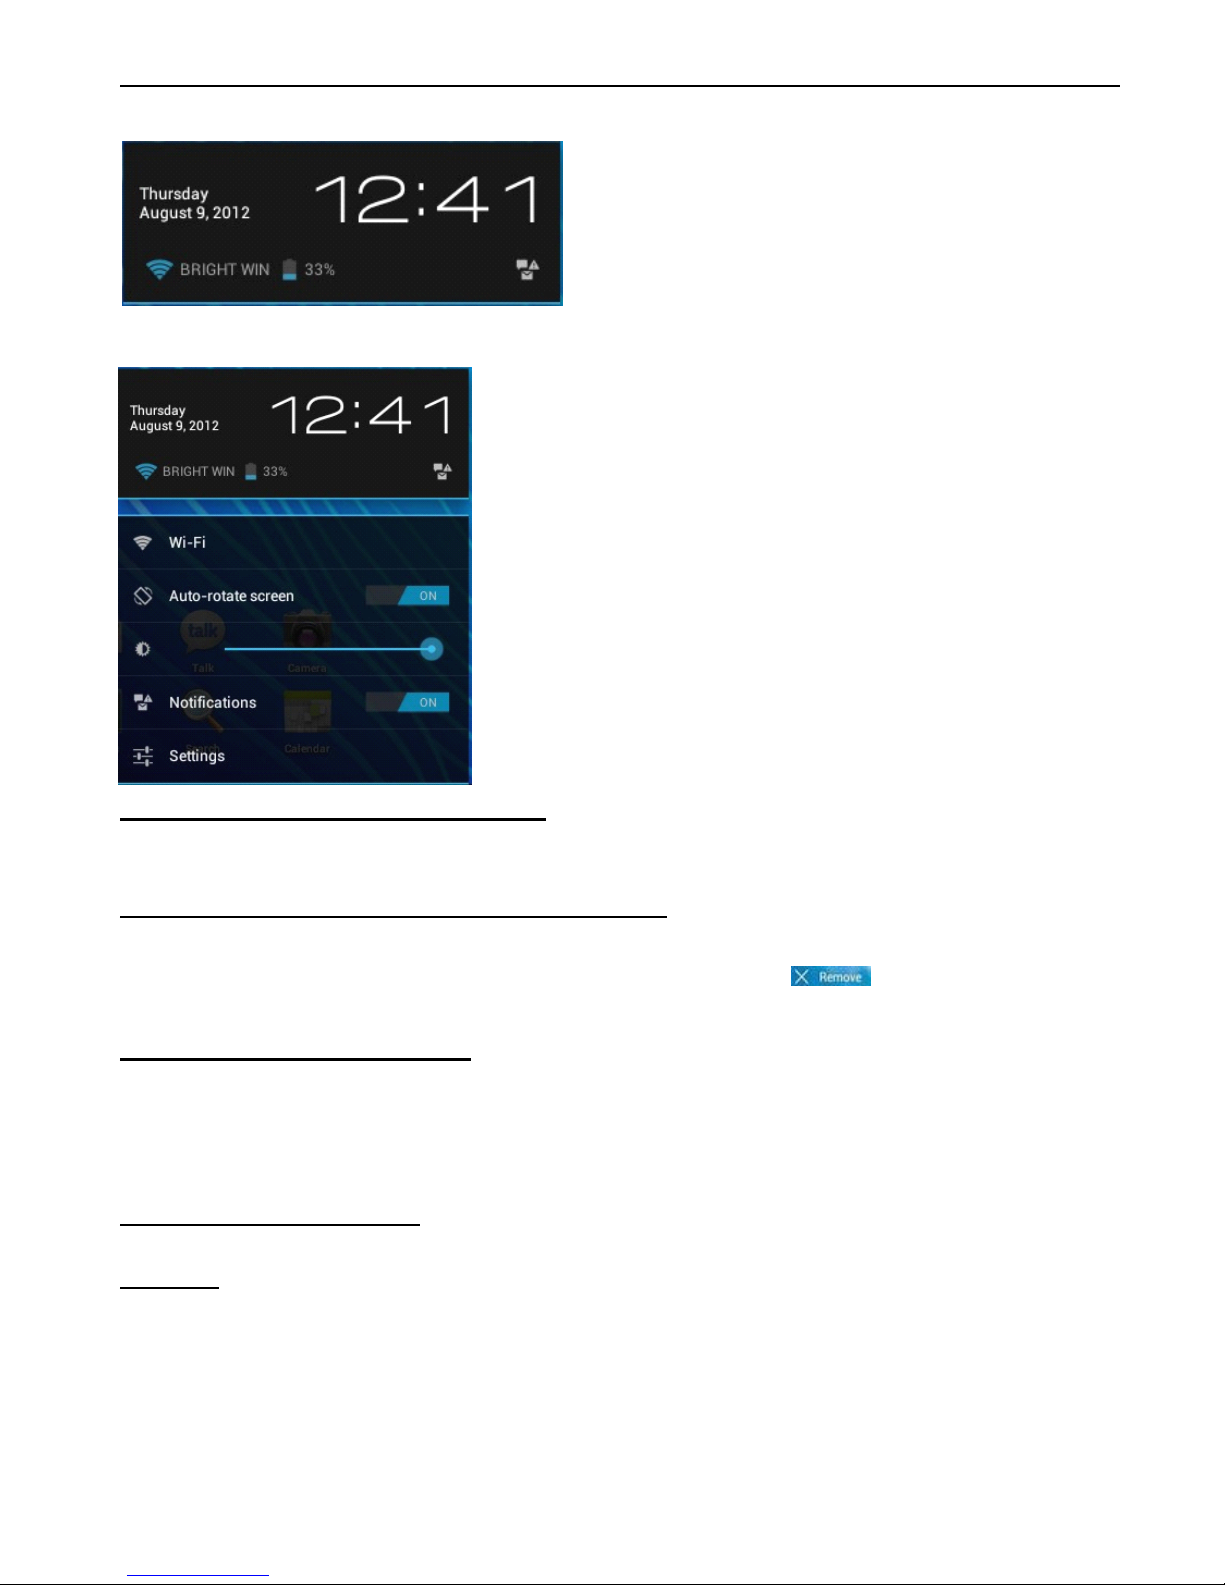
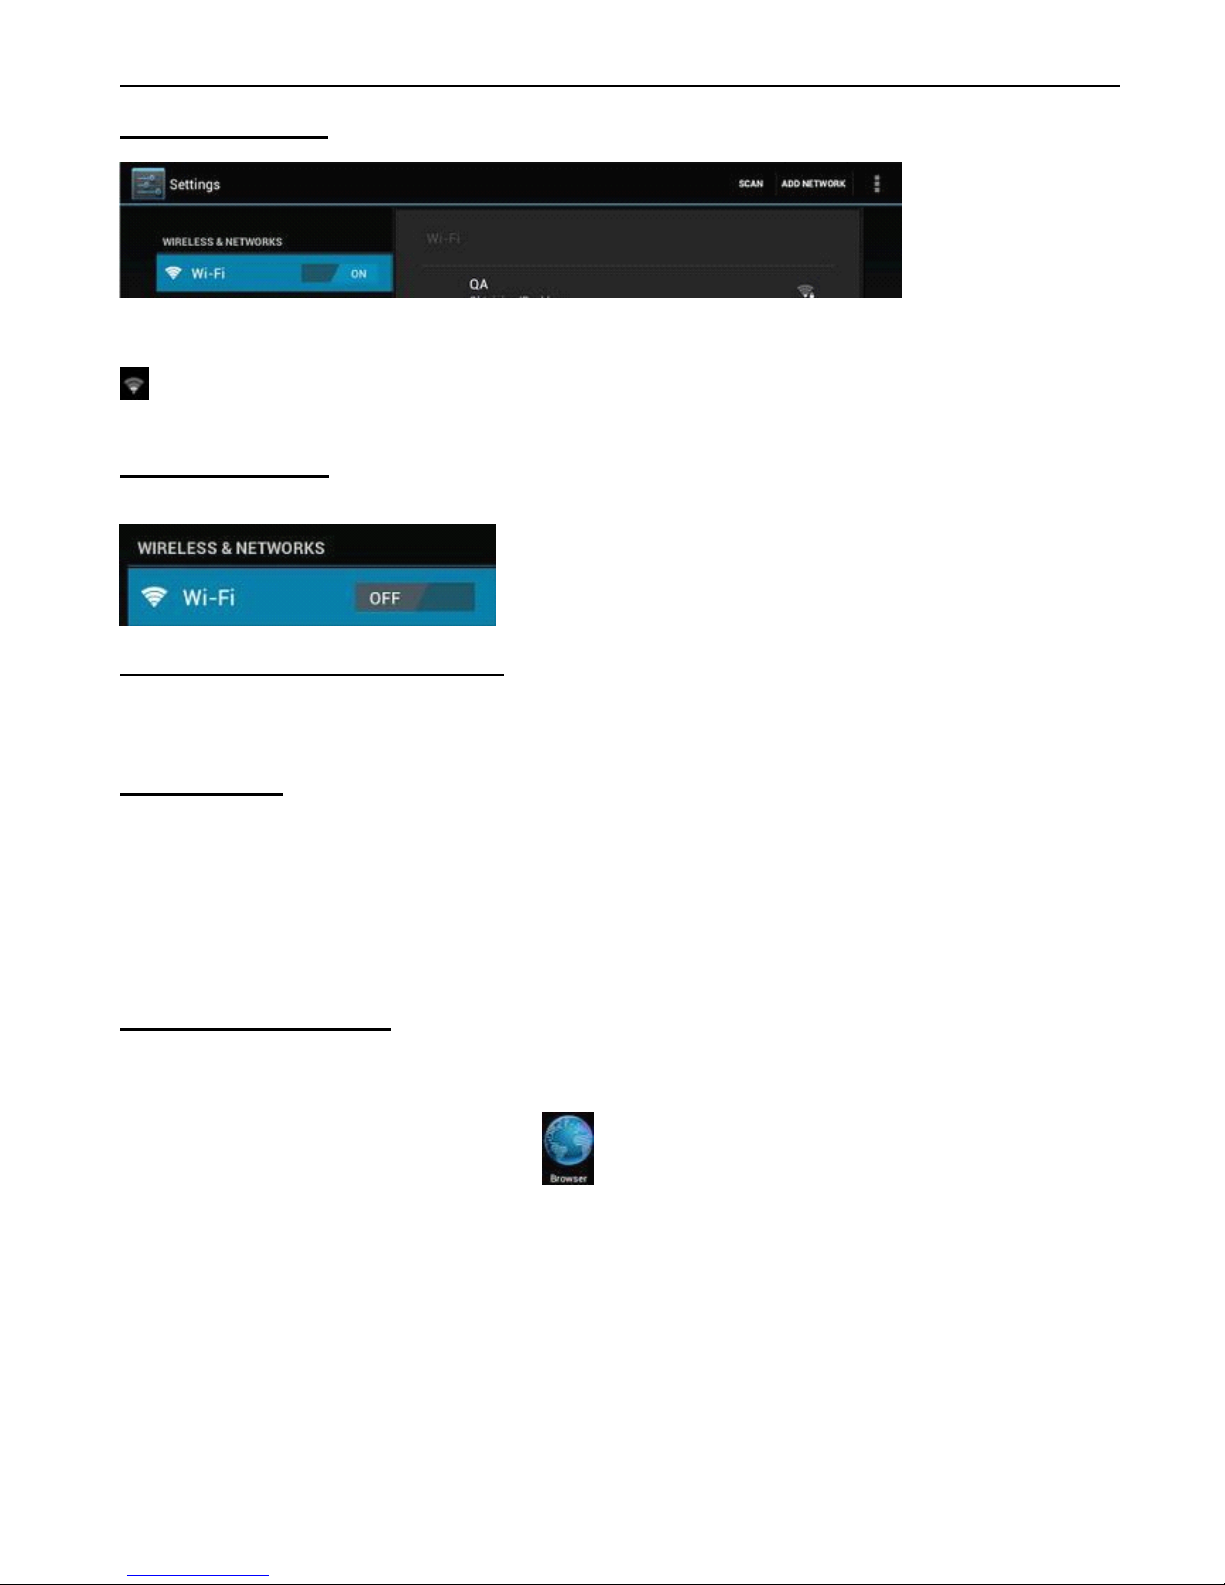
Within the App Panel, tap “ Settings ” , “ Wireless & networks ” and then “ Wi-Fi ” to turn it on.
Your tablet will list all the networks it finds within range. Tap a network to connect. If necessary, enter the Wireless
password, and tap “ Connect ” . When your tablet is connected to the network, the wireless indicator
appears in the status bar. The number of grey/blue waves indicates the connection strength of the wireless
network.
6.1.2.
6.1.2.
6.1.2.
6.1.2. Turn
Turn
Turn
Turn off
off
off
off Wi-Fi
Wi-Fi
Wi-Fi
Wi-Fi
Turn off Wi-Fi when you are not using it to save the battery. To turn off Wi-Fi, tap Wi-Fi again.
6.1.3.
6.1.3.
6.1.3.
6.1.3. Add
Add
Add
Add a
a
a
a Wi-Fi
Wi-Fi
Wi-Fi
Wi-Fi network
network
network
network manually
manually
manually
manually
You can also manually add a Wi-Fi network under “ Wi-Fi settings ” . In “ Wi-Fi settings ” , tap “ Add network ” .
Enter the SSID (name) of the network. If necessary, enter security or other network configuration details. Touch
Save.
6.2
6.2
6.2
6.2 3G
3G
3G
3G Network
Network
Network
Network
A 3G network is a mobile network that allows high-speed data access and advanced network capacity. It features a
wider range of services and advanced network capacity over the previous 2G network.
Your tablet supports external 3G network by a 3G dongle. 3G dongles are connected via the USB HOST port. Note:
Note:
Note:
Note:
some models support an optional 3G network. If you have purchased a tablet with a SIM card slot, you can access the
Internet via your 3G SIM card when a Wi-Fi network is not available. Please insert your 3G card into the SIM card slot
of the tablet, and the tablet will obtain 3G signal automatically. If you've purchased a tablet without a SIM card slot,
you can also access Internet with a USB 3G dongle.
7.
7.
7.
7. INTERNET
INTERNET
INTERNET
INTERNET BROWSING
BROWSING
BROWSING
BROWSING
Before using the browser, make sure you have set up an Internet connection on your tablet. Go to the
“ Settings ” app and under “ Wireless and networks ” connect to a Wi-Fi network.
To browse the Internet, open the browser app in the applications overview.
Tap the address bar to bring up the Android keyboard for entry of keywords or a web address (a URL). Hold
down the text field to edit text or change an input method.

9
The browser will display the following buttons by default:
Bookmarks:
Bookmarks:
Bookmarks:
Bookmarks: Open and manage bookmarks
Menu:
Menu:
Menu:
Menu: Here you will find the other Browser options (including “ Settings ” )
New
New
New
New tab
tab
tab
tab sheet:
sheet:
sheet:
sheet: Open a new tab sheet
Refresh:
Refresh:
Refresh:
Refresh: Refresh the page
Search:
Search:
Search:
Search: Search in Google
Set
Set
Set
Set bookmark:
bookmark:
bookmark:
bookmark: Create a new bookmark for the page that you are currently viewing
Next
Next
Next
Next page:
page:
page:
page: Continue to the next page
Previous
Previous
Previous
Previous page:
page:
page:
page: Return to the previous page
Press the Menu button to select the other options including:
New
New
New
New tab
tab
tab
tab sheet:
sheet:
sheet:
sheet: Open a new tab sheet
New
New
New
New incognito
incognito
incognito
incognito tab
tab
tab
tab sheet:
sheet:
sheet:
sheet: Open a tab sheet that does not save entries
Page
Page
Page
Page sharing:
sharing:
sharing:
sharing: Share the Internet page with your contacts
Settings:
Settings:
Settings:
Settings: Adjust all browser settings
Request
Request
Request
Request desktop
desktop
desktop
desktop version:
version:
version:
version: View desktop version instead of the mobile website
Refresh:
Refresh:
Refresh:
Refresh: Refresh the current page

10
8.
8.
8.
8. INSTALL
INSTALL
INSTALL
INSTALL AND
AND
AND
AND MANAGE
MANAGE
MANAGE
MANAGE APPS
APPS
APPS
APPS
8.1.
8.1.
8.1.
8.1. Install
Install
Install
Install Apps
Apps
Apps
Apps
The ApkInstaller allows you to install an .apk file from the internal memory or an SD card. The
ApkInstaller can be found in the applications overview.
Select "Install" to install a program.
After you have selected this option, select the medium on which the .apk file is stored: the Internal Memory or an SD
card (TF card). Open the .apk file and follow the steps on the screen to install the application.
Note:
Note:
Note:
Note: Make sure the .apk file is workable on android 4.0, and the suffix is .apk. e.g. “ angrybirds.apk ” .
In some cases, there may be no icon in the App Panel after an .apk file has been installed. Possible reasons may be
that this app is not compatible with your OS or the downloaded .apk file is a broken one so you may need to
download a working version.
8.2.
8.2.
8.2.
8.2. Manage
Manage
Manage
Manage Apps
Apps
Apps
Apps
The ApkInstaller allows you to manage all the programs installed. The
ApkInstaller can be found in the application overview.
Select “ Manage ” to launch, export or uninstall an app.
After you have selected this option, you will receive an overview of all the applications installed on your tablet.
Click on an app to launch, export or uninstall it. Exported applications are always stored in the internal memory.
This tablet can read files directly from an SD Card or USB stick. To use a memory card, place it in the card slot at the
side of the device. Make sure the card is inserted correctly! Push the card all the way in until it clicks. To remove the
card, push it slightly inward until it is released. To use a USB stick, insert the stick in the USB port. In both cases go to
Explorer in the application overview to gain access to the files stored on the SD card or the USB stick.
You can also go to “ Apps ” under “ Settings ” to manage apps.

11
8.3
8.3
8.3
8.3 Market
Market
Market
Market
The Market app allows you to download and install all the available apps for your tablet.
To use the Market app open the “ Settings ” application, go to “ Apps ” and click on “ Show Google Apps in Launcher ” .
You will now find the Market in the Apps Launcher.
If you wish to use the Android Market, you must use your current Google Account or register a new
account.
The Market app has the following options:
Search:
Search:
Search:
Search: search for available apps for your tablet
My
My
My
My apps:
apps:
apps:
apps: manage and update all the apps on your tablet
Menu:
Menu:
Menu:
Menu: contains all other options of the application
9.
9.
9.
9. MULTI-MEDIA
MULTI-MEDIA
MULTI-MEDIA
MULTI-MEDIA FUNCTIONS
FUNCTIONS
FUNCTIONS
FUNCTIONS
9.1
9.1
9.1
9.1 Music
Music
Music
Music
After loading music on your tablet, tap the music icon to open the music player. You can select to sort your
music by Artist, Album, Song or stored Playlist. Tap to select. The media player allows you to shuffle, skip, or pause
your current selection and even displays the album artwork when available.
Tap at the bottom of the screen to open a submenu on the music page.

12
9.2.
9.2.
9.2.
9.2. Video
Video
Video
Video
9.2.1.
9.2.1.
9.2.1.
9.2.1. Video
Video
Video
Video Player
Player
Player
Player
You can play videos stored on your tablet or SD card. To play, tap the Video icon to launch the video player:
Tap the video you would like to play. To playback, fast forward or pause your video tap the screen to display the
toolbar. You can also add bookmarks, adjust the brightness, or set the screen ratio. Below is an example of the
toolbar:
9.2.2.
9.2.2.
9.2.2.
9.2.2. HDMI
HDMI
HDMI
HDMI Output
Output
Output
Output
Connect the tablet to your TV via an HDMI cable and wait a few seconds for your TV set to receive the display
signal. Adjust your TV settings if necessary. An HDMI cable is not included as an accessory.
The HDMI port is a single-ended output. The screen of the tablet goes dark when connected to the TV. To carry
out operations on the tablet, please use a USB mouse.

13
9.3.
9.3.
9.3.
9.3. Gallery
Gallery
Gallery
Gallery
You can view and edit your digital pictures on the tablet ’ s full color, high-resolution display.
After placing images on your tablet, tap Gallery to display your pictures:
Tab the picture you want to display and slide right or left to show the next or previous picture. Tap the
Menu icon to edit, rotate, crop, or set the image as a wallpaper.
9.4.
9.4.
9.4.
9.4. Camera
Camera
Camera
Camera
Tap the icon to open the camera app.
You can take a photo, or record a video with the front camera.
Note:
Note:
Note:
Note: After turning on your tablet, you can go to the camera directly by dragging the lock icon onto the camera.

14
9.5.
9.5.
9.5.
9.5. E-book
E-book
E-book
E-book reader
reader
reader
reader
The tablet supports many e-book formats like PDF, Text, E-Pub, FB2.
Tap the “ e-book ” icon to open the e-bookshelves. Tap an e-book to open the book and read.
You can go to the next or previous page by sliding your finger right or left.
Tap on the Menu button to check the sub-menus. You can change the font size, Go To Page, check your
bookmarks, set the auto flip time, etc.

15
9.6
9.6
9.6
9.6 E-mail
E-mail
E-mail
E-mail
To use email on your tablet, use the E-Mail application in the App Launcher.
If you want to use Gmail, instead of using the E-mail app use the GMail application which is specially
designed for GMail, Google mail.
To set up an email account on your tablet, you will need the incoming and outgoing server settings of your email
account for the configuration.
Open the E-mail application, which will display the screen below. Enter your email address and
password and select “ Volgende ” (Next).
You will then be asked to select your email account type. After you have clicked on the appropriate type you will
proceed to the next step.

16
Depending on the type of account, details of the incoming server settings will be requested; enter all the details of
the incoming server settings for your email account.
The E-mail app will automatically enter the most common default settings however they should be checked for
correctness.
After entering the settings, click on “ Volgende ” .
If the settings are correct, you will proceed to the next step. If this is not the case, the tablet will indicate which
details have not been correctly entered.
Next, enter the outgoing server settings and then select “ Volgende ” .
The E-mail app will automatically enter the most common default settings however they should be checked for
correctness.
If the settings are correct, you will proceed to the next step. If this is not the case, the tablet will indicate which
details have not been correctly entered.

17
After the incoming and outgoing mail server settings have been correctly entered, the tablet will ask which mail
account data requires to be synchronized and the interval for downloading emails.
Finally, you will be asked under which name the account should be added and which sender address should be
displayed on emails sent by you .
.
.
.

18
After entering the required information, mail from your account will be downloaded onto the tablet and will appear on
the screen within a few minutes.

19
10.
10.
10.
10. SETTINGS
SETTINGS
SETTINGS
SETTINGS
Tap the “ Settings ” icon in the app launcher to go to the settings menu.
In the “ Settings ” menu you will find the following categories and subcategories:
10.1.
10.1.
10.1.
10.1. Wireless
Wireless
Wireless
Wireless and
and
and
and networks:
networks:
networks:
networks:
Wi-Fi: Connect to or manage your wireless networks
Data usage: View and limit the data usage of a mobile (3G) connection
10.2.
10.2.
10.2.
10.2. Device:
Device:
Device:
Device:
Sound: Set volume levels and turn sounds on/off.
Display: Set all display options including brightness and sleep mode.
Storage space: Display storage space of internal memory, SD card and USB stick.
Battery: Battery ’ s charge percentage and total standby time.
Apps: Manage all your applications.
10.3.
10.3.
10.3.
10.3. Personal:
Personal:
Personal:
Personal:
Accounts and synchronization: Manage accounts and set account synchronization options. Location
services: Manage the use of your location used by applications.
Security: Set screen security and manage other security settings.
Language & input: Adjust language and keyboard settings.
Back-up & reset: Make a back-up of your data to the Google servers and restore the tablet back to factory settings.
10.4.
10.4.
10.4.
10.4. System:
System:
System:
System:
Date and time: Set date and time including time zone and date notation. Accessibility:
Enable/disable automatic screen rotation and other accessibility options.
About tablet: Information about the tablet including IP/MAC address and Android version.

20
11.
11.
11.
11. EXPLORER
EXPLORER
EXPLORER
EXPLORER
In Explorer , you can manage all your files. You can copy, delete, paste, or rename your files in your Micro
SD Card, Internal Memory and USB disk.
For example, to copy files from "Internal Memory" to Micro "SD Card":
1. Open "Explorer", you will see the above interface
2. Tap "Internal Memory" to see all the files that are on your tablet
3. Tap "Multi" icon and then select all the files you want to edit
4. Tap "Editor" icon, you will see a pop-up menu, select "copy"
5. Tap the"Home" icon in the top left corner to return to the main interface, select "SD card", then tap the
"Editor" icon, you will see a pop-up menu, select "Paste".
After these steps the files are copied from your tablet to your Micro SD card.
Other manuals for t708
1
This manual suits for next models
1
Table of contents
Other Dopo Tablet manuals

Dopo
Dopo Internet Tablet T711 User manual

Dopo
Dopo D7015 User manual

Dopo
Dopo Internet Tablet MD-740 User manual

Dopo
Dopo EM63 User manual

Dopo
Dopo GS918 User manual

Dopo
Dopo D7020 User manual

Dopo
Dopo D9018 User manual

Dopo
Dopo M7088 User manual

Dopo
Dopo Internet Tablet MD-740 User manual

Dopo
Dopo DPW7A-BT User manual