DORMA-Glas UNIQUIN User guide

EN
Mounting profile
Mounting instruction
WN 059546 45532
2023-08 / 16676
Moving Details.
UNIQUIN
Inhalt
1 About this manual 2
1.1 Information about the manual 2
1.2 Other applicable documents 2
1.3 Target group 2
1.4 Symbols used 2
1.4.1 Safety instructions 2
1.4.2 Further labeling 2
2 Safety 2
2.1 Intended use 2
2.2 Foreseeable misuse 3
3 Product description 3
3.1 Example of a UNIQUIN unit 3
3.2 Product variants 3
3.3 Parts included 4
3.4 Example of a mounted mounting profile 4
3.5 Specifications of the mounting profiles 4
3.5.1 Glass thickness from 10-13.5 mm 4
3.5.2 Glass thickness from 14-18 mm 4
3.5.3 Glass thickness from 16-19 mm 4
3.6 Glass clamping piece 5
4 Storage and transport 5
5 Installation preparation 6
5.1 Tools for mounting 6
5.2 Maintain the unit alignment 6
5.3 Specifications for joint mounting 6
5.3.1 Prepare inside T-joint 6
5.3.2 Prepare outside T-joint 7
5.3.3 Prepare corner joint for outside corner 8
5.3.4 Corner joint for inside corner 9
5.3.5 Joint-mounting in an alignment 9
5.4 Prepare profiles 10
5.4.1 Determine dimensions at the assembly location 10
5.4.2 Determine the dimensions of the base profiles 10
5.4.3 Determine the dimensions of the cover profiles 10
5.4.4 Cut profiles 10
5.5 Attach silicon seals 11
6 Mounting 11
6.1 Mount base profiles 12
6.1.1 Mount base profiles vertically 12
6.1.2 Mount base profiles horizontally 12
6.1.3 Siliconize sound insulation units 13
6.2 Mount fixed elements 14
6.2.1 Mount side panels 14
6.2.2 Mount additional unit components (optional) 15
6.3 Complete mounting 15
6.4 Mount cover profiles 16
7 Maintenance and care 17
7.1 Maintenance instructions 17
7.2 Cleaning instructions 17
8 Disassembly and disposal 17

22023-08 / 16676
DORMA-Glas
WN 059546 45532
UNIQUIN Mounting profile About this manual
1 About this manual
1.1 Information about the manual
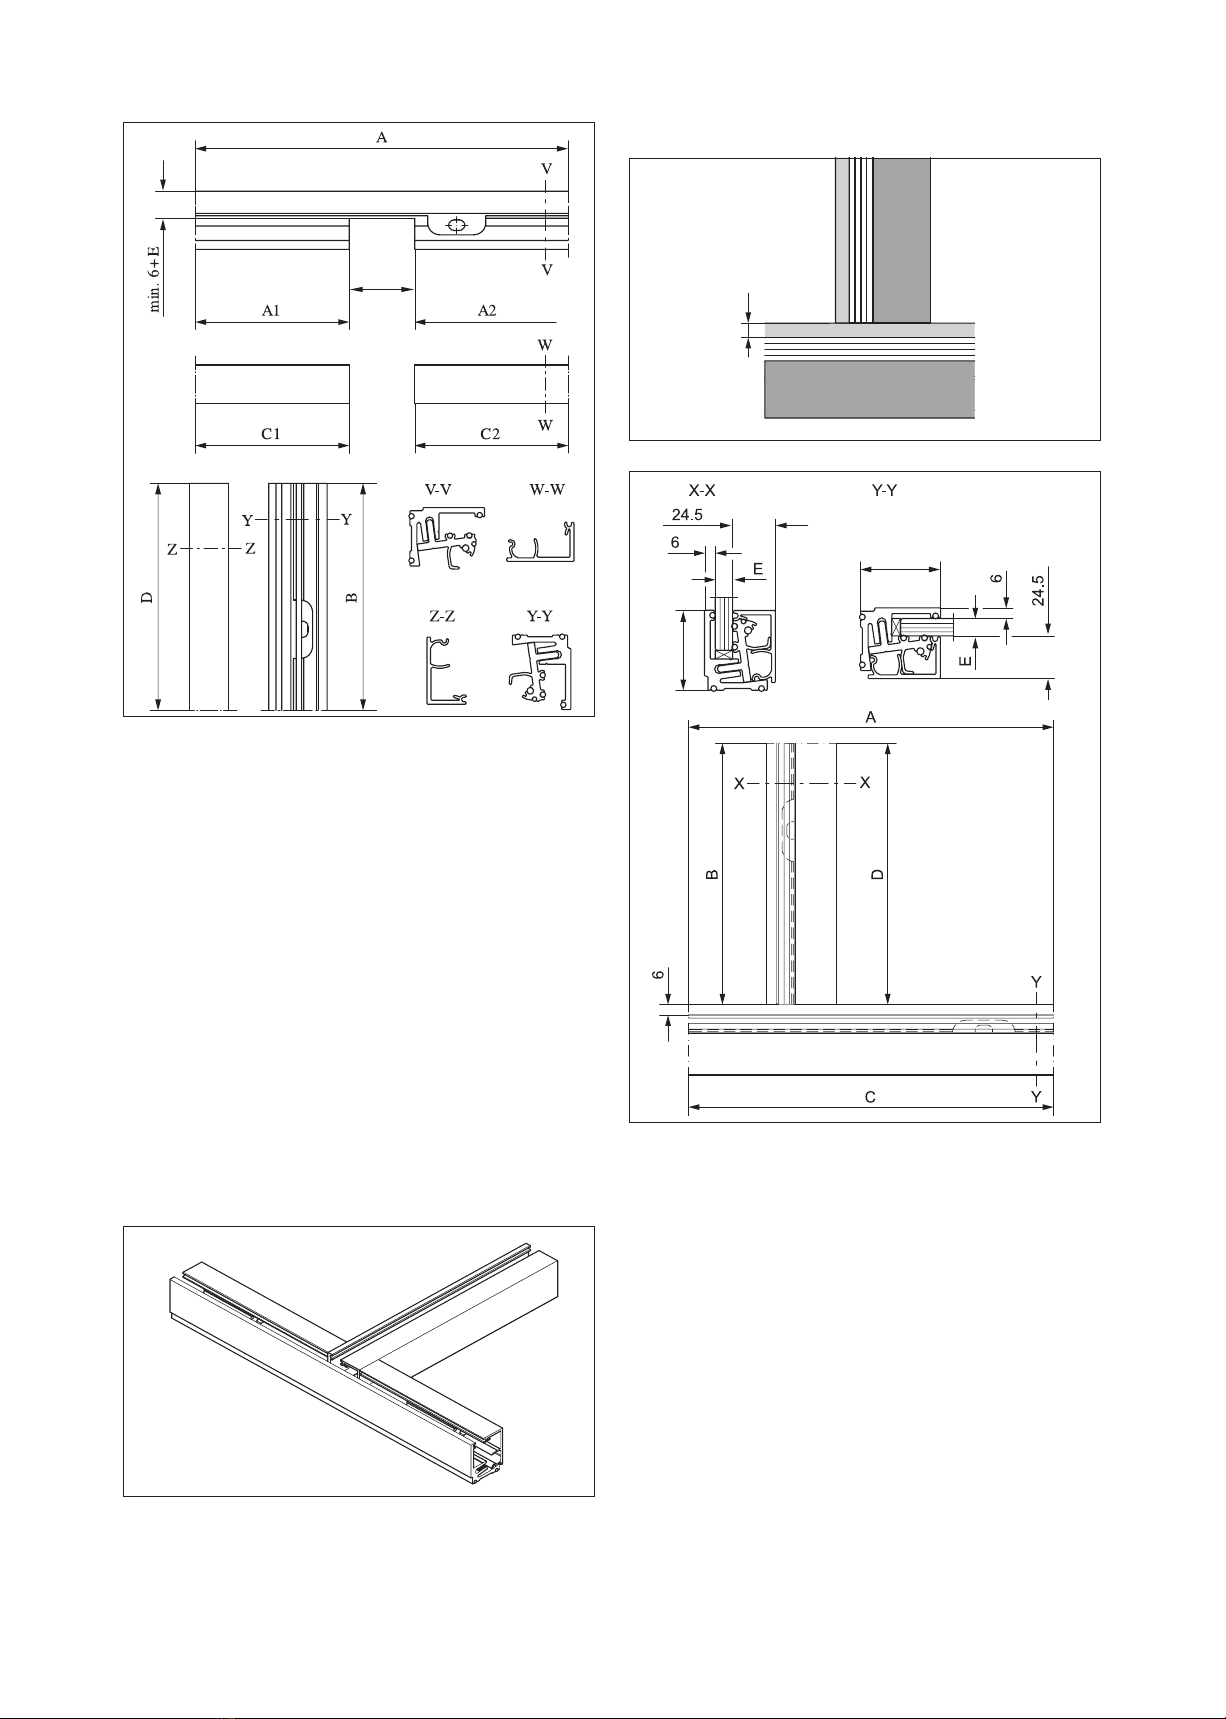
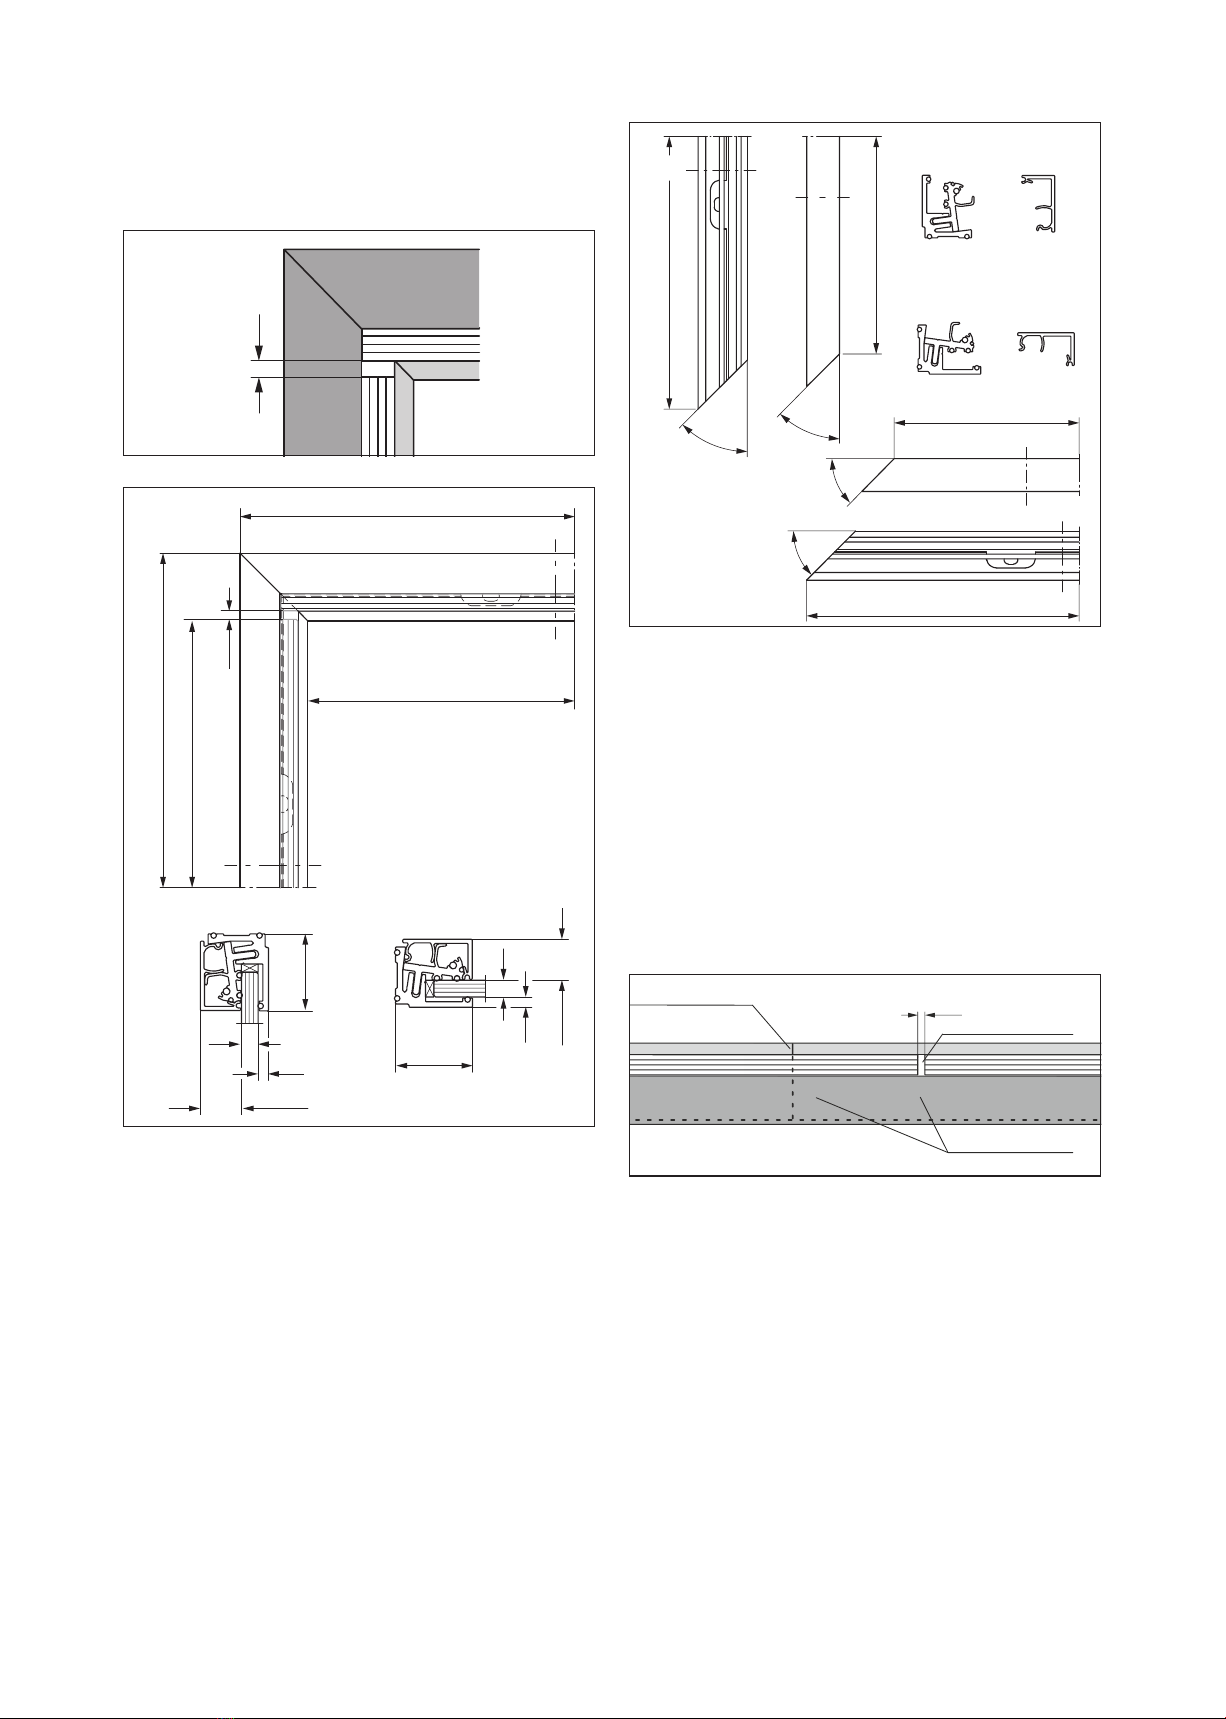
This manual describes how to install a UNIQUIN mounting
profile as part of a UNIQUIN partition wall system and provides
maintenance and care information.
Further unit components and mounting instructions may be
required to complete the UNIQUIN partition wall unit’s mounting
according to the project-related unit drawing, e.g. for the
door frame unit with hinges and overpanel. The illustrated unit
components and configurations are exemplary and do not show
every possible mounting situation.
1.2 Other applicable documents
Refer to the following technical documents for the product:
• The project-related unit drawing
• The mounting instructions of all unit components
• The UNIQUIN system manual
1.3 Target group
The target group of these mounting instructions is qualified
personnel who have been specially trained in glazing installation.
1.4 Symbols used
1.4.1 Safety instructions
Safety instructions are marked with symbols. The safety
instructions are introduced by signal words that express the extent
of the hazard, e.g.:
WARNING
This signal word indicates a situation of potential
risk, which could lead to death or serious injury if not
averted.
CAUTION
This signal word indicates a situation of potential risk,
which could lead to minor or slight injury if not averted.
ATTENTION
This signal word indicates a situation of potential
risk that could lead to damage to property or the
environment if not averted.
NOTE
This signal word indicates useful information for
ecient and trouble-free operation.
1.4.2 Further labeling
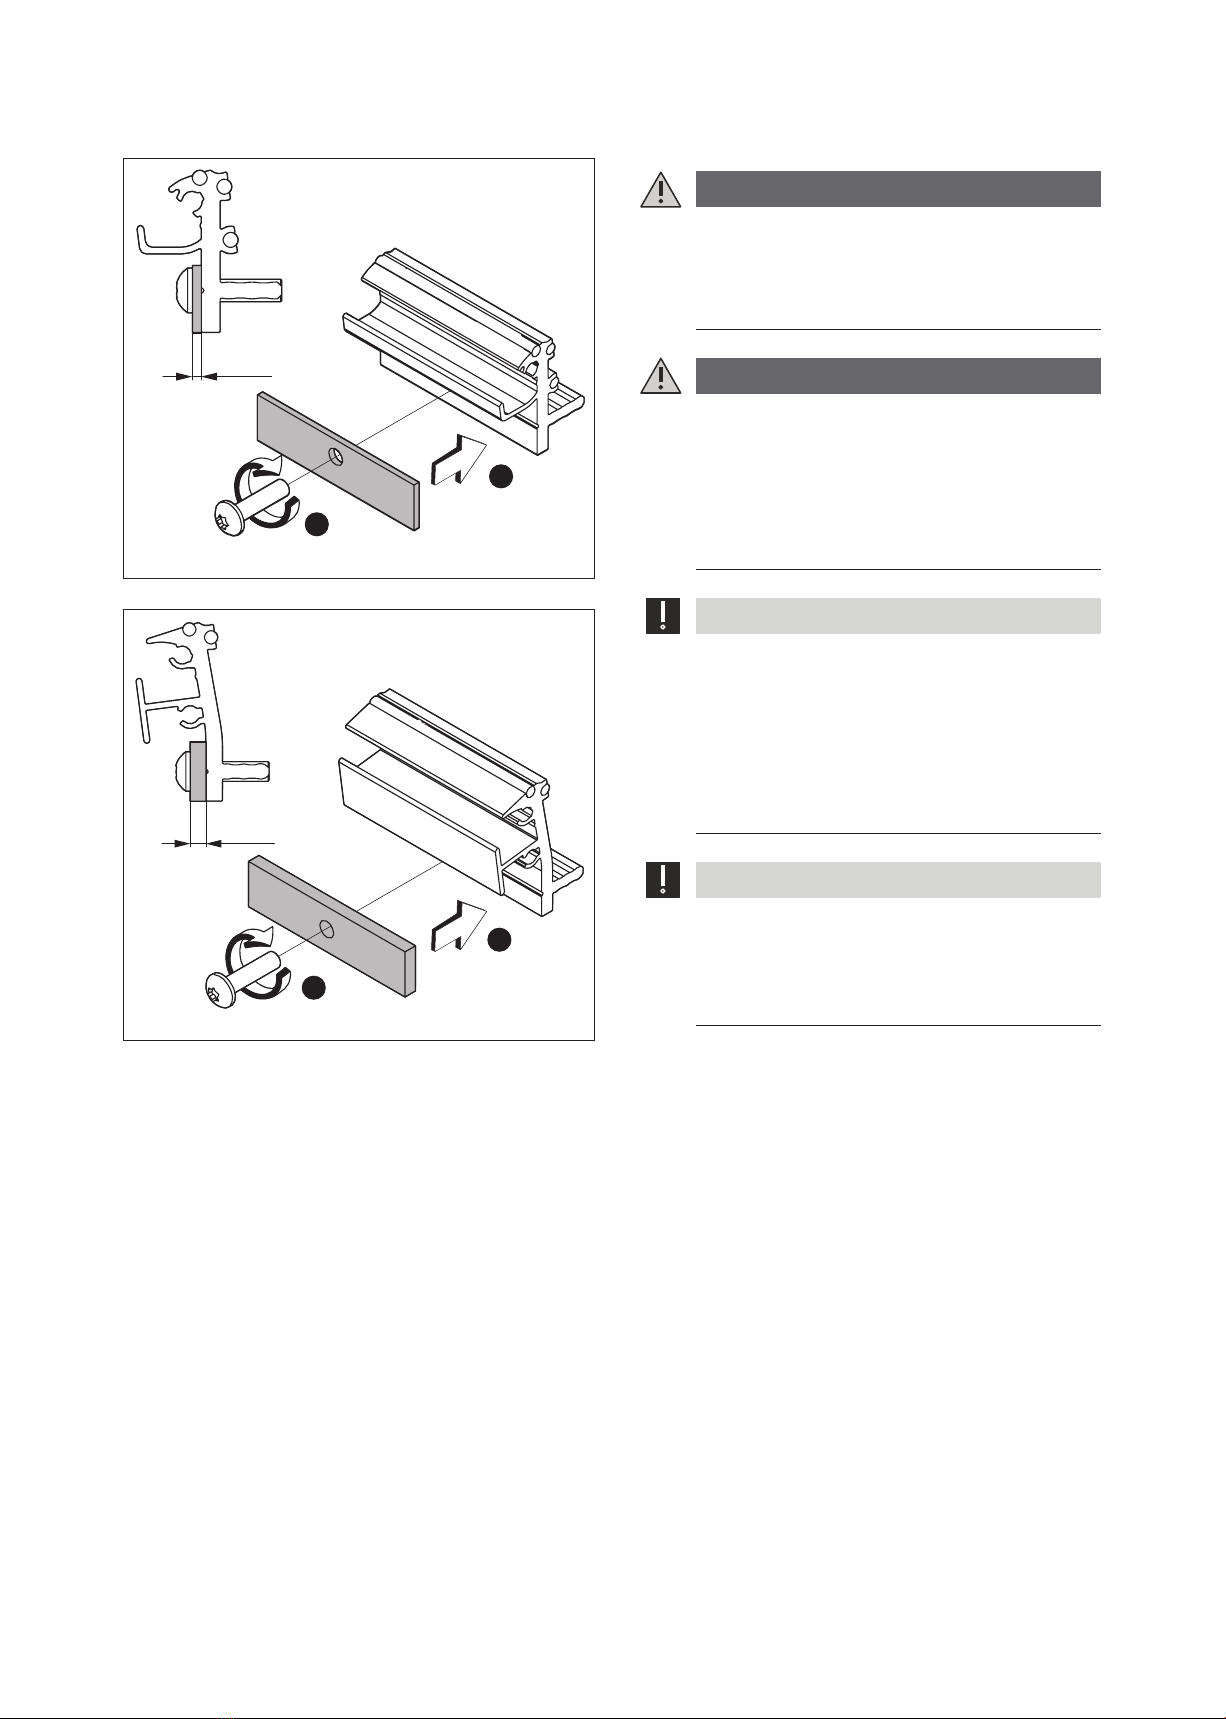
2.1. Step-by-step graphics
1 2 Position numbers for parts
in diagrams
2 Safety
2.1 Intended use
The product is designed to connect a UNIQUIN partition wall
system to the floor, wall and ceiling from the inside.
The product may only be mounted with unit components designed
by dormakaba for the installation situation and approved according
to the project-related unit drawing.
• The product may only be mounted undamaged and in accordance
with the requirements of the assembly location.
• The product may only be mounted by qualified personnel who
correspond to the defined target group.
• Only toughened safety glass (TSG) or laminated safety glass
(LSG) made of TSG may be installed with the product.
• The use of other composites must be checked by the designer or
contractor and the stability assured.
• The product may only be attached to a surface capable of bearing
loads using suitable fixing materials.
• The product is only suitable for indoor use.
• The product is suitable for use in tropical countries.

3
2023-08 / 16676
DORMA-Glas
WN 059546 45532
UNIQUIN Mounting profile Product description
2.2 Foreseeable misuse
WARNING
Danger to life due to falling glass.
Falling glass can lead to life-threatening injuries.
• Glass should not be suspended.
• Mount glass with at least 2 persons.
• Secure glass using the correct methods.
• Follow correct installation sequence.
• Clamping profiles on the base profile are not load-
bearing.
CAUTION
Risk of injury from falling to a lower floor.
The failure of the unit e.g. through broken glass, can
lead to personal injury, as people could fall to a lower
floor.
• The unit must not be installed as fall protection in
places where there is a risk of falling to a lower floor.
ATTENTION
Risk of damage due to eccentric vertical load.
Attaching eccentric vertical loads to the product can
cause damage.
• Do not attach any eccentric vertical loads to the
product, e.g. by building shelves.
• The product is not suitable for outdoor mounting.
• The product is not suitable for mounting in the vicinity of
showers, saunas, swimming and salt-water bath or rooms in which
chemicals (e.g. chlorine) are used.
Fig.1 Not suitable for showers, saunas, baths or salt-water baths
3 Product description
3.1 Example of a UNIQUIN unit
This UNIQUIN unit is an example of a UNIQUIN partition wall
unit. Further combinations with other unit components, e.g. with an
acoustic element or a sliding door are possible.
Fig.2
13
5
6
7
2
4
Example of a UNIQUIN unit
(1) Ground profile and cover profile
(2) Overpanel
(3) Side panel
(4) Door frame system
(5) Glass door
(6) Lock with door handle set
(7) Door hinges
3.2 Product variants
There are 3 product variants for use with dierent glass thicknesses,
see Chapter 3.5.
NOTE
For ceilings with a flatness deviation of more than 15
mm over 10 m, it is recommended to use the 55th
mounting profile for glass thicknesses from 16 to 19
mm.

42023-08 / 16676
DORMA-Glas
WN 059546 45532
UNIQUIN Mounting profile Product description
3.3 Parts included
The exact delivery quantities and profile lengths vary depending
on the product variant or the planned combination of the unit
components. The glass is not part of the delivery. The profiles can
come in warehouse length, fixed length or in fixed length with
oversize.
Fig.3 Example components included in delivery
(1) Cover profile (possibly in warehouse length)
(2) Screw for the clamping piece
(3) Clamping piece with silicone seal
(4) Base profile (possibly in warehouse length)
(5) Silicone seal (possibly in warehouse length)
(6) Mounting instructions
3.4 Example of a mounted mounting profile
Fig.4 Example of a mounted mounting profile
(1) Cover profile
(2) Screw for the clamping piece
(3) Clamping piece with silicone seal
(4) Base profile
(5) Silicone seal
(6) Finished floor
(7) Suitable fixing materials
(not included in delivery)
(8) Wooden block (not included in delivery)
(9) Glass or alternative composite
(not included in delivery)
3.5 Specifications of the mounting profiles
3.5.1 Glass thickness from 10-13.5 mm
• Glass recess in the 46 mm base profile 23 mm ± 2 mm
Fig.5 Dimensions in mm for glass thicknesses from 10 to 13.5 mm
3.5.2 Glass thickness from 14-18 mm
• Glass recess in the 46 mm base profile 23 mm ± 2 mm
Fig.6 Dimensions in mm for glass thicknesses from 14 to 18 mm
3.5.3 Glass thickness from 16-19 mm
• Glass recess in the 55 mm base profile 32 mm ± 2 mm
Fig.7 Dimensions in mm for glass thicknesses from 16 to 19 mm

5
2023-08 / 16676
DORMA-Glas
WN 059546 45532
UNIQUIN Mounting profile Storage and transport
3.6 Glass clamping piece
Fig.8
5 Nm
1.
2.
2 mm
Glass clamping piece for 46 mm base profile
Fig.9
5 Nm
2.
1.
4 mm
Glass clamping piece for 55 mm base profile
4 Storage and transport
CAUTION
Risk of injury due to heavy weight.
Lifting heavy components can result in injury.
• Lift the heavy components together with several
persons or a suitable lifting device.
CAUTION
Risk of crushing and collision due to unsecured
components.
Unsecured components can lead to crushing or impact
injuries during transport.
• Wear personal protective equipment.
• Secure components adequately during transport.
ATTENTION
Risk of damage to the glass components by contact
with hard materials (e.g. glass, metal, concrete).
The contact may cause conchoidal fractures,
damage the edges and/or break the glass of the glass
components.
• Protect glass edges with spacers.
• Do not install damaged glass components.
ATTENTION
Risk of damage during transport.
Unsecured components may be damaged during
transport.
• Secure components adequately during transport.

62023-08 / 16676
DORMA-Glas
WN 059546 45532
UNIQUIN Mounting profile Installation preparation
5 Installation preparation
CAUTION
Risk of injury due to sharp edges.
Contact with cut edges can lead to cuts.
• Wear protective gloves.
• Deburr cutting edges.
• Blunt the cut edges, e.g. with silicone.
• Secure cut edges against contact.
5.1 Tools for mounting
• Straight and miter saw
• Torx angle screwdriver
• Spirit level
• Hexagon socket set
• Drilling machine
• Vacuum lifting tool
• Wooden blocks
• Torque wrench
• Knife or scissors
5.2 Maintain the unit alignment
The product has no fixed outside or inside and can be mounted
aligned on both sides.
• Check assembly location on site, e.g. in the building floor plan.
• Check the escape direction on site and compare it with the
project-related unit drawing.
• Check the opening direction of swing doors on site and compare
them with the project-related unit drawing.
• Consider the direction of other components (optional) e.g.
sliding door or acoustic element according to the project-related
unit drawing.
• Determine the direction of the unit according to the on-site
check and according to the project-related unit drawing and
adjust the mounting accordingly.
5.3 Specifications for joint mounting
• Corner fittings directly adjacent to doors are not possible.
• The cutting is done by the customer.
• Recommendation: Order the profiles in excess length.
• With T-joints and corner joints, the same or dierent glass
thicknesses can be mounted at the same profile height.
• A T-joint can only be mounted at a 90° angle.
5.3.1 Prepare inside T-joint
Fig.10
3±2
Inside T-joint on the side of the cover profile
Fig.11
46 (55)
46 (55)
Example of a mounting with inside T-joint
ABase profile 1
BBase profile 2
CCover profile 1
C1 Cover profile 1.1
C2 Cover profile 1.2
DCover profile 2
EGlass thickness

7
2023-08 / 16676
DORMA-Glas
WN 059546 45532
UNIQUIN Mounting profile Installation preparation
Fig.12
E+33,5
Inside T-joint, profile cut on site
ABase profile 1
A1 Base profile 1.1
A2 Base profile 1.2
BBase profile 2
C1 Cover profile 1.1 = Linear measure A1
C2 Cover profile 1.2 = Linear measure A2
DCover profile 2
EGlass thickness
Procedure
1. Place base profile 2 flush on base profile 1 at a right angle.
2. Mark the legs of base profile 2 on base profile 1. Remove base
profile 2 and complete the markings up to the identification
groove.
3. Separate the marked area from base profile 1.
4. Insert base profile 2 into the cut-out and check.
5. Cut all cover profiles
Fig.13
A2 = 6+E+24.5+3
Profiles prepared
5.3.2 Prepare outside T-joint
Fig.14
6
Outside T-joint on the side of the base profile
Fig.15
46 (55)
46 (55)
Example of a mounting with outside T-joint
ABase profile 1
BBase profile 2
CCover profile 1
DCover profile 2
EGlass thickness
6

82023-08 / 16676
DORMA-Glas
WN 059546 45532
UNIQUIN Mounting profile Installation preparation
Fig.16
A
C
D
B
Y
Y
Z
Z
X
X
W
W
X-X Y-Y Z-ZW-W
Outside T-joint, profile cut on site
ABase profile 1
BBase profile 2
CCover profile 1
DCover profile 2
5.3.3 Prepare corner joint for outside corner
• Base profile outside: Miter joint
• Cover profile inside: Butt joint
Fig.17
3±2
Corner joint for outside corner
Fig.18
46 (55)
46 (55)
Example of a mounting with corner joint for outside corner
ABase profile 1
BBase profile 2
CCover profile 1
DCover profile 2
EGlass thickness
Fig.19
A
45°
C
D
B
45°
Y
Y
Z
Z
X
X
W
W
X-X
Y-YZ-Z
W-W
Corner joint for outside corner, profile cut on site
ABase profile 1
BBase profile 2
CCover profile 1
DCover profile 2
3±2

9
2023-08 / 16676
DORMA-Glas
WN 059546 45532
UNIQUIN Mounting profile Installation preparation
5.3.4 Corner joint for inside corner
• Base profile outside: Miter joint
• Cover profile inside: Miter joint
Fig.20
3±2
Corner joint for inside corner
Fig.21
B
A
D
C
3±
2
E
6
24.5
6
24.5
E
Y
Y
X
X
X-XY-Y
46 (55)
46 (55)
Example of a mounting with corner joint for inside corner
ABase profile 1
BBase profile 2
CCover profile 1
DCover profile 2
EGlass thickness
Fig.22
A
45°
C
D
B
45°
45°
45°
Y
Y
Z
Z
X
X
W
W
X-X
Y-YZ-Z
W-W
Corner joint for inside corner, profile cut on site
ABase profile 1
BBase profile 2
CCover profile 1
DCover profile 2
5.3.5 Joint-mounting in an alignment
• Only the same glass thicknesses can be mounted.
• Centrally mount a clamping piece at the height of the joint of the
glasses.
• Fit another clamping piece at the joint of the base profiles and
the cover profiles.
• Arrange the joint of the base profiles oset to the joint of the
glasses.
Fig.23
Base profile
join Glass joint
Glass clamping
pieces
3±2
Joint-mounting in an alignment

10 2023-08 / 16676
DORMA-Glas
WN 059546 45532
UNIQUIN Mounting profile Installation preparation
5.4 Prepare profiles
If the profiles are available in longer or warehouse lengths, the
profiles and seals must be cut to size before mounting.
5.4.1 Determine dimensions at the assembly
location
1. Determine the dimensions of the passage opening at the
assembly location (Fig.24).
Fig.24
A
B
D
C
Determine the dimensions of the passage opening at the assembly
location
5.4.2 Determine the dimensions of the base profiles
NOTE
It is recommended that the dimensions of the last
section of the base profiles on the floor be determined
and cut only when the mounting of the last side panel
is imminent.
1. When determining the dimensions, consider the joint
mounting of the base profile.
Fig.25 Example of joint mounting with horizontal and vertical base profile
2. Match the determined dimensions with the project-related
unit drawing.
3. If the dimensions on site are more than 5 mm over the
project-related unit drawing’s specifications, then adjust the
wall opening on site to the dimensions of the unit drawing prior
to mounting.
4. Observe the instructions for mounting edge to edge (see
Chapter 5.3).
»The dimensions of the required base profile have been
determined.
5.4.3 Determine the dimensions of the cover
profiles
NOTE
The dimensions of the cover profiles are determined
only after all other unit components are mounted.
1. When determining the dimensions, take into account the
mounted base profiles.
2. Match the determined dimensions with the project-related
unit drawing.
3. If the project-related unit drawing stipulates a mounting with a
corner joint, then determine the dimensions for cover profiles,
if necessary on a miter.
»The dimensions of the required cover profile have been
determined.
5.4.4 Cut profiles
Requirement
• The dimensions of the profiles are determined.
1. Mark the cutting marks on the base profiles according to the
dimensions determined at the assembly location.
2. Cut the profiles at the cutting marks with a suitable metal saw.
Fig.26 Cut base profile correctly
3. Deburr and, if necessary, blunt the cut edges without
damaging the coating, which is still visible after mounting.
»The profiles are cut as needed.

11
2023-08 / 16676
DORMA-Glas
WN 059546 45532
UNIQUIN Mounting profile Mounting
5.5 Attach silicon seals
Requirement
• The profiles are cut.
1. Identify the groove provided for the silicone seal depending on
the profile (see Chapter 3.4).
2. Fit the full length of the silicone seal into the groove provided.
3. Ensure that no tensile forces are exerted on the silicone seal.
Fig.27 Attach the silicone seal, e.g. on the base profile
4. If necessary, cut the silicone seal to the required length.
»The silicone seal is attached.
6 Mounting
CAUTION
Risk of injury from toppling objects.
Toppling unsecured components can cause injury.
• Wear personal protective equipment.
• Store and mount objects in a tilt-proof manner.
CAUTION
Risk of injury by crushing.
During mounting, high-weight shearing components
can cause finger-crushing injuries.
• Wear protective gloves.
• Lift glass with vacuum lifter and insert.
CAUTION
Risk of injury due to sharp edges.
Touching cut edges may result in cuts.
• Secure cut edges against contact.
• Wear protective gloves.
• Deburr cutting edges.
• Blunt edges, e.g. with silicone.
CAUTION
Risk of injury due to heavy weight.
Lifting heavy components can result in injury.
• Lift heavy components together with several people
and with suitable lifting device.
CAUTION
Risk of injury from broken glass during mounting.
Incorrect mounting can lead to broken glass and cause
injuries.
• Secure the installation site.
• Carry out the mounting with at least 2 people.
• Wear protective clothing.
• Use vacuum lifting tool.
• Store glass on trestles or wooden blocks and ensure
that it cannot fall.
CAUTION
Risk of injury due to insucient unstable attachment.
Components must be attached in a suciently stable
manner. The clamping profiles on the base profile are
not load-bearing.
• Only use components planned and approved by
dormakaba according to the project-related unit
drawing.
• Only mount the glasses on a load-bearing surface
with wooden blocks.
• Do not suspend glass.
• A silicone joint for the floor attachment is
insucient.
ATTENTION
Risk of damage due to eccentric vertical load.
Attaching eccentric vertical loads to the product can
cause damage.
• Do not attach any eccentric vertical loads to the
product, e.g. by building shelves.
NOTE
Strict observance of the mounting sequence for all unit
components is recommended.

12 2023-08 / 16676
DORMA-Glas
WN 059546 45532
UNIQUIN Mounting profile Mounting
NOTE
It is recommended that, when following
the mounting sequence of the unit
components, the fixed elements should be
mounted from one side to the other,
e.g. beginning on the wall towards
a door frame.
6.1 Mount base profiles
Requirements
• Mounting preparation is completed.
• Follow the project-related unit drawing.
6.1.1 Mount base profiles vertically
1. Align the base profile vertically.
2. Mark all the base profile’s drill holes on the floor.
Fig.28
1.
2.
Align the base profile vertically
NOTE
The slot in the base profile has a diameter of 6.5 mm.
3. Drill the holes as needed into the floor.
4. Install the required fixing materials in the drill holes, e.g.
dowels.
5. If necessary, correct the unevenness in the ground properly,
e.g. with underlay.
6. Align the base profile.
7. Fix the base profile to all drill holes.
Fig.29
6.
7.
Align and fix the base profile.
8. Mount all other vertical base profiles as described.
»The vertical base profiles are mounted.
6.1.2 Mount base profiles horizontally
NOTE
When mounting the horizontal base profiles, take
into account all unit components, e.g. door frames or
acoustic elements.
Requirement
• The vertical base profiles are mounted.
1. Mark the unit alignment e.g. with a chalk line.
2. Align the base profile horizontally.
› The base profile on the floor must always be mounted to
align vertically under the base profile on the ceiling or the
lintel.
Fig.30 Align the horizontal base profiles vertically with each other
3. Omit the passages e.g. swing door, sliding door or acoustic
element.

13
2023-08 / 16676
DORMA-Glas
WN 059546 45532
UNIQUIN Mounting profile Mounting
NOTE
If e.g. an omission of the base profile on the ground is
planned for an acoustic element, then:
1. Only prepare the horizontal base profiles on the
ground to one side of the omission.
2. Only mount the fixed elements on one side of the
omission (Chapter 6.2).
3. Mount the components for the omission.
4. Continue mounting the base profiles and fixed
elements.
5. Mark all the base profile’s drill holes on the floor.
6. Drill the holes as needed into the floor.
7. If necessary, install the required fixing materials in the drill
holes, e.g. dowels.
8. Align the base profile.
9. If necessary, correct the unevenness in the ground properly,
e.g. with underlay.
10. Fix the base profile to all drill holes.
11. Fix all further horizontal base profiles as described.
»The horizontal base profiles are mounted.
6.1.3 Siliconize sound insulation units
NOTE
To meet the requirements of a sound insulation unit, it
is imperative to seal the joints with silicone or double-
sided adhesive tape.
Seal joints with silicone
NOTE
• For silicone use a permanently elastic and UV-
resistant silicone.
• Use an LSG-compatible silicone to siliconize LSG
glazing.
1. Correctly siliconize the joints from the inside of the profile
before mounting the cover profiles.
Fig.31 Example of siliconizing profile edges from the inside
2. Professionally siliconize the entire length of the joints between
glasses.
Seal joints with double-sided adhesive tape
We recommend the use of transparent, double-sided adhesive tape
TESA ACX Plus.
The adhesive tape for glass-on-glass joints should always be 2mm
narrower than the glass (e.g. glass thickness 15 mm and tape width
13 mm).
Glass thickness
(mm)
Adhesive tape width
(mm) Item no.
10 8 50.529
12 10 50.530
13.5 11 50.531
15 13 50.532
17 15 50.533
19 17 50.534
1. Stick the adhesive tape onto the center of one edge of the
glass in a straight line.
2. Press on the adhesive tape over its entire length without
bubbles (e.g. with a pressure roller).
3. Join the glass edges and press them together (e.g. with a glass
plate clamp).

14 2023-08 / 16676
DORMA-Glas
WN 059546 45532
UNIQUIN Mounting profile Mounting
6.2 Mount fixed elements
Requirements
• The base profiles are mounted.
• The acoustic element is prepared (optional).
• The door frame system is prepared (optional).
6.2.1 Mount side panels
1. If necessary, align and mount the door frame positioner on the
unit’s alignment according to the door frame unit’s mounting
instructions.
Fig.32 Example of mounted door frame positioner
2. If an acoustic element is planned, then follow the acoustic
element’s mounting instructions.
NOTE
Only mount the acoustic elements on the horizontal
base element when exactly one of the adjacent side
panels is fixed. After mounting the acoustic element, fix
the second adjacent side panel.
3. If a overpanel is planned, then follow the mounting instructions
of the door frame system.
4. If necessary, follow the instructions for mounting side panels
edge to edge.
5. Prepare the lower wooden blocks as needed
(Fig.33).
6. Working in a pair, lift the side panel with a suitable vacuum
lifting tool and place on the lower wooden blocks.
Fig.33
6. 5.
Working in a pair, place the side panel on the wooden blocks
7. Prepare the vertical wooden blocks to maintain the
corresponding vertical clearance.
8. Align the side panel vertically.
9. If a door frame connects to the side panel, then maintain the
glass bite of the glass on the door frame positioner according
to the door frame system’s mounting instructions.
Fig.34
8.
7.
18 ± 1
9.
Align the side panel vertically

15
2023-08 / 16676
DORMA-Glas
WN 059546 45532
UNIQUIN Mounting profile Mounting
10. Maintain the distance between the clamping pieces of approx.
80 mm to the corner (Fig.35)
11. Fix the side panel with 3 clamping pieces per meter on the
base profile vertically and horizontally with a torque of 5 Nm.
Fig.35 Example of attaching clamping pieces to the vertical base profile and
side panel
12. If several side panels are to be mounted edge to edge in
alignment, joints the maintain a clearance between 2 side
panels with spacers.
HINWEIS
3 mm clearance = sealing with TESA ACXplus
5 mm clearance = sealing with silicon
Fig.36 Ensure the clearance between 2 side panels with spacers
13. Mount a clamping piece in the horizontal base profiles at the
top and bottom exactly on the joint of the side panels.
Fig.37 A mounted clamping piece on the joint between
2 side panels
14. If necessary, follow the specifications for joint mounting (see
Chapter 5.3).
15. Mount further side panels as described.
»The side panels are mounted.
6.2.2 Mount additional unit components (optional)
1. Follow the unit components’ mounting instructions.
2. Mount additional unit components.
3. Follow system manual.
»The mounting of further unit components is completed.
6.3 Complete mounting
1. Follow the mounting instructions for all unit components to
complete the mounting.
2. Keep to the mounting sequence.

16 2023-08 / 16676
DORMA-Glas
WN 059546 45532
UNIQUIN Mounting profile Mounting
6.4 Mount cover profiles
Requirements
• The unit components are correctly mounted.
• The cover profiles are prepared and cut to length as needed (see
Chapter 5.4).
• The silicone seals are attached to the cover profiles.
1. Remove the spacers from the joints between 2 fixed elements.
Fig.38 Remove the spacers between 2 fixed elements
NOTE
To meet the requirements of a sound insulation unit, it
is imperative to siliconize the joints as described.
NOTE
• For silicone use a permanently elastic and UV-
resistant silicone.
• Use an LSG-compatible silicone to siliconize LSG
glazing.
2. It is recommended that the joints between 2 fixed elements
are siliconized along their entire length.
3. If necessary, cut the vertical cover profiles to size as needed.
4. For mounting a joint on the vertical cover profile, saw out a 15
mm x 15 mm recess on the glass side
(Fig.39).
5. Deburr all edges using the correct methods.
NOTE
• The recess allows the mounting of the cover profile
without tilting with the abutting base profile.
• The recess is no longer visible after mounting the
adjacent cover profiles.
• If necessary, power or data lines can be routed
through the recess.
6. Attach the prepared cover profile to the abutting edge of the
base profiles.
Fig.39
6.
15
15
4.
Saw out a recess e.g. on the vertical cover profile at the lower joint
edge
7. Attach the other cover profiles.
Fig.40 Example of attaching a vertical cover profile with recess above
8. Cut the horizontal cover profiles to length if necessary and
attach.
9. Follow the system manual.
»The mounting of the unit is completed.

17
2023-08 / 16676
DORMA-Glas
WN 059546 45532
UNIQUIN Mounting profile Maintenance and care
7 Maintenance and care
CAUTION
Risk of injury due to cut edges
Touching cut edges can lead to cuts, e.g. at the corner
joint of an acoustic element.
• Wear protective gloves.
7.1 Maintenance instructions
The product is largely maintenance-free.
1. Refer to the maintenance instructions for all unit components.
2. Follow the system manual.
7.2 Cleaning instructions
Only use suitable cleaning and care products to clean the surfaces.
8 Disassembly and disposal
Disassembly is carried out in the reverse order of the mounting
instructions and must be done by qualified personnel. When
disposing, observe the relevant national standards and guidelines.
Dispose of the product in an environmentally friendly
manner.
Electronic parts and batteries must
not be disposed of with domestic waste.
Use designated acceptance collection points to dispose
of electro-technical parts and batteries.
Acceptance and collection points.
Observe the applicable national legal regulations.

18 2023-08 / 16676
DORMA-Glas
WN 059546 45532
UNIQUIN Mounting profile Mounting

19
2023-08 / 16676
DORMA-Glas
WN 059546 45532
UNIQUIN Mounting profile Mounting

Original document
DORMA-Glas GmbH
Max-Planck-Straße 33-45
D - 32107 Bad Salzuflen
T +49 5222 924-0
www.dorma-glas.com
DORMA-Glas GmbH
DORMA-Glas GmbH
Moving Details.
Table of contents
Popular Indoor Furnishing manuals by other brands

Express Küchen
Express Küchen Trea O-SOBL-105 Installation Instructions / Care instructions and warranty card

pivotal
pivotal ATHLETIC EDGE Assembly instructions

Takara Belmont
Takara Belmont LEGEND AB-LGF Operation manual

nest
nest HOMEBASE Assembly instructions

Cubby
Cubby Freesia Assembly instructions

ROBERTO FIORE
ROBERTO FIORE Cabinets To Go BC30 Assembly instructions

Office Star Products
Office Star Products Work Smart WD5330 operating instructions

Innostyle
Innostyle CONTEST X 3020HW11 Assembly instructions

Whalen Furniture
Whalen Furniture PROL-37 manual

Safavieh Furniture
Safavieh Furniture Tezza COF9001A quick start guide

Safavieh Furniture
Safavieh Furniture AMH6614 manual

AZEK
AZEK TimberTech PRO Installation & maintenance guide