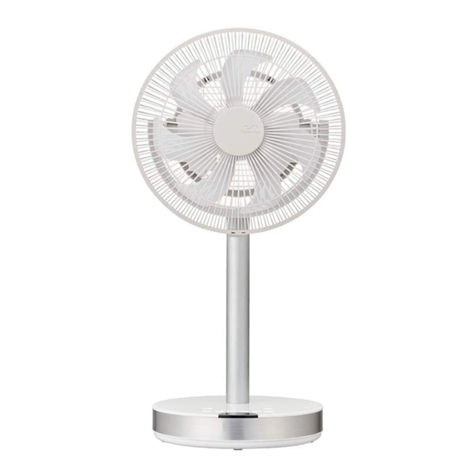
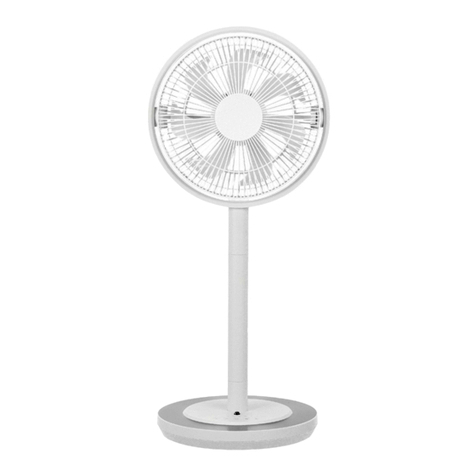
DOSHISHA FLU-253DHK User manual

DC Folding Fan FLU-253DHK
Thank you very much for choosing our
product. Please read the User Manual
carefully in order to use this product correctly.
Please keep the User Manual properly after
reading.
[This product is for indoor use only]
User Manual
Specifications
● The specifications are subject to change without prior notice.
● This unit is only intended to be sold in Hong Kong and Macau.
● The diagram and illustration in this manual are for reference only. The actual product is subject to
manufacturer specifications.
DOSHISHA Co., Ltd.
Contents
Safety Precautions.........................................1
Name of Parts and Function...........................3
How to Use.....................................................5
Maintenance and Storage.............................11
Troubleshooting............................................13
Power supply
Power consumption
Voltage
Frequency
Cable length of AC adapter
Dimensions
Net Weight
Remote control battery
DC 24V, AC adapter (dedicated)
About 10W (when using a dedicated AC adapter)
220V
50 Hz
About 1.8m
Width 34 × depth 30 × height 75cm (when bracket unfolded)
About 4.6kg(excluding the remote control and AC adapter)
Lithium battery (CR2025)

Warning
Please read Safety Precautions carefully in order to ensure proper use
Please read and abide by the critical safety information listed in this section carefully
Please keep it properly after reading
Incorrect operation may cause a risk of death or serious injury
indicates “mandatory”. The specific mandatory content will be shown with picture and
text inside and beside . (The picture on the left indicates that “the power plug must be
pulled out from the socket”)
Prohibited
Prohibited
Prohibited
Unplug
Disas-
sembly
prohibited
Instruction
Do not connect this product to
power supply excepted rated
voltage and rated frequency
Do not use devices other than
those provided with dedicated AC
adapters
It may cause electric shock and fire
Do not
Do not damage the power cord and
AC adapter, and do not use the
device before the plug is properly
inserted into the socket
It may cause electric shock, short
circuit and fire
Do not operate without the blades
and protective covers
It may cause personal injury and
device failure
Do not expose the product to
children, or use it in any place that
the children can access
It may cause electric shock and
personal injury
Do not insert metal objects such
as pins and wires into the gaps in
the main unit.
It may cause electric shock and
personal injury
Be sure to disconnect the AC
adapter out of the socket when
not in use. It may cause electric
shock, electric leakage, or fire
due to insulation deterioration.
For maintenance, remove the AC
adapter from the socket.
Failure to remove it may cause
electric shock, fire, or personal
injury.
Disassembly prohibited. Only
qualified personnel are allowed to
carry out repairs.
It may cause fire, electric shock,
personal injury, and other safety
accidents. For repairs, please
consult the sales office or Shun
Hing Electric Service Center Ltd.
Do not directly plug or unplug the
AC adapter with wet hands.
It may cause safety accidents such
as electric shock.
Immersion and watering of the
device are prohibited.
It may cause short circuit, electric
shock and other safety accidents.
In the event of an abnormality
(e.g. burnt smell, smoke), unplug
the AC adapter immediately and
stop using it.
It may cause fire or electric shock
Please insert the AC adapter fully
into the socket.
Failure to fully insert may cause
electric shock, short circuit and
fire.
Clean the dust adhering to the
pins and mounting surfaces of
the AC adapter.
Inserting AC adapter with dust
attached may cause safety
accidents such as short circuit and
fire.
After maintenance, fully secure the
blades and protective cover.
If it is not fully tightened or
properly installed, it may result in
safety accidents such as personal
injury and device failure.
If the battery liquid leaked from the
remote control and accidentally
enters into the eyes, do not rub.
Rinse immediately with cool water
and go to the hospital.
It may cause blindness or visual
impairment.
Wet hands
prohibited
Water
prohibited
indicates “prohibited”. The specific prohibited content will be shown with picture and text
inside and beside . (The picture on the left indicates “Disassembly prohibited”)
Incorrect operation may cause personal injury or property damage
(including residence, family properties, livestock and pets)
Warning
Attention
Meaning and example icon symbols
connect AC adapter to
socket when cleaning or
maintenance.It may cause fire,
electric shock,or personal injury.
Safety Precautions
Do not damage,process,bend,pull,
twist,or bundle the power cord,and
do not put any heavy object on the
cord and pinch it.It may cause fire
or electric shock.

Attention
Instruction Prohibited
Prohibited
When unplugging the AC adapter,
be sure to hold the AC adaptor
instead of the power cord.
It may cause electric shock, short
circuit, or break off the power cord.
Do not use a battery other than
specified.
It may cause liquid leakage.
Do not get your hair too close to
the device.
It may cause personal injuries due
to hair being caught.
Please confirm the positive and
negative poles of battery in the
remote control.
Incorrect installation of positive and
negative poles will not only cause
device failure, but may also cause
safety accidents due to liquid
leakage and battery rupture.
Do not place the battery of the
remote control in a hot place where
there is direct sunlight.
It may cause liquid leakage, battery
rupture, fire and other safety
accidents.
Do not use in the following places.
● Near stoves and other fire
sources
● Places with flammable gas
● Places that can be splashed by
rain and water
It may cause discoloration,
deformation, flame extinguishing,
fire, electric shock and other safety
accidents.
Take the battery out of the remote
control if it won’t be used for a long
time.
If the device is left unused for an
extended period of time with battery
installed, internal contamination
may be caused by liquid leakage,
and safety accidents such as fire
and personal injury may occur due
to battery rupture.
Do not blow directly to the body for
a long time.
It may cause harm to your health.
Do not use household cleaners,
thinners, gasoline, alcohol or
abrasive powder for cleaning. It
may cause discoloration,
deformation, electric shock or
device failure.
When disposing of the remote
control, be sure to remove the
battery.
Disposal of the remote control
directly with battery installed may
cause an accident. Please dispose
of the battery as required by local
government.
Do not drag the main unit.
It may damage the floor.
Do not forcibly turn the main unit to
the front while it is swinging.
It may cause device damage,
malfunction or noise.
Do not insert your fingers into
the guard or any moving parts
It may cause safety accidents
such as personal injury.
While folding the bracket or
adjusting the fan height, be careful
to prevent pinching the fingers.
It may cause safety accidents such
as personal injury.
Do not use in an unstable place.
It may cause personal injury,
device failure and other safety
accidents.
When setting up, be sure to fully
unfold the bracket to make it
completely touch the ground.
If the device is not set properly, it
may cause safety accidents such
as falling over.

Handle
Support frame
Operation panel
Remote control signal receiver
Natural (green)/sleep
(red) wind indicator
Timer indicator
Running indicator
The current status can be confirmed by the indicator light
around the operation button.
● Air volume indicator
Display the air volume during operation. One of the four
indicators turns on during operation (all indicators turn on
at level 5 air volume).
● Natural/sleep wind indicator
The green indicator turns on in natural wind mode, and
the red indicator turns on in sleep wind mode.
● Timer indicator
(Red indicator on: scheduled power-on; green indicator
on: scheduled power-off)
If scheduled power-on is enabled, the indicator is turned
on when the device is turned off at scheduled time.
● Swing indicator
The indicator turns on during swing operation.
Operation buttons
The functions are same as the buttons on the main unit and
the remote control.
Power button
Start/stop operation.
Natural/sleep wind indicator
Switch between natural and sleep wind
Press and hold it for three seconds to set the
indicator to off mode.
Timer button
Set the time of schedule on/off
Air volume button
Adjust the air volume during operation.
Swing button
Start/stop swinging.
Transmission area (remote control)
Point this part at the remote control signal receiver of the
main unit.
Swing indicator
Air volume
indicator
Transmitting
area
Operation panel Remote control
Base
Remote control storage position (drawn
by magnet in the remote control)
Air supply opening, front guard,
air outlet (fan blades)
Name of Parts and Function

Main unit
Rear guard, air
intake part
Remote control
Remote control
storage area
※ The remote control can’t be operated in
storage area.
Please pay special attention that the
remote control has a magnet inside.
Do not place the remote control in chest
pocket if you are using a cardiac
pacemaker; do not put the remote
control together with weak magnetic
objects (e.g. magnetic card)
When the remote control isn’t used
Put the remote control in the storage area
when it is not in use.
Warning
Power cord hook
DC power port
DC plug
Power cord
AC power adapter
DC plug
Power cord
Fix the power cord on the hook
AC power adapter (dedicated)

Packing List
After purchase, please confirm if the following accessories are complete
Warning
Attention
※Do not throw away the packaging materials after assembly, which can be used to store the product after use.
● Do not turn on the power before the blades and guards are installed.
● Do not turn on the power before the main unit in the correct setting (in a stable place and the
support frame is raised).
Preparation before Use
1. Install the battery into the remote control
① Pull out the battery case from the remote control
Pull the battery case out of the gap.
② Insert the coin lithium battery into the battery case.
Pay attention to the polarity of the battery Keep
the side upwards.
③ Insert the battery case into the remote control
④ Please insert the battery case until you hear a click
sound.
Usable range
● About 5m in front of the main unit
● About 30° to the left and right sides in front of the main unit
● When there is an obstacle between the remote control and
the main unit, the remote control may not work properly.
2. Place the main unit on a stable level place
3. Press the base to erect the support frame
Press the base to prevent it from moving, and then erect
the support frame to prevent the baffle from moving.
Raise the support
frame until the
baffle can’t move
● To extend the life, remove the battery
when it is not used for a long time.
● Please properly mount the battery pole
to avoid battery rupture or liquid
leakage.
● Do not charge, short circuit, disassemble,
throw in fire or heat the battery.
● When liquid leakage occurs, clean it
completely before inserting a new battery.
● Please pay special attention to avoid
pinching fingers by the base or support
frame.
When erecting the support frame, raise it
until the baffle can’t move; do not stop
midway.
It may cause accident or injury.
Main unit·······················································1pcs
Remote control···············································1pcs
AC adapter····················································1pcs
Coin lithium battery (CR2025)····························1pcs
User Manual···················································1pcs
Warranty Card················································1pcs
Attention
How To Use

● Do not stop before the support frame is
fully erected.
It may cause accident or injury, and the
support also may fall down.
● Do not start operation before the
support frame is fully erected.
4. Place the main unit on a stable level place
Please hold the handle to erect the support frame or
move the main unit.
5. Insert the DC plug of the power adapter into the
main unit
● Insert the DC plug into the DC port in the main unit.
● Then, fix the power cord on the hook.
The support hasn’t been fully
erected
In this state, it may fall down
easily and cause injury or
malfunction.
Power cord hook
DC power port
DC plug
Power cord
Fix the power cord on the hook
6. Insert the power plug into the power socket
The main unit will make a buzzing sound.
※ Do not stop midway when erecting the support frame.
Attention
● Be sure to fix the power cord on the hook.
● Do not let the DC power line and the
power cord being squeezed under the
base
It may damage the DC power line and the
power cord and cause fire or electric
shock.
Attention

How To Use (cont.)
Natural (green)/sleep
(red) wind indicator
Timer indicator
Swing indicator
Feeble Weak Medium
(All indicators on)
TURBO
Strong
Air volume
indicator
Transmitting
area
Operation panel Remote control
Running indicator
The current status can be confirmed by the indicator light
around the operation button.
● Air volume indicator
Display the air volume during operation. One of the four
indicators turns on during operation (all indicators turn on
at level 5 air volume).
● Natural/sleep wind indicator
The green indicator turns on in natural wind mode, and
the red indicator turns on in sleep wind mode.
● Timer indicator
(Red indicator on: scheduled power-on; green indicator
on: scheduled power-off)
If scheduled power-on is enabled, the indicator is turned
on when the device is turned off at scheduled time.
● Swing indicator
The indicator turns on during swing operation.
Start/stop operation
1. Start operation
Simply press the power button on the main unit
or remote control to start the operation.
● In normal use, the air volume and swing angle will
default to the setting when it was turned off last
time because of the memory function.
● After inserting AC adaptor into the power socke,
press the power button on the main unit or the
remote control for the first time to start the opera-
tion from the minimum air volume and non-swing
state.
2. Adjusting air volume
Press the air volume button on the main unit or
remote control to adjust the air volume.
※ TURBO indicates the strongest air volume.
Operation buttons
The functions are same as the buttons on the main unit and
the remote control.
Power button
Start/stop operation.
Natural/sleep wind indicator
Switch between natural and sleep wind
Press and hold it for three seconds to set the
indicator to off mode.
Timer button
Set the time of schedule on/off
Air volume button
Adjust the air volume during operation.
Swing button
Start/stop swinging.
Transmission area (remote control)
Point this part at the remote control signal receiver of the
main unit.
● The fan can’t start operation before the
support frame is fully expanded.
● Keep a sufficient distance between front
guard, air supply opening, rear guard, suction
port and the surroundings.
● To ensure the safety of the intake and swing,
please confirm that distance with the
surroundings is sufficient before starting
shipping.
Memory function
When you press the power button on the main unit or
the remote control, operation will start from the last setting
mode when the unit was turned off (air volume and swing
angle)
※ When the AC adapter is removed from the plug, the
device will automatically restore the initial settings.
[Initial setting] Air volume: Feeble; Swing: None.
Attention

● It is prohibited to change the direction
forcibly in the swing process.
● For safety reason, turn off the power before
changing the direction.
● Changing direction forcibly may cause
device damage, failure and noise.
Auto-off function
The fan will automatically stop running after 12 hours
since the last operation of the main unit or the remote
control.
Attention
Unplug the AC adapter from the power
socket after use.
Failure to remove it may cause fire or device
failure.
Warning
● When the AC adapter is plugged into the power socket, the current will continue to flow to the AC
adapter and the microcomputer controller.
To save power when the fan is unused for a long period of time, unplug the AC adapter from the power socket.
● When power failure occurs or the AC adapter is removed from the power socket during running, all
settings will be cancelled and the operation will stop.
Please restart the operation.
● Please prevent water spill to the product and keep out of water. It may cause short circuit, electric shock and
other safety accidents.
Attention
3. Natural/sleep wind function
The function can be switched by pressing the
natural/sleep wind button on the main unit
or the remote control.
About natural/sleep wind function
Natural wind (green indicator on)
Adjust the air volume to reproduce the feeling of natural
wind.
Press the air volume button on the main unit or remote
control to change the air volume.
Sleep wind (red indicator on)
Adjust the air volume to reproduce the feeling of natural
wind.
Press the air volume button on the main unit or remote
control to change the air volume as follows.
(TURBO) TURBO natural wind →Strong natural
wind → Medium natural wind → Weak
natural wind → Feeble natural wind:
Changes with time.
( At strong wind) Strong natural wind → Medium natural
wind → Weak natural wind → Feeble
natural wind: Changes with time.
(
At medium wind)
Medium natural wind → Weak natural
wind →Feeble natural wind: Changes
with time.
( At weak wind) Weak natural wind →Feeble natural
wind: Changes with time.
( At feeble wind) Same as feeble natural wind.
※During sleep wind, the air volume indicator remains the
display at the time of setting even if the air volume
changes.
4. Start/stop swinging
Pressing the swing button on the main unit
or the remote control during operation will start
swinging. Pressing it again will stop swinging.
The swing angle is about 75°
Dimming mode
If you feel that the indicator is glaring, you can press
and hold the natural/sleep wind button on the main
unit or the remote control for three seconds) to set the
dimming mode.
Unplug the power plug from the power socket after use
Cancel dimming mode
● Press and hold the natural/sleep wind button
for three seconds
● Stop running
5. Stop operation
During operation, simply press the power
button on the main unit or the remote
control to stop.
6. Pull the AC adapter out of the power socket
The left-right swing direction can be changed manually
The range of the angle is about 60° (three segments in
each direction, 10° per segment)
Press and hold the natural/sleep wind button
on the main unit or the remote control for 3
seconds to turn off ( ) the display area and
running indicator.
Green indicator
on (Natural wind)
Red indicator on
(Sleep wind)
Indicator off
(Cancel)

Setting timer
Off timer setting
When off timer is set, the fan will automatically stop
running after reaching the set time.
1. Press the timer button during running to set
the off timer
When you press the timer button during running,
the timer indicator will turn on, and the schedule off
mode is enabled.
The time for schedule off can be set by pressing the
timer button .
● Please confirm the timer indicator and set the time
before the device stops.
● When the off timer is set, the timer display will show
the remaining time before the schedule off function
starts.
2. Cancellation of schedule off
The timer indicator will automatically turn off by
simply pressing the timer button several times.
About the timer indicator
Each time you press the timer button , the timer
indicator will switch in sequence as follows.
After the off/on timer is set, the timer indicator will
change with the time and show the time before
the timer is activated.
The red indicator turns on when the on timer is
set, and the green indicator turns on when the off
timer is set.
※ The on timer and off timer can’t be set at the
same time.
On timer settings
When on timer is set, the fan will automatically start
running after reaching the set time.
1. Press the timer button to set the on timer when
the fan is stopped
If you press the timer button when the fan is
stopped, the timer indicator will start flashing, indicat-
ing that the schedule on mode is enabled.
● The indicator for the last air volume (including the
swing indicator) also flashes (→Memory function).
The time for schedule on can be set by pressing the
timer button .
● When the on timer is set, the timer indicator will
show the remaining time before the schedule on
function starts.
(1 hour)
(1 hour)
(2 hour)
(2 hour)
(4 hour)
(4 hour)
(8 hour)
(8 hour)
How To Use (cont.)
After use, press the power button to turn
off the power and unplug the AC adapter from
the power socket.
It may cause fire or malfunction.
Before enabling the on timer, check the
surrounding environment to ensure that the
fan can operate normally after reaching the
set time.
Do not use the on timer in an environment
where there are children, where strong wind
may cause the device to tip over.
Warning
Attention
(Light out)
(Cancel timer)
(Light out)
(Timer on)

2. Setting running air volume when reaching the set
time
You can simply press the air volume button on the
main unit or the remote control to set the running air
volume at the set time. The air volume indicator also
flashes.
● The wind blowing mode at the set time can be set by
pressing the swing button and the natural/sleep
wind button.
● Confirm the settings through the flashing indicator.
3. Cancel the setting of schedule on
You can simply press the timer button on the main
unit or the remote control several times and the timer
indicator will turn off automatically.
Adjusting up/down angle
Hold the handle, and press the top or bottom of the front
guard to turn it up and down slowly.
● When adjusting the angle, stop the operation and
make sure that the blades have stopped.
● Hold the main unit with one hand and adjust with the
other to avoid tipping over.
Used as circulating fan
It can be used to circulate the air in the room and can be
used together with an air conditioner to improve the
efficiency.
Handling
Please hold the handle when handling.
Auto-off function
The fan will automatically shut down after 12 hours
of continuous operation even if it is started through
the on timer.
The fan will automatically stop running after 12
hours since the last operation of the main unit or the
remote control.
Be careful to avoid pinching your fingers
while adjusting the angle during operation.
It may cause injury or malfunction.
Down swing
The angle can be adjusted by
45° from the front at most
Up swing
The angle can be adjusted by
90° from the front at most
Handle
Front
Rear
RearFront
Attention

●After cleaning and maintenance, be sure to
install the fan blades, spinner, and front
guard correctly.
●Do not operate until the front guard is
installed properly.
Unlocking switch
Safety screw
Attention
Maintenance and Storage
Before cleaning or maintenance, be sure to unplug the AC adapter from the power socket.
It may cause electric shock, fire, or injury.
Notice
● Never use household detergents or diluted solvents,
volatile oils, alcohol or abrasive powder for cleaning.
● Do not spray water on the main unit and AC adapter
(it may cause electric shock or malfunction)
Cleaning and maintenance
Routine cleaning and maintenance (when the main
unit is dirty)
If the main unit is dirty, wring a soft cloth soaked in
warm water or neutral detergent (except citrus type)
and wipe it gently, then dry the surface gently with a
dry cloth. (Do not rub the resin part hard, or else it
may cause damage)
Routine cleaning and maintenance
Please clean the dust from the front guard, air supply
opening, rear guard and suction port with a vacuum
cleaner.
Internal cleaning and maintenance
Remove the front guard and the fan blade as described
below and perform internal cleaning and maintenance.
Remove the parts
①
Unscrew the safety screw to unlock the two switches on
the top of the front guard by pulling them outsides. Pull
forward to remove the front guard.
②
Rotate the spinner to the right and remove the blade.
Install the parts
③ Insert the fan blade in accordance with the shape of the
motor shaft, then turn the spinner to the left and lock it to
the left.
④ Align the hook under the front guard with the alignment
mark under the rear guard, and then lock the two
switches and screw the safety screw on the top of the
front guard.
Warning
Insert the fan blade according to the
shape of the motor shaft
Alignment mark
Alignment
mark
Blade
Front guard
Motor shaft
Rear guard
Spinner
Rear guard
Front guard

●Always unplug the AC adapter from the
power socket before folding.
●When folding the support frame, be careful
to avoid pinching your fingers.
It may cause injury or malfunction.
●Do not place the minimized fan upright.
Do not store it within the reach of children.
It is possible to expand or fall down.
●Only hold the handle while moving.
Minimized state
It can be stored in a narrow place after being
minimized
Attention
Folding the support frame (minimizing)
The unit can be folded (minimized) in a compact state
when it is not in use.
1. Stop the operation with the fan blades facing the
front, unplug the AC adapter from the power socket,
and remove the DC plug from the main unit.
2. Press the base, hold the handle, and slowly lower
the support frame to the base side (reverse to the
steps of 3. Press the base to erect the support frame
on page 5)
※ Do not place the minimized fan upright in a place
where people are passing through.
※Please insert the remote control into the storage
area and store it in an appropriate place.
Storage method
●Clean the dust from the front guard, air supply
opening, rear guard and suction port with a vacuum
cleaner.
●Fully dry after cleaning and maintenance.
● Put on a plastic bag, put it in the packaging box, and
store it in a place where there is no moisture.
● When storing for a long time, remove the battery of
the remote control.

Troubleshooting
Only qualified technicians are allowed to disassemble or repair the fan.
Check according to the following table when you think it may have “failure”.
Is there any of the following situations?
● Power cord or AC adapter heats up abnormally.
● The power is connected and disconnected repeatedly
● Burning smell
● Other abnormalities & failures
Please cut off the power, unplug the AC adapter and
contact the dealer or Shun Hing Electric Service
Centre Ltd.
No power
Air volume too small
Running stops suddenly
Running indicator is dark
Too much noise during running
The indicator flashes but the fan
does not work when the button
is pressed
Remote operation invalid
● Power plug falls off the power socket
● DC plug falls off the DC port
● Too much dust accumulated on the front
guard, air supply opening, rear guard or
suction port
● The rear guard or air supply opening is
blocked
● Auto-off function is enabled to turn off the
power automatically
● The dimmer mode is enabled.
● The front guard or blades are not properly
installed
● The base isn’t fully erected
● On timer is enabled
● The battery voltage is low
● The battery is loaded incorrectly
● The remote control is installed in the
storage area during operation
● The remote control doesn’t point at the
receiver
● Too far away from the receiver
Insert the power plug into the power socket
Insert the DC plug into the DC port (page 4)
Clean the dust with vacuum cleaner
● Eliminate blockage of the rear guard or air
supply opening
● Remove the objects blocking the rear guard
or air supply opening
Press the power button on the main unit or
the remote control to turn on the power
Press and hold the natural/sleep wind button
on the main unit or the remote control for
three seconds, or stop the running
Install the front guard and blades properly
Erect the base until it is fully upright
Press the timer button repeatedly to disable
the timer
Replace the battery
Install the battery properly
Point at the receiver
Operate in effective range
Problem
Fans used for long term should be carefully inspected
Cause Solution
Warning
Table of contents
Other DOSHISHA Fan manuals