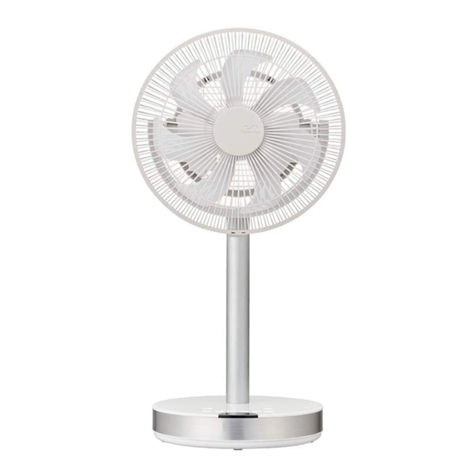
DOSHISHA Kamome FKLS-281D User manual

Thank you for purchasing the Kamome FKLS-2810/SLKF-281D.
Before use, be sure to carefully read this information on safety to
ensure that you use this product correctly. After reading this manual,
keep it in a safe place for future reference.
*This product is designed to be assembled by customers themselves.
FKLS-281D/SLKF-281D
Kamome FKLS-281D/SLKF-281D
User’s Manual
English
kamomefanFKLS-281DEn.indd1kamomefanFKLS-281DEn.indd1 2019/12/2419:23:122019/12/2419:23:12

2
English
Safety Information
This section presents important safety information. Always follow
these instructions when using the product.
IMPORTANT SAFETY INSTRUCTIONS
When using electrical appliances, basic precautions should always be
followed to reduce the risk of fire, electric shock, and injury to
persons, including the following:
1. Read all instructions before using this product.
2. This product is designed for home use only. Do not use for any other purpose.
3. Extreme caution is necessary when any fan is used by or near children and
whenever the product is left operating and unattended.
4. Always unplug the product when not in use.
5. Do not operate any fan with a damaged cord or plug or after the product
malfunctions, has been dropped or damaged in any manner. Return the product
to an authorized service facility for examination, electrical or mechanical
adjustment, or repair.
6. Do not use outdoors.
7. This product is NOT intended for use on tabletops or desktops; use ONLY ON
FLOORS. It is not to be used in wet or moist locations, such as bathrooms and
laundry areas. Never position this product where it may fall into a bathtub or other
water container.
8. Do not run cord under carpeting. Do not cover cord with throw rugs, runners, or
similar coverings. Do not route cord under furniture or appliances. Arrange cord
away from traffic area and where it will not be tripped over.
9. To unplug the product, first turn controls to the OFF position, then grip the plug
and pull it from the wall outlet. Never pull by the cord.
10. Do not insert or allow foreign objects to enter any ventilation or exhaust opening
as this may cause an electric shock or fire, or damage the product.
11. Always plug the product directly into a wall outlet/receptacle. Never use with an
extension cord or relocatable power tap (outlet/power strip).
12. SAVE THESE INSTRUCTIONS
WARNING
In order to avoid any electrical shock, short-circuit, burns, injury, or
cause a fire:
• Do not disassemble. This product may only be disassembled by qualified repair technicians.To
request repair, see Warranty Page at the back of this manual.
• Do not use any AC adapter other than the dedicated AC adapter.
• Do not use if the power cord or plug is damaged, or if the plug is not fully inserted into the
outlet.
• Do not scratch, damage, modify, forcibly bend, pull, twist, bind/clamp, or place heavy objects on
the power cord.
kamomefanFKLS-281DEn.indd2kamomefanFKLS-281DEn.indd2 2019/12/2419:23:122019/12/2419:23:12

3
English
• Do not allow children to use this product by themselves, and keep the product and power cords
out of the reach of small children.
• Do not plug in or unplug the product while your hands are wet.
• Do not apply water or sprinkle water over the fan.
• Do not operate without installing the blades and guard.
• Use only with the designated power supply 220 – 240 V.
• If you notice anything unusual during operation (burning smell, smoke, etc.), immediately stop
use, and unplug the power cord.
• Insert the power plug all the way into the outlet.
• Wipe off any dust adhering to the power plug blades and plug surface.
• If any liquid leaks from the battery of the remote control and gets in your eyes, do not rub them;
rinse them out with water and see a doctor.
• After use, be sure to turn off the power, and unplug the power cord from the outlet.
• When cleaning the product, for safety's sake be sure to unplug it from the outlet.
CAUTION
• Do not expose your body to the fan wind for a long period of time.
• Do not drag the base of the main unit.
• Do not change the direction of the guard by force during swinging operation.
• Do not put your fingers in the guard.
• Do not bring your hair close to the guard.
• Do not leave the room while the product is on.
• Do not use on an unstable surface.
• Do not use near flames such as oven ranges, or where there is flammable gas.
• Do not use in places subject to rain or splashes.
• When cleaning the product, do not use household detergent, thinner, benzene, alcohol or a
polishing powder or spray.
• For remote control batteries, do not use any other than that specified.
• Do not leave the battery of the remote control in a hot location or in direct sunlight; and do not
put it into a fire.
• Face the terminals (+/-) correctly when putting the battery in the remote control.
• Remove the battery from the remote control when it will not be used for a long time.
• Remove the battery before discarding the remote control.
kamomefanFKLS-281DEn.indd3kamomefanFKLS-281DEn.indd3 2019/12/2419:23:122019/12/2419:23:12

4
English
Names of Parts and Their Functions
Base
Remote control receiver
Center mark shell (aroma circle disk)
Front Grille
Blade
Ring
Front
Middle pole part
Rear grille
Motor unit
Lock button
DC jack
Remote control unit storage box
Cable hook
Handle
Rear
Power Plug
Power Cord
DC plug
DC cord
AC adapter
Dedicated AC adapter
kamomefanFKLS-281DEn.indd4kamomefanFKLS-281DEn.indd4 2019/12/2419:23:122019/12/2419:23:12

5
English
Control panel of main unit Remote control
Left: Air volume lamp
Center: Off timer lamp
Right: Natural/Sleep wind lamp
⑥
① ② ③ ④ ⑤
①
③
⑤
②
④
⑦
①Power button
Start/stop operating.
②Air volume Button
Switch the air volume during operation.
③Swing button
Start/stop swing.
④Off Timer button
Set the time for schedule power off.
⑤Natural/Sleep wind button
Switch between Natural wind and Sleep wind.
*Hold the Natural/Sleep wind button more than three seconds to be enable or
disable dimmer mode.
⑥Signal receiver (remote control)
Point the remote control at the signal receiver.
⑦Transmitter (remote control only)
Use by pointing at the remote control receiver on the main unit.
kamomefanFKLS-281DEn.indd5kamomefanFKLS-281DEn.indd5 2019/12/2419:23:122019/12/2419:23:12

6
English
Adjust the Angle
Support the handle, push the top or bottom of the front guard, and slowly move
the fan up or down.
The angle can be adjusted up to 90 degrees upward or 30 degrees downward.
Ring Ring
FrontFront
90º
30º
Rear Rear
CAUTION
For safety, press the power button to stop the blades’ rotation before adjusting
the direction. Changing the direction by force may cause damage, malfunction,
abnormal noise, etc.
Carrying
When moving the unit, be sure that the base, middle pole, and head are assembled
firmly together, and carry the whole unit by holding the handle.
CAUTION
When adjusting the angle or the height, or when carrying, pay attention not to
pinch your fingers in the gaps between the parts.
kamomefanFKLS-281DEn.indd6kamomefanFKLS-281DEn.indd6 2019/12/2419:23:122019/12/2419:23:12

7
English
Installation and Setup
Accessories included in box
After purchasing, please confirm that the items below are included in the box.
Base ....................................................................................................1
Head (aroma circle disk installed)..........................................................1
Middle pole .........................................................................................1
Dedicated AC adapter..........................................................................1
Remote Control (installed in the base)....................................................
Coin lithium battery.............................................................................1
Replacement felt (1 in aroma circle disk)...............................................4
Manual (including Warranty Card)........................................................1
*Keep the packaging box to store the product after use.
CAUTION
• Firmly attach the guard and the blades to the main unit before inserting the
power plug in the outlet.
• Be careful to avoid injury from the edges of blades.
kamomefanFKLS-281DEn.indd7kamomefanFKLS-281DEn.indd7 2019/12/2419:23:122019/12/2419:23:12

8
English
1. Assembly of base, middle pole and head
The middle pole can be removed or installed, and the height can be adjusted.
Enlarged View
of Connection
The lock button
is located on the
rear side.
Lock button
Confirm the rod and hole size
first, and insert the rods into
the holes at the same time.
Head
①
➊
②
➋
③
Rear
Rear
Middle
pole
The base of
the main unit
When in tall position
Height is approx. 83.0 cm
When in short position
Height is approx. 57.0 cm
Setting up in the tall position
①Put the base on a stable position.
②Insert the middle pole into the base.
③Insert the head into the middle pole.
*When performing steps ②and ③, pay attention to the directions that the middle
pole and the head are facing.
Setting up in the short position
➊Put the base on a stable position.
➋Attach the head to the base.
*Pay attention to the direction in which you attach the head.
*When setting up the unit in the short position, the middle pole is not used so be
careful not to lose it.
*To remove the head and middle pole, press the lock button on the rear side.
CAUTION
There should be no gaps between the connected parts.
kamomefanFKLS-281DEn.indd8kamomefanFKLS-281DEn.indd8 2019/12/2419:23:122019/12/2419:23:12
9
English
2. Connect the dedicated AC adapter
Please insert the DC plug of the AC adapter into the DC jack on the back of the
base. In order to avoid tripping over the cord, hook it to the base.
DC cord Cable hook DC plug DC jack
(The base of the main unit)
WARNING
Be sure to insert the DC cord into the cable hook.
If the DC cord is not inserted in the cable hook, the DC plug can disconnect easily,
which causes a risk of fire, accident, or malfunction
kamomefanFKLS-281DEn.indd9kamomefanFKLS-281DEn.indd9 2019/12/2419:23:122019/12/2419:23:12

10
English
Correct Use of the Fan
Preparation before Use
1. Place the main unit on a stable horizontal surface
Make sure the main unit is assembled properly.
2. Install the battery into the remote control
Remote Control Removal/Storage
Transmitter
①②
③
When taking the remote control out of the storage box on the left side of the base:
①Push on the remote control in the storage box until there is a click sound and the
remote control pops out
②Pull out the remote control
When putting the remote control back into the storage box:
③
Push the remote control into the storage box until there is a click sound.
*Insert the remote control with the buttons facing up and the transmitter end
entering first.
Install the battery into the remote control
Insert the included battery (CR2025 coin lithium battery) in the remote control as
shown below.
①Pull out the battery holder
Battery holer
①
*With the buttons facing down, hook your finger on the part indicated by the
arrow and pull it out.
②Pay attention to the polarity of the battery and insert the coin lithium battery into
the battery holder.
+ Positive side
②
*Insert the battery with the positive side facing up.
kamomefanFKLS-281DEn.indd10kamomefanFKLS-281DEn.indd10 2019/12/2419:23:122019/12/2419:23:12

11
English
③
Re-Insert the battery holder into the main unit of the remote control until you
hear a click sound.
③
Range
• About 5 m front of the main unit.
• About 30° to the left and right sides in front of the main unit.
• If there is an obstacle between the remote control and the main unit, the remote
control may not work properly.
Caution
• Do not recharge, short, disassemble, put into the fire and heat.
• When liquid leakage occurs, clean it completely before inserting a new battery.
3. Plug the power plug into the outlet.
The unit will make a “beep” sound.
Start/stop operation
1. Start operation
Simply press the power button on the main unit or remote control to start the
operation.
• In normal use, the air volume and swing angle will default to the setting when it
was turned off last time because of the memory function.
• When the AC adapter is removed from the plug, the device will automatically
restore the initial settings.
Memory Function
When you press the power button on the main unit or the remote control,
operation starts with the previous settings (air flow / Swing).
*If you disconnect the power plug from the outlet, the fan will reset to the initial
settings.
[Initial settings] Air flow: Very weak. Swing: None
2. Adjusting the air volume
Press the Air volume button of the main unit or the remote control during
operation to switch the air volume setting.
*The lamp for the air volume that is set lights up (or blinks).
Lit up
Slight Weak Moderate Strong
Blinking
kamomefanFKLS-281DEn.indd11kamomefanFKLS-281DEn.indd11 2019/12/2419:23:132019/12/2419:23:13

12
English
3. Start Natural/Sleep wind function
Press the Natural/Sleep wind button of the main unit or the remote control
during operating to switch between the functions.
*The lamp for Natural/Sleep wind lights up, blinks, or turns off to indicate which
function is set.
Lamp off
(Canceled)
Lamp lit up
(Natural wind)
Lamp blinking
(Sleep wind)
About Natural wind/Sleep wind
Natural wind (the lamp turns on)
Both high level and low level can reproduce natural wind.
Press the Air volume button repeatedly to change the volume of the wind.
Sleep wind (the lamp blinks)
Both high level and low level can reproduce natural wind.
Press the Air volume button repeatedly to change the volume of the wind as
follows:
Strong wind: Strong Moderate Weak Slight, change with time
Moderate wind: Moderate Weak Slight, change with time
Weak wind: Weak Slight, change with time
Slight wind: same with Natural wind
4. Starting/Stopping Swing Operation
Swing operation starts when you press the Swing button on the main unit or the
remote control during operation. Press the button again to stop swing operation.
You can change the direction manually. The direction can be changed left and right
to 3 click positions on each side, with 1 click of about 10°, totaling about 60°.
• During swing operation, the parts above the base move.
• To change the direction of swing manually, hold and turn the middle pole or the
lower part of the head.
Middle pole
(under the head)
kamomefanFKLS-281DEn.indd12kamomefanFKLS-281DEn.indd12 2019/12/2419:23:132019/12/2419:23:13

13
English
5. Timer Setting - Off timer
Press the off timer button of the main unit or the remote control during
operating to enable the off timer setting (the Off timer lamp will light up). The off
timer can be set for up to 8 hours.
*To cancel the off timer setting, press the Off timer button repeatedly until the
Off timer lamp turns off.
About off timer
When you press the off Timer button on the unit or the remote control, the off
timer lamp changes as follows.
1H
(1 hour)
2H
(2 hours)
4H
(4 hours)
lamp off
(Timer disabled)
8H
(8 hours)
After setting the off/on timer, the lamp changes with time. The timer shows the
time when the operation stops.
8H
(8 hours)
4H
(4 hours)
2H
(2 hours)
lamp off
(Timer enabled)
1H
(1 hour)
Dimmer mode
If the LED lamps are too bright, you can enable Dimmer mode by pressing and
holding the Natural/Seep wind button on the main unit or the remote control for
more than three seconds.
To cancel Dimmer mode:
• Press the Natural/Sleep button more than three seconds again.
• Stop operation.
6. Stop operation
During operation, press the power button on the main unit or remote control to
stop operation.
Function to prevent accidentally leaving the power on:
Operation stops automatically when 12 hours have passed since the last time a
button was pressed on the main unit or the remote control.
7. Unplug the power plug from the outlet.
CAUTION
• If the power plug is plugged into the power outlet, some of the controls
will become warm due to the power consumption of the microcomputer.
When not using the unit for a long time, unplug the AC adapter from the outlet
to save power.
• If a power failure occurs or the power plug is disconnected during
operation, all settings will be canceled and operation will stop.
Please configure settings again from the beginning.
kamomefanFKLS-281DEn.indd13kamomefanFKLS-281DEn.indd13 2019/12/2419:23:132019/12/2419:23:13

14
English
Use of aroma oil
1. Remove the center mark shell (aroma circle disk) from the center of front grille.
Center mark shell
(aroma circle disk)
①
②
①②: Turn the center mark shell to the left to unfasten it.
2. Soak aroma oil into the felt tab on the center mark shell (aroma circle disk).
Make sure that the felt tab is installed. Carefully sprinkle 2-3 drops of aromatic or
natural essential oil onto the felt tab.
Aroma essential oil or
natural essential oil Felt cover
CAUTION
• Do not overfill the center mark shell (aroma circle disk) with the aroma oil
or natural essential oil until it overflows from the felt compartment.
• Be sure to wipe away any aroma oil or natural essential oil that may drip
off the felt tab or cover.
• Do not set new felt tabs in the center mark shell (aroma circle disk) or felt
cover if it is stained with aroma oil or natural essential oil.
• Do not use any type of felt tab other than the dedicated felt tabs. Doing
so may cause damage or malfunction of the unit.
kamomefanFKLS-281DEn.indd14kamomefanFKLS-281DEn.indd14 2019/12/2419:23:132019/12/2419:23:13

15
English
3. Install the felt cover, and put the aroma circle disk back into place. When
installing the felt cover, place it in the center mark shell and turn to right.
Then put the center mark shell back on the front grille and turn to right.
4. Start operation
Follow “Start/stop operation” on pages 11 - 13 and you can enjoy the cool breeze
with aromatherapy.
Felt tab replacement
*If the aroma oil felt tab is dirty or a different aroma oil is used, replace the felt tab.
*To replace the felt tab, turn the felt cover to the left, and then take out the felt tab.
Rotate the felt cover to the left to remove it from the center mark shell (aroma circle disk)
Felt cover
Packing
Felt tab
Center mark shell
(aroma circle disk)
*Install the felt tab under the buckles as shown in the figure and make sure that
the packing is inserted, and then turn the felt cover to the right to install it.
To prevent the felt from exposing/overflowing from the felt compartment in the center mark
shell (aroma circle disk), place the felt under the buckles when installing.
Buckle
Felt tab
Packing
kamomefanFKLS-281DEn.indd15kamomefanFKLS-281DEn.indd15 2019/12/2419:23:132019/12/2419:23:13

16
English
*In addition to the felt tab inside the disk we also provide 3 replacement felt tabs.
The felt tab cannot be reused even washed.
*Install the felt tab under the buckles of the felt compartment in the center mark shell.
When replacing the felt tab, install it under the buckles.
Buckle
Felt tab
Clean the center mark shell with neutral detergent, fully dry and install according
to steps 1 to 3.
*Felt tab replacements are sold separately. Please contact the service department.
Aroma oil/natural essential Oil
• Keep it away from flames.
• Keep it out of reach of children.
• If some oil spilled on your clothing, rinse with plenty of water and let it dry
naturally. Do not use a dryer.
• Wash hands immediately if some oil spilled on your hands.
• Be sure to read the instructions for use of aroma oil/natural essential oil.
kamomefanFKLS-281DEn.indd16kamomefanFKLS-281DEn.indd16 2019/12/2419:23:132019/12/2419:23:13

17
English
Cleaning and Storage
CAUTION
Do not flush the main unit or AC adapter with water.
Maintenance
When the main unit is dirty, soak a soft cloth in warm water or neutral
detergent (excluding citrus series), wring it thoroughly, wipe the dirt, and
then wipe with a dry cloth. (Do not rub the resin hard, or else it may cause
scratches on the surface.)
Removal Method of Blades and Front Grille
Disassemble the front grille before maintenance of the internal blades of the main
unit. To perform disassembly, reverse the assembly procedure shown below.
Assembly Method of Blades and Front Grille
①
②
④
③
Turn the front grille to the right. ④
The △mark is at the top.
Front grille
Front grille Rear grille
Blade-mount spinner Motor shaft Rear grille
Ring
Blade
Align the □of the
front grille with the
rear grille △and push
it in. ③
Ring
kamomefanFKLS-281DEn.indd17kamomefanFKLS-281DEn.indd17 2019/12/2419:23:132019/12/2419:23:13

18
English
1. Install the blades.
①Align the blade notch with the notch at the tip of the motor shaft and attach the
blades.
②Align the hole on the blade-mount spinner with the tip of the motor shaft. Hold
the blades and turn the blade-mount spinner counterclockwise to tighten the
blades firmly.
2. Install the front grille.
③Align the □mark on the front grille with the △mark on the upper part of the
rear grille and push it in.
④Install the front grille by turning it clockwise until it stops.
Removal of front grille
[If it is a large fan, please separate the base from the head]
①Keep the fan facing up, and pinch the lower part of the fan with your feet.
*Please be careful to prevent being cut by the blade edges
②Wet your fingers or wrap your hands with a thin wet towel, and hold the outer
ring of the front grille to prevent it from slipping.
③Rotate the front grille counterclockwise.
④Rotate the outer ring of the front grille about 2cm to open the lock.
⑤Lift the front grille upwards to remove it.
Storage method
• After disassembling, please clean and dry the parts.
• Put the dried parts in a plastic bag and put it in the packing box.
• To store the unit in the original box, see pages 7 - 8 “Installation and Setup” and
disassemble the unit by performing the reverse of the assembly procedure.
WARNING
Do not operate without attaching the blades and the guard to the main
unit.
CAUTION
• Firmly attach the guard and the blades to the main unit before inserting
the power plug in the outlet.
• Be careful to avoid injury from the edges of blades.
kamomefanFKLS-281DEn.indd18kamomefanFKLS-281DEn.indd18 2019/12/2419:23:132019/12/2419:23:13

19
English
Troubleshooting
This product can be disassembled and repaired by qualified repair
technicians only.
Please check if the product has any of the following symptoms before
sending it for repair.
Problem Primary Cause Solution
Blades won’t turn • The blades are not
correctly installed.
• The blades are stuck.
Install blades and grilles properly
as described on pages 17 - 18
“Assembly Method of Blade and
Front Grille”.
Power plug disconnected
from the outlet.
Reinsert the power plug.
DC plug disconnected
from the DC jack
Plug DC connector firmly into the
DC jack.
The lamps of the
operation unit are
dark. (Air volume
lamp, Timer lamp,
Natural/Sleep wind
lamp)
Dimming mode is set. Press the Natural/Sleep wind
button more than three seconds or
stop the operation.
Operation stops
suddenly.
Unit is turned off for 12
hours and the auto-off
function is activated
Press the power button on the
main unit or remote control to turn
on the power.
Loud noise when fan
is on.
• The blades are
installed incorrectly.
• The blades are stuck.
• The grille isn’t installed
properly.
Install blades and grilles properly
as described on pages 17 - 18
“Assembly Method of Blade and
Front Grille”.
Blade is loose. Tighten the bundle as described on
pages 17 - 18 “Assembly Method
of Blade and Front Grille”.
The remote control
does not work.
The battery is worn out. Put a new battery in the remote.
The terminals (+/–) of
the battery are reversed.
Check the battery terminals (+/–)
and put it in correctly as described
on page 10 “Install the battery into
the remote control”.
kamomefanFKLS-281DEn.indd19kamomefanFKLS-281DEn.indd19 2019/12/2419:23:132019/12/2419:23:13

20
English
The fan needs to be checked regularly for any defects.
• Power cord, plug or AC adapter
heats up abnormally.
• The power connects and then
disconnects repeatedly.
• Buring smell.
Please turn off the power, unplug
the power cord and contact the
service department at Doshisha.
Specifications
Product name Kamome
Model FKLS-281D / SLKF-281D
Power supply 220 – 240 V. 50/60 Hz - (DC 24 V)
Power consumption 18 W
AC adapter cord length Approx. 2.5 m
Size Width 36.5 cm × Length 33 cm × Height 57cm (L),
Height 83 cm (H)
Weight Approx.3.8 kg (body only)
* Due to a continuous process of product improvement, the specifications and
other information are subject to change without notice.
kamomefanFKLS-281DEn.indd20kamomefanFKLS-281DEn.indd20 2019/12/2419:23:132019/12/2419:23:13
This manual suits for next models
1
Table of contents
Other DOSHISHA Fan manuals
Popular Fan manuals by other brands

Halton
Halton Max Ultra Circular Installation, commissioning and maintenance guide

elsner elektronik
elsner elektronik WL610 Technical specifications and installation instructions

Lasko
Lasko XTRA AIR T48331 operating manual

Hunter
Hunter 28875 Parts guide

Weinmann
Weinmann MEDUMAT Transport quick start guide

Ellington
Ellington LAR54CH3 installation guide