DOSHISHA Kamome FKLT-302DHK User manual

User manual
Thank you very much for choosing our
product. Please read the
User manual
carefully
in
order
to
use
this
product
correctly. Please keep this User manual
properly
after
reading.
※ Some parts of the product need to
be
assembled
by
the
customer.
Contents
Safety Precautions ......................... P1-P2
Name of Parts and functions ............... P3
Preparation before Use ......................... P4-P5
How to use ................................... P6-P9
Maintenance and Storage.................P10-P11
Troubleshooting..........................................P12
Power
supply DC24V,
dedicated
AC
adapter
23W
(when
using
a
dedicated
AC
adapter)
About
1
8m.
Width
34
×
Length
28.5
×
Height
57
cm
(when
tube
removed)
Height
100
cm
(when
tube
assembled)
About
4.0kg
(excluding
the
remote
control
and
AC
adapter)
Power
consumption
Cable
length
of
AC
adapter
Dimensions
Net
Weight
FKLT-302D
HK
Kamomefan
Voltage
Frequency
220V
50Hz
DOSHISHA CO.,LTD
Remote Control Battery Lithium Battery (CR-2025)
●This design and specifications of the product may be modified without prior notice.
●The diagram and illustrations in this user manual are for reference only,
the actual product is subject to manufacturer specifications.
[This
products
is
for
indoo
r
use
only]

Warning
Please read Safety Precautions carefully in order to ensure proper use
Please read and abide by the critical safety information listed in this section carefully
Please keep it properly after reading
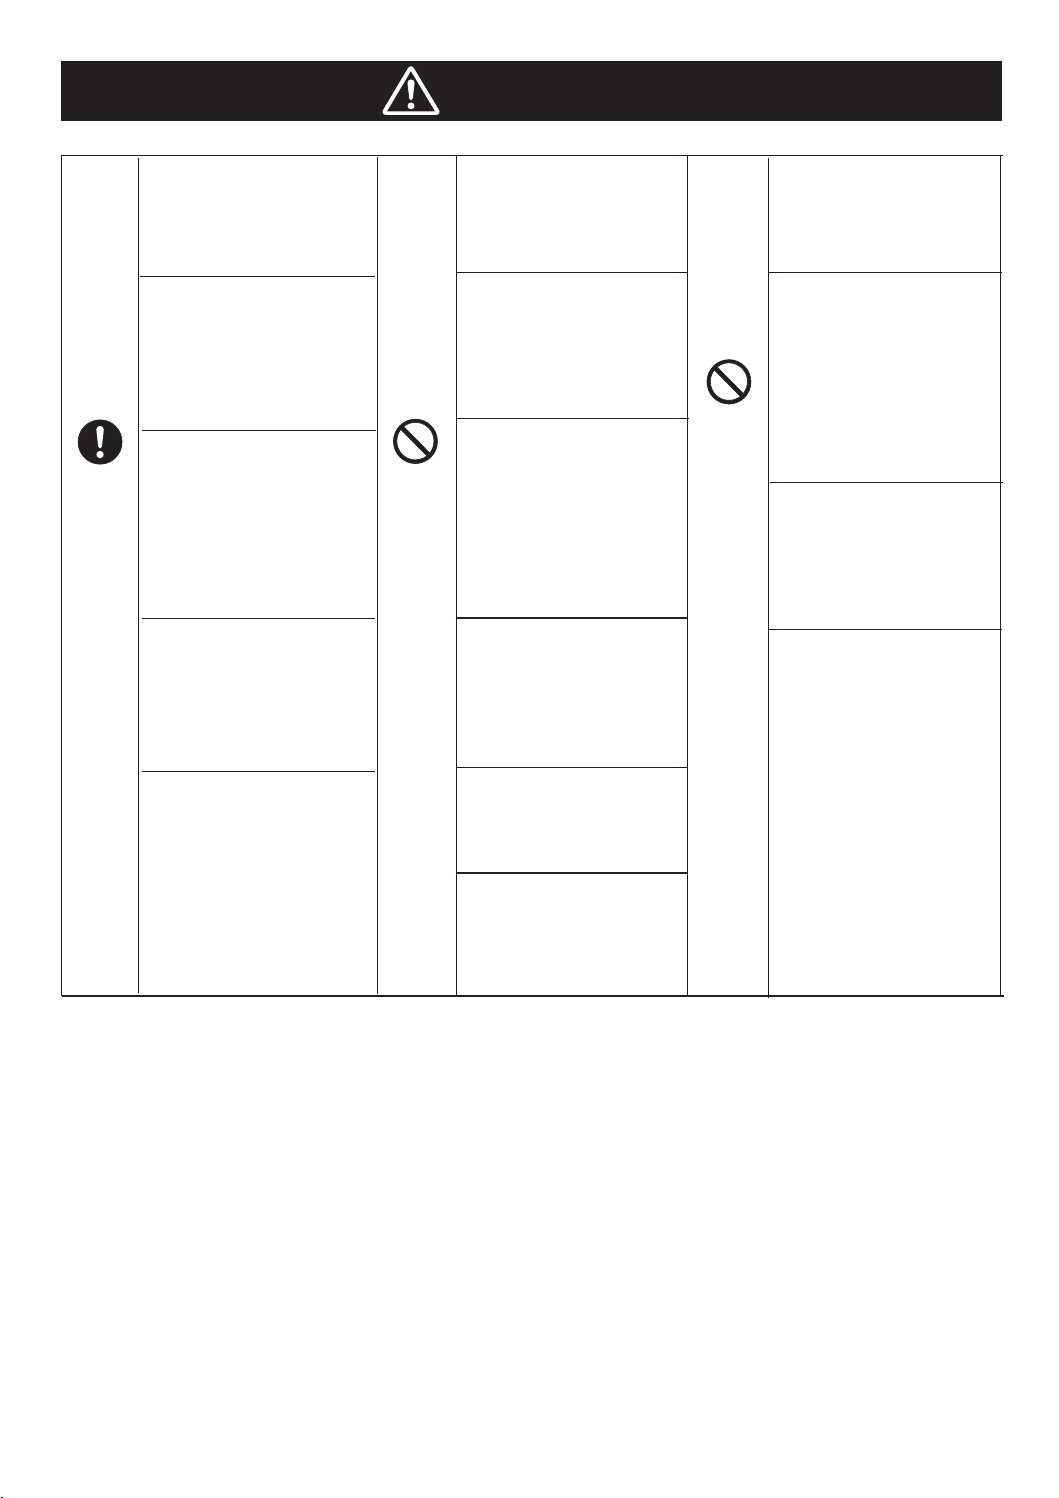
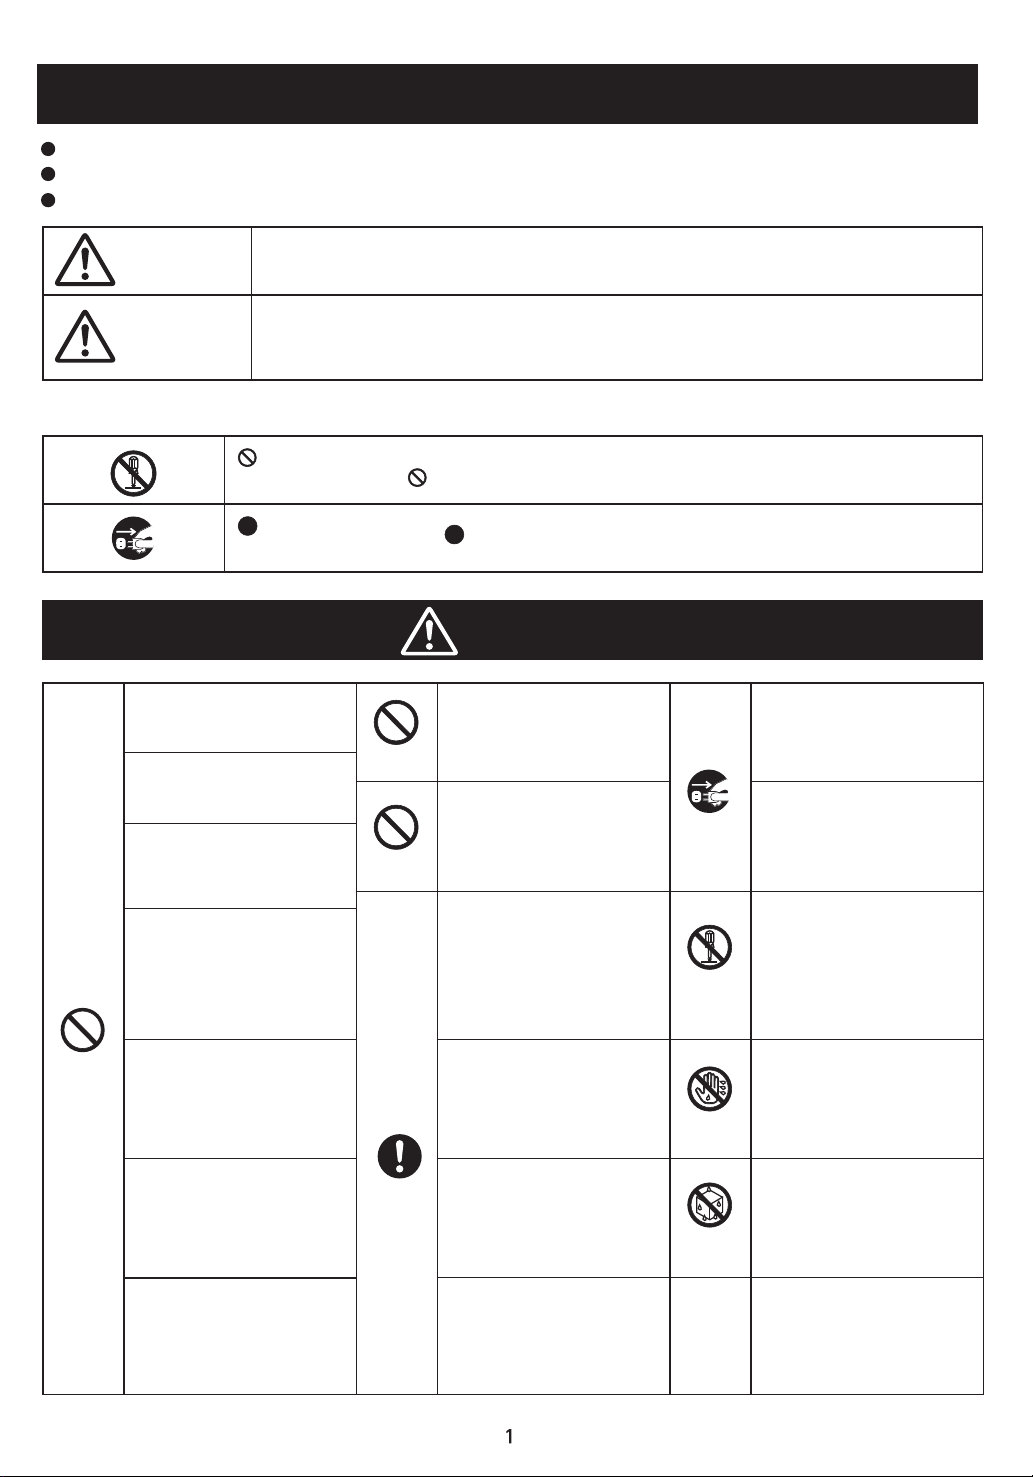
Incorrect operation may cause a risk of death or serious injury
indicates “mandatory”. The specific mandatory content will be shown with picture and
text inside and beside . (The picture on the left indicates that “the power plug must be
pulled out from the socket”)
Prohibited
Prohibited
Prohibited
Unplug
Disas-
sembly
prohibited
Instruction
Do not connect this product to
power supply excepted rated
voltageandrated frequency
Do not use devices other than
those provided with dedicated AC
adapters
It may cause electric shock and fire
Do not
Do not damage the power cord and
AC adapter, and do not use the
device before the plug is properly
inserted into the socket
It may cause electric shock, short
circuit and fire
Do not operate without the blades
and protective covers
It may cause personal injury and
device failure
Do not expose the product to
children, or use it in any place that
the children can access
It may cause electric shock and
personal injury
Do not insert metal objects such
as pins and wires into the gaps in
the main unit.
It may cause electric shock and
personal injury
Be sure to disconnect the AC
adapter out of the socket when
not in use. It may cause electric
shock, electric leakage, or fire
due to insulation deterioration.
For maintenance, remove the AC
adapter from the socket.
Failure to remove it may cause
electric shock, fire, or personal
injury.
Disassembly prohibited. Only
qualified personnel are allowed to
carry out repairs.
It may cause fire, electric shock,
personal injury, and other safety
accidents. For repairs, please
consult the sales office or Shun
Hing Electric Service Center Ltd.
Do not directly plug or unplug the
AC adapter with wet hands.
It may cause safety accidents such
as electric shock.
Immersion and watering of the
device are prohibited.
It may cause short circuit, electric
shock and other safety accidents.
In the event of an abnormality
(e.g. burnt smell, smoke), unplug
the AC adapter immediately and
stop using it.
It may cause fire or electric shock
Please insert the AC adapter fully
into the socket.
Failure to fully insert may cause
electric shock, short circuit and
fire.
Clean the dust adhering to the
pins and mounting surfaces of
the AC adapter.
Inserting AC adapter with dust
attached may cause safety
accidents such as short circuit and
fire.
After maintenance, fully secure the
blades and protective cover.
If it is not fully tightened or
properly installed, it may result in
safety accidents such as personal
injury and device failure.
If the battery liquid leaked from the
remote control and accidentally
enters into the eyes, do not rub.
Rinse immediately with cool water
and go to the hospital.
It may cause blindness or visual
impairment.
Wet hands
prohibited
Water
prohibited
indicates “prohibited”. The specific prohibited content will be shown with picture and text
inside and beside . (The picture on the left indicates “Disassembly prohibited”)
Incorrect operation may cause personal injury or property damage
(including residence, family properties, livestock and pets)
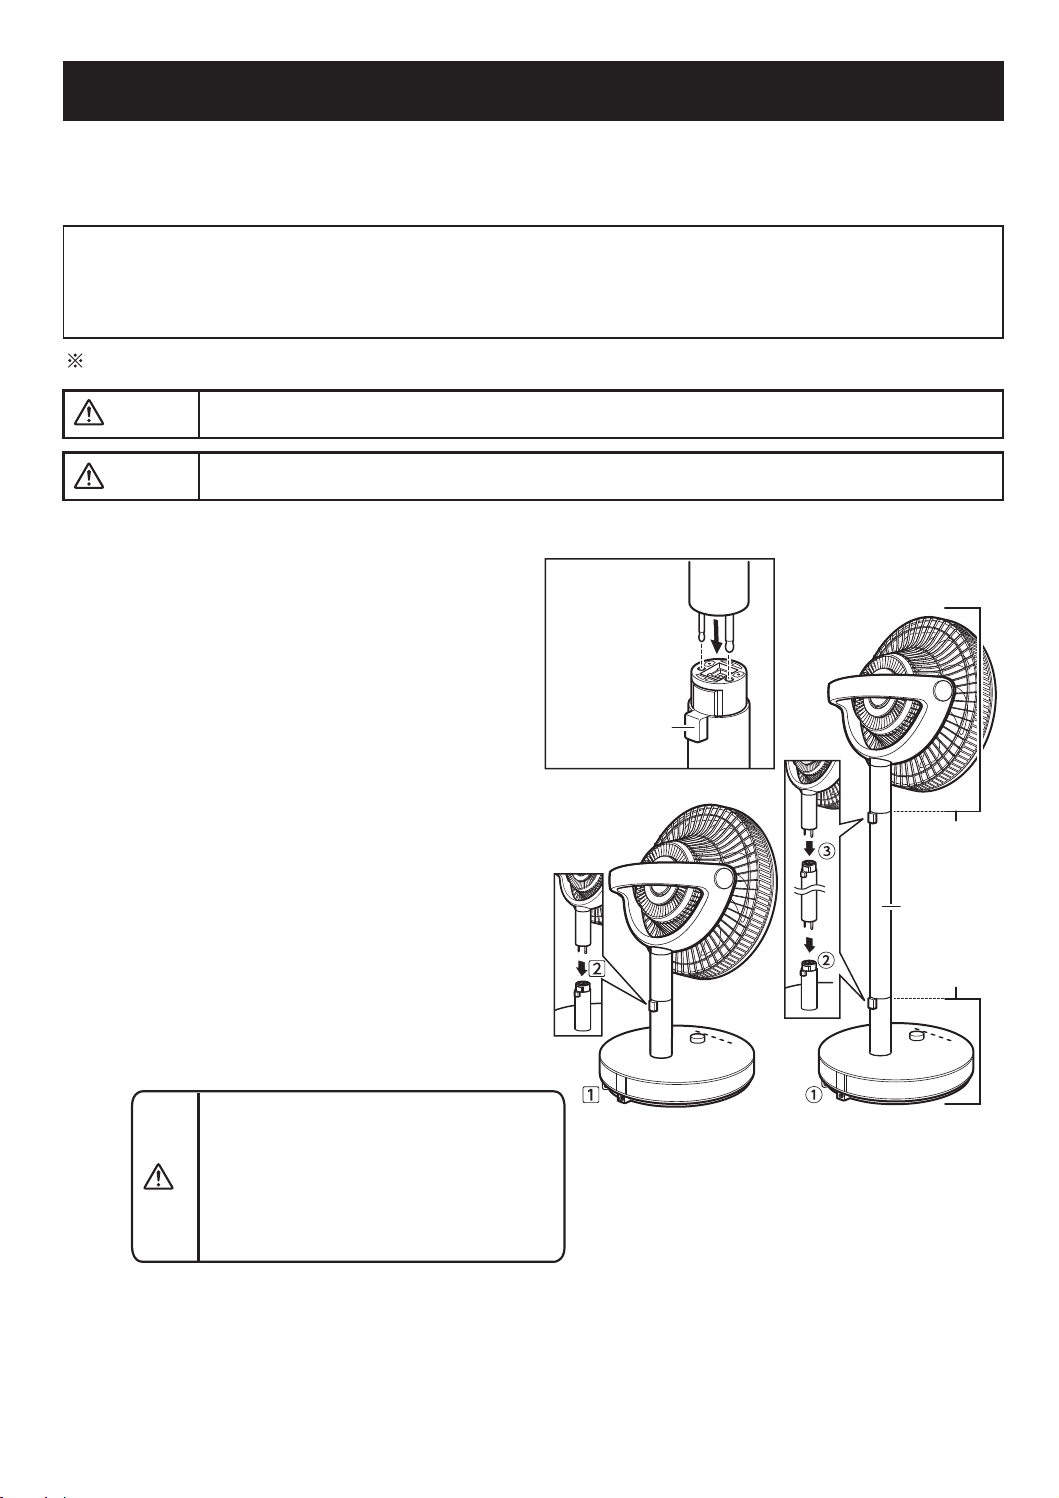
Warning
Attention
Meaning and example icon symbols
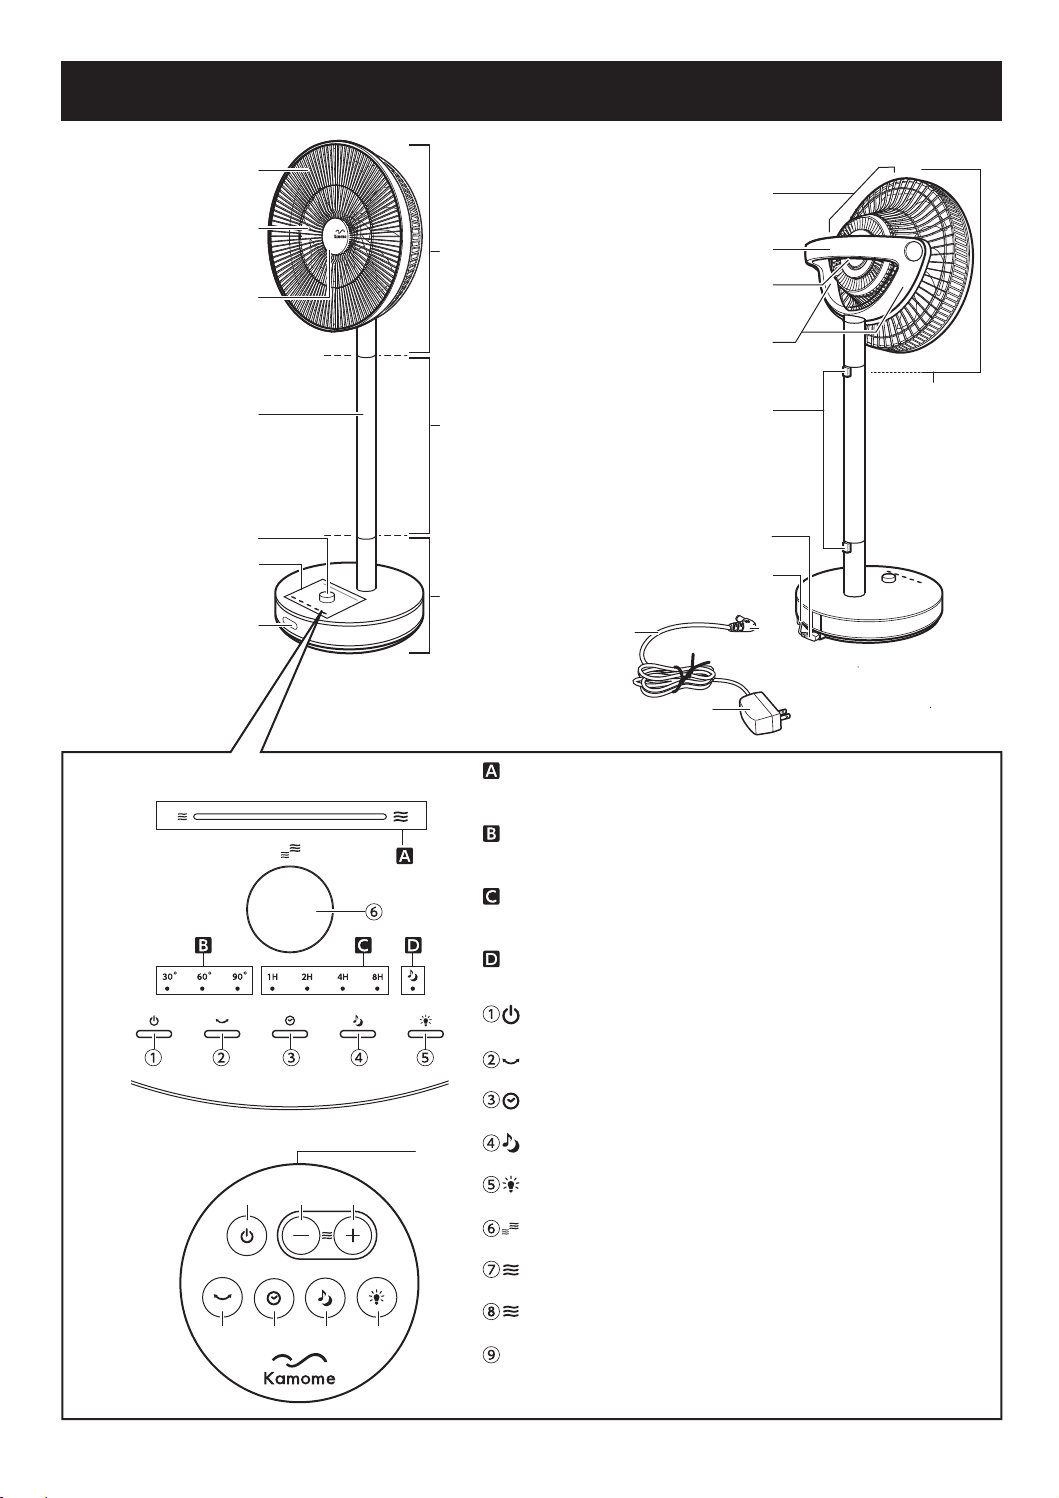
connect AC adapter to
socket when cleaning or
maintenance.It may cause fire,
electric shock,or personal injury.
Safety
Precautions
Do not damage,process,bend,pull,
twist,or bundle the power cord,and
do not put any heavy object on the
cord and pinch it.It may cause fire
or electric shock.

Prohibited
Prohibited
When
unplugging
the
AC
adapter, Do not use abattery other than
Do not place the battery of the
Instruction
Attention
2
be
sure
to
hold
the
AC
adaptor
instead
of
the
power
cord.It
may
cause
electric
shock,
short
circuit,
or
break
off
the
power
cord.
Please confirm the
positive
and
negative poles
of
battery
in
the
remotecontrol.
Incorrect
installation
of
positive
and
negative
poles
will
not
only
cause
device
failure,
but
may
also
cause
safety
accidents
due
to
liquid
leakage
and
battery
rupture.
Take
the
battery
out
of
the
remote
control
if
it
won’t
be
used
for
a
long
time.
If
the
device
is
left
unused
for
an
extended
period
of
time
with
battery
installed,
internal
contamination
may
be
caused
by
liquid
leakage,
and
safety
accidents
such
as
fire
and
personal
injury
may
occur
due
to
battery
rupture.
When
disposing
of
the
remote
control,
be
sure
to
remove
the
battery.
Disposal
of
the
remote
control
directly
with
battery
installed
may
cause
an
accident.
Please
dispose
of
the
battery
as
required
by
local
government.
While
installing the unit top,middle
tube and base part of the product,
be
careful to
prevent
pinching
the
fingers. It
may
cause
safety
accidents
such as
personal
injury.
specified.
Itmaycause
liquid
leakage.
remote control in a hot place
where there is direct sunlight.
It may cause liquid leakage ,
battery rupture , fire and other
safety accidents.
Do not blow directly to the
body for a long time.
It may cause harm to your
health.
Do
not
drag
the
main
unit.
It
may
damage
the
floor.
Do
not
insert
your
fingers
into
the
guard
or
any moving
parts
It
may
cause
safety
accidents
such
as
personal
injury.
Do not use in an unstable place.
It may cause personal injury,
device failure and other safety
accidents.
Do not get your hair too close to
the device.
It may cause personal injuries
due to hair being caught.
Do not use in the following
places.
●Near stoves and other fire
sources
●Places with flammable gas
●Places that can be splashe by
rain and water
It may cause discoloration,
deformation, flame extinguishing,
fire, electric shock and other
safety accidents.
Do not use household cleaners,
thinners, gasoline, alcohol or
abrasive powder for cleaning. It
may cause discoloration,
deformation, electric shock or
device failure.
Do not forcibly turn the main unit
to the front while it is swinging.
It may cause device damage,
malfunction or noise.
■This appliance is not intended for use by persons (including children) with reduced physical,
sensory or mental capabilities, or lack of experiences and knowledge, unless they have been given
supervision or instruction concerning use of the appliance by aperson responsible for their safety.
■Children should be supervised to ensure that they do not play with the appliance.
■The appliance is only to be used with the power supply unit provided with the appliance.
■The appliance must only be supplied at safety extra low voltage corresponding to the marking on the
appliance.

Front guard
Blade
Aroma box
Middle tube
Air volume
adjusting knob
Operation part
Remote control receiver
Base part
To use the maximum height,
insert the middle tube into the
base, and insert the top into
the middle tube
Middle tube
part
Unit top
Rear guard
Handle
Lock
DC plug
Hanging hook
To remove the unit
top, push the lock
inwards
Remote control/re-
mote control storage
part; store the
remote control here
when it is not in use
Name of Parts and Function
Front side
Operation part
Rear side
Air volume indicator
Indicates the air volume; when the air volume increases,
the light turns on from left to right
Swing display
When swing function is enabled,
The light of corresponding swing angle turns on.
Timer display
Natural/sleep wind display
The white light turns on in natural wind mode and the
blue light turns on in sleep wind mode.
Power button
Start/stop running
Swing button
Start/stop swing
Timer button
Set the time for schedule power on/off
Natural/sleep wind button
Switch between natural wind and sleep wind
Dimmer button
Enable or disable dimmer mode
Air volume adjusting knob
Adjust the air volume during running
Air volume - button (remote control)
Reduce the air volume during running
Air volume + button (remote control)
Increase the air volume during running
Signal receiver (remote control)
Point the remote control at the signal receiver
3
Power
cord
Power plug
Display the remaining time before the schedule on/off
function starts.
⑨
②③④⑤
①⑦⑧

Preparation before Use
Do not throw away the packaging materials after assembly, which can be used to store the product after use.
Do not turn on the power before the blades and guards are installed
Plug the AC adaptor into the socket only when the blades and guards have been properly installed
Base part.......................................................1
Unit top (with aroma lid) ................................1
Middle tube....................................................1
Dedicated AC adapter....................................1
Remote Control................................................................................1
Coin lithium battery (CR2025 • separate plastic bag packaging).....1
Aroma cotton (1 in aroma box).........................................................1
User Manual (including Warranty Card) .........................................1
Packing List
Warning
Attention
Assembly of base, middle tube and unit top
The middle tube can be removed or installed,
and the height can be adjusted freely.
■ When the product height needs to be
increased
① Put the base on a stable position
② Insert the middle tube into the base
③ Insert the unit top into the middle tube
※ In steps ②and ③, please note the mount-
ing direction of the middle tube and unit top.
■ When the product height needs to be
decreased
①Put the base on a stable position
② Insert the unit top into the base
※Please note the mounting direction of
the base and unit top
※Please keep the middle tube properly when
it is not in use
※Press the lock button and key to remove the
unit top and middle tube
Please use on a stable level surface
Please hold the handle to move the product
Installation and Setup
There should be no gaps between the connection
parts. Pull slightly to confirm if the connection is
proper.
If the installation is not firm, the fan may shake
during running, which may lead to falling, drop and
other failures.
The product may drop when you hold the handle
with your hands.
1.
2.
After you purchase, please confirm if the following accessories are complete
《Enlarged View of Connection》Confirm the rod and hole size
first, and insert the rods into
the holes at the same time
Lock
Unit top
Middle tube
The height is about
57cm when the
product is lowered
The height is about
100cm when the
product is lifted
Base part
Rear
Rear
4

Preparation before Use
3.
5.
4.
Use a dedicated AC adapter
Installation of Battery
When the remote control is not in use
When the power plug is inserted into the power
socket, the product emits a “bibi” sound.
DC line of the AC adapter must be
hung to the hook of the base.
If not, the DC terminal is easy to fall
off and can easily cause fire, accident
and malfunction.
Wire hook
DC port DC cable
DC plug
①Please insert the DC plug of the AC
adapter is into the DC port on the back of
the base.
②In order to avoid falling of DC line, be sure
to hang the DC wire to the hook of the
base.
①Pull out the battery case from the main
body of the remote control and pull out the
battery holder from the gap
② Insert into the coin lithium battery; keep the
positive pole upwards
③ Insert the battery case into the remote
control until there is a “click” sound
④ Please place the remote control in th
storage position behind the guard.
The remote control and the storage position
integrate magnet to snap the remote control.
• If the remote control won’t be used for a long
time, remove the battery
• The positive and negative terminals of the
battery must be installed correctly
• Do not charge, short circuit, disassemble or
heat the battery.
• In the event of battery leakage, wipe clean
and load a new battery before use
Please pay special attention that the remote
control has a magnet inside.
Do not place the remote control in chest
pocket if you are using a cardiac pacemaker;
do not put the remote control together with
weak magnetic objects (e.g. magnetic card)
Possible range of use
• About 5m in front of the main body
• About 30° on the left and right of the main body
• When there is an obstacle between the remote control
and the main body, the normal action of the remote
control may be affected.
Warning
Warning
Warning
Battery case
Remote
control
5

Press the Power button on the unit or
remote control to start running.
In normal use, the fan starts with the air
volume and swing angle of last running.
If you press the Power button on the unit
or remote control when the power plug is
first inserted into the socket, the fan runs
at the minimum air volume and swing is
disabled.
How to use
Start /Stop
1. Start running
The state (air volume, swing angle) of last running
resumes when the Power button on the unit or
remote control is pressed down.
※The initial state is restored when the power cord
is unplugged.
[Initial setting] Air volume: minimum; no swing
Natural wind (white LED turns on)
Both high level and low level can reproduce natural
wind.
Press the and the button on the unit or the
remote control to adjust the air volume.
Sleep wind (blue LED turns on)
Both high level and low level can reproduce natural
wind.
Press the and the button on the unit or the
remote control to adjust the air volume.
(Strong wind) Strong → Moderate → Weak→
Feeble, change with time
(Moderate wind) Moderate → Weak→ Feeble, change
with time
(Weak wind) Weak→ Feeble, change with time
(Feeble wind) Feeble, same with natural wind
※Air volume indicator will maintain the display state
at the time of setting.
Weak
Weak
Weak
Feeble Weak Strong
Mod-
erate
Air volume Air volume
Strong
Strong
Air volume
adjusting
knob
Strong
E.g. current air
volume
Turn left Turn right
Function memory
About natural wind/ sleep wind
Air volume light band
Operation part
Button
Press on the unit or remote control panel
during running to switch between natural and
sleep wind.
※The set natural /sleep wind LED turns on
White LED turns on Blue LED turns on
(Natural wind)
Natural wind / sleep wind LED
turns off
(Sleep wind)
(Canceled)
3. Natural /sleep wind switch
When the fan is running, you can turn the air volume
adjusting knob on the unit to right or press on the
remote control to increase the air volume.
When the fan is running, you can turn the air volume
adjusting knob on the unit to left or press on the
remote control to reduce the air volume.
※Air volume indicator changes from left to right to
indicate the set air volume.
[Increase air volume]
Turn the knob on the unit clockwise.
Press on the remote control.
If you press and hold the + button,
the fan will increase the air volume in
sequence automatically.
[Reduce air volume]
Turn the knob on the unit anti-clockwise.
Press on the remote control.
If you press and hold the - button,
the fan will reduce the air volume in
sequence automatically.
2. Adjustment of air volume
6

How to use
The swing angle can be set to 30°, 60° or 90°.
• When you insert the DC plug into the unit and
press the Swing button, the 30° LED turns on
and the fan starts swing.
After the angle is set, the fan needs some time
to reset before starting to swing.
The swing angle can be manually adjusted by
70° upwards, 10° downwards and 60°
horizontally
Swing 30°
[30°] LED on [60°] LED on
Swing canceled
(Swing LED off)
[90°] LED on
Swing 60° Swing 90°
4. Start /stop swing
If the air volume indicator or LED light is too
bright , you can press the Dimmer button on
the
unit or the remote control to dim the light
indicator
and
LED
light;
press
it
again
to
cancel
dimmer
function.
Swing to left and right
Adjust the angle upwards/downwards
Adjust by 10° downwards and 70° upwards.
10° downwards 70° upwards
5. Enabling/disabling dimmer mode
7

You can set the off timer and the fan stops automatically after the set time.
1. When the fan is running, you can press the timer button to set the off timer.
When the fan is running, you can press the button on the unit or remote control to set
the timer and the red LED turns on.
Press the button on the unit or remote control to set the time of schedule operation.
2. To cancel the timer, press the button on the unit or remote control and the timer LED
turns off.
Timer Setting
Off timer
You can set the on timer and the fan starts automatically after the set time.
1. When the fan is stopped, you can press the timer button to set the on timer and the
green LED turns on.
• The product integrates memory function, and the air volume LED and swing LED of
last mode will flash.
• The time of on timer displays in the on timer setting menu.
On timer
Timer LED
When you press the Timer button on the unit or the remote control, the
timer LED changes as follows.
After setting the off/on timer, the LED changes with time. The timer
shows the time when the operation stops
The LED is red when the off timer is enabled and green when the on
timer is enabled.
Off timer and on timer can’t be enabled at the same time.
About timer LED
1H (1 hour)
1H (1 hour)
2H (2 hour)
2H (2 hour)
(LED off)
(Timer disabled)
(LED off)
(Timer enabled))
4H (4 hour)
4H (4 hour)
8H (8 hour)
8H (8 hour)
8
How to use

How to use
Use of aroma oil
1. Remove the lid of the aroma box from the
center of front guard, turn the front lid anti-
clockwise and take it out.
2. Take out the filter, drip the essential oil on the
filter, and install the front lid of the aroma box.
3. Turn to left and take out the filter cover from
the aroma box . Make sure that the filter is
installed. Drip 2-3 drops of aromatic or natural
essential oil sold on the market . Be careful
not to drip to the outside.
4. Install the filter cover, and put the front lid of the
aroma box back into place. When installing the
filter cover, place it in the front lid of the aroma
box and turn clockwise. Then put the front lid
back on the front guard and turn clockwise.
5. Start work. Please follow the procedure of
[Start/Stop] on page 6. You can enjoy the
fragrant wind.
Filter replacement
※If the aroma oil filter is dirty or aroma oil of
different type is replaced, please replace the
filter
※To replace the filter, turn the filter cover to left,
and then take out the filter.
※In addition to the filter inside the box, we also
provide 3replacement filter; do not re-use
the filter after cleaning;
※Clean the front lid of aroma box with neutral
detergent, fully dry and install according to steps
1~3.
Filter replacement
The filter for replacement are sold separately.
Please contact the dealer or Shun Hing Electric
Service Center Ltd.
※The replacement during the warranty period is
charged as the filter are consumables.
Lid of aroma box
Aroma or natural essential oil
Lid of
aroma box
Inner lid of
aroma box
Filter
Filter
protective lid
Aroma box
9
.

Note
• Do not use cleaner, thinner, gasoline, alcohol or cleanser.
• Do not wash the unit or dedicated adapter with water (or else it may cause electric shock or
malfunction.)
Storage
When the product is not in use, soak a soft cloth in warm water or neutral detergent and wring it
dry. Then gently wipe the stain on the product, and then wipe with a dry cloth. (Do not apply too
much force on plastic parts, or else it may scratch the surface)
Disassembly of blades
Remove the front grille before removing the blades. It is best to operate with two persons at the same
time. One person holds the product and the other removes the grille.
Disassembly of the blades • front guard
1. To remove the front guard, remove the safety screws under the front
guard and turn the front guard to the left. See ①
2. Turn the front guard anti-clockwise to the
left
and
remove
it. See ②
3. Hold the blades with your left hand , turn the
knob with your right hand, remove the blade
knoband then remove the blades.
The structure of the knob is different from that of
the ordinary rotating components.
Contrary to ordinary rotating direction , anti -
clockwise rotation is to tighten and clockwise
rotation is to disassemble.
※Rear guard
can’t
be
disassembled
as
there
are
lines
inside.
※
Please
be
sure
to
store
in
a
dry
environment.
Disconnect the AC adapter from the power socket before
maintenance. Avoid electric shock, fire and personal injury.
Warning
Maintenance and Storage
The fan must be stopped before removing the fan blades and guard.
Warning
Do not insert the AC adapter into the socket until the blades and guard are installed properly.
Attention
Do not turn the front guard exces-
sively in the opposite direction.
This may cause product damage
or malfunction.
Rear guard
Front guard
Safety screw
Knob
Blade Motor shaft
Attention
②①
③
④
10

Assembly of the blades • front guard
1. Align the blade to the motor shaft and install it.
See Fig. ①
Align the center of the blade with the center of the
motor shaft and insert the blade into the root of the
motor shaft.
2. Hold the blade with your left hand, and align the
blade center with the motor shaft and turn to the
left with right hand to fix the blade. See Fig. ②
3. Align the recess of front guard with the U-shaped
print on rear guard.
Fasten the front guard to the rear guard.
See Fig. ③
4. Rotate the front guard to the right. See Fig. ④
Turn the front gurad to the right until it is locked,
and then lock the safety screws.
There will be abnormal noise if the front guard is
not locked.
5. Lock safety screws of guard. See Fig. ⑤
Storage method
• After disassembling, please clean and dry the
parts.
• Put the dried parts in a plastic bag and put it in the
packing box.
• Before packing, adjust the unit top to the front.
• When it is not in use for a long time, take out the
battery of the remote control.
Do not rotate the front guard
vigorously in the opposite
direction.
Damage or malfunction may
occur.
Attention
Align the recess of front guard with the
U-shaped part of rear guard, and fasten
the front guard③; turn clockwise④
When the blades are assembled, align the blade center
with the center of the motor shaft, and insert the blade into
the motor shaft center. See Fig. ①
U-shaped part
Front
guard
Front guard recess
Rear guard
Front grille
Safety screw
KnobBlade
Motor shaft
Knob fixing part
Motor shaft
11
⑤

Problem Cause Solution
Troubleshooting
When the product fails, please check if the product has any of the following symptoms before
sending it for repair. Do not disassemble and repair without permission.
Blades won’t turn
Running stops suddenly
Install blades and guard properly as
described on page 11 [Assembly of
blades • grilles]
• The blades are not properly installed
• The blades are stuck by the guard
Refer to page 4 and reinstall fan •
middle tube • base properly
• The fan • middle tube • base are not
properly installed
Plug AC adapter into the DC
port (page 5)
• AC adapter falls off the DC port
Reinsert the power plug (page 5)
• Power plug falls off the socket
The Power button on the unit or the
remote control is pressed by mistake
• There is no operation in 12 hours
and the auto-off function is activat-
ed (pages 7 & 8)
Air volume light band or
indicators are dark
Cancel dimmer mode (page 7)• Dimmer mode is set
Tighten the knob as described on
page 11 [Assembly of blades • grilles]
• Blade knob is loose;
Loud noise during running
The swing angle is greater than
set or normal operation starts
after a certain period when the
swing button is pressed
Fans not used for long term should be carefully inspected.
Is there any such situation?
• Power cord, plug or AC adapter heats up abnormally. Please cut off the power, unplug the
power
cord
and
contact
the
dealer or
Shun Hing Electric Service Center
Ltd.
• The power is connected and disconnected repeatedly
• Burning smell
• Other abnormalities • failures
Install blades and guard properly as
described on page 11 [Assembly of
blades • grilles]
• The blades are installed properly
• The blades are stuck by the guard
• The guard isn’t installed properly
Please wait for the swing to resume
normal
• This is not a failure
• The tube first turns to the left for 45°
from the stop position and looks for
the center
Remote operation invalid Replace the battery (page 5)• The battery voltage is low.
Install the battery properly (page 5)• The battery is loaded incorrectly
Point at the receiver
Operate in effective range (page 5)
• The remote control doesn’t point at
the receiver
• Too far away from the receiver
12
Table of contents
Other DOSHISHA Fan manuals
Popular Fan manuals by other brands

Goldair
Goldair Platinum GPTF370 operating instructions

Scarlett
Scarlett Comfort SC-SF111B16 instruction manual

Airflow
Airflow Duplexvent Flexi DV1600 Installation, use and maintenance manual

TJERNLUND
TJERNLUND DB-2 DUCT BOOSTER 8504030 REV B 0900 Owner's instructions

Borg
Borg W2100R owner's guide

Panasonic
Panasonic FV-08-11VFM5 installation instructions

ECG
ECG FS 40a instruction manual

Pelonis
Pelonis FS40-16CR owner's manual

HOMCOM
HOMCOM 824-050V90 Assembly & instruction manual

Home Decorators Collection
Home Decorators Collection GRENADA YG522-BN Use and care guide

FläktGroup
FläktGroup CENTRIFLOW 3D PLUG FAN GMEC operating instructions

Carlton
Carlton CSF403SS instruction manual