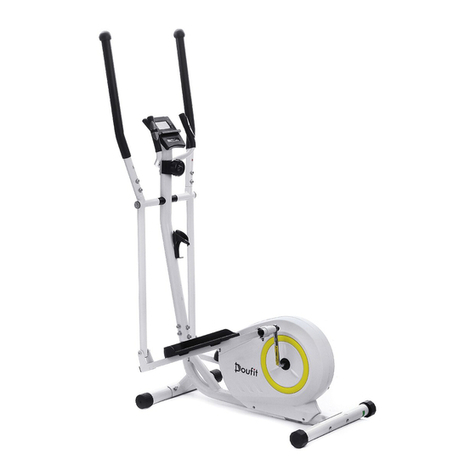
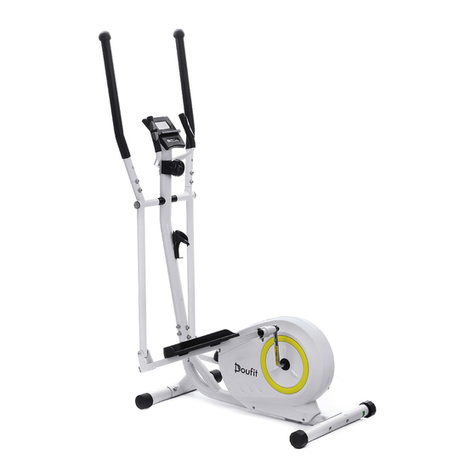
Doufit EM-04 User manual

EM-04 Elliptical Machine
Instruction Manual
!
* Please read the instruction manual carefully and follow it.
* Please keep the instruction manual for your later use.
* If you want to give this product to your friends, don't forget to bring them the instruction manual.

Catalogue
Precautions
Page 1
Precautions---------------------------------------------------------------------------------------------------------- - - -
Exploded Diagram------------------------------------------------------------------------------------------------------
1
2
Parts List ------------------------------------------------------------------------------------------------------------ - - -
Accessories Chart--------------------------------------------------------------------------------------------------- - - -
Assembly Method--------------------------------------------------------------------------------------------------- - - -
Details of Monitor-------------------------------------------------------------------------------------------------- - - -
3
4
5
10
Service -------------------------------------------------------------------------------------------------------------- ---- 11
*The maximum load bearing is 250 Lbs.
*Don’t use this product without your physician's approval.
*Frequent strenuous exercise must be approved by your doctor. Please exercise in moderation according
to your physical condition.
*If you feel unwell during using the product, please stop using it immediately and consult your doctor for
instructions before next use.
*Please read the instruction manual carefully before assembly.
*During use, must keep children away from the machine.
*For children, elderly or disable people, they can only use it under guardianship.
*For your safety, you must keep at least 1 meter away from anything around.
*Always check if all of the screws and bolts are tightened. And regularly check all of moving parts for
obvious signs of wear or damage.
*Clean it with a wet cloth. Solvent cleaners are prohibited.
*Please place the product on a flat and solid place to avoid falling. If necessary, use a rubber mat underneath
to avoid slipping.
*It is better to wear proper sportswear during exercise. Don’t wear the clothes too loose to avoid drag.
*Keep it in a clean and dry place to avoid rusting and other problems that could be controlled.
*Before using, please warm up at first. Ride lightly, adjust your breath and pace to slowly get into motion.
*Regular exercise with relevant nutritious diet is more effective for your fitness.
*Don’t use the product immediately after diet or drinking, you need to wait for at least 1 hour.
Page 2
Exploded Diagram
26
8
20 21
7
17 18 19 13 16
14
28
2
4 4 33 33
4 4
3
5
6
1
29
33
15
22 21 31
30
32
22
23 27
21 20

Page 3
Parts List
If any part is missing, distorted or broken when you receive the package, please contact [email protected]
with your order number, we will send the replacement part to you as soon as possible.
For step 1
1. Frame x 1
2. Front foot pipe x 1
3. Rear foot pipe x 1
4. M8 carriage bolt x 4
5. M8 flat washer x 4
6. M8 acorn nut x 4
For step 2
7. Main pipe x 1
8. Resistance knob x 1
9. Above resistance cable x 1
10. Below resistance cable x 1
11. Above sensor cable x 1
12. Below sensor cable x 1
13. Central axis x 1
For step 3
14. Left swing arm x 1
15. Right swing arm x 1
16. M19 wave washer x 2
17. M8*20mm Allen bolt x 2
18. M8 flat washer x 2
19. Plastic axis cap x 2
20. M8 curved washer x 4
21. M8*16mm Allen bolt x 4
For step 4
20. M8 curved washer x 2
21. M8*16mm Allen bolt x 2
22. Sensor handlebar x 1
23. Monitor x 1
24. M5*10mm bolt x 2
(Pre-assembled on the back of the monitor)
25. Pulse cable x 1
For step 5
20. M8 curved washer x 4
21. M8*16mm Allen bolt x 4
26. Left handlebar x 1
27. Right handlebar x 1
For step 6
28. Left pedal arm x 1
29. Right pedal arm x 1
30. Left pedal x 1
31. Right pedal x 1
32. M6 carriage bolt x 4
33. M6 clamping nuts x 4
Tools
34. M6 Allen wrench x 2
35. Open end wrench x 1

Page 4
Accessories Chart
The first number is the code of the part in the Parts List.
Attention: If a part isn't in the accessories kit, please check if it was assembled.
If any part is missing, distorted or broken when you receive the package, please contact [email protected]
with your order number, we will send the replacement part to you as soon as possible.
4.M8 carriage bolt x 4 5.M8 flat washer x 4 6.M8 acorn nut x 4
13.Central axis x 1 16.M19 wave washer x 2 17.M8*20mm Allen bolt x 2
18.M8 big flat washer x 2 19.Plastic axis cap x 2 20.M8 curved washer x 10
21.M8*16mm Allen bolt x 10
24.M5*10mm bolt x 2
(On the back of the monitor) 32.M6 carriage bolt x 4
33.M6 clamping nuts x 4 34.M6 Allen wrench x 2 35.Open end wrench

Page 5
Assembly Method
For the assembly video, please visit:
www.youtube.com/channel/UCorBKk34KZgI96OyGSkjFdA
Attention:Don’t tighten all bolts until you finish all assembly steps.
Step 1: Assemble foot pipes
For this step, please prepare two foot pipe(No.2)(No.3), four M8 carriage bolts(No.4), four M8 flat washers
(No.5), four M8 acorn nuts(No.6), and the open end wrench(No.35).
Attention: There are two kinds of foot pipes. The front foot pipe has two wheels, the other one doesn’t have
wheels. Please assemble the front foot pipe with wheels in front of the main frame.
Insert two M8 carriage bolts from the bottom of each foot pipe, and then screw two M8 acorn nuts and two
M8 curved washers by using the wrench.
The wheels face outward.
1
6
5
2
44
6
5
5
6
44 3

Page 6
Step 2: Connect cables in the main pipe
Firstly, adjust the resistance to the 8th gear. The resistance cable will become more longer.
Secondly, connect the sensor cables(No.11)(No.12) carefully.
Thirdly, hook the bottom of above resistance cable(No.9) into the wire clip of metal bracket(No.10).
Fourthly, pull the resistance cable upward hard. And slide it into the top of the metal bracket.
Finally, reduce the resistance gear to prevent the resistance cable unhooks. Insert the main pipe.
7
11 9
10
12
Step 1
Step 2
Step 3
Step 4

Page 7
Step 3: Assemble swing arms and the main pipe
For this step, please prepare the central axis(No.13), two M19 wave washers(No.16), two M8*20mm Allen
bolts(No. 17), two M8 big flat washers(No.18), two plastic axis caps(No.19), four M8 curved washers
(No.20), four M8*16mm Allen bolts(No.21), and the M6 Allen wrench(No.34).
Attention: Assemble two swing arms before assembling the main pipe. Otherwise, the central axis will be
more difficult to insert.
Put two M19 wave washers between swing arms and both sides of the main pipe.
Insert the central axis through two swing arm and the main pipe.
Cover two plastic axis caps on both sides. Screw two M8*20mm Allen bolts and two M8 big flat washers to
fix.
Screw four M8 curved washers and four M8*16mm Allen bolts to fix the main pipe.
17 18 19 13 16
20
21

Page 8
Step 4: Assemble the sensor handlebar and monitor
Attach the sensor handlebar(No.22) to the main pipe. Screw two M8 curved washers(No.20) and two
M8*16mm Allen bolts(No.21) with the M6 Allen wrench(No.34).
Unscrew two M5*10mm bolts(No.24) on the back of the monitor(No.23).
Connect cables between the main pipe and the monitor. Attach the monitor and screw two bolt back.
Install two AAA batteries.
Insert the pulse cable(No.25) of the sensor handlebar to the monitor.
Step 5: Assemble handlebars
Insert two handlebar(No.26)(No.27) to the relevant swing arms.
Screw four M8 curved washers(No.20) and four M8*16mm bolts(No.21) with the M6 Allen wrench(No.34).
26
20
21
27
22
25
20
21
23
24

Page 9
Step 6: Assemble pedals
Attention: there are six holes on each pedal arm. You can adjust the pedal forward and backward by
different holes. The baffles of pedals face inward.
Attach two pedals(No.30)(No.31) to relevant pedal arms. Twist four M6 carriage bolts(No.32) and four
clamping nuts(No.33) to fix.
31 32
33
3032
33

Page 10
Details of Monitor
Time(TIME) 00:00-99:59
Speed(SPD) 0.0-99.9ML/H
Distance(DIST) 0.0-99.99ML
Calories(CAL) 0.00-99.9KCAL
Pulse(PUL) 40-240BPM
Mode Parameters
Operation
Speed(SPD) ----------------------This mode displays the speed of your exercise in real time.
Time(TIME) ---------------------This mode displays the time you have pedaled.
Distance(DIST) ------------------This mode displays the distance you have pedaled.
Calories(CAL) -------------------This mode displays the calories you have burned during your exercise.
Pulse(PUL) ----------------------This mode displays your heart rate per minute.
Turn on/off
The monitor will automatically turn on when you start to exercise, and you can also turn on it manually by
pressing those buttons.
The monitor will automatically turn off after a while when you stop exercise.
If there is no data showing, please check if all cable have connected, or change the batteries.(The battery
model is AAA .)
Enter
(This button is used to choose the mode you want to set except speed.)
If you don’t set goal data, the monitor would show your exercise data normally.
The mode will be flashing when chosen.
If you long press the button over 3 seconds, all data will be zeroed.
UP/ Down
(These two buttons are used to set your exercise goals up and down.)
After you press the button “Enter” to choose a mode you want, you can press these two buttons to set your
goals.
Reset
(These two buttons are used to reset your exercise data or goals data.)
Press the “Enter” button to choose a mode except speed. Then press the “Reset” button to reset the relevant
data.
If you long press the button over 3 seconds, all data will be zeroed.
UP
RESET
DOWN
RESET
SPEED
TIME
DISTANCE
CALORIE
PULSE

Page 11
Service
If the item is damaged or you have any question or problem, please contact
it for you ASAP.
Table of contents
Other Doufit Elliptical Trainer manuals