DPA d:fine CORE 6066 Series User manual

6066 Subminiature Headset

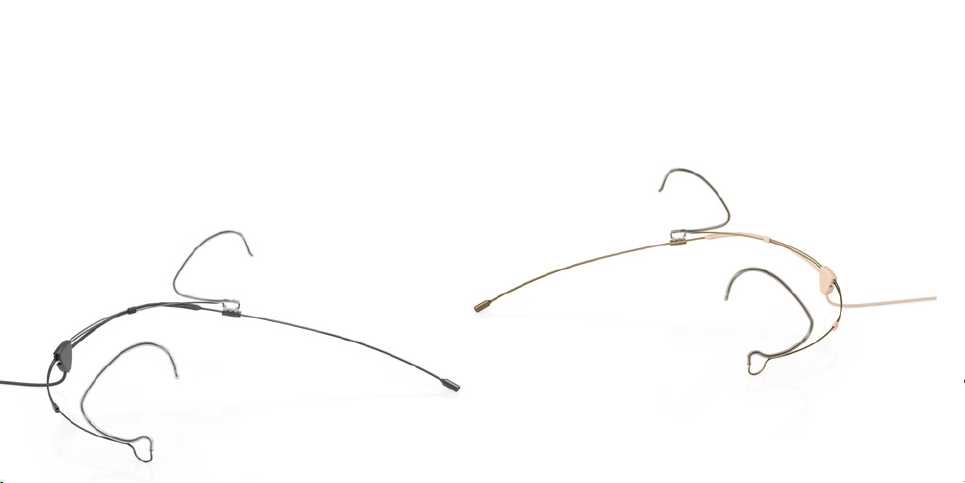
The d:fineTM CORE 6066 Subminiature Headset Microphones provides a natural and open sound. Ultra-lightweight and
adjustable, these headset mics ensure a secure and comfortable fit in live performance environments. To ensure optimal
performance of your 6066 Subminiature Headset Microphone, please follow the simple instructions in this manual.
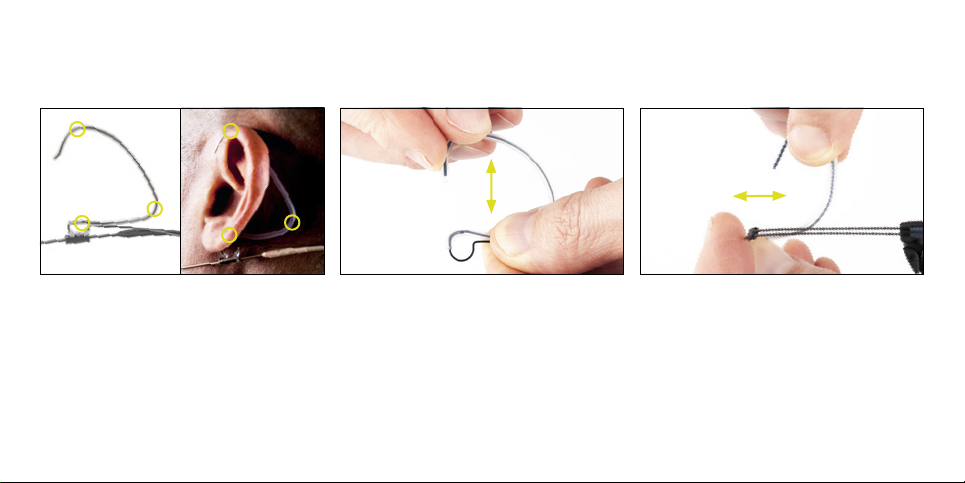
The 6066 Subminiature Headset sports a completely redesigned, lightweight, one-size-fits-all headset. It uses 3-point ear grips with
spring mechanisms that attach over the ears, grip below the ears and press gently inwards behind the ears for added security and comfort.
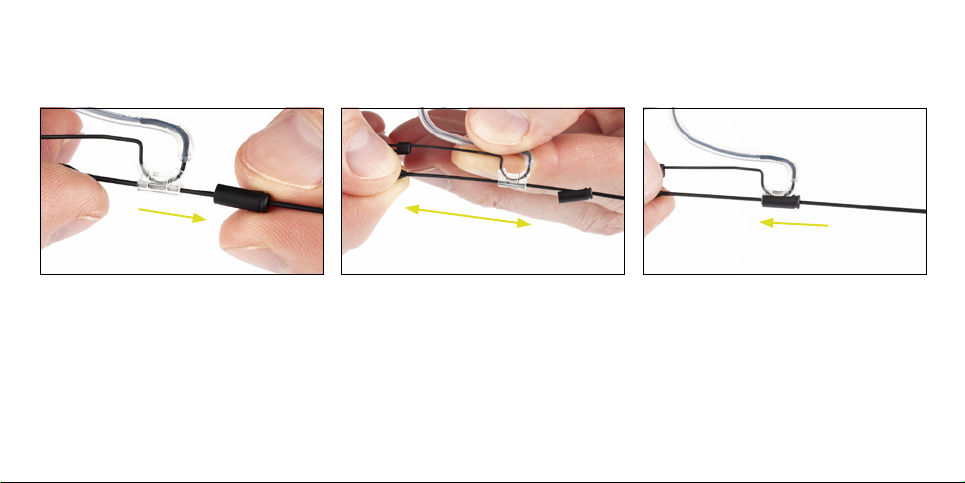
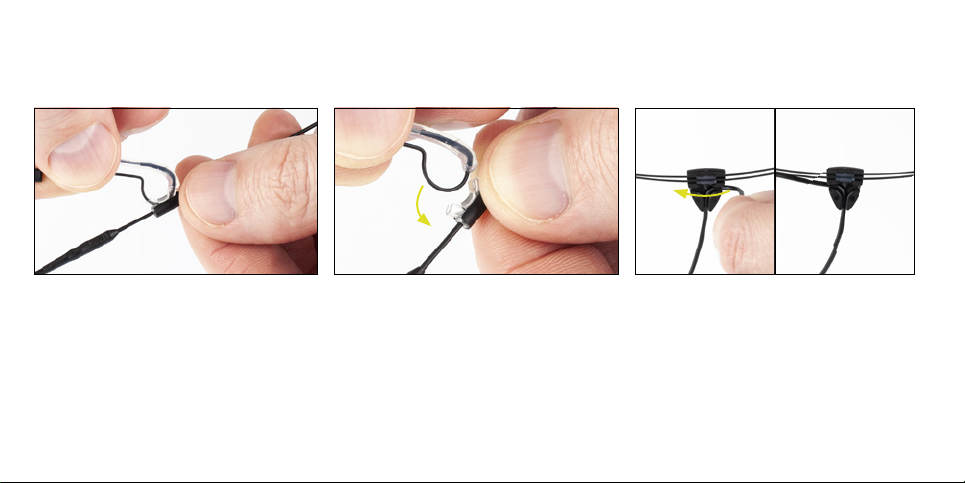
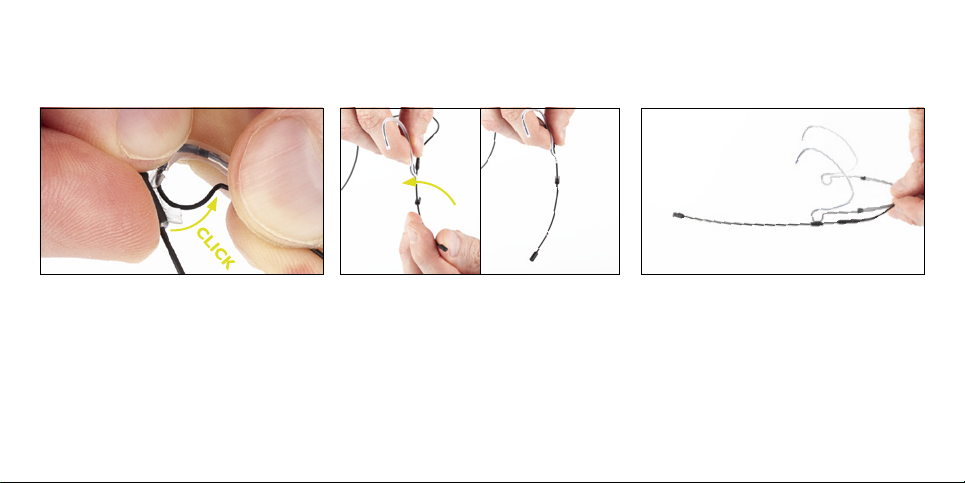
A 2-way adjustable boom system (length and height) with an anti-rotate mechanism makes this new headset very easy to fit. A new 90°
cable management system safeguards the cable and directs it down the wearer’s back, where it can’t be seen.
6066 Subminiature Headset is IP58 certified. This durability is achieved through a number of defense mechanisms. Water-repellant nano-
coating of the cover and housing, hermetic sealing of the sensitive amplifier at the core of the microphone, and dual gold plating of the
diaphragm ensure maximum stability and performance under the toughest environmental conditions.
Introduction

Technically advanced mechanical construction
The new one-size-fits-all headset is the most advanced construction on the market. It ensures comfort, even during long-term
wear, but does so without sacrificing security. Its form grips gently and snuggly around the head and is easily adjustable. The
spring mechanisms that grip around the ears are gentle, yet firm enough for you to feel secure during your performance. The
headset can also be customized on site to suit individual performers for perfect fit.

Adjusting frame size
The frame is one size fits all with a
simple adjustment mechanism for quick
and easy resizing. Move the ‘frame
guides’ to adjust the size.
Moving the guides towards each other
will enlarge the frame and moving
them away from each other will make
it smaller.

Adjusting boom length
Release the sliding lock by gently pulling
it away from the ear grip. There is a
recess for your fingernail to help you get
a grip on the lock.
Gently pull (to shorten) or push (to
lengthen) the boom pole to the desired
position.
Move the sliding lock back on the ear
grip to secure the desired position. The
boom is now locked firmly in position.

Adjusting boom height
The boom pole can be pivoted up and
down at a fixed point below the ear
(without bending the boom).
While holding the frame in one hand,
gently move the boom pole up or down
with your other hand.

This headset relies on a 3-point ear
gripping system – adding a support area
behind the ear pressing gently inward.
To adjust the ear grips further, press and
gently bend them.
Adjusting ear grips

Flip boom (left to right side)
Detach the boom pole from the ear
grip by gently pulling the boom down
(starting at the back and tipping
forward).
Move the cable to the other side of the
cable guide.

Flip boom
Move the boom pole to the other
side and reattach it by gently pushing
tup (starting at the back and tipping
forward) until it clicks onto the ear grip.
Release the sliding lock and turn the
boom pole 180 (so it bends inwards
towards the face) by twisting it near the
ear grip. Please note that the boom is
oval and can only be locked in two posi-
tions – left- or right-angled. Move the
sliding lock back on the ear grip.

90º Cable management system
The cable guide can be used to move
the cable out of sight (for instance, hid-
den from the main camera).
The cable guide can be moved from left
to right on the frame
– just make sure the cable isn’t pulled
too tight when you slide the guide.

Disconnecting the service connector
For service purposes (replacing boom
or cable) disconnect the cable from the
boom at the service connector.
For service purposes only!
First remove the protective cover and – then firmly pull the metal parts from
each other at the seam.

Placement of microphone
We suggest that you expand the frame
and then place it on your head before
adjusting it to the correct size.
The microphone capsule is correctly
positioned when it sits close to (but not
touching) your face, at the corner of
your smile.
The enclosed windscreens oer
additional protection against wind and
pop noise. Gently place the windscreen
over the microphone head.
DUA9531-B
(3 pcs. of relevant color included)
DUA9531-F
DUA9501 (included)

Specifications
20 Hz 50 100 200
500
1 kHz 2510 20
40
dB
10
-10
-20
-30
0
Frequency response
Typical frequency response.
Directional pattern
Omnidirectional
Cartridge type
Pre-polarized condenser
Frequency range
20 Hz - 20 kHz
Sensitivity, nominal ±3 dB at 1 kHz
6 mV/Pa; -44 dB re. 1 V/Pa
Equivalent noise level, A-weighted
Typ. 26 dB(A) re. 20 µPa
Total harmonic distortion (THD)
< 1% THD up to 128 dB SPL peak
Max. SPL, peak before clipping
144 dB
Connector
MicroDot, TA4F, LEMO and MiniJack
Color
Beige, Black

General maintenance
The grid protects the tiny 3 mm capsule.
The tiny grid holes add to the mics’
resilience to water and sweat.
The mic cap can easily be removed
for cleaning by pulling it gently. When
you reattach it, you will feel and hear a
“click” when the cap is secured.
The orange, protective cap shields the
mic head when putting on make-up,
hairspray, etc. Remove this cap before
use.
DUA9301-B (optional)
DUA9301-F (optional)

The cable is usually longer than required. Make sure that excessive cable is wound up in soft figure-of-eight loops
(preferably 6-8 cm (2.5-3 in) diameter) and avoid kinks in the cable.
Use organic oil (e.g. olive oil) or lukewarm distilled water to remove residue from tape, glue or makeup on the
cable. Do not bend the cable or rub it harshly, it may stress the inner cores of the cable and cause them to break
over time.
The headset microphone is resistant to high levels of humidity and water. For optimum performance the
microphone capsule should be kept dry. Keep the microphone away from exposure to cleaning fluids and do not
use spray or fluids containing chemicals that could remove static electricity on or close to the microphone. This
could cause permanent damage.
Rinsing the microphone capsule must be done only with demineralized water.
The microphone must be left to air-dry afterwards.
Please refer to our instructions and videos explaining the cleaning process.
dpamicrophones.com/wash-miniature

DPI-6066-QG-2
© Copyright 2018
Warranty
d:finetm Headset Microphones are covered by a two-year
limited warranty.
Service & repair
If you are not satisfied with the characteristics exhibited by
this product, please contact your nearest DPA Microphones
representative for support.
CE marking
This product conforms to all relevant directives approved by
the European Commission.
Product features and specifications are subject to change
without notice.
dpamicrophones.com/6066
This manual suits for next models
3
Table of contents
Other DPA Headset manuals