DQ HEATING Moto Horizontal Manual

Moto Horizontal Radiator Fixing Instructions
Please unpack your delivery carefully and inspect the radiator and contents –
any damages or shortages must be notified to your supplier within 3 days of
delivery of your goods.
SPECIFICATIONS FOR MOTO HORIZONTAL
Technical Specifications
Materials Aluminium
Connections ½” Flow and Return
Test Pressure 8 Bar
Testing Authority EN442
Max operation pressure 4 Bar
Max working temperature 95c
These can be cleaned using a soft damp cloth with
a non-abrasive cleaning product.
PLEASE NOTE: That in accordance with Part L1 2006 of the Building Regulations and BS7593:1992 code of practice for the
treatment of hot water and central heating systems, we recommend flushing the heating system before installation of new
radiators and then adding the correct quantity and type of inhibitor for use with the radiator and system to prevent corrosion.
Damage caused to systems not protected by a suitable inhibitor will not be covered by the manufacturer warranty. It is the
responsibility of the installer to ensure the correct use and suitability of the fixings provided. No liability for costs or damages
arising from failure to do so can be accepted.

Over
–
force should
not be applied and
pipe wrench
should
not be used during
fixing.
Specific care
should
be taken
into
consideration.
max
8,5
Do not apply force
exceeding 18 Nm.
Liquid tread sealant should
be used instead of PTFE
tape or hemp.
pH
m n
7,
8
Ph value of the water
used in the system
should be between 7,8
and 8,5.
REQUIRED MATERIALS FOR INSTALLATION
CONTENT OF INSTALLATION SET
Bracket
Bracket lock
6,3 x60 mm
Screw
10 x 50 mm
Wall Plug
Diverter
Air vent
Blind plug
Diverter fit-in
plastic tube
Mounting bracket
support part
x4
x4
x4
x4
x1
x1
x1
x1
x8
M
-1
M-2
M-1
Mark the bracket holes of the product by
measuring them according to the X, Y,
Z
dimensions.
M-2
Tighten all brackets from the point you marked
bysynchronizingwith a spirit level.
Y
M-3
Attach the plastic bracket
supports to grooves on the
brackets.
X
Z
(min.)
M
-3
//////////////////////////////////////////////
INSTALLATION GUIDE
/
MOTO
Do not remove the corner protectors and shrink until all the construction work is complete.
When connecting pipes of various materials, the difference in electrode potential may cause galvanic
corrosion and serious damage.To avoid galvanic corrosion, it is highly recommended to use the same
materials,or materials with similar electric potential, throughout loop.
The wall plugs supplied with your radiator may not be suitable for your wall type.The appropriate wall
plugs should be used by your qualified installer.
Corrosion occurs on heating system components like radiator, valve, pump, etc. due tothe oxygen diffusion through pipes,
ifthepiping systemis plastic. In suchcases Oxygen barrier pipes shouldbe used. Otherwise,radiatorscan be corroded andleaked.
or
Electric Drill ,
Hammer
Metric Ruler
Cordless
Cross
Spanner
Stepladder
Drill Bit Ø10
Screwdriver
Point
(8mm)
(For high products)
Spirit Level
(Bit PH2)
Screwdriver
DIMENSIONS
Rear view
Width
:
W
Height
:
H
Distance between bracket center
:
X
(Applicable for Tempo valves. For other valves “+90mm” measure will vary)
Distance between top and bottom bracket center
:
Y
1
178 X= W - 356mm 178
178
W
C1 AXIS = W + 90mm - 20mm
178
Side view
119
mm
65 mm
Z= 110 mm (min.)
Products with
3 sections
Total of 2 brackets
needed on (One to the
bottom collector and
one to the top collector).
Rear view of 3 sections radiators
H
C2 AXIS = H
-70mm
Y= H - 100mm
7
7

M
-5
M-5
Lock the bracket by inserting
the bracket into the slots on
the upperbrackets of
radiator as shown.
M-4
Position the product on
the brackets so that
the collectors pass
through the channel on
the brackets.
Compact valve connection:
Please note this section if your
radiator has a compact valve.
C-1
C-1
Do not use linen or teflon as the sealing element
while mounting the connection fittings.
C-2
Do not apply more than 18 Newton meters.
*Do not usethepipewrench, it may damage theproductandapparatus.
C-3
After the installation, apply force to the nuts.
Do not exceed 18 Nm.
C-2 C-3
58 50
50 mm axis H valve
assembly sequence
Thermostatic
sensor installation:
Please note this
section if your
radiator has a
thermostatic
sensor.
T-1
Compact Connection
T-1 T-2
T-2 T-3
clik!
T-3
If thermostatic sensor is not used,
thermostatic core cover can also be
used for valve purposes.
Pull out the thermostatic core cover
which comes with the product.
Before mounting the sensor, make sure that
the adjustment mark on the sensor is placed
above the sensor. Mount the thermostatic
sensor on the valve and press in the
direction of the arrow until you hear a click.
2
M
-4
28.11.2019 Rev:04
R.EYS.KK.00142
NOTE: If your product is equipped with a
compact valve, there are 2 conduit couplings
in addition to the contents.

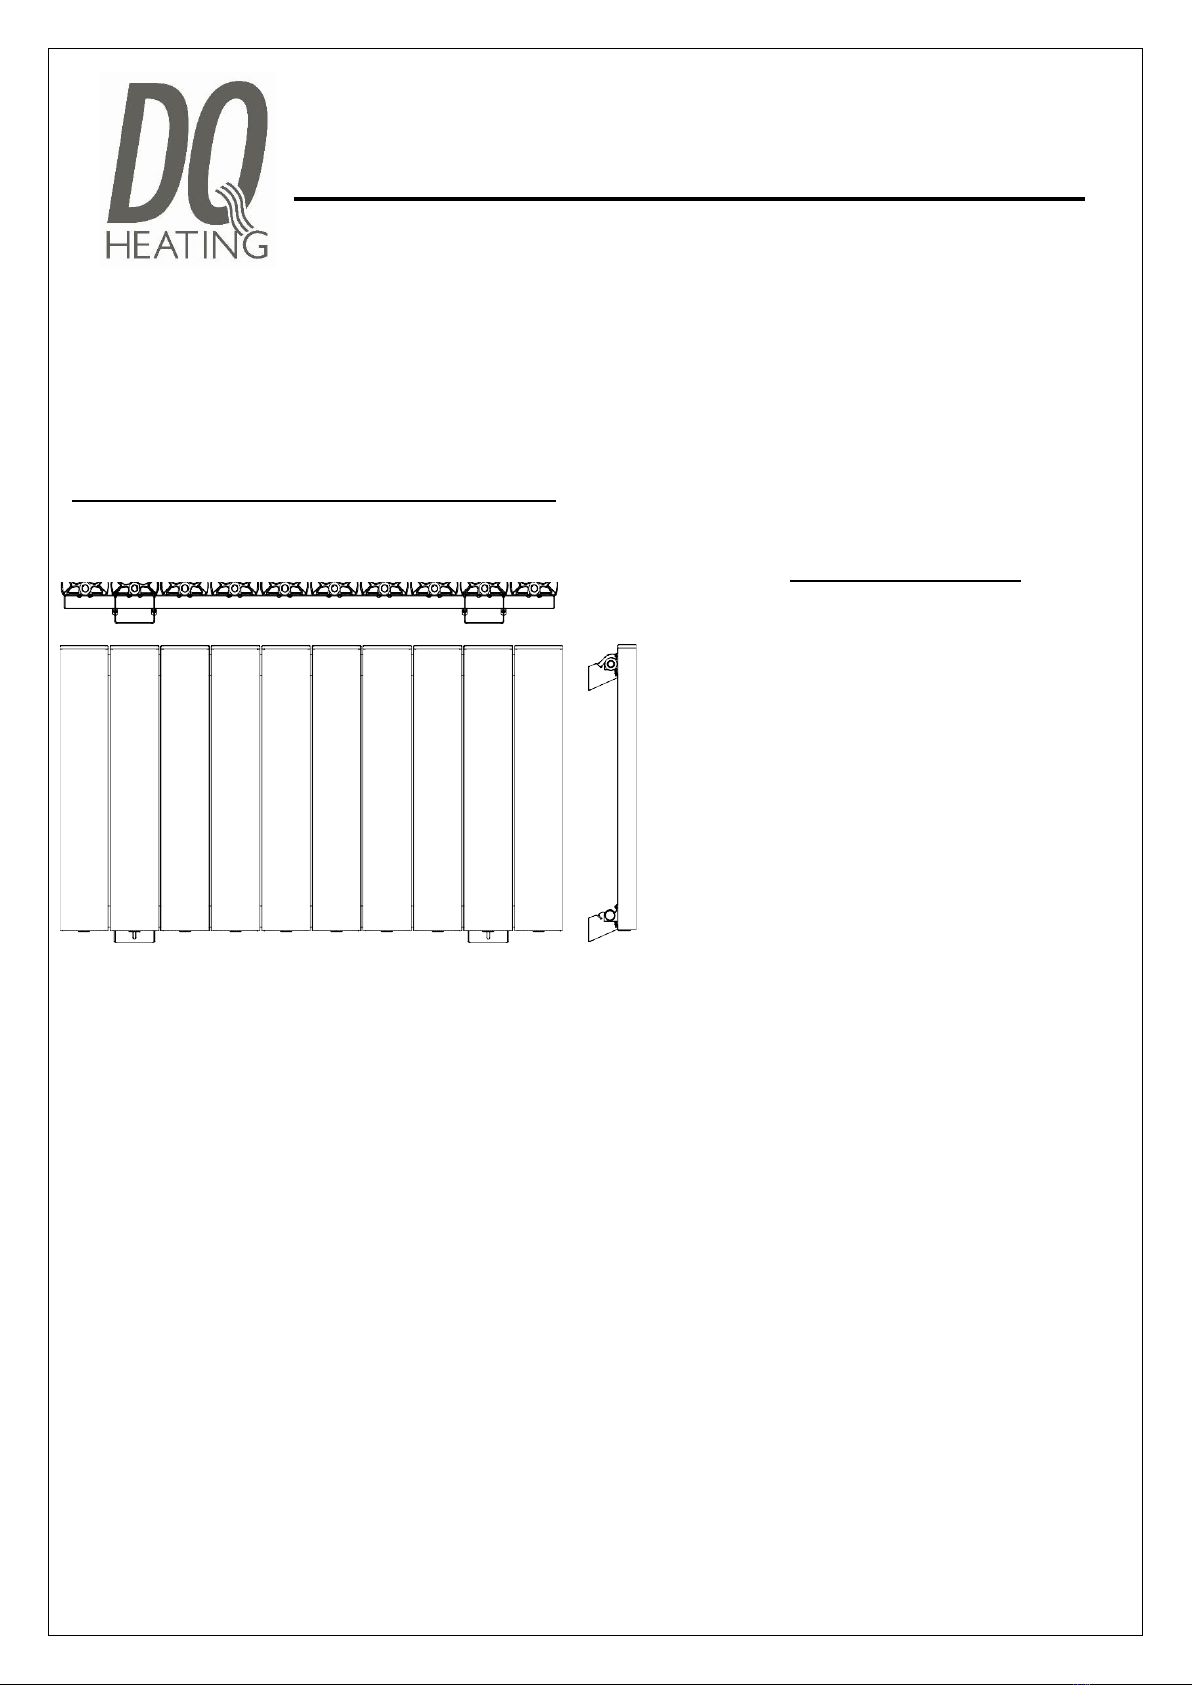
TERMS AND CONDITIONS
You must immediately remove all packaging, inspect the goods and notify us of any damage to the goods within 3 days of delivery. We shall have no obligation to
replace or repair damaged goods in the event of failure by the Buyer to comply with this provision. Radiators which are off an unacceptable standard or are
damaged must not be installed. If any items is installed it will be treated as being as accepted as received.
Damaged goods being returned will only be collected from your delivery address, unless otherwise agreed in writing. Any other goods, which we accept back, are
to be returned by you to our place of business at your expense.
Items will be accepted as a return which have not been installed or damaged after delivery. We do not accept liability for any damages sustained after delivery.
Goods should be returned in their original packaging, provided such packaging and goods are undamaged.
We may issue a credit note for goods which we accept as returned.
We may agree to provide you with replacement goods prior to collecting or receiving back the goods to be returned (whether faulty, damaged or otherwise) but
only on the condition that: the replacement goods are paid for in full and we reserve the right to re-invoice you in the event that the returned goods are found to
be in a worse condition than when they were originally received by you or where such goods have not been received back to us within 3 months of the replacement
goods being received by yourselves. A re-stocking charge of 30% will be applied to all non-faulty stock items that wish to be returned. Special order and non-
stock products cannot be canceled. Where cancellation or alteration of orders is accepted by us, you may be required to pay a restocking charge, to cover
administrative costs and collection costs (if applicable); such charges to be determined by us. If the goods we deliver are faulty or damaged, we will meet the
cost of the return, as long as the fault is reported to us within 3 working days.
The goods will be deemed to have been accepted when they have been delivered and we may not accept claims for any visible defects found after installation.
We accept no liability for any cost incurred relating to the cost of installation.
We shall not be liable for any plumber’s costs, decorator’s costs, transport costs, late penalties, or any other costs, as a direct or indirect result of (i) any defect in
the goods (including but not limited to any manufacturing faults, such as leaks, that become apparent on or after installation) or (ii) late delivery of the goods.
GUARANTEES AND LIABILITIES – we are not the manufacturer of this product we will take all reasonable endeavors to make over to you the benefit of any
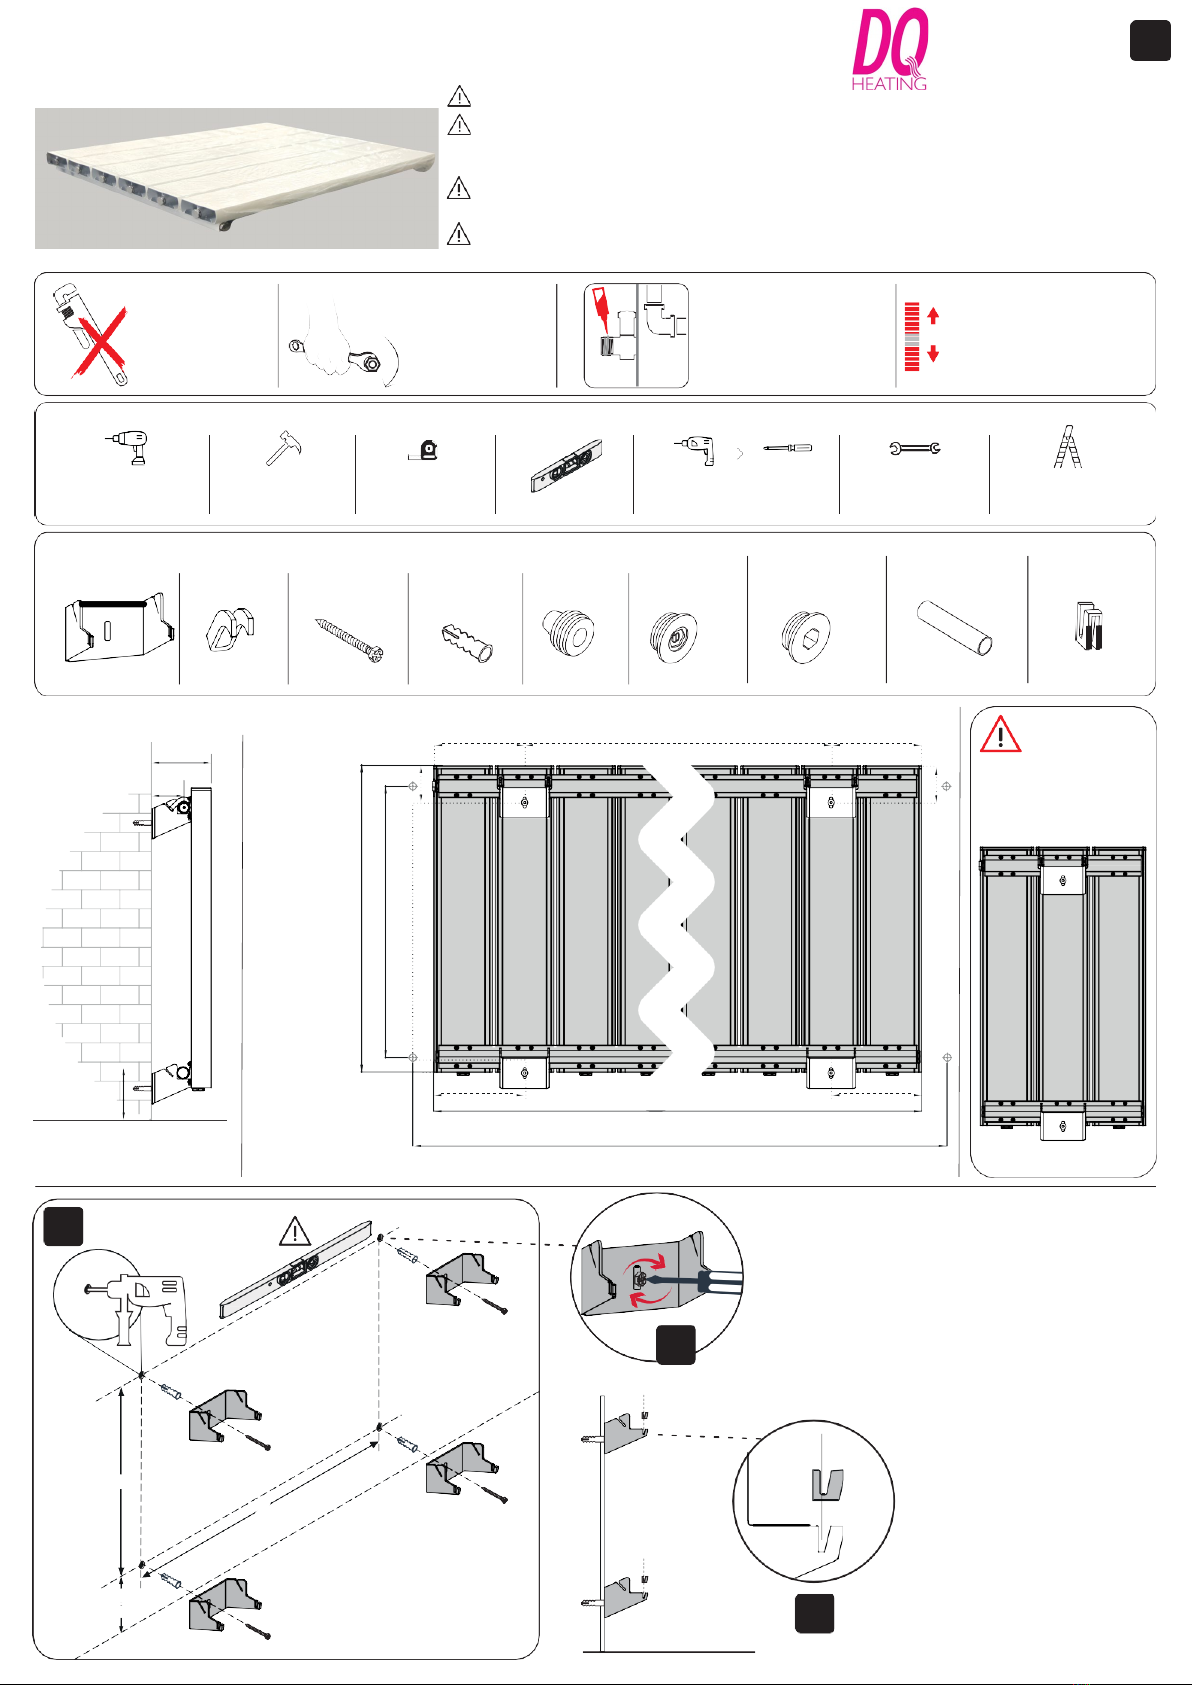
warranty or guarantee given by the manufacturers. The item must have been fitted in accordance with British and or European standards as well as these fitting
instructions.
www.dqheating.com [email protected] 01842 810833
Other DQ HEATING Heater manuals
Popular Heater manuals by other brands

Etherma
Etherma BHK user manual

Empire Heating Systems
Empire Heating Systems RH-50-7 Installation instructions and owner's manual

Uberhaus
Uberhaus 1861 Operator's manual

HeatStar
HeatStar JET20 Operating instructions and owner's manual

Galletti
Galletti AREO Installation, use and maintenance

Megatherm
Megatherm PSH Series Installation & user manual

Heatstore
Heatstore HSACR3000N Installation, operation and maintenance instructions

Truma
Truma Ultraheat S 3004 installation instructions

Sabiana
Sabiana DUCK STRIP Installation and maintenance manual

Qlima
Qlima R7224S C operating manual

Flandria
Flandria BodyHeat Series Installation maintenance and operating instructions

MILL
MILL CO1200WIFI3 Assembly and instruction manual