Draminski Animal profi 2 User manual

DRAMIŃSKI Animal profi 2
P o r t a b l e u l t r a s o u n d s c a n n e r
wi t h m e c h a n i c a l p r o b e s
MANUAL
www.draminski.com
EN08.02.2019

DRAMIŃSKI Animal profi 2 user manual
Manufactured by:
DRAMIŃSKI S.A.
ul. Owocowa 17
10-860 Olsztyn
Poland
Phone: +48 89 527 11 30
e-mail: ultrasound@draminski.com
www.draminski.com
DRAMINSKI S.A. company established and maintains a full quality management system
meeting the requirements of the EN ISO 9001:2008 standard. The system is periodically
audited by a notified authority TUV Rheinland LGA Products GmbH, Tillystrasse 2, 90431
Nuremberg, Germany, which participates in the conformity assessment.
Declaration of conformity
It can be obtained in our Sales Department:
Fax: +48 89 527 84 44
e-mail: ultrasound@draminski.com
We wish you and all the users of our product every success with your patients and
we are convinced that with our product you will be able to serve your patients well.
DRAMINSKI S.A. company will be happy to hear any comments from our clients with regard
to the device and this instruction.
Please call us: + 48 89 527 11 30
and send emails to: ultrasound@draminski.com
Developed by DRAMINSKI S.A.
All rights reserved.
Copying without the consent of DRAMINSKI S.A. is prohibited.

DRAMIŃSKI Animal profi 2 user manual
Table of contents
I. Introduction...........................................................................................................4
II. Construction of DRAMIŃSKI Animal profi 2 ultrasound scanner..........................7
III. Preparing the device for operation .....................................................................15
IV. The menu structure.............................................................................................16
V. Most frequently used functions ..........................................................................19
VI. Technical data....................................................................................................35
VII. Charging batteries .............................................................................................36
VIII. Operational and technical comments.................................................................38
IX. Guarantee..........................................................................................................39

DRAMIŃSKI Animal profi 2 user manual
4
I. Introduction
Information on the user manual for the device
The goal of this User Manual is to identify the technical characteristics of the device. It has
been written in an accessible way to facilitate, as much as possible, the use of information
contained in it.
In no way will reading the manual substitute even a basic ultrasound course. It is necessary
that the user of the device completed an appropriate training during authorised ultrasound
courses.
Individual chapters of the manual describe the construction, all accessories used during
normal use of the device, preparation for work as well as functions and operation of the
ultrasound scanner.
Warnings and comments used in this manual
Due to the need of emphasizing important content in this manual, the following ways of
highlighting were applied:
Warning! - when necessary to draw attention due to safety of the
patient or the user of the device.
Attention! - when necessary to draw attention due to the protection of the device against
damage or due to its proper operation.
Bold text - to draw attention to more important fragments in the manual or to make them
more distinct or legible..
Descriptions to diagrams and drawings - to make it easier to spot the details.
Since symbols used in the manual do not fully inform about safety tips, you should
read the tips first and follow them!

DRAMIŃSKI Animal profi 2 user manual
5
Brief information on ultrasonography
Ultrasound devices are widely used in veterinary diagnostics. Particularly useful and
commonly used is the method of real-time imaging, which offers a two-dimensional graphical
presentation of tissue sections in 256 shades of grey, in the so called B-Mode (Brightness-
Mode).
In this kind of devices the quality of achieved image depends on the frequency of waves
emitted by the ultrasonic head. The higher the frequency, the higher the image resolution.
However, as the frequency increases, the penetration depth decreases and the wave
absorption and dispersion coefficient increases almost linearly.
Diagnostic effectiveness of ultrasonography is considered to be high, but effects of working
with this method are significantly impacted by the quality of the device, type of the used
probe and the user's individual knowledge as well as following ultrasound scanning
standards.
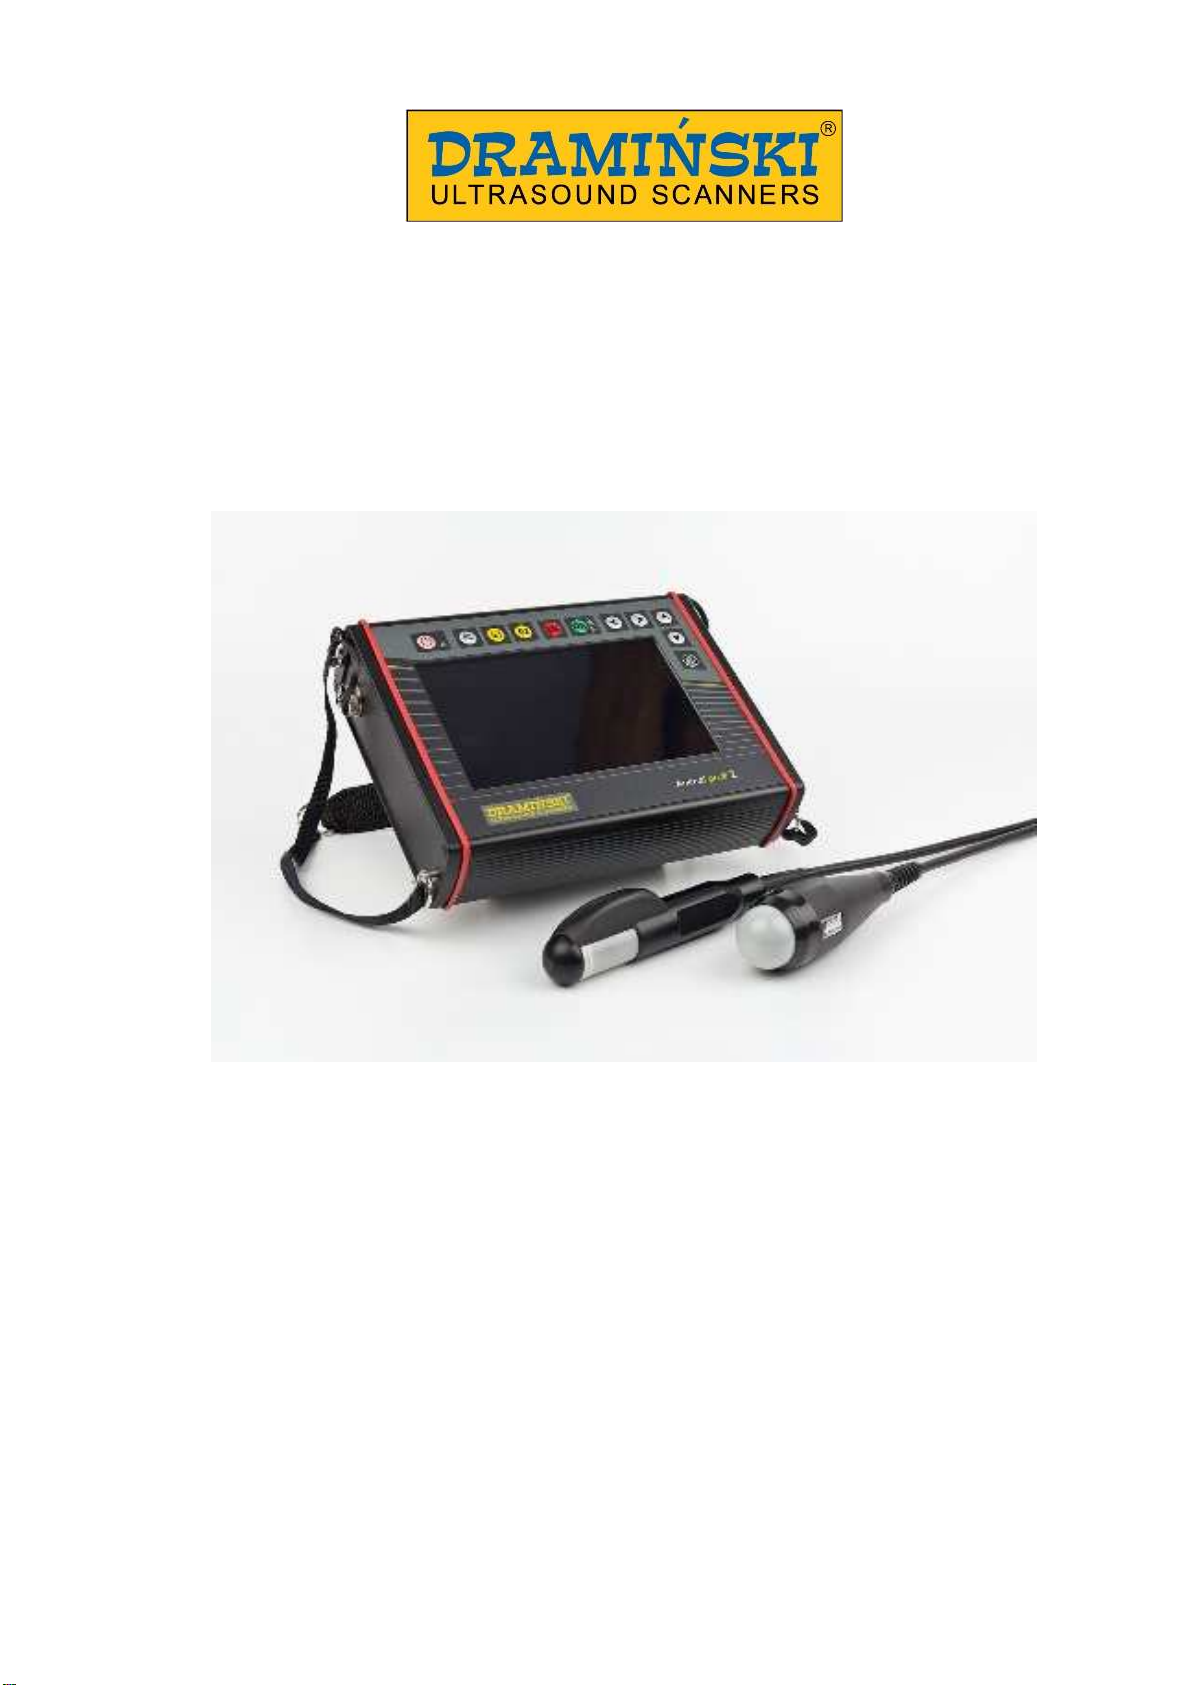
Basic information about the portable ultrasound scanner
DRAMIŃSKI Animal profi 2 is a modern, specially designed device powered by a battery
pack. The ultrasound scanner operates based on a small-sized computer system. Special
functions of the computer include: small size and weight as well as a strong aluminium
casing which hides high-tech electronics to guarantee top quality image.
DRAMIŃSKI Animal profi 2 is a unique diagnostic device. Small size and efficient battery
power supply make this ultrasound scanner with high quality and resolution LCD LED
monitor a portable and ergonomic working tool used by physician in almost every conditions.
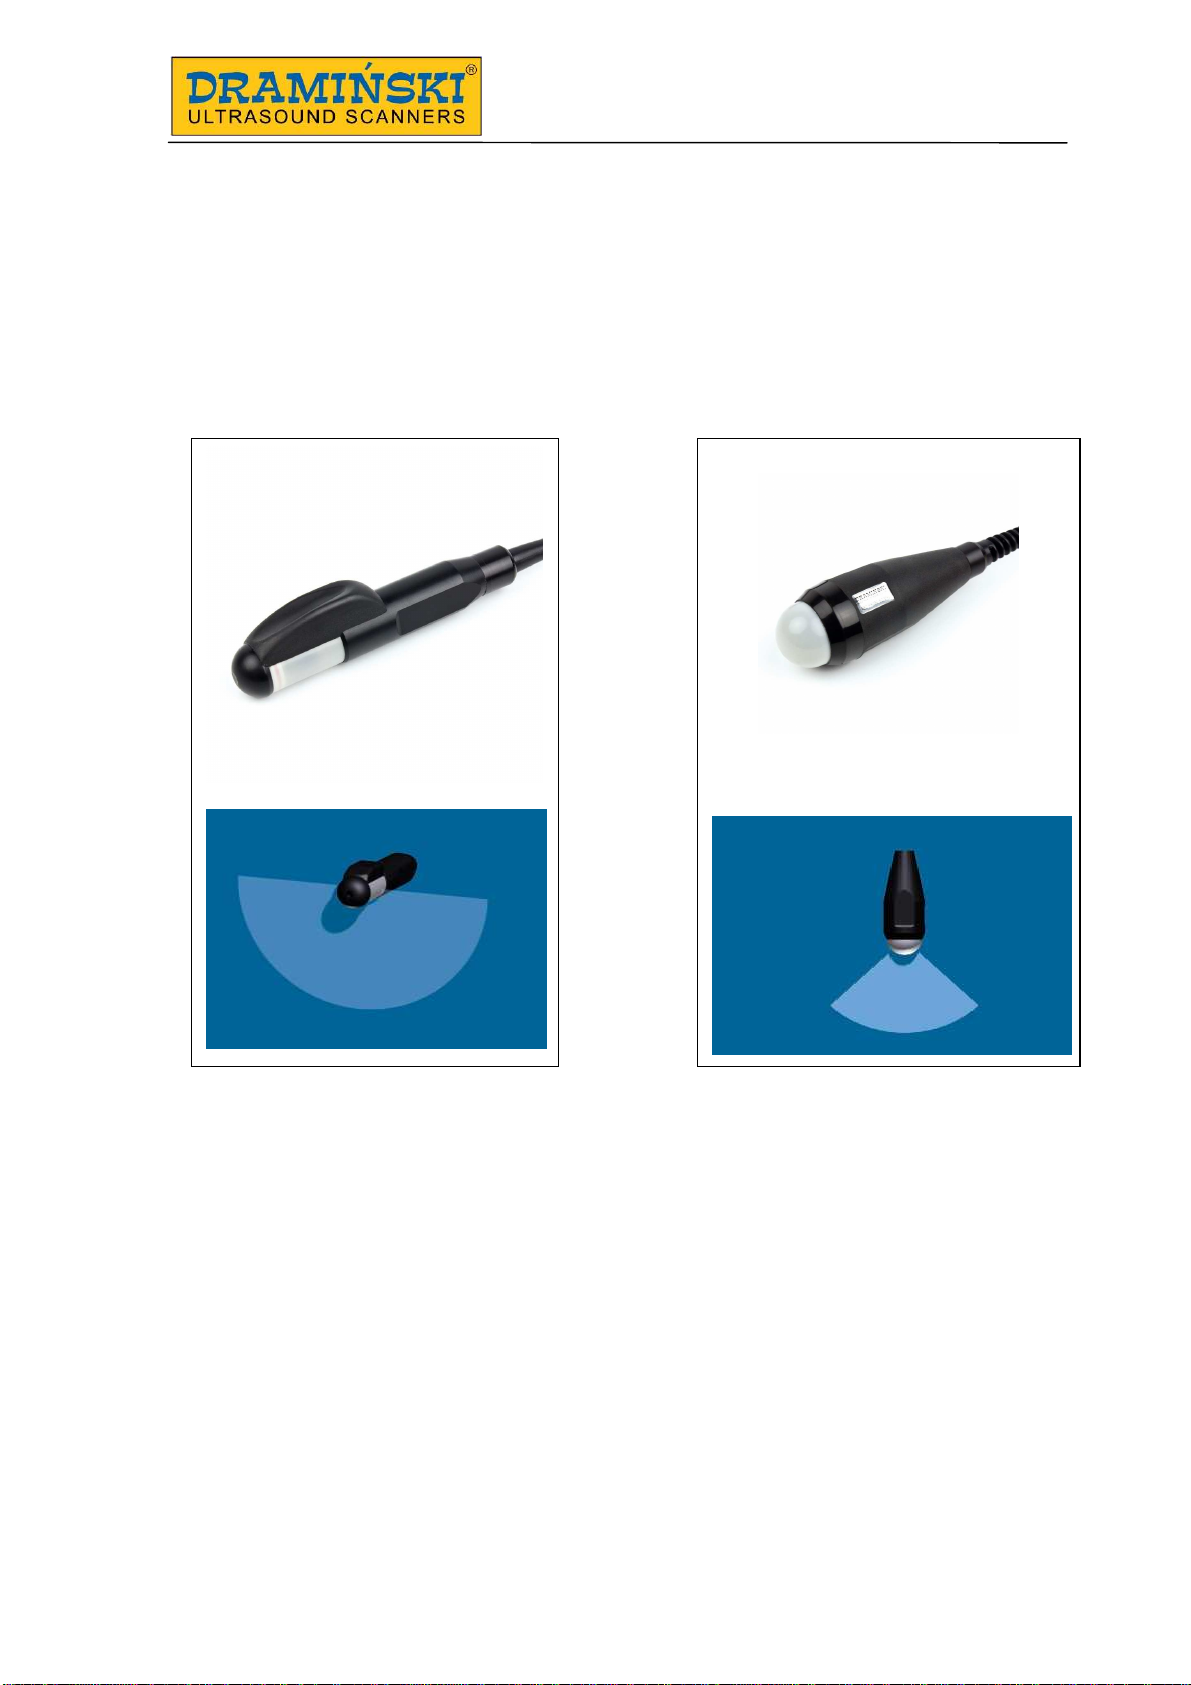
DRAMIŃSKI Animal profi 2 is a diagnostic device used to monitor illnesses and physiological
conditions through the application of 2D (black and white) imaging. With Animal profi 2 you
can examine abdominal cavity organs and carry out urological and gynaecological
examinations (depending on the probe used with different animal species).

DRAMIŃSKI Animal profi 2 user manual
6
List of Animal profi 2 ultrasound scanner elements - standard equipment
Name and description quantity
1 Device with LCD LED monitor and a membrane keyboard 1
2 Mechanical probe - type as agreed with the Supplier 1
Second probe – as agreed with the Supplier
3 Li-ion 14,4V / 3,1 Ah battery power supply pack 2
4 Battery charger with a 230 V power cable 1
5 Connector adapter to transmit images via USB 2.0 to external memory 1
6 Explorer type transport casing with a foam insert 1
7 A carrying strap and a waist belt 1
8 User Manual 1
9 Ultrasound gel (250ml) 1
Any additional accessories to be used with the Animal profi 2 ultrasound scanner are
available after a consultation with the supplier.

DRAMIŃSKI Animal profi 2 user manual
7
II. Construction of DRAMIŃSKI Animal profi 2 ultrasound scanner
The device comprises several main elements:
1. A casing with a membrane keyboard and LCD LED display.
2. Ultrasonic probe connected to a multi pin connector.
3. Battery pack for recharging - external power supply pack (BATTERY PACK).
4. Electrically powered 110-240V/ 60Hz battery pack charger.
1. Ultrasound scanner casing
The housing is made of high quality aluminum. The mounting system for the supplying
battery pack is installed on the back panel of the housing.
The following connectors are arranged on the side walls of the housing: USB 2.0 (in the form
of the 6 - pin circular connectors) and 12 - pin probe connector. The connectors are closed
with the special protecting plugs when not in use.
The description and location of housing components is presented on the following pages of
this manual.
Attention!
The ultrasound scanner has a strong construction, however it should be operated and
transported with due care in order not to expose the device to strong impacts to avoid
potential damage. Probe connectors should be protected against dirt and moisture.
The high quality LCD monitor with a 7” LED display, which is used in this device, is
characterised by a very wide viewing angles, excellent contrast and brightness as well as
resolution that guarantees very good display of the ultrasound image. The screen has a
brightness adjustment option in its menu.
Functions and location of membrane keyboard buttons with their description are shown in
the drawings below.
The ultrasound scanner is an advanced hi-tech device. Miniaturization and
independent source of power make the scanner a fully mobile and easy-to-use tool
even in tough conditions.

DRAMIŃSKI Animal profi 2 user manual
8
View and description of casing elements
carrying strap
fastening
membrane keyboard
with a monitor window
LCD monitor with LED
display
USB 2.0 connector to
transmit images to external
memory via special
adapter
casing body made
of aluminium silicone gasket
12- pin connector to
connect the heads

DRAMIŃSKI Animal profi 2 user manual
9
View of the housing rear wall with the pack installed
ultrasonic probe
connector socket (port)
system for mounting the pack on the casing
lock of the battery
pack mount system
removable external battery pack

DRAMIŃSKI Animal profi 2 user manual
10
2. Ultrasonic probe
Probe (head) is an important element of the device.
DRAMIŃSKI Animal profi 2 ultrasound scanner has one port but it is compatible with two
types of mechanical, sectorial probes, they are:
3. Batteries
Specially configured Li-Ion type batteries create an enclosed pack with its own thermal fuse
protecting against overheat while charging.
In the pack casing, there is a socket for connecting a charger cable as well as special holes
with contacts used to connect the ultrasound scanner with electric power supply. During
operation, the pack is attached to the bottom of the device with a special attachment system
with a lock.
Abdominal, sector probe
5,0 MHz ( 3-7 MHz),
scanning angle 90°.
Rectal, sector probe
5.0 MHz (4-7 MHz),
scanning angle 180°.

DRAMIŃSKI Animal profi 2 user manual
11
Connecting the battery.
Batteries are expected to last for 500 charging cycles. Owing to the use of modern, high
capacity batteries (3.1Ah), it's possible to work up to 4 hours with one battery.
Precautions for dealing with the Li-Ion battery pack are described further in the manual in the
BATTERY CHARGING section.
Li
-
Ion type battery pack
2
1
2
3

DRAMIŃSKI Animal profi 2 user manual
12
5. Charger
For charging batteries use an appropriately adapted charger powered by a 110-240V/ 60Hz
power supply and equipped in cables and a coloured diode signalling the charging status.
Attention: To charge the pack use only an original charger delivered with the ultrasound
scanner.
For more details concerning pack charging procedure and the use of the charger see
"Battery charging" section.

DRAMIŃSKI Animal profi 2 user manual
13
Membrane keyboard and button layout
The keyboard buttons are placed in its upper part to allow for operating the ultrasound
scanner with a left or right hand. A double function was assigned to most buttons to enable
both access to various options as well as easier and faster setting of image parameters (the
so called fast access). Functions of individual buttons are presented further in this manual.
Power button (turn on / turn off – hold longer) with an additional function to
freeze and enable imaging
A button opening menu for saving or loading images and cine loops in the
device's memory as wel as saving them on a pendrive type external memory.
G1 – signal near field gain level setting
G1 – signal far field gain level setting
ESC – escaping the menu and withdrawing from the change in parameter
settings
1
2
3
4
5
6
7
8
9
2
3
4
5
1

DRAMIŃSKI Animal profi 2 user manual
14
OK/MENU - 1. opening the main menu and accepting the selected option or
settings 2. approving the position of the marker while dimensioning
navigation keys are assigned to the following operations:
Image freeze and imaging enable function.
6
7
=/ navigating the menu and setting parameter values
= "Cineloop" function automatic fast-forward and rewind option after freezing the image
= "Cineloop" function crolling frame by frame after freezing the image.
=/ setting markers while dimensioning
=/ selection of symbols when describing images or cine loops before saving them in
the memory
= setting the focus indicator at the optimum depth (with a closed menu)
= setting the depth of scanning (with a closed menu)
= marking selected images and cine loops to send them to external storage
8
9

DRAMIŃSKI Animal profi 2 user manual
15
Monitor view
Messages and information shown on the screen while working with the device.
An example of a Animal profi 2 screenshot with a frozen image and description of
messages and displayed information:
III. Preparing the device for operation
Connecting the probe.
Note! Probe connector must be protected from mechanical damage, dirt and humidity.
Probe cable must be protected from excessive loads, strong multiple folding and pulling.
After proper plugging the round connector of the probe into the socket in the housing, it
should be tightened, holding the metal part, to provide full and correct contact of the probe
connector with the socket in the housing.
open menu
Information bar
showing current settings: date and time, type of probe, level of G1 and G2
gains, set probe frequency, scanning range, zoom, refreshing (Fps), focus, Gamma level,
image freeze, battery status, measurement results
imaging sector
Line with a resolution of 1 cm
battery status indicator
Gamma

DRAMIŃSKI Animal profi 2 user manual
16
DRAMIŃSKI Animal profi 2 ultrasound scanner is fitted with a single multi pin connector for
connecting the probes.
Note! The probe replacement must be carried out at the unit switched off.
In order to change the probe, unscrew and remove the connector, and then plug the new
one and re-tighten the connector.
The connected head is automatically recognized by the system and the imaging sector will
change according to the type of the connected head.
View of the head connector correctly screwed
IV. The menu structure
Rules for navigating the menu
The Animal profi 2 ultrasound scanner's menu comprises two blocks, i.e. the main menu and
the additional menu, each having several positions with a drop-down list of options. To
navigate individual menu options, navigation buttons are used:
Selected position or option will be marked (backlit) with a blue background.
To confirm the choice of a menu option, use "OK" button. To cancel the selected option, use
"ESC" button.

DRAMIŃSKI Animal profi 2 user manual
17
In some options messages (hints) are displayed, suggesting which buttons may be
used to set or change a selected parameter.
Main menu is opened with the use of button. The menu has several positions with
drop-down lists and enables the user to set the following parameters in various options:
in the System
option the following
parameters
may be adjusted:
MHz
Range
Gamma
Zoom
Negative
Averaging
Postprocessing
Full screen
System >
Switch le t/right/
Date / Time
Brightness
Language
Factory settings
Automatic power o
Presets >
Settings
Mode P
resets Help
Settings
Mode
Presets Help
B mode
B+B mode
B+M mode
Settings Mode Presets
Help
About the program
Preset 1
Preset 2
Preset 3
Preset 4
Preset 5
Settings Mode
Presets
Help

DRAMIŃSKI Animal profi 2 user manual
18
Additional menu opened with the button makes it possible to manage images and
image sequences (cine loop), i.e. saving, loading, transferring via USB, deleting and
dimensioning. (besides this menu provides access to the imaging mode selection position).
In the measurement position, age tables are available, allowing for estimating the age of
foetus in various animal species based on properly taken measurements listed below:
Age of a foetus for the marked species and type of measurement is displayed on the
information bar next to measurement results.
File Measurements Mode Presets File Measurements Mode Presets
File Measurements
Mode
Presets
Distance
Sur ace area
Volume
Age tables >
Clear
Turn on/o grid
Back at
B mode
B+B mode
B+M mode
Disable
•Cow_ LCC
Cow _DBP
Horse_ DSG
Horse_ DO
Sheep LCC
Lama_DBP
Pig_LCC
Save image
Load image
Save cine
Load cine
File Measurements
Mode
Presets
Preset 1
Preset 2
Preset 3
Preset 4
Preset 5

DRAMIŃSKI Animal profi 2 user manual
19
V. Most frequently used functions
The table below shows basic functions that are used most frequently when working with the
ultrasound scanner as well as keyboard buttons to activate them:
Turn on/off the
scanner and
image freeze
The ultrasound scanner is switched on by pressing the
ON/OFF button. When the ON/OFF button is pressed for 2
seconds the device switches off.
Freezing and unfreezing of the image during the test starts with
a short press of one of these two buttons.
Image is stopped and on the information bar word FREEZE
appears
Gain control
Signal gain control.
Gain 1 button = near field gain. After pressing G1, the level is
regulated with the use of navigation buttons that remain active
for 2 seconds.
Gain 2 button = far field gain. After pressing G2, the level is
regulated with the use of navigation buttons that remain active
for 2 seconds.
Scope - changing
depth of
penetration
The scope of penetration is set with the use of navigation
buttons vThese parameters are adjusted to achieve an
optimum image quality depending on the type of examination
and type of probe. The value of the set scope is displayed on
the information bar.
MHz - filtering the
signal from
transducers
The level of MHz (quick access) is set with the help of
navigation buttons, when the Menu is switched off.
The head has broadband transducers, and this function
enables filtration of their signal within the range between
3.0 MHz and 7.0 MHz. This option is also available in MENU /
MHz (frequency). The value of the set parameter is indicated
in the information bar.
GAMMA MENU / GAMMA. This function enables adjustment within a
wide range of greyscale level to optimize the image during
examination
Zoom -
enlargement MENU / Enlargement (zoom). Percentage enlargement (or
reduction) of a standard 100% by leaps within the range from –
60% to +200%.

DRAMIŃSKI Animal profi 2 user manual
20
Cineloop
The function allowing for displaying the maximum 256 of the
recent frames from the moment the image is frozen. By using
the navigation buttons, the user may scroll manually frame by
frame the sequences of the completed examination or may
automaticallyplay forward or backwards cine loop by using the
buttons.
Dimensioning
ADDITIONAL MENU / MEASUREMENTS/ When the image is
frozen the user may measure the images with the use of
navigation buttons, setting the markers and confirming their
position with the OK button. There is also the option to turn on
and off the grid in this menu.
B+B Mode
MENU / MODE. Dividing the monitor into two sections (B+B
Mode) to allow for comparing the frozen image with the one
which is currently being scanned.
ESC – fast access. Holding the button for about 1 second
results in quick start-up of the B+B mode. You can come back
to the B –Mode by holding the ESC button again.
Saving images
and cine loops
ADDITIONAL MENU / Save image / Save cine. This function
allows for saving the image or cine loop comprising the
maximum of 256 frames in the device's memory.
Loading images
and cine loops to
the monitor and
managing images
ADDITIONAL MENU / Load image / Load cine. This function
allows for loading to the monitor the images or cine loops
recorded in the memory from the list with a preview of
miniatures.
Loaded images or cine loops may be sent to the external
storage media.
Table of contents
Other Draminski Scanner manuals