Draminski Pregnancy Detector for Dogs User manual

DRAMIŃSKI S.A.
Owocowa 17, 10-860 Olsztyn, Poland
Tel. +48 89 527 11 30, fa . +48 89 527 84 44
e-mail: [email protected]
1
DRAMIŃSKI Pregnancy Detector
for Dogs
OPERATION MANUAL
www.draminski.com

2
CONTENTS
1. Introduction ............................................................... 2
2. Description .................................................................
3
3. Test Settings .............................................................. 3
4. Operation ...................................................................
4
5. Observations .............................................................. 7
6. Care & C eaning .......................................................... 8
7. Battery Rep acement ................................................... 8
8. Technica Data ............................................................ 8
INTRODUCTION
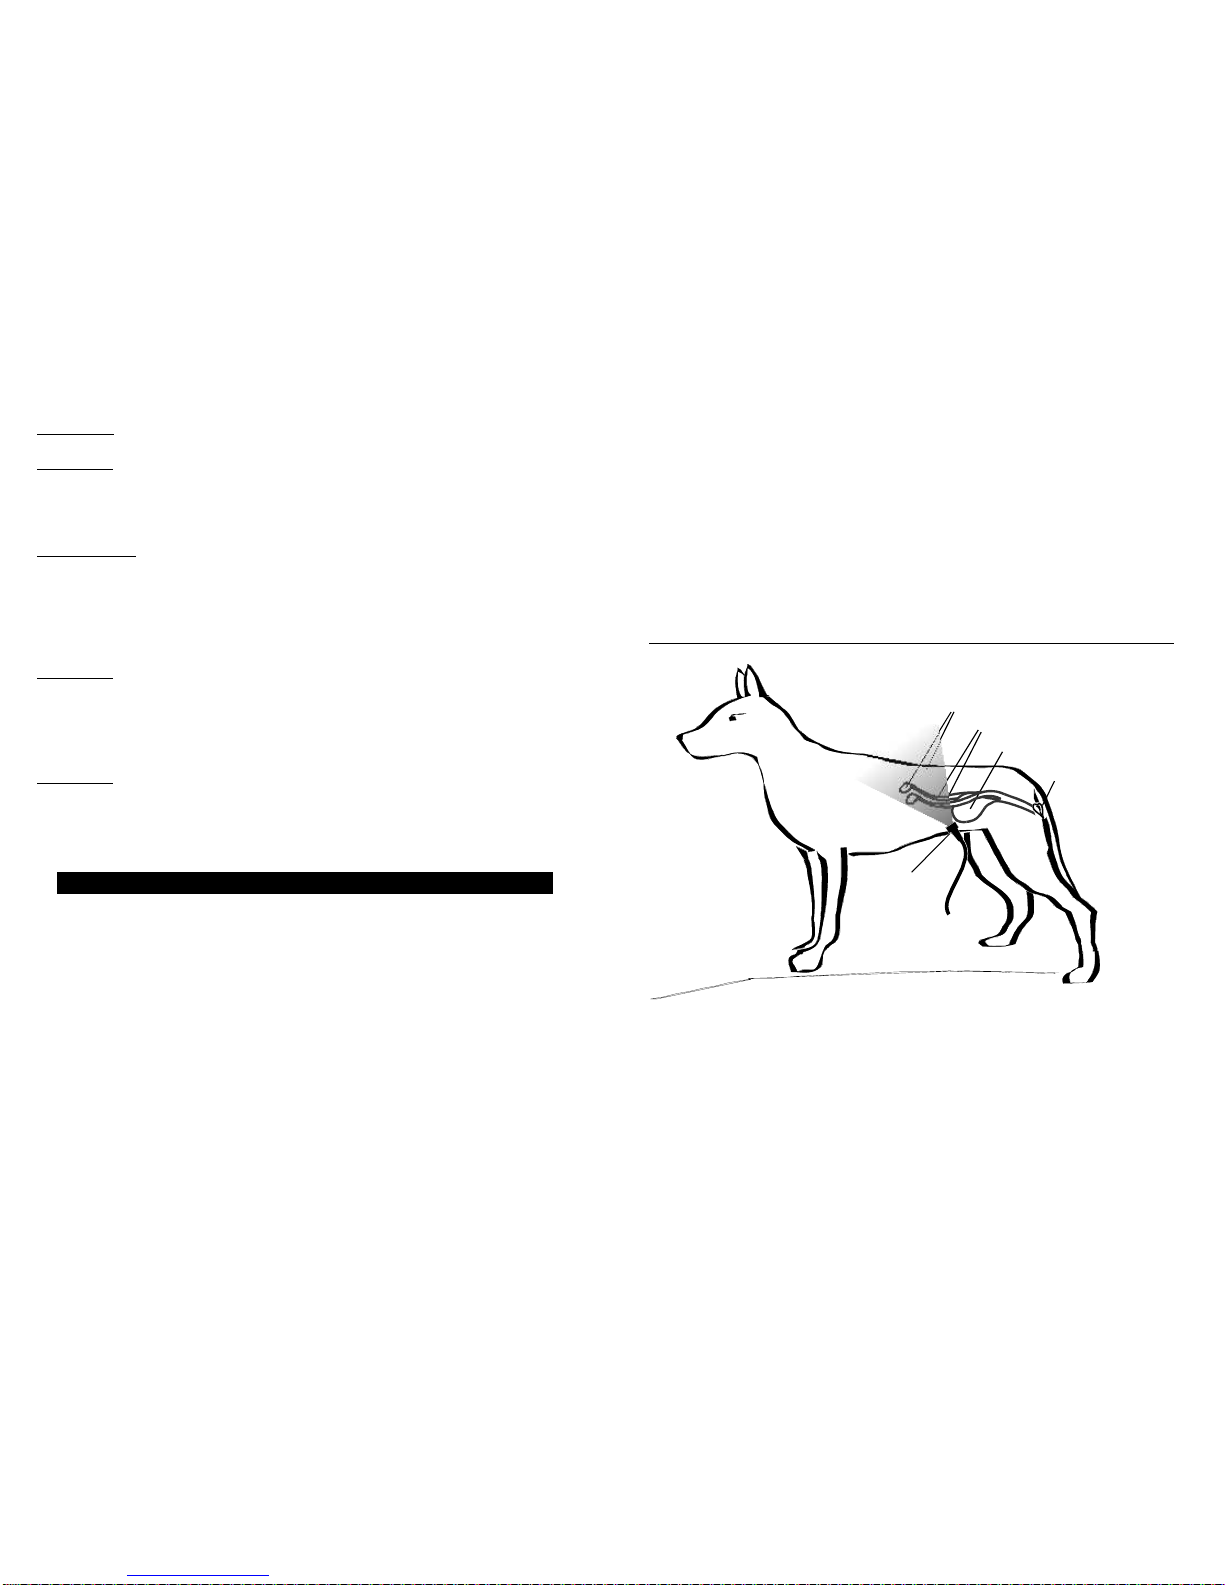
The DRAMINSKI U trasonic Pregnancy Detector for Dogs determines
pregnancy in dogs by ocating amniotic f uid in the uterus.
The u trasonic probe (sensor) he d against the skin of the bitch, emits
u trasonic sound waves which are ref ected by the amniotic f uid in the
uterus of the pregnant bitch and return to the probe. The ref ected
sound is then measured and ana ysed by the instrument.
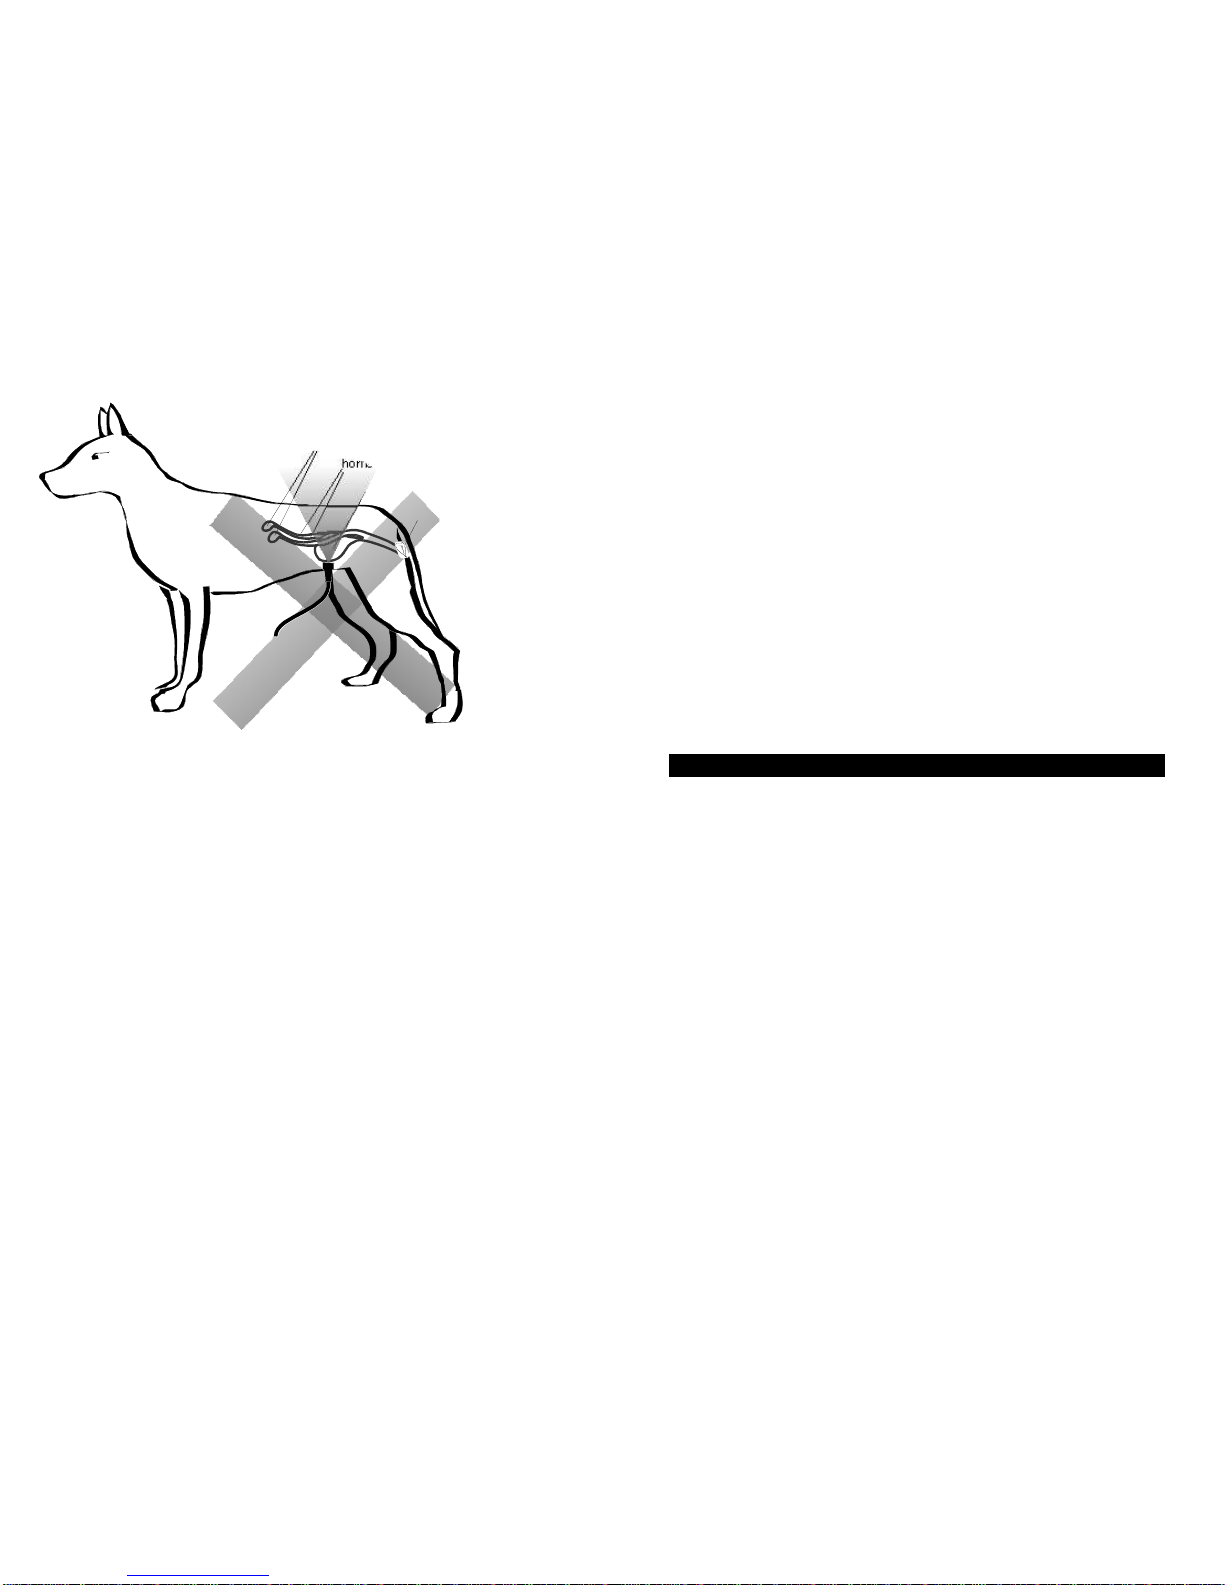
When an air ess contact is made between the head of the probe and the
skin, the instrument signa s this with the diode ( ight) pu sing and a
high-frequency acoustic (sound) signa ing regu ar y once a second.
When pregnancy is detected however, the instrument signa s this with a
rapid pu sing of the diode ( ight) and a corresponding rapid high-
frequency acoustic (sound) signa .
The DRAMINSKI U trasonic Pregnancy Detector for Dogs is idea y suited
to pregnancy determination for individua breeders, arge breeding &
show kenne s, veterinary surgeries and commercia organisations a ike.
It is designed to be easy to use, maintain and provide rapid resu ts with
maximum accuracy.
Testing can be performed from 3 weeks after mating. However the
optima time for accurate diagnosis is between days 25 & 28, because of
the en argement of the uterus at this time and its movement s ight y
downward, c oser to the peritoneum. Testing prior to day 25 is possib e, 3
but accuracy decreases due to insufficient amniotic f uid being present to
ref ect the u trasonic waves. Testing after the optima period is a so
possib e.
DESCRIPTION
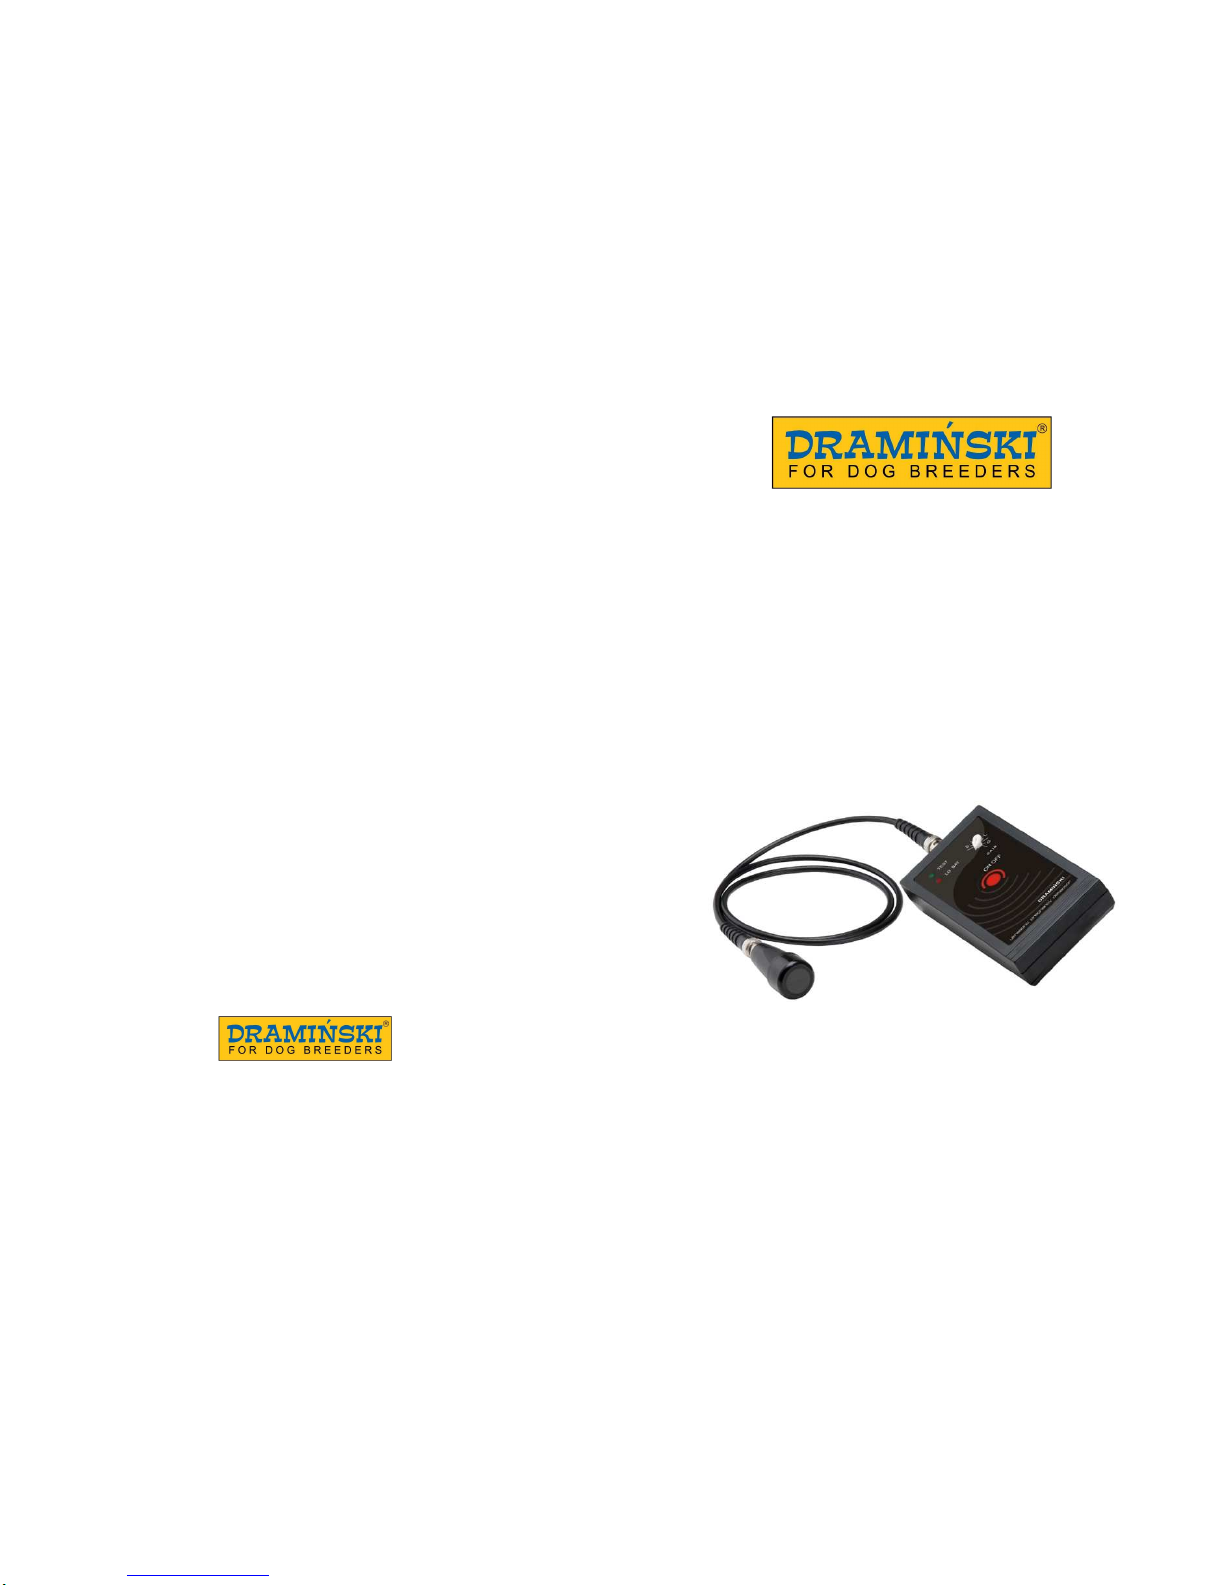
The DRAMINSKI U trasonic Pregnancy Detector for Dogs consists of the
fo owing:
1. The instrument body with red and green signa ing diodes, on/off
button, battery compartment, probe connector-cab e output
termina and a variab e gain contro to ‘set’ for the size & weight
of the bitch to be tested.
2. U trasonic sensor probe with co-axia connecting cab e.
3. A ka ine 9 vo t battery inside the battery compartment of the
instrument body.
4. P astic carrying and storage case.
TEST SETTINGS
Setting the potentiometer (gain contro ) correct y, is a very important
factor, which inf uences the va idity of the resu ts obtained by testing.
Bitches vary in regards of weight and size for different breeds and thus
the gain must be set to the particu ar position re evant to the size of the
bitch that is being tested.
For ease the potentiometer has been calibrated to show:
S For sma bitches
M For medium size bitches
L For arger bitches
G For the giant bitches.
With usage, fami iarity and experience, the gain contro can be adjusted
to suit the particu ar bitch, both in terms of breed type and actua size,
so that an optimum setting is achieved to ascertain accurate resu ts.

4
Examples:
S (Small)
*Yorkshire Terrier *Chihuahua *Pekingese
*Toy Pood e *Dachshund *Papi on
M (Medium)
*West High and White Terrier *Border Terrier
*Norwich or Norfo k Terrier *Fox Terrier
* Whippet * Cocker Spanie *Lhasa Apso
* Shih Tzu *Corgi
L (Large)
*GermanShepherd *Border Co ie *Rottwei er
*Labrador / Retriever *AfghanHound *StandardPood e
*Doberman *Boxer *Da matian
G (Giant)
*B oodhound *O d Eng ish Sheepdog *St.Bernard
*Newfound and *Bernese Mountain Dog *Irish Wo fhound
OPERATION
Before testing, ensure you know the date of mating or insemination.
Immerse the head of the probe in the ge , oi or other suitab e contact
medium (exce ent resu ts via ease of use have been obtained by using
any norma househo d cooking oi ).Use a sma g ass jar containing the
oi with a wide mouth top and dip the end of the u trasound probe into
the oi . The unit wi beep & f ash rapid y (effective y showing a
pregnancy resu t). Remove the probe from the oi and gent y shake of
the excess, then p ace the probe in the correct position on the bitch and
begin to test.
Ho d the probe against the skin of the bitch at the position shown on the
diagram. Move the probe in a s iding motion unti you achieve a good
air ess contact, indicated by a steady f ashing green pu se of ight from
5
the diode and acoustic signa ‘beeping’ at the same frequency.
(Approximate y once per second).
As shown on the diagram, when p acing the probe against the skin, you
must direct the u trasound waves towards the horns of the uterus. Test
for pregnancy on both the eft and right hand sides and commence
scanning by moving the probe head around the genera area, keeping
the probe pressed against the skin so as not to ose the air ess contact.
When good contact is achieved, proceed with the scanning. As soon as
the u trasonic waves ocate the amniotic f uid in the uterus and are
ref ected back, the green diode and acoustic signa wi change to rapid
pu sing at 4 to 5 per second to indicate pregnancy.
The drawing illustrates the initial placement of the probe on the animal.
horns of uterus
ovaries
vulva
bladder
probe
It is im erative that the robe is laced and directed as shown in
the diagram ointing towards the front of the bitch at an
a roximate angle of 40 to 45 degrees.

6
horns of uterus
ovaries
vulva
bladder
probe
If the robe is directed vertically a false reading of regnancy
could be obtained by reflection of the ultrasonic waves
emanating from the urine in the bladder.
If no pregnancy signa is achieved, (ie: the frequency of the f ashing
diode and the acoustic signa remains at once per second) move the
probe by s iding against the skin surface whi st sti maintaining good
contact (confirmed by the continuance of the ight pu se and sound at
once per second) around the genera area, initia y moving s ight y to the
rear of the bitch and then moving forward a ways keeping at a 40 to 45
degree ang e.
In the diagram opposite, you wi see the correct position to p ace the
probe, which is directed at an ang e towards the uterine horns, thus
avoiding the b adder which may produce fa se readings, especia y if the
bitch has a fu b adder. It is therefore important to et your bitch urinate
before taking a reading.
It is prudent to note that if you a so move the probe forward too far, or
in the centre of the underside of your bitch, up as far as the base of the
sternum, or p ace the probe on either side of the rib cage itse f, then you
may ‘pick up’ f uid within the kidneys, which wou d provide a fa se
reading.
7
It is imperative therefore to achieve accurate readings that the
probe is placed and tested on either side of the bitch in the
position indicated and shown on the diagram.
The probe shou d be he d firm y against the bitch’s body, but not
pressed so as to cause pressure to the abdomina cavity, with the
u trasound waves directed at a 40 to 45 degree ang e, aiming at the
spine as shown in diagram. Directing the u trasound waves a most
vertica y may cause the ref ection of urine in a fu b adder, thus
providing a fa se signa of pregnancy.
For accuracy the tests shou d be conducted on both sides, when the
bitch is standing.
The best time to test the bitch is when she has an empty stomach and
an empty b adder. A fu stomach and/or b adder may cause fa se
pregnancy resu ts, by ref ecting the u trasound waves. It is best to
confirm the resu ts by testing on 3 occasions.
OBSERVATIONS
The tests can be done from 3 weeks unti approximate y 40 days after
mating or insemination.
The most accurate resu ts are achieved between days 25 and 28.
If a test is carried out ear y, we advise that the test is conducted again
between the optimum test period of 25 to 28 days.
Norma scanning time is 15 to 20 seconds or a itt e onger, but with
practice, accurate test resu ts can be achieved in a few seconds.
A though very high rates of pregnancy accuracy are possib e with
practice, natura and physio ogica factors inc uding re-absorption of the
foetus after a positive scanning resu t can prevent 100% accuracy being
achieved.
This unit has been designed and calibrated for pregnancy detection on
dogs and is not suitable for use on humans.

8
CARE & CLEANING
Do not wet the detector, immerse it in water or expose to excessive
moisture, as the instrument body is not designed to be tota y
waterproof.
C ean the instrument body, probe and cab e with a damp c oth or
preferab y a ‘wet-wipe’ and dry thorough y before use or storage.
Store the detector in its carrying case in a c ean and dry p ace when not
in use.
BATTERY REPLACEMENT
Low battery power is indicated by the red diode ( ight) and a new
battery is required when this appears. It is recommended that a high
performance a ka ine battery is used for this instrument or a ternative y
a good qua ity rechargeab e battery.
To change the battery:
1. Unscrew both screws, which fix the battery cover p ate on the
rear of the unit.
2. Remove battery from its compartment and re ease from
termina s.
3. Renew battery, fix c asps to correct termina s and rep ace in
battery compartment.
4. Rep ace battery cover p ate, and rep ace two fixing screws.
TECHNICAL DATA
Dimensions: (L)120mm x (W)75mm x (H)30mm
Net Weight: 250g approximate y
Power Source: A ka ine 9 vo t battery (automatic battery fai ure
signa )
Working Temperature: From 0
o
C to + 60
o
C
Table of contents
Other Draminski Security Sensor manuals
Popular Security Sensor manuals by other brands

Hochiki
Hochiki IFD-E(Exd) user manual

INFRARED CAMERAS
INFRARED CAMERAS SOUND DETECTAI user manual

B.E.G. LUXOMAT
B.E.G. LUXOMAT PD4-M-HCL-FC Application description

SKYLOTEC
SKYLOTEC CS2 Instructions for use

B.E.G.
B.E.G. LUXOMAT PD9-DIGI-FC Installation and operating instruction

ITALIANA SENSORI
ITALIANA SENSORI 8032-ISR023 Installation, operation and maintenance manual