Draper TJ2/QL Manual

OPTIONAL ACCESSORIES
IMPORTANT SAFETY TIPS cont’d
2. CORRECT POSITIONING:
The jack should be positioned (normally
under the suspension near appropriate
front or rear wheels). Since these points
may vary with each vehicle, it is important
to consult the vehicle manufacturer’s
handbook or Haynes manual.
- 4 -
3. TERRAIN:
The jack should be operated on a hard
and level surface as the location will
permit.
4. NEVER EXCEED THE JACK’S RATED
CAPACITY.
5. WORKING UNDER THE VEHICLE:
It is extremely important, when working
under the vehicle, to ensure axle stands
are always used.
©Published by Draper Tools Ltd.
No part of this publication may be reproduced, stored in a retrieval system or
transmitted in any form or by any means, electronic, mechanical photocopying,
recording or otherwise without prior permission in writing from Draper Tools Ltd.
TROUBLE PROBABLE CAUSE REMEDY
TROUBLE SHOOTING
Jack will not hold load.
Jack will not lift load.
Jack will not lift to its full height.
Jack pump feels unsteady under
load.
Jack will not lower completely.
Jack will not lift to its full height.
Jack pump feels unsteady under
load.
Jack pump feels unsteady under
load.
Jack will not lower completely.
(1) Dirt on valve seats.
(2) Worn seals.
Air block.
(1) The reservoir could be
overfilled.
(2) Low hydraulic oil level.
The pump cup seal could be worn
out.
(1) Air block.
(2) Unit needs lubrication.
(1) Lower the lifting arm, close
the release valve and remove
oil filler plug.
(2) Place one foot on a front
wheel and pull up the lifting
arm to its full height by hand.
(3) Open the release valve to
lower the lifting arm.
(4) Replace seals.
(1) Open the release valve and
remove oil filler plug.
(2) Pump handle a couple of full
strokes and close the release
valve.
(1) Check the oil level.
(2) Remove the filler plug. Top up
oil to correct level.
Replace the cup seal with a new
one.
(1) Release air by removing filler
plug.
(2) Oil external moving parts.
- 5 -
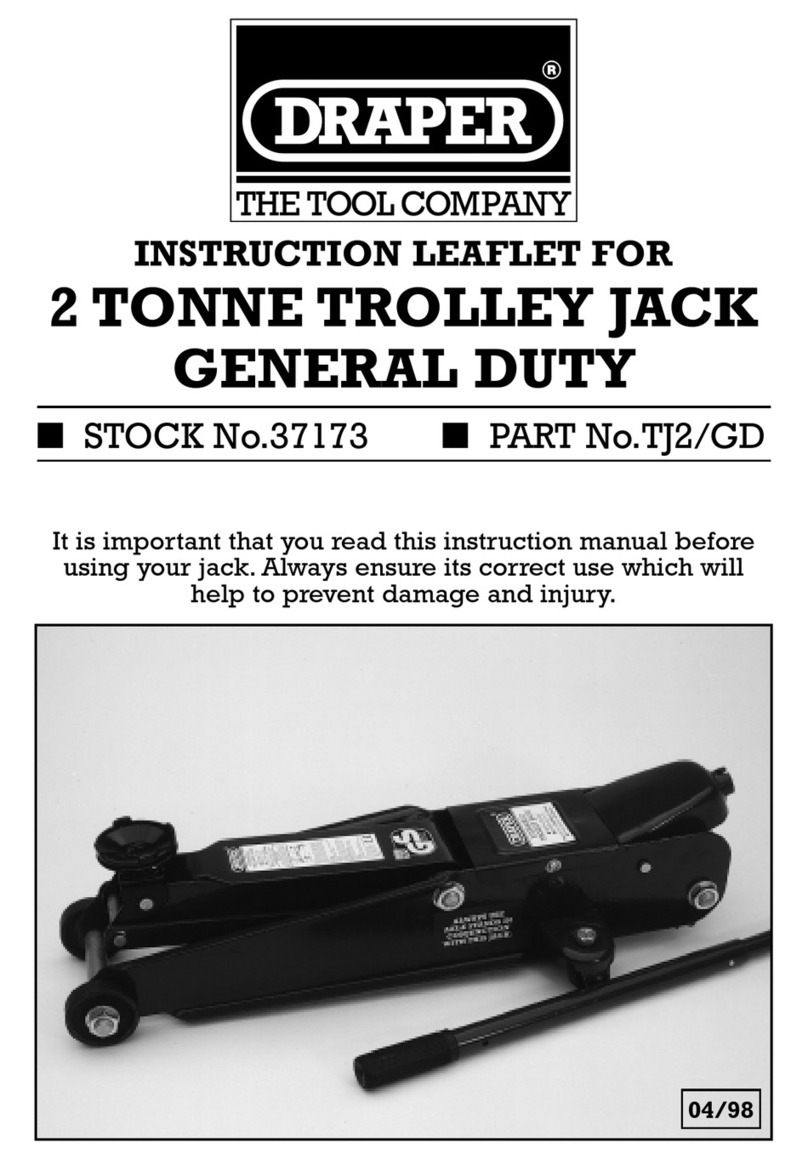
INSTRUCTION LEAFLET FOR
2 TONNE GENERAL DUTY
QUICK LIFT TROLLEY JACK
■STOCK No.63205 ■PART No.TJ2/QL
07/2000
It is important that you read this instruction manual before
using your jack. Always ensure its correct use which will
help to prevent damage and injury.
FOLDING AXLE STANDS
PART No.FAS18
STOCK No.36524
FRONT
WHEELS
REAR
WHEELS
SUGGESTED
JACKING
POINTS
DRAPER TOOLS LIMITED,
Hursley Road, Chandler's Ford,
Eastleigh, Hants. SO53 1YF. U.K.
Helpline: (023) 8049 4344.
Sales Desk: (023) 8049 4333.
General Enquiries: (023) 8026 6355.
Fax: (023) 8026 0784.
www.draper.co.uk
63205 PTTJ2|QL bkt 22/1/02 4:36 pm Page 2 (Black plate)

- 1 -
CAUTION:
• Use only on a firm, level surface.
• Do not exceed the rated capacity of this jack.
• This is a lifting device only...do not work under the vehicle without proper support
devices, such as axle stands.
• Make sure that the lifting point is stable and correctly centred on the jack saddle.
• Familiarize yourself thoroughly with this manual before operating to prevent damage
to the jack, property, or personal injury.
CAUTION
SPECIFICATION FOR: Hydraulic Trolley Jack.
Capacity ................................................................................................................2000kg
Lifting range ................................................................................................135 x 385mm
Overall size ........................................................................................550 x 212 x 140mm
Weight ................................................................................................................9kg nett
KNOW YOUR TROLLEY JACK
1. Cylinder Pump.
2. Release Valve.
3. Base.
4. Castor.
5. Oil Filler Plug.
6. Reservoir.
7. Middle Spindle.
8. Frame.
9. Front Wheel.
10. Radius Link.
11. Saddle.
12. Lifting Arm.
13. Cover Plate.
14. Handle Sleeve.
15. Jack Handle.
BEFORE USE
1. If oil spillage is noted, check oil
level, refer to maintenance
section, paragraphs 3
and 4, on page 3.
2. Check to see that the release
valve is opened. (Never more
than two full turns), then
insert the handle into handle
sleeve and pump a couple of full
strokes to purge any
air from the system and evenly
distribute the hydraulic oil.
- 2 -
1. Firmly lock release valve in a clockwise
direction with the end of the jack handle.
2. Place the handle in the sleeve to position
the jack under the lifting point. Check that
the saddle is correctly positioned.
To prevent damage to the jack, or the
vehicle, NEVER MOVE THE JACK WITH THE
HANDLE ON THE RELEASE VALVE.
3. To raise load, insert handle into handle
sleeve and pump up and down fully, until
the desired height is reached.
4. ALWAYS USE AXLE STANDS.
5. To lower load, slowly turn the release valve
anticlockwise two full turns with the end of
the jack handle.
OPERATING INSTRUCTIONS
CARE AND MAINTENANCE
1. When the jack is not in use, the lifting arm and handle sleeve should be kept in the
fully lowered position.
2. Keep the jack clean and lubricated. Oil the points indicated on the diagram below
on a regular basis.
3. To check oil level, fully lower jack on level
ground and remove cover plate (Item 13).
Remove filler plug . The correct level is 5mm
below filler plug hole. If low, add oil as
needed.YOUR JACK WAS FILLED AT THE
FACTORY WITH HIGH GRADE HYDRAULIC
OIL. ONLY USE APPROVED JACK OIL*.
4. After extensive use, the oil supply should be
replaced to ensure longer equipment life. To
drain, remove filler plug and release valve.
Ensure that no dirt gets into the system. Refill
with approved jack oil, as paragraph 3.
5. Check pump piston rod periodically for signs of rust or corrosion. Clean exposed
area with a clean oiled cloth.
* We recommend Shell Telus 22.
- 3-
1. BEFORE POSITIONING THE JACK,YOU SHOULD ENSURE THE FOLLOWING:
IMPORTANT SAFETY TIPS
A. Vehicle should be clear of all
passengers. Transmission should be
in gear (or ‘Park’ for automatic
transmissions) and the handbrake
applied.
B. To prevent vehicle from movement,
wheels should be securely blocked
with wheel chocks.
TO RAISE:
TURN RELEASE
VALVE
CLOCKWISE
TO LOWER:
TURN RELEASE
VALVE
ANTICLOCKWISE
We
Draper Tools Ltd. Hursley Road, Chandler’s Ford, Eastleigh, Hampshire.
SO53 1YF. England.
Declare under our sole responsibility that the product:
Stock No:- 63205. Part No:- TJ2/QL.
Description:- Trolley Jack 2 Tonne Quick Lift.
To which this declaration relates is in conformity with the following directive(s)
98/37/EC.
With reference to: EN292-1:1992, EN292-2:1992, prEN1494:1994 & DIN76024:1984.
JOHN DRAPER
Managing Director 18/07/2000
DECLARATION OF CONFORMITY
63205 PTTJ2|QL bkt 22/1/02 4:36 pm Page 1 (Black plate)

OPTIONAL ACCESSORIES
IMPORTANT SAFETY TIPS cont’d
2. CORRECT POSITIONING:
The jack should be positioned (normally
under the suspension near appropriate
front or rear wheels). Since these points
may vary with each vehicle, it is important
to consult the vehicle manufacturer’s
handbook or Haynes manual.
- 4 -
3. TERRAIN:
The jack should be operated on a hard
and level surface as the location will
permit.
4. NEVER EXCEED THE JACK’S RATED
CAPACITY.
5. WORKING UNDER THE VEHICLE:
It is extremely important, when working
under the vehicle, to ensure axle stands
are always used.
©Published by Draper Tools Ltd.
No part of this publication may be reproduced, stored in a retrieval system or
transmitted in any form or by any means, electronic, mechanical photocopying,
recording or otherwise without prior permission in writing from Draper Tools Ltd.
TROUBLE PROBABLE CAUSE REMEDY
TROUBLE SHOOTING
Jack will not hold load.
Jack will not lift load.
Jack will not lift to its full height.
Jack pump feels unsteady under
load.
Jack will not lower completely.
Jack will not lift to its full height.
Jack pump feels unsteady under
load.
Jack pump feels unsteady under
load.
Jack will not lower completely.
(1) Dirt on valve seats.
(2) Worn seals.
Air block.
(1) The reservoir could be
overfilled.
(2) Low hydraulic oil level.
The pump cup seal could be worn
out.
(1) Air block.
(2) Unit needs lubrication.
(1) Lower the lifting arm, close
the release valve and remove
oil filler plug.
(2) Place one foot on a front
wheel and pull up the lifting
arm to its full height by hand.
(3) Open the release valve to
lower the lifting arm.
(4) Replace seals.
(1) Open the release valve and
remove oil filler plug.
(2) Pump handle a couple of full
strokes and close the release
valve.
(1) Check the oil level.
(2) Remove the filler plug. Top up
oil to correct level.
Replace the cup seal with a new
one.
(1) Release air by removing filler
plug.
(2) Oil external moving parts.
- 5 -
INSTRUCTION LEAFLET FOR
2 TONNE GENERAL DUTY
QUICK LIFT TROLLEY JACK
■STOCK No.63205 ■PART No.TJ2/QL
07/2000
It is important that you read this instruction manual before
using your jack. Always ensure its correct use which will
help to prevent damage and injury.
FOLDING AXLE STANDS
PART No.FAS18
STOCK No.36524
FRONT
WHEELS
REAR
WHEELS
SUGGESTED
JACKING
POINTS
DRAPER TOOLS LIMITED,
Hursley Road, Chandler's Ford,
Eastleigh, Hants. SO53 1YF. U.K.
Helpline: (023) 8049 4344.
Sales Desk: (023) 8049 4333.
General Enquiries: (023) 8026 6355.
Fax: (023) 8026 0784.
www.draper.co.uk
63205 PTTJ2|QL bkt 22/1/02 4:36 pm Page 2 (Black plate)

OPTIONAL ACCESSORIES
IMPORTANT SAFETY TIPS cont’d
2. CORRECT POSITIONING:
The jack should be positioned (normally
under the suspension near appropriate
front or rear wheels). Since these points
may vary with each vehicle, it is important
to consult the vehicle manufacturer’s
handbook or Haynes manual.
- 4 -
3. TERRAIN:
The jack should be operated on a hard
and level surface as the location will
permit.
4. NEVER EXCEED THE JACK’S RATED
CAPACITY.
5. WORKING UNDER THE VEHICLE:
It is extremely important, when working
under the vehicle, to ensure axle stands
are always used.
©Published by Draper Tools Ltd.
No part of this publication may be reproduced, stored in a retrieval system or
transmitted in any form or by any means, electronic, mechanical photocopying,
recording or otherwise without prior permission in writing from Draper Tools Ltd.
TROUBLE PROBABLE CAUSE REMEDY
TROUBLE SHOOTING
Jack will not hold load.
Jack will not lift load.
Jack will not lift to its full height.
Jack pump feels unsteady under
load.
Jack will not lower completely.
Jack will not lift to its full height.
Jack pump feels unsteady under
load.
Jack pump feels unsteady under
load.
Jack will not lower completely.
(1) Dirt on valve seats.
(2) Worn seals.
Air block.
(1) The reservoir could be
overfilled.
(2) Low hydraulic oil level.
The pump cup seal could be worn
out.
(1) Air block.
(2) Unit needs lubrication.
(1) Lower the lifting arm, close
the release valve and remove
oil filler plug.
(2) Place one foot on a front
wheel and pull up the lifting
arm to its full height by hand.
(3) Open the release valve to
lower the lifting arm.
(4) Replace seals.
(1) Open the release valve and
remove oil filler plug.
(2) Pump handle a couple of full
strokes and close the release
valve.
(1) Check the oil level.
(2) Remove the filler plug. Top up
oil to correct level.
Replace the cup seal with a new
one.
(1) Release air by removing filler
plug.
(2) Oil external moving parts.
- 5 -
INSTRUCTION LEAFLET FOR
2 TONNE GENERAL DUTY
QUICK LIFT TROLLEY JACK
■STOCK No.63205 ■PART No.TJ2/QL
07/2000
It is important that you read this instruction manual before
using your jack. Always ensure its correct use which will
help to prevent damage and injury.
FOLDING AXLE STANDS
PART No.FAS18
STOCK No.36524
FRONT
WHEELS
REAR
WHEELS
SUGGESTED
JACKING
POINTS
DRAPER TOOLS LIMITED,
Hursley Road, Chandler's Ford,
Eastleigh, Hants. SO53 1YF. U.K.
Helpline: (023) 8049 4344.
Sales Desk: (023) 8049 4333.
General Enquiries: (023) 8026 6355.
Fax: (023) 8026 0784.
www.draper.co.uk
e-mail: [email protected]
63205 PTTJ2|QL bkt 22/1/02 4:36 pm Page 2 (Black plate)
This manual suits for next models
1
Table of contents
Other Draper Jack manuals

Draper
Draper TJ100B User manual

Draper
Draper 16407 User manual
Draper
Draper 78611 User manual
Draper
Draper 03461 User manual

Draper
Draper TJ2LD-LE User manual
Draper
Draper TJ2250B User manual
Draper
Draper 53089 User manual
Draper
Draper 24276 User manual
Draper
Draper 13064 User manual
Draper
Draper 02078 User manual
Popular Jack manuals by other brands
Monzana
Monzana DBWH003 Original operating instructions

Pro-Lift
Pro-Lift PL3200 Operating instructions & parts manual

Sealey
Sealey 1020LE instructions
Simplex
Simplex RDA1010 instruction manual

Westfalia
Westfalia 25 81 94 instruction manual
Ranger Products
Ranger Products RFJ-3000LPF Installation and operation manual
