Dream DreamBlaster X16 User manual

DreamBlaster
X16/X16GS User
Manual
User Manual
The DreamBlaster X16 and X16GS are newly developed wavetable modules. They
are fully General MIDI compatible, come with 1Gbyte of flash memory, have an USB
interface and are software configurable with multiple soundbanks. Additionally
X16GS features a GS compatible Dream/Roland licensed bank.
Revision 1.00 SERDACO BVBA June 4th 2023

DreamBlaster X16/X16GS User Manual 1
Table of contents
Introduction .............................................................................................................................2
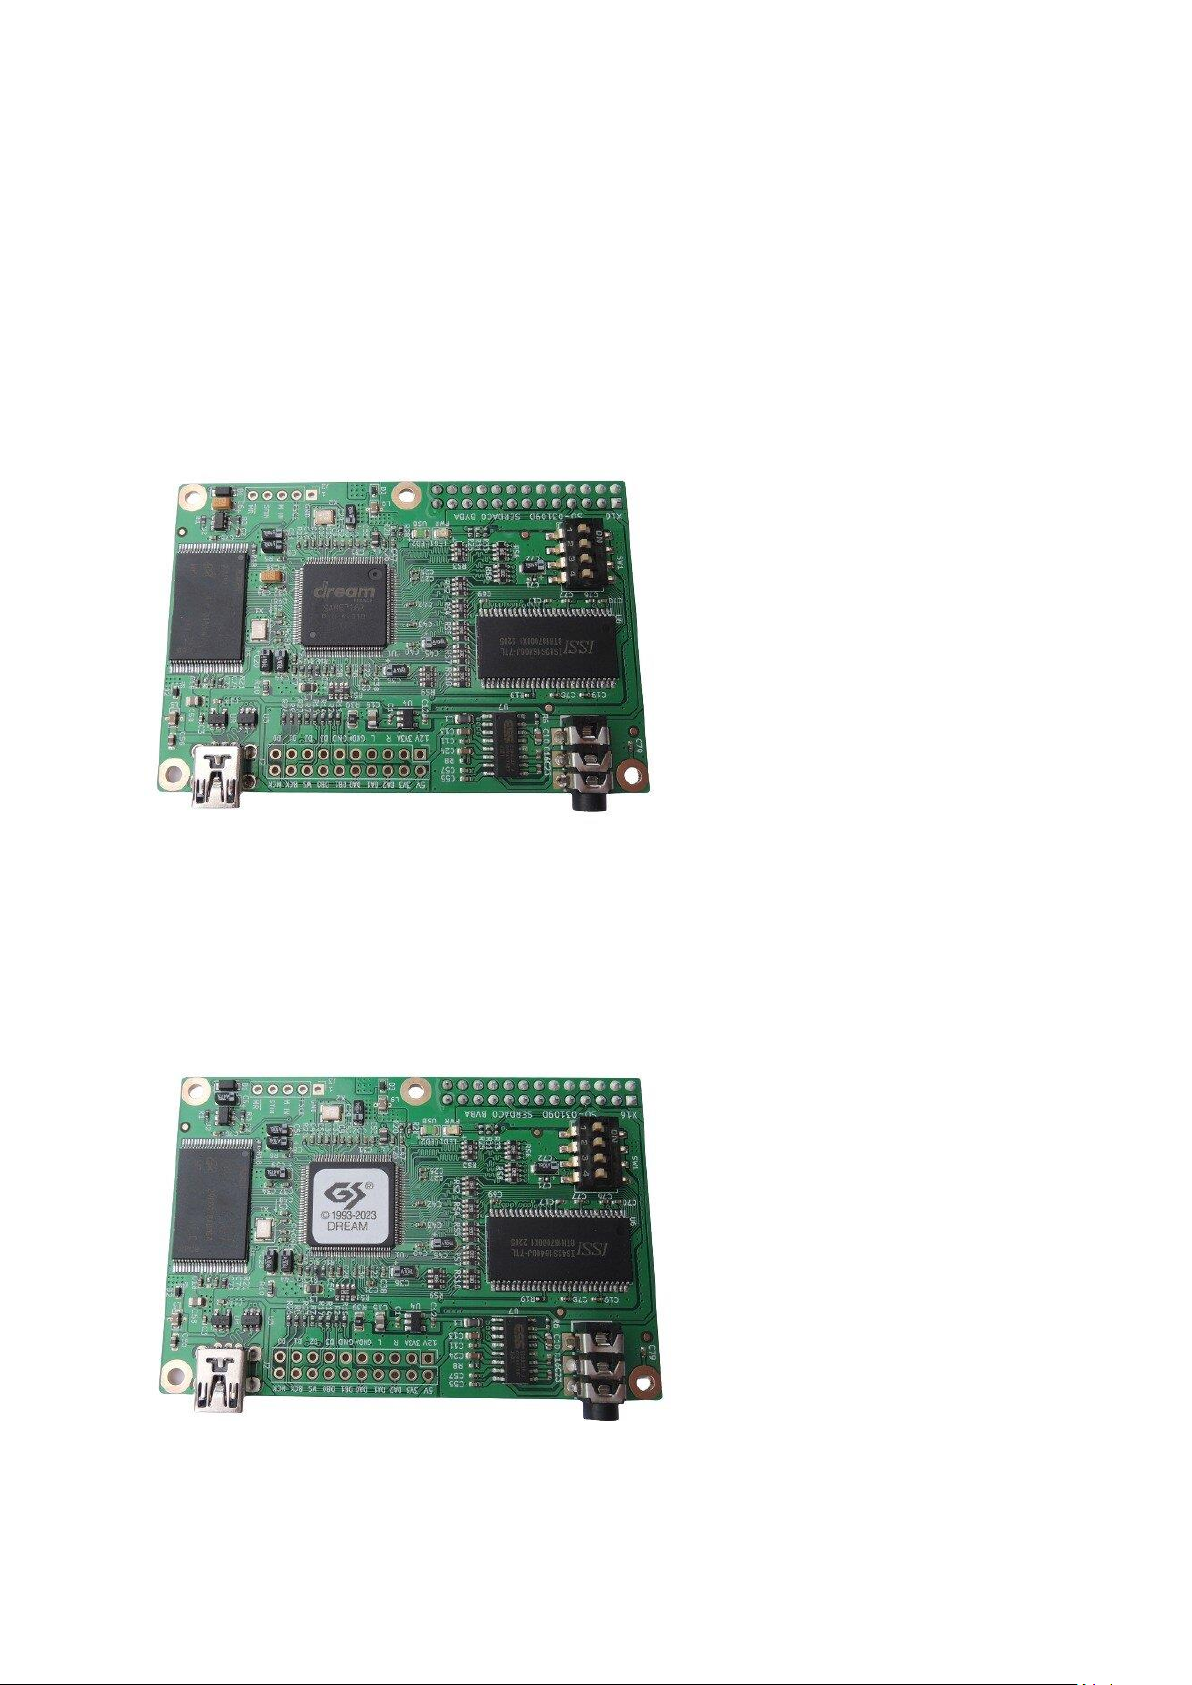
X16 and X16GS : The differences explained........................................................................3
X16 - Standard/musician’s edition :..................................................................................3
X16GS - gamer's edition: ....................................................................................................3
Resources..................................................................................................................................4
Specifications ...........................................................................................................................5
X16 Board Overview...............................................................................................................6
Using the X16...........................................................................................................................7
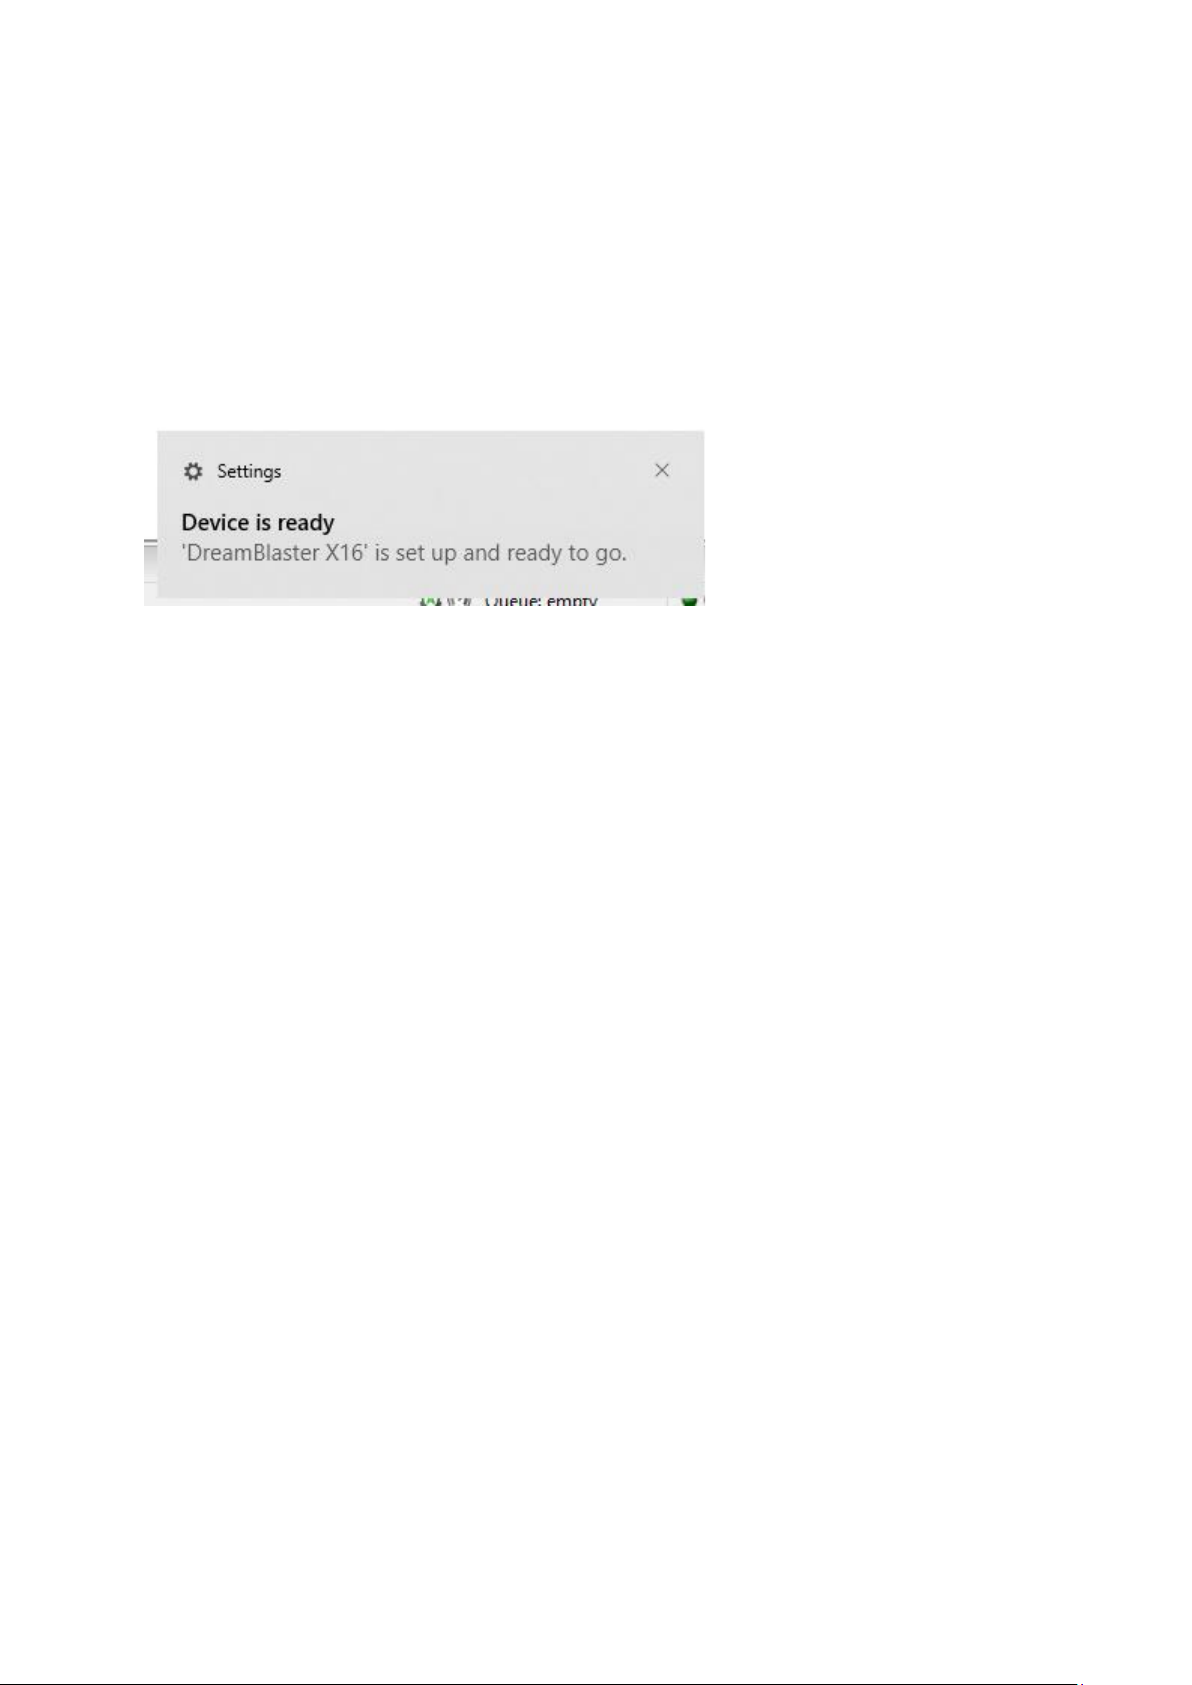
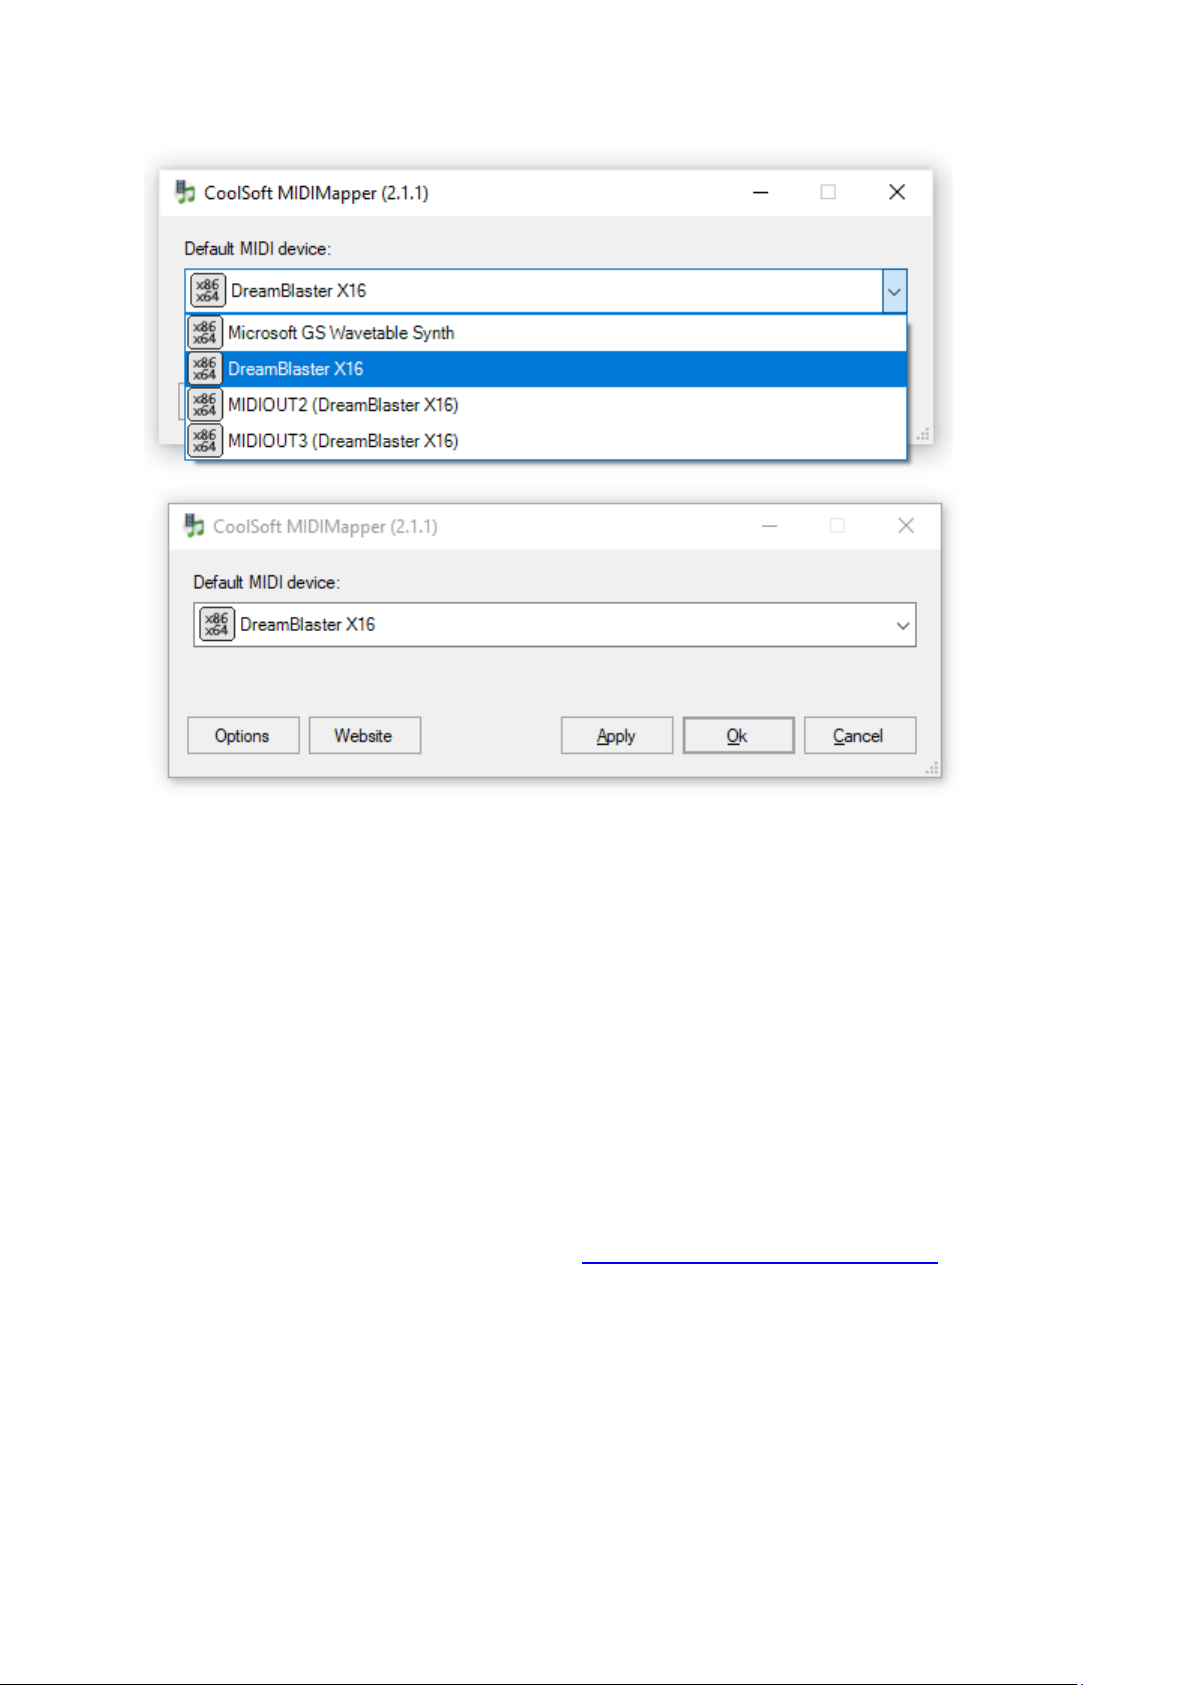
As a USB MIDI device........................................................................................................7
As a wavetable board .........................................................................................................9
Mixer settings ....................................................................................................................10
X16 connectors pinout..........................................................................................................11
J4 : Stereo 3.5mm line out.................................................................................................11
J13: ‘X16 WaveBlaster’ Connector pinout.....................................................................11
J2 : Expansion IO connector pinout................................................................................12
Connector positions and mechanical layout .................................................................12
Dip Switch settings ...............................................................................................................13
X16Manager software...........................................................................................................14
Available SoundBanks .....................................................................................................14
Available Presets...............................................................................................................15
Uploading Presets and Soundbanks ..............................................................................15
DXP Preset Editor .................................................................................................................18
Using DXP Preset Editor..................................................................................................18
DXP Reverb Acoustic Settings ....................................................................................19
DXP Chorus Acoustic Settings....................................................................................19
DXP Equalizer / Amp Settings ....................................................................................19
Firmware updating...............................................................................................................20
Synth Architecture ................................................................................................................22
MIDI Specifications...............................................................................................................22
Soundbank slot selection through NRPN commands.................................................23

DreamBlaster X16/X16GS User Manual 2
Introduction
Thank you for purchasing the DreamBlaster X16 or X16GS. The company behind
this product is Serdaco BVBA in Belgium. Serdaco was founded in 2011 by Roland
and Serge Defever, specializing in software and hardware development and
consulting. We also produce MIDI related products, having launched products such
as the DreamBlaster X1, X2, S1, S2,… The DreamBlaster X16/X16GS is our latest and
greatest MIDI wavetable board. It is fully General MIDI compatible, comes with
1Gbyte of flash memory, has a USB interface and is software configurable. We have
developed software tools that let the user upload Dream soundbanks, presets and
firmware updates to the on-board flash memory. X16 and X16GS support switching
between up to 7 different soundbanks, using a flash slot mechanism.
In the rest of the manual, I will refer to X16 when describing common functionality
that applies to both X16 and X16GS. When needed, i will explain the difference for
X16GS.
I very much hope you are satisfied with this product and enjoy it

DreamBlaster X16/X16GS User Manual 3
X16 and X16GS : The differences explained
This manual describes both the X16 and X16GS soundcards. It is important to
understand the licensing differences between these 2 products. While the boards are
technically similar, X16 cannot be converted to X16GS or vice versa. It is important to
make the correct choice before purchasing.
X16 - Standard/musician’s edition :
This X16 can be used for any purpose including making musical instruments. This
X16 does not have the Dream GS license sticker, and does not come with the
protected soundbank and licensing restrictions as X16GS (see below).
X16GS - gamer's edition:
X16GS is intended for DOS gamers, that enjoy the classic Dream/Roland midi sound.
It features a preloaded officially licensed, read only 16mbyte GS bank. This bank is
Figure 1 - DreamBlaster X16
Figure 2 - DreamBlaster X16GS

DreamBlaster X16/X16GS User Manual 4
used with the express permission of Roland Corporation. The bank must be used
conforming a license agreement with Dream.
The X16GS product may not be installed in any musical instrument. Using this
product in the manufacture of musical instruments or selling this product for use in
a musical instrument is a violation of the intellectual property rights of Roland
Corporation and will result in liability for infringement.
So if you want to use the soundcard in a musical instrument project, you should
order X16 instead of X16GS.
Resources
The DreamBlaster X16 is an advanced wavetable board, having features and
functionality not found in other wavetable modules. Because the flash memory is
user upgradable, check the Serdaco product page for any updates, information and
support.
Resource
URL
X16 product page
https://www.serdashop.com/DreamBlaster-X16
X16GS product page
https://www.serdashop.com/DreamBlaster-X16GS
X16/X16GS downloads
https://serdaco.com/downloads/X16/

DreamBlaster X16/X16GS User Manual 5
Specifications
•High End 16 core Dream 5000 series synth chip (SAM5716B), with up to 256
voice polyphony
•Compact high-quality green, gold-plated PCB, 53mm x 77mm
•Super low latency < 1ms
•8 MByte SDRAM for high quality effects
•1 GByte Flash for soundbanks
•2x13 Waveblaster header for integration on DOS sound cards and custom
projects
•Up to 400mA current consumption at 5V, when using all DSP cores.
•USB-MIDI interface (Class compliant), USB mini connector
•Stereo out, high quality 24 bit 112 dB DNR DAC
•Expansion header for future expansion / OEM projects
•High quality Dream synth engine, compatible with Dream 5000 SDK for
custom soundbank design
•High quality GS compatible reverb and chorus
•3 Stereo Insert Multi-Effects blocks (s (Distortion, Equalizer, Compressor,
Chorus/Flanger/Phaser/Tremolo/Rotary, Delay), controllable by MIDI.
•4-bands Equalizer controllable by MIDI.
•Multi slot soundbank support, fast bank uploading over USB to flash using
Serdaco X16Manager multi slot upload tool
•Bootloader for updating firmware over USB
•Supports DreamBlaster DXP Presets
•Preloaded soundbanks (For X16GS: preloaded licensed GS bank)

DreamBlaster X16/X16GS User Manual 6
Figure 2 : Bottom of DreamBlaster X16 PCB
Figure 1 : Top of DreamBlaster X16
X16 Board Overview
Mini USB interface
used for flashing the
X16 and as a MIDI
interface.
3.5 mm stereo port
with line-out level
signal.
Wavetable connector to
connect the X16 to your
sound card.
Expansion
header for
custom projects
Dip Switch for
configuring
bootloader mode
and default
soundbank

DreamBlaster X16/X16GS User Manual 7
Using the X16
As a USB MIDI device
The USB interface of the DreamBlaster X16 is a class compliant USB MIDI interface.
Connect the X16 to a USB port to your PC and after a short while the X16 will appear
as a MIDI device.
Figure 3 - Windows 10 detecting X16
Windows supports several MIDI devices, so it’s important to configure the software
so that the X16 is actually being used, rather than the default Microsoft GS SoftSynth.
To ensure that the X16 is the default MIDI device it is recommended that you’re
using applications that let you select the MIDI device. Examples of such applications
are:
•DOSBox
•Falcosoft SoundFont Midi Player
•Midibar midi player (included with MIDI-OX)
With newer versions of Windows, applications are supposed to offer the selection of
MIDI device, however not every application supports this. In such a case you need
to use a tool, often referred to as MIDI Mapper, to select the default MIDI device of
your system. We recommend the CoolSoft MIDIMapper:

DreamBlaster X16/X16GS User Manual 8
Figure 4 - CoolSoft MIDI Mapper Windows 10 64 bit
DreamBlaster X16 provides 3 USB midi port, you can choose any of these 3 (X16
allows playback of up to 3 USB MIDI Streams in parallel.). Once you have
configured the DreamBlaster X16 as the default MIDI device, you can use most
media players to play MIDI files. It will then also work with DOSBox and
ScummVM without having to change the MIDI device internally.
Note that the X16 will output music through the 3.5 mm stereo line out port. You can
route it through the line-in of your computer or use external speakers or an external
mixer.
USB usually doesn’t supply a stable 5V supply and ground connection. The X16
sound quality is best when powered from a stable supply, through the waveblaster
connector. For high end external use, an interface board like Serdaco CHiLL
Interface can be used. This is available at https://www.serdashop.com/chill .

DreamBlaster X16/X16GS User Manual 9
As a wavetable board
Attaching the DreamBlasterX16 to a sound card with wavetable connector is straight
forward, but to be 100% sure of the correct orientation, pins 1 and 2 on the top right
side (see arrow –align the indicated pin to pin1 on your soundcard)
Figure 5 –X16 pin 1 and 2 location
Most sound cards have pins 1 and 2 marked as well, so it’s easy to attach the X16
correctly:
Figure 6 - Marking for pin 1
Figure 7 - Marking for pin 1 and 2

DreamBlaster X16/X16GS User Manual 10
Mixer settings
The exact procedure varies between sound cards, but many sound cards have the
wavetable muted by default. Under Windows this is straight forward and you just
have to access the Windows mixer.
Under DOS however every card uses different tools. Some have a Graphical User
Interface, such as Creative Sound Blaster or Yamaha YMF718-S cards, others use
command line utilities such as the ESS AudioDrive range of cards.
If you are not getting sound from the X16 do the following:
•Connect a line input to the on-board 3.5mm jack and confirm that the X16 is
outputting sound
•Consult the documentation of your sound card as to how to access the mixer
to unmute the wavetable

DreamBlaster X16/X16GS User Manual 11
X16 connectors pinout
J4 : Stereo 3.5mm line out
Figure 8 : J4 : Stereo 3.5mm line out
Note :
-The stereo line signal is the same as available on the J13 waveblaster header
pins 19 and 23. The 3.5mm connector allows for convenient quick testing
when connected to USB.
J13: ‘X16 WaveBlaster’ Connector pinout
Figure 9: J13: ‘WaveBlaster’ Connector pinout
Notes :
-For MIDI IN signal , TTL 5V and 3.3V level both work fine (it is 5V
tolerant)
-The MIDI Out signal level is 3.3V
-The board only uses the 5V supply, it consumes about 400mA.
-The +12V pin is not used by X16, it is passed through to the IO expansion
header, for future/project use.
-The /Reset pin must be pulled high (to 5V or 3.3V) to boot up the board.

DreamBlaster X16/X16GS User Manual 12
J2 : Expansion IO connector pinout
Figure 10: J2 : Expansion IO connector
Notes :
-This connector is intended for future use, for developers only.
-If you have a project that would need to use the IO header, contact me at
https://www.serdashop.com/Contact for discussing the options.
Connector positions and mechanical layout

DreamBlaster X16/X16GS User Manual 13
Dip Switch settings
The dip switch on your X16 allows to configure the bootup mode and the supported
soundbanks.
The 4 switches are represented from left (1) to right (4):
1means the switch is turned on (moved towards pcb outside).
0means the switch is off (moved towards pcb inside).
xmeans the switch does not matter.
0000: Bootloader mode (for updating only, does not play music)
0001: Synthesiser using soundbank from slot 1 at startup
0010: Synthesiser using soundbank from slot 2 at startup
0011: Synthesiser using soundbank from slot 3 at startup
0100: Synthesiser using soundbank from slot 4 at startup
0101: Synthesiser using soundbank from slot 5 at startup
0110: Synthesiser using soundbank from slot 6 at startup
0111: Synthesiser using soundbank from slot 7 at startup
1xxx: Reserved for future use
See the following example photos of settings :
Figure 11 : Dip switch setting 0000 : Bootloader mode
Figure 12 : Dip switch at 0001 seting = soundbank slot 1 selection
Figure 13 : Dip switch at 0010 setting = soundbank slot 2 selection

DreamBlaster X16/X16GS User Manual 14
X16Manager software
Available SoundBanks
X16 supports uploading of multiple soundbanks to the flash memory.
DreamBlaster X16 compatible soundbanks are Dream specific binaries with the .B16
extension. At the time of this publication, several soundbanks are available that are
compatible with the DreamBlaster X16 :
•GMBK5X128-V2.03.B16 : Dream 16M GM Bank (Copyright Dream S.A.S France -
Only to be used with DreamBlaster X16)
•BURAN-v1.00.B16 : Buran 53M GM Bank –high quality GM bank
•OPL-3 FM 128M-v1.00.B16 : OPL3 FM synth Bank, 128M size
•GXSCC GM-v1.00.B16 : Chiptune SoundBank 588 kBytes size
The available soundbanks, can be downloaded from :
https://serdaco.com/downloads/X16/
Additionally, the X16GS comes with the Dream/Roland 16M Licensed GS bank
preloaded. This special bank is only compatible with X16GS. The bank cannot be
erased from X16GS. It is not compatible with X16 and not available for download.
Custom soundbanks can be designed using the Dream 5000 SDK hardware/software
kit, available separately.
Figure 14: Dream 5000 SDK
See https://www.serdashop.com/DREAM5000SDK for more information.

DreamBlaster X16/X16GS User Manual 15
Available Presets
DreamBlaster X16 supports DXP presets (.DXP extension), to customize sound
characteristics and behaviour for each soundbank. These presets are 100%
compatible with both DreamBlaster X2 and X16 and can be edited using the
DreamBlaster DXP Preset Editor (see the description in the next chapter).
Uploading Presets and Soundbanks
Plug the X16 in an USB port, and the USB MIDI driver ‘DreamBlaster X16’will
become available. Start up X16Manager.exe and you will see an overview of the
contents in your X16’s flash memory.
The memory is divided into slots :
Slot 1 : Global preset location
Slot 2-8: 7 presets for the corresponding sound banks
Slot 9-15: 7 locations for sound banks.
Figure 15: X16 Manager - overview of slots
Large soundbanks can cover multiple slots : for example if you load a 80mbyte
soundbank in slot 2, it will work fine, but it will use also space from slot 3. The ‘Max

DreamBlaster X16/X16GS User Manual 16
Size’ column shows the maximum soundbank size you can load to a specific slot,
when allowing to span over multiple slots. That said, here are the next steps :
Press the browse button to select the file you wish to upload.
Highlight the slot you wish to upload to.
Figure 16: X16 Manager - highlight slot
Then press the upload button. The uploading to the slot will start, the progress bar
will indicate.

DreamBlaster X16/X16GS User Manual 17
Figure 17 X16 Manager - upload in progress
After the upload is complete, the new bank will appear in the slot :
Figure 18: X16 Manager - upload done

DreamBlaster X16/X16GS User Manual 18
DXP Preset Editor
Using DXP Preset Editor
DXP presets are profiles that let you change the sound signature of the device.
These ‘classic’ presets are compatible with both DreamBlaster X2 and DreamBlaster
X16. A set of default Presets are available for download from :
https://serdaco.com/downloads/X16/
•Factory default Preset
•Dry Preset (No Reverb and Chorus effects)
•Boombastic (Factory default Preset with bass boost applied)
•GS Effects Preset by Appiah4 (Tuned for classic GS sound characteristics)
To get the most out of the DreamBlaster X16, your own custom presets can be
created with the provided DXP Preset Editor :
Figure 19 - Preset Editor with default settings
With this utility you can create, read and edit preset files. Remember that you still
have to flash the preset file to the X16 as described in the previous chapter. For easy
testing you can have the preset editor, as well as X16Manager open at the same time.

DreamBlaster X16/X16GS User Manual 19
Only checked / ticked options are saved into the preset file. When the X16 boots, it
will first load its default settings, and then override this with any custom settings
that is checked. The X16 will first load the global preset slot, and then the preset slot
associated with the current soundbank.
DXP Reverb Acoustic Settings
Reverb (short for reverberation) is created when sound is reflected by objects, often
referred to as echo. It greatly affects how the X16 sounds and you can configure it to
sound like in a recording booth or in a large church, or anything in-between.
DXP Chorus Acoustic Settings
Chorus sounds like more of the same instruments are playing, making the sound
thicker and more layered.
DXP Equalizer / Amp Settings
General Output Amp: Some sound cards clip or distort with wavetable boards and
certain games that output loud music. With this setting you can adjust the volume to
avoid this.
Swap Stereo: Some sound cards have the wavetable wired up incorrectly, resulting in
left sounds coming out of the right speaker and vice versa. You can use this option to
swap them around and correct this behaviour.
Equalizer: This lets you adjust the low and high frequencies (bass and treble), further
adjusting the sound signature to your taste.
This manual suits for next models
1
Table of contents
Other Dream Sound Card manuals