Dreambox Two UltraHD User manual

Dreambox Two UltraHD
User Manual
Digital satellite receiver to receive free and
encrypted DVB programs.
UltraHD
Twin DVB
-S2x tuner
Gigabit network interface
WIFI 2.4 / 5 GhZ
Bluetooth
1x Smartcard-Reader DreamcryptTM
1x Common Interface slot
1x USB 2.0
1x USB 3.0
HDMI 2.0 out
Dreambox OS
Dreambox API

Foreword
Dear Customer,
Congratulations on the purchase of your Dreambox Two UltraHD.
These
operating instructions should help you to connect your Dreambox correctly
to learn basic operation and also to get to know the numerous functions.
Please note that the functional scope of your Dreambox is constantly expanding through software updates.
If you have updated the software of your Dreambox or find errors in the operating instructions,
please have a look in the download area of our homepage www.leontechltd.com for an updated version
Operating instructions are available.
We hope you enjoy using your Dreambox Two UltraHD
The Dreambox bears the CE mark and fulfills all required EU standards.
DiSEqCTM is a trademark of EUTELSAT.
Dolby and the double-D symbol are registered trademarks of Dolby Laboratories.
HDMI® , the HDMI-Logo and “High Definition Multimedia Interface” are trademarks or registered
trademarks of HDMI Licensing LLC.
Subject to changes and misprints.
i i

Contents
1Before starting up the receiver 1
1.1 Safety instructions .................................................................................................................. 1
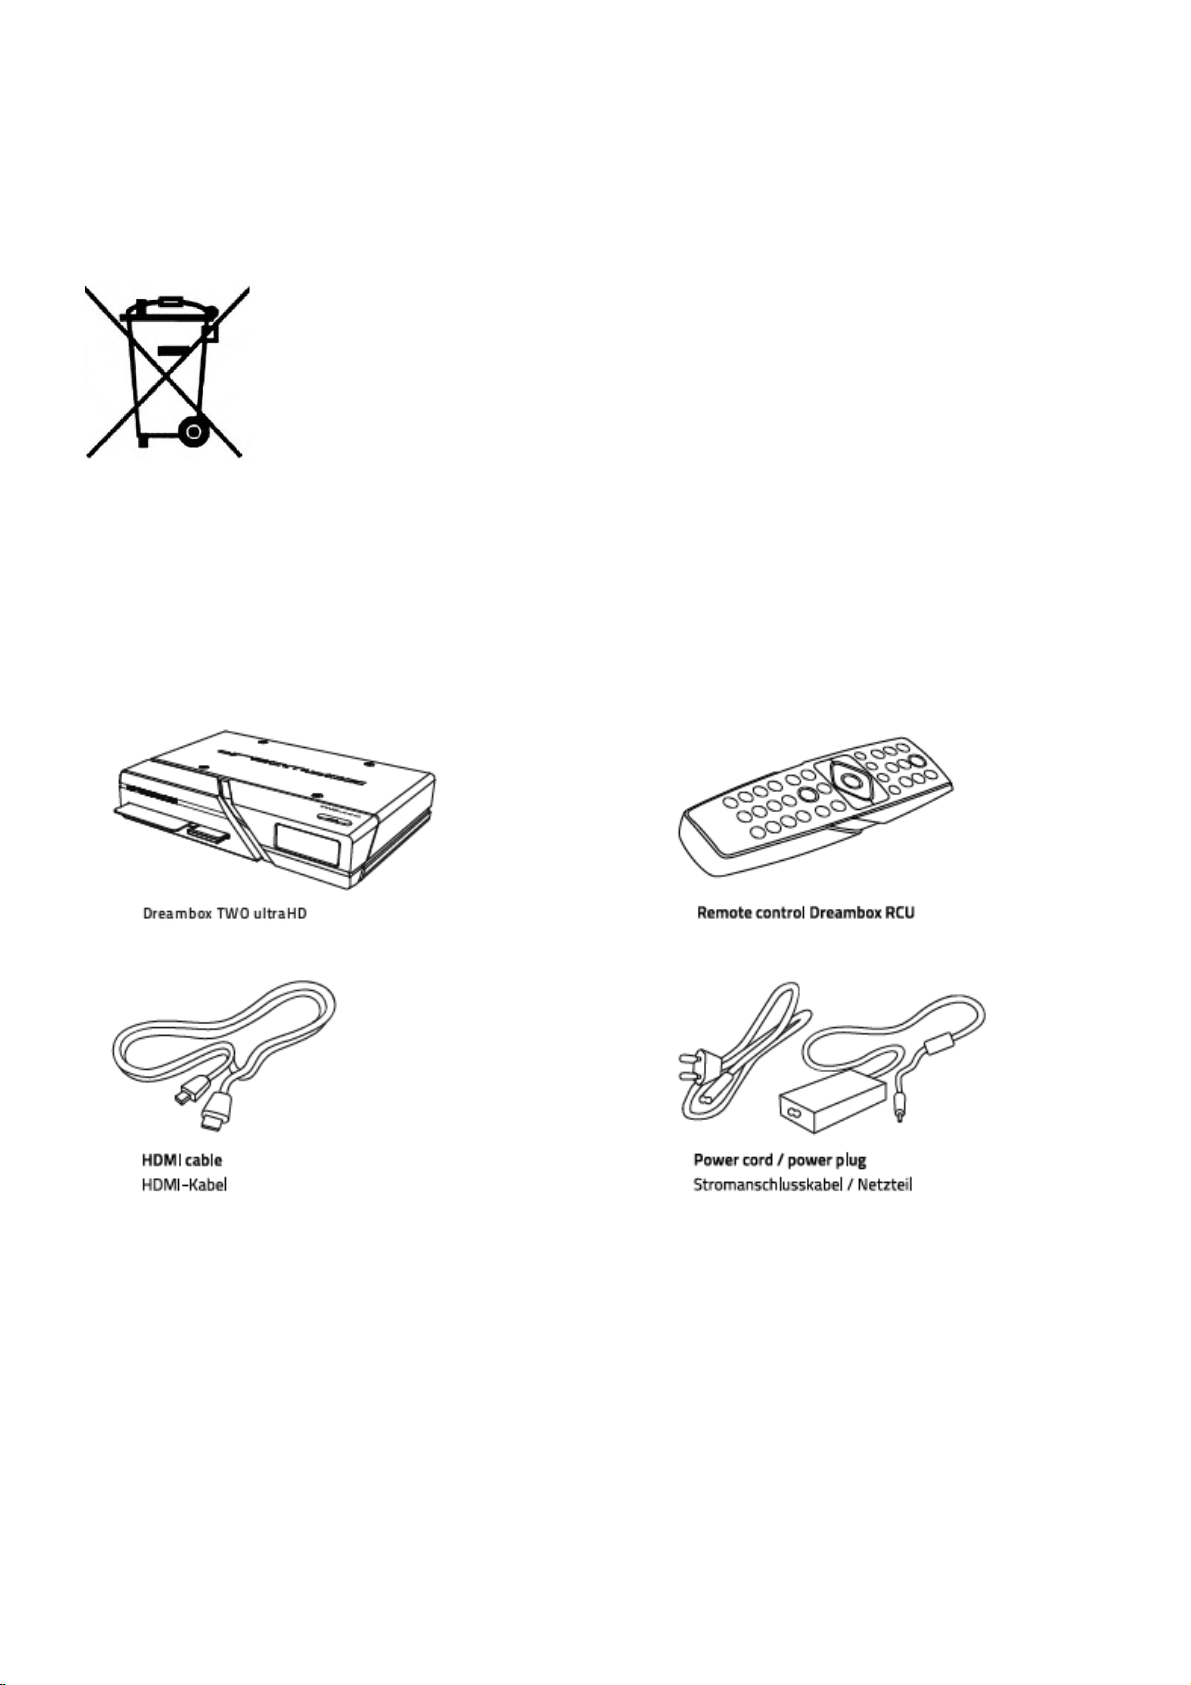
1.2 Scope of delivery.................................................................................................................... 3
1.3 Device views .......................................................................................................................... 4
1.3.1 Front view.................................................................................................................... 4
1.3.2 Rear view..................................................................................................................... 5
2 Start up 6
2.1 Connecting............................................................................................................................... 6
2.1.1 Satellite Dish (DVB-S/S2)................................................................................................ 6
2.1.2 Television...................................................................................................................... 7
2.2 Turning the device on................................................................................................................ 8
2.3 Start wizard.............................................................................................................................. 8
3 Basic operation 10
3.1 Turning your Dreambox on and off............................................................................................ 10
3.2 Service selection ................................................................................................................... 11
3.3 Changing channel using the service list .................................................................................... 11
3.4 Controlling the volume............................................................................................................. 12
3.5 Changing the audio track......................................................................................................... 12
3.6 Sub Services ........................................................................................................................ 12
3.7 TV/Radio switching ................................................................................................................. 12
3.8 Subtitles ............................................................................................................................... 13
3.9 Infobar ................................................................................................................................. 14
3.10 Electronic Program Guide - EPG ............................................................................................ 15
3.11 Teletext (Videotext))............................................................................................................. 19
3.12 Sleep timer........................................................................................................................... 22
4 Edit the channellist 23
4.1 Adding a bouquet.................................................................................................................... 23
4.2 Add a service to favorites......................................................................................................... 24
4.3 Adding multiple services to a bouquet....................................................................................... 24
4.4 Remove a service from favorites............................................................................................... 25
4.5 Moving a service in favorites list ............................................................................................... 25
4.6 Adding a marker to favorites..................................................................................................... 25
iii

v
4.7 Parental control .......................................................................................................................
4.8 Common-Interface...................................................................................................................
26
28
5Setup 29
5.1 Language ............................................................................................................................ 29
5.2 Customize ........................................................................................................................... 29
5.2.1 Simple Mode............................................................................................................... 30
5.2.2 Intermediate mode: .................................................................................................... 30
5.3 Timezone ............................................................................................................................. 31
5.4 A/V Settings........................................................................................................................... 31
5.5 Network ............................................................................................................................... 33
5.5.1 Connection via network cable ...................................................................................... 34
5.5.2 Integrated wireless (WLAN)......................................................................................... 35
5.6 Skin ..................................................................................................................................... 36
5.7 Factory reset.......................................................................................................................... 36
6Service searching 37
6.1 DVB-S2 Tuner-Configuration................................................................................................ 38
6.1.1 Single satellite – direct connection ............................................................................... 38
6.1.2 Two satellites via Toneburst A/B.................................................................................. 38
6.1.3 Two satellites via DiSEqC A/B ..................................................................................... 39
6.1.4 Four satellites via DiSEqC A/B/C/D.............................................................................. 40
6.1.5 Stab Positioner using USALS ...................................................................................... 41
6.1.6 Stab Positioner without USALS.................................................................................... 43
6.2 DVB-C Tuner-Configuration ................................................................................................. 44
6.3 DVB-T Tuner-Configuration ................................................................................................. 45
6.4 Automatic scan...................................................................................................................... 46
6.5 Manual scan.......................................................................................................................... 49
7 Systeminformation 50
7.1 Service ................................................................................................................................ 50
7.2 About (Hard- and Software).................................................................................................... 51

v
8Updating the software 52
8.1 Backing up your settings............................................................................................................... 52
8.2 Restoring your settings................................................................................................................. 52
8.3 Updating a new software .............................................................................................................. 53
8.3.1 With browser..................................................................................................................... 53
9Troubleshooting 55
10 Technical data 56
11 Features 59
12 Service & Support Information 60


1
Chapter 1
Before initial operation of the receiver
1.1 Safety instructions
Please read the safety instructions completely and carefully, before using the Dreambox. The Manufacturer
takes no responsibility for damages as a result of incorrect handling of the Dreambox.
• Make sure to have enough space around the Dreambox for sufficient ventilation.
• Do not cover the top of the Dreambox and allow enough space to other devices. The louvers of the
devices must be free at all times to allow sufficient heat transfer from inside the device.
• Never put vases or any other liquid filled containers on top of the device. Do not expose the device to
dripping or splashing liquids.
• Do not place open flame sources, such as lit candles, on top of the device.
• The device may only be operated in moderate climate.
• Do not remove the cover. Risk of electric shock. If it is necessary to open the device please contact a
trained professional.
Do not put any metal things into the slots or ventilation openings.
A hard disk / tuner may only be installed or converted by trained personnel or a specialist dealer trained
for this purpose.
Modifications or modifications to the device will void the guarantee if they are not carried out by a specialist dealer
and are certified in writing. We recommend the installation of a hard disk by the specialist dealer. If the hard disk
is incorrectly installed, the warranty will expire.

2
Shut down
• In case your Dreambox is in use for a longer period of time disconnect the power plug from the power
outlet.
• During thunder storm the unit should also be physically disconnected from the power outlet.
Additional safety instructions
• (Dis-)Connecting to a LNB:
Turn the Dreambox o. before you connect or disconnect a cable coming from or going to a LNB.
• Connecting to a TV:
Before connecting or disconnecting your Dreambox to/from a TV please turn it off
• In case you notice any damage to the power cord or power plug immediately disconnect the device
from the power outlet.
• In case the device was exposed to humidity immediately disconnect the device from the power outlet.
• In case you notice any serious damage to the outer shell of the device immediately disconnect the
device from the power outlet.
• Do not expose the Dreambox to direct sunlight, lightning or rain.
• Grounding:
The LNB cable must be grounded. The grounding system must meet SABS 061 requirements.
• Cleaning:
Disconnect the mains power cord before cleaning the cover. Use a slightly damp cloth without cleaning
agents.
• Connect the Dreambox only to suitable sockets. Do not allow overloads to occur.
• Please be careful that the batteries of your remote control are not exposed to heat, since they might
explode.

3
Disposal instructions
The packaging of the Dreambox only consists of reusable materials. Please recycle if possible.
This symbol on the product or on its packaging indicates that this product must not
be disposed of with your other household waste. Instead, it is your responsibility to
dispose of your waste equipment by handing it over to a designated collection point for
the recycling of waste electrical and electronic equipment. The separate collection and
recycling of your waste equipment at the time of disposal will help to conserve natural
resources and ensure that it is recycled in a manner that protects human health and
the environment. For more information about where you can drop o. your waste equipment
for recycling, please contact your local
city office, your household waste disposal service or
the shop where you purchased the product.
Please note that empty batteries and electric waste is not to be put into the regular
garbage.
1.2 Packaging contents
Please check the completeness of the box’s contents.

4
1.3
Views
1.3.1 Front view
1x smart card reader Insert your Dreamcrypt smart card with the chip facing downwards and
forwards into the smart card reader.
IR-Sensor receives the infrared signals from your Dreambox remote control.
SD-Card reader
standby button switches your Dreambox on or off
Status LED indicates the standby status of the Dreambox.

5
1.3.2
Rear view
LNB
-
Input (2x DVB
-
S2x Tuner)
Connect the coaxial cable from your LNB here.
HDMI -Output You can connect a TV to the HDMI® out of your Dreambox if your TV has the right input.
S/PDIF optical audio You can connect your Dreambox with an optical (Toslink) cable to your HiFi-
Amplifier or DSP. The AC3 signal is also available at this port in case the selected channel transmits
Dolby Digital signals.
Power switch The main power switch shuts o. power from your Dreambox.
!!! IMPORTANT !!! Before opening the device, always pull the power plug!
1x USB 3.0 port The USB 3.0 Port is designed for devices that support the USB 3.0 standard. The amount
of supported USB devices depends on the installed image (Software) and is still under development.
1x USB 2.0 port The USB 2.0 Port is designed for devices that support the USB 2.0 standard. The amount
of supported USB devices depends on the installed image (Software) and is still under development.
1x CI Slot You can insert a Common Interface - Module of your choice in one of the CI-Slots.
Network interface The Communication Port is an Ethernet port. It is used to communicate with your
Dreambox via HTTP, FTP, NFS, Telnet, SSH and Samba to access your recorded movies, to upload
channel lists, etc. This port is also used to update the operating system of your Dreambox. Please
use a regular patch cable to connect your Dreambox to your LAN.
Service connector The Service port is used to update the operating system. Please connect a
mini-usb-tousb-
cable here.
Power supply connector Plug the power cable of the power supply that came with your Dreambox into
power outlet. Connect your power supply to your Dreambox. You must not connect the power plug
of the power supply to anything other than a socket that supplies 230V/50Hz.

6
UDIO
PVR
NFO
MEN
O K
EX I T
Chapter 2
Start-up
2.1 Connecting
Before using the Dreambox, please read the safety instructions under Chapter 1.1 Safety instructions on
page 1.
In the following is described how to connect the dreambox to , an a/v receiver, a tv-device and a network.
2.1.1 Satellite Dish (DVB-S/S2)
Connect the (LNB) with a suitable coax cable to the LNB-Input of your Dreambox.

7
Anschluss über HDMI-Kabel
Verbinden Sie mit Hilfe eines HDMI-Kabels den HDMI-Ausgang der Dreambox mit dem HDMI-Eingang Ihres
AV-Receivers. Verbinden Sie dann mit einem weiteren HDMI-Kabel einen HDMI-Ausgang Ihres AV-Receivers
mit ein
2.1.2
Connection via HDMI cable
HDMI (I)
Connect the dreambox with the hdmi-cable to the TV-input of your television.
At least use the hdmi-interface for getting the best picture quality (through digital transmission).
You can use the supplied HDMI cable for connecting the dreambox with the hdmi-input of your
television.

8
2.2 Turning the device on
1. Place the batteries inside the battery compartment of the remote control keeping in mind the right
polarity.
2. Plug in the power cable into the supplied power supply and connect it to the Dreambox. The power
plug has to be plugged into a 110V/60Hz or 230V/50Hz power socket.
3. Now turn on your dreambox.
If you are using a switchable power socket please shutdown your Dreambox into standby before switching
off the power socket. Detailed information can be found under Chapter3.1 Turning your Dreambox on andoff on
page 10.
2.3 Start wizard
If you switch on your Dreambox for the first time, you will see the setup wizard. The setup wizard will
guide you through the first time installation. Follow the instructions on the screen and use the Navigation-
Buttons (▲▼◄►) and the OK-Button. With the red Options-Button you can choose the desired
language.
Video output selection
You will be shown di.erent video output modes for roughly 20 seconds, after you have connected and
switched on your Dreambox. Once you see a clear picture on your TV screen press theOK-Button to
select it. If you prefer a di.erent output than the selected one you can use theNavigation-Buttons ( ▲▼)
and the OK-Button to select it.

9
Language selection
With the Navigation-Buttons ( ▲▼) choose your desired language and confirm with the OK-Button.
Tuner
Detailed information about the tuner setup can be found in chapter 6.1 DVB-S2 Tuner-Configuration on page 38
Default services list/Service scan
Depending on your tuner configuration in the previous step, you might be o.ered to install default services
lists. Otherwise you will be asked to perform a service scan. Detailed information about the service scan can be found in
Chapter 6.4 Automatic scan on page Seite 46.
Parental Control
Parental control makes it possible to lock selected channels. Detailed information can be found under Chapter 4.7
Parental control on pag 26.
Network
The network wizard will assist you with the network setup of your Dreambox. Detailed information can be found under
Chapter 5.6 Network on page 33.

1 0
Chapter 3
Basic operation
3.1 Turning your Dreambox on and off
Your Dreambox has an idle mode and an standby mode. Both functions di.er in their power consumption
and the time which is needed until the box has booted.
• Idle about 1 Second (higher power consumption)
• Standby about 15 seconds (less power consumption)
Idle Mode
To put your Dreambox into Idle-Mode either press the Standby-Button on your remote control or directly
on your Dreambox.
Standby
For putting your Dreambox into Standby-Mode, there are 3 options:
1. Holding down the Standby-Button on your remote control for three seconds.
2. Press the MENU-Button, with the Navigation-Buttons ( ▲▼) choose the option “Standby /
Restart” and press the OK-Button. With the Navigation-Buttons ( ▲▼) choose the option “Standby”
and press the OK-Button.
3. Alternatively you can push down the Standby-Button on your Dreambox for 5 seconds. If no OSD
Menu is visible on the screen this will also put your dreambox into Standby-Mode. (If the OSD Menu
is still open press the EXIT-Button).
All your settings will be saved now and your Dreambox goes into Standby-Mode afterwards (saves energy!)
Das
Standby / restart
-
Menu.
Use the navigation buttons ( ▲▼) to select the desired
option and confirm with the OK button.

1 1
Sleep Timer
Put
your Dreambox into Standby after a duration of time that can be chosen freely. (See
Chapter 3.12 Sleep timer on page 22)
Idle Mode Puts your Dreambox into Idle mode.
Restart Your Dreambox will be rebooted.
Standby Puts your Dreambox into Standby-Mode.
3.2 Service selection
Pressing the Navigation-Buttons (◄►) on your Dreambox remote control will take you to the previous
or next service.
Pressing the 0on the Numeric-Keypad will enable you to skip back and forth between the two most recently
watched services. This feature is quite useful during commercial breaks since it enables you to watch another
channel and quickly check if your movies is back on.
Using the Navigation-Buttons (◄►) you can switch to the 20 last viewed services.
3.3 Change channel using the service list
Pressing the Navigation-Buttons
(
▲▼)
activates the service
list.
With the Navigation-Buttons ( ▲▼) choose the desired
service and press the OK-Button.

1 2
3.4 Controlling the volume
The Volume +/
-
Buttons
control the volume of the audio.
Pressing +will make turn it up and pressing -will turn it down.
down
down
Pressing the
MUTE
-
Button
mutes the volume. A crossed
speaker symbol will appear on the screen.
3.5 Changing the audio track
Pressing the AUDIO-Button in TV or Radio Mode.
Use the
Navigation
-
Buttons
(
▲▼)
to move to desired audio
track. Press the OK-Button to select.
The contents of this menu will vary from service to service.
AC3-Downmix: Press the red Options-Button to toggle
“AC3-Downmix” (See Chapter 5.4 A/V Settings on page 31)
on and off.
3.6 Sub Services
The green dot on the left side of “Sub Services” in the Infobar appears if the selected station transmits sub
services.
Pressing the
green
Options
-
Button
in TV or Radio mode
will reveal the “sub services” menu. With the Navigation-
Buttons ( ▲▼) choose one of the sub services, then press the
OK-Button to select.
You can use the Arrow-Left-Right-Button for switching
to the next sub service.
3.7 TV/Radio
-
switching
Pressing the RADIO-Button activates the RADIO-Mode. By pressing the TV- or EXIT-Button you
can quit the RADIO-Mode.

1 3
3.8 Subtitles
Follow these steps:
1. In TV- or Radio Mode press the AUDIO-Button.
2. By pressing the yellow Options-Button a list with the available subtitles will show up.
3. With the Navigation-Buttons ( ▲▼) select a desired subtitle and press the OK-Button to activate.
The screenshot on the left shows
you an example how a
subtitle looks.
Note: Keep in mind that not every station o.ers subtitles. If no subtitles are available, the subtitle
list will be empty.
To deactivate subtitles follow these steps:
1. In TV- or Radio Mode press the AUDIO-Button.
2. By pressing the yellow Options-Button a list with the available subtitles will show up.
3. With the Navigation-Buttons ( ▲▼) select the activated subtitle and press the OK-Button to
deactivate.

1 4
3.9 Infobar
The Infobar appears when switching a channel and shows all necessary information about the selected
service. By pressing the OK-Button you can open the Infobar if needed!
INFO
MENU
Table of contents