• Les enfants doivent être surveillés pour s’assurer qu’ils ne jouent pas
avec le produit. Ce produit n’est pas un jouet.
• Ne fixez pas le câblage du produit avec des agrafes ou des clous, et ne
le placez pas sur des crochets ou des clous pointus.
• Ne placez jamais le produit à proximité de sources de chaleur ou de
froid excessif. Les températures extrêmes ont un impact négatif sur la
vie de l’électronique.
• Tenez le produit à l’écart des liquides et vapeurs spéciaux.
• Ne plongez aucune partie du produit dans l’eau.
• Débranchez l’appareil lorsqu’il n’est pas utilisé pendant une longue
période ou avant de nettoyer l’appareil. N’entreprenez pas de tentatives
de réparation vous-même.
• Si le produit n’est pas correctement installé ou utilisé, Dreamled®ne
peut pas assumer la responsabilité.
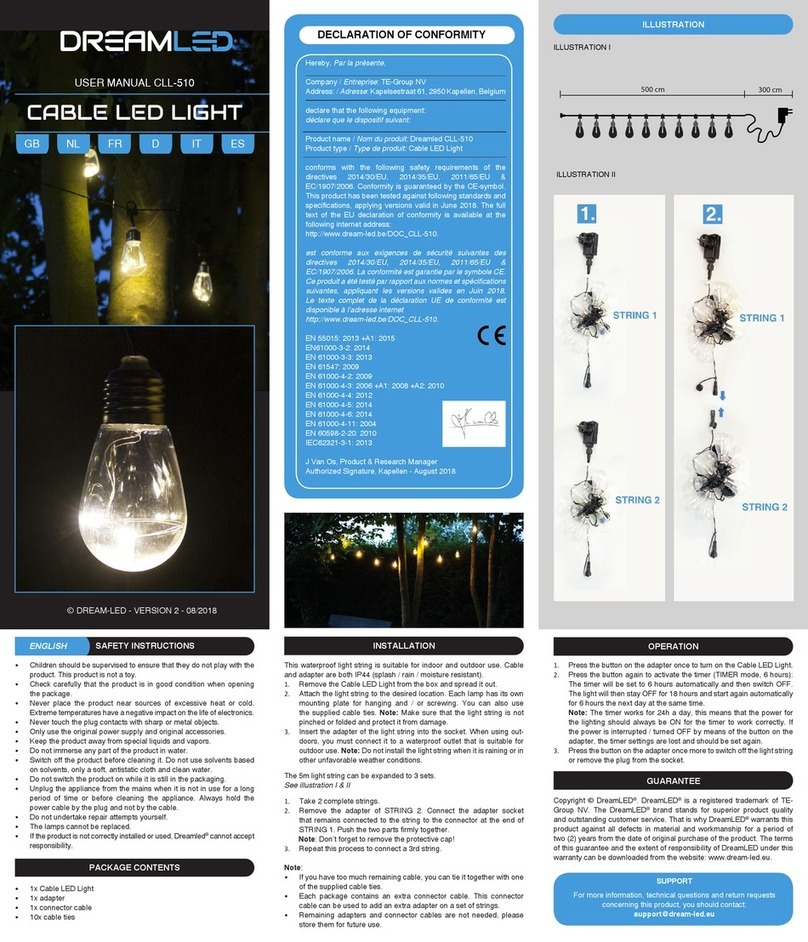
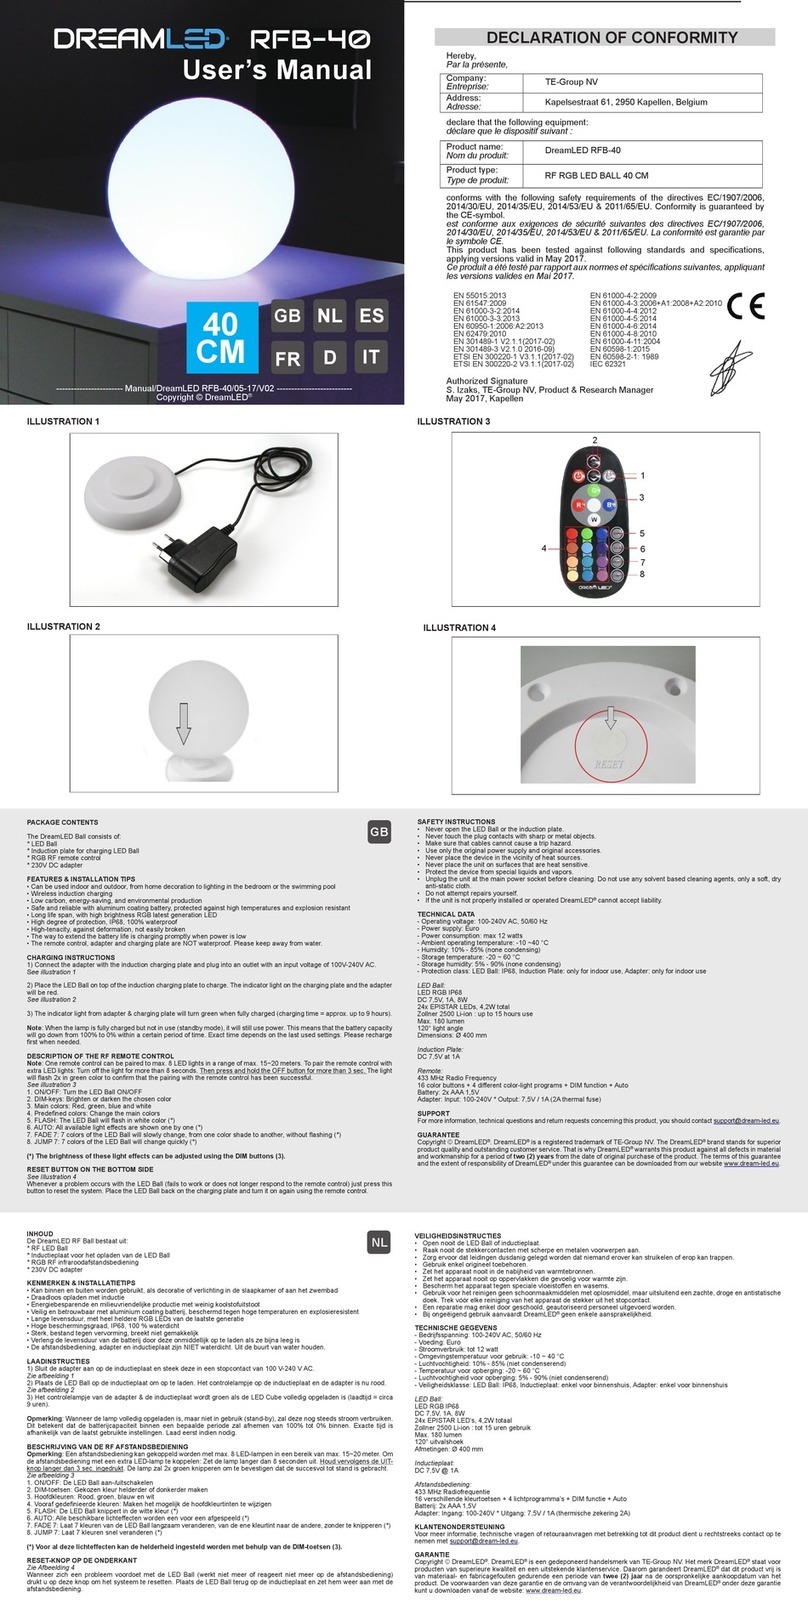
Voir illustration I
1. Music Color LED string
1. Haut-parleurs
2. Boîtier de commande
3. 1x câble adaptateur DC-USB
4. 1x câble AUX
1. Retirez la chaîne de lumière de la boîte et étalez-la.
2. Fixez la chaîne de lumière à l’endroit désiré.
• Houd toezicht op kinderen om te voorkomen dat ze met het product
spelen. Dit product is geen speelgoed.
• Zet de bedrading van het product niet vast met nietjes of spijkers, en
plaats het niet op scherpe haken of spijkers.
• Plaats het product nooit in de nabijheid van bronnen van overmatige
hitte of koude. Extreme temperaturen hebben een negatieve invloed op
de levensduur van elektronica.
• Houd het product uit de buurt van speciale vloeistoffen en dampen.
• Dompel geen enkel onderdeel van het product onder in water.
• Schakel het product uit wanneer het gedurende langere tijd
niet in gebruik is of voordat u het reinigt. Onderneem zelf geen
reparatiepogingen.
• Indien het product niet correct geïnstalleerd is of gebruikt wordt, kan
Dreamled®geen verantwoordelijkheid accepteren.
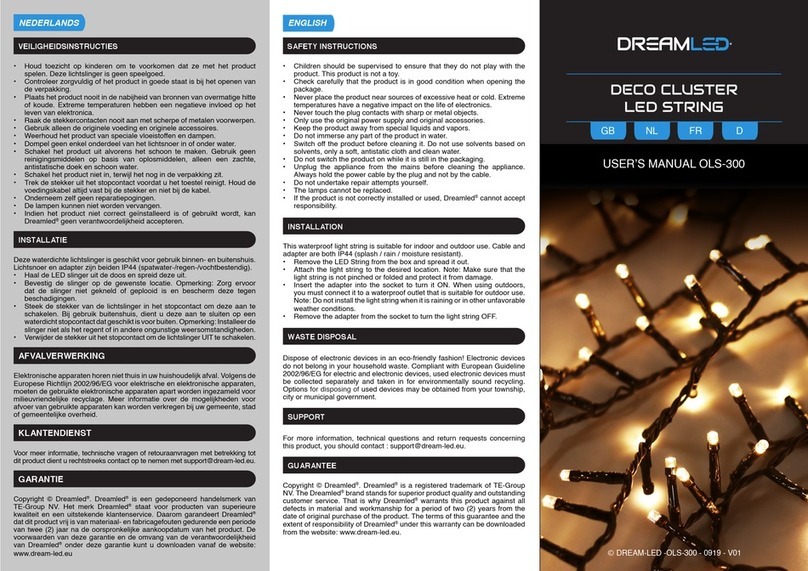
Zie afbeelding I
1. Music Color LED string
2. Luidsprekers
3. Bedieningseenheid
4. 1x DC-USB-adapterkabel
5. 1x AUX-kabel
1. Haal het LED lichtsnoer uit de doos en spreid deze uit.
2. Bevestig het lichtsnoer op de gewenste plaats. Zorg ervoor dat het
lichtsnoer niet bekneld of gevouwen is en bescherm het tegen be-
schadiging.
3. Steek de DC-USB-adapterkabel in de DC-aansluiting (4)
en sluit het andere uiteinde van de kabel aan op een USB-
stroombron zoals PC / laptop / powerbank of op een stopcon-
tact met behulp van een USB-adapter (niet meegeleverd).
Opmerking: Zorg ervoor dat de uitgangsstroom van de stroombron
lager is dan 2 A.
4. Het LED lichtsnoer gaat AAN.
ENKEL ALS VERLICHTING GEBRUIKEN
• Nadat het LED-lichtsnoer op de stroom is aangesloten, wordt deze
ingeschakeld in Verlichtingsmodus 1: Alle lampjes zijn AAN.
• Druk op de Lichtmodus-knop (2) op de bedieningseenheid om de
verlichtingsmodi te wijzigen.
• Er zijn 8 verschillende verlichtingsstanden, b.v. Knipperen, Langzaam
vervagen, Twinkelen... Telkens u op de Lichtmodus-knop (2) drukt,
wordt de volgende beschikbare verlichtingsmodus geactiveerd.
• Verwijder het LED-lichtsnoer uit de stroombron om deze UIT te
schakelen.
GEBRUIKEN ALS VERLICHTING MET LUIDSPREKERS
A. DRAADLOOS VIA BLUETOOTH
• Houd de Power / Bluetooth / AUX-knop (1) ingedrukt totdat het LED-
indicatielampje (3) rood en blauw knippert, wat betekent dat het
LED-lichtsnoer zich in de koppelingsmodus bevindt en zoekt naar
beschikbare Bluetooth®-apparaten.
• Laat uw Bluetooth®-muziekapparaat zoeken naar andere Bluetooth®-
apparaten en selecteer ‘MLS-500’ in de lijst met gevonden apparaten.
• Als het koppelen is gelukt, knippert het blauwe LED-indicatielampje
(3) langzaam. Het LED-lichtsnoer en je muziekapparaat zijn nu
verbonden. U kunt nu muziek streamen vanaf uw muziekapparaat.
Opmerking: het LED-lichtsnoer maakt automatisch opnieuw verbinding
met het laatst verbonden apparaat wanneer deze weer wordt ingeschakeld.
Als uw Bluetooth®-muziekapparaat NIET automatisch opnieuw verbinding
maakt met de MLS-500, kunt u handmatig opnieuw verbinding maken
met uw Bluetooth®-muziekapparaat (raadpleeg de handleiding van uw
Bluetooth®-muziekapparaat).
B. BEDRAAD VIA AUX-KABEL
• Houd de Power / Bluetooth / AUX-knop (1) ingedrukt tot het LED-
indicatielampje (3) rood en blauw knippert.
• Steek de AUX-kabel in de AUX-poort (5) en sluit het andere uiteinde
van de kabel aan op de hoofdtelefoonaansluiting of AUX-IN-
aansluiting van uw muziekapparaat.
• Druk eenmaal op de Power / Bluetooth / AUX-knop (1) om naar
de AUX-modus te gaan. U kunt nu muziek afspelen vanaf uw
muziekapparaat.
Copyright © Dreamled®. Dreamled®is een gedeponeerd handelsmerk van
TE-Group NV. Het merk Dreamled®staat voor producten van superieure
kwaliteit en een uitstekende klantenservice. Daarom garandeert
Dreamled®dat dit product vrij is van materiaal- en fabricagefouten
gedurende een periode van twee (2) jaar na de oorspronkelijke
aankoopdatum van het product. De voorwaarden van deze garantie en de
omvang van de verantwoordelijkheid van Dreamled®onder deze garantie
kunt u downloaden vanaf de website: www.dream-led.eu.
VEILIGHEIDSINSTRUCTIES
INSTALLATIE
VERPAKKINGSINHOUD
NEDERLANDS
WERKING
KLANTENONDERSTEUNING
Voor meer informatie, technische vragen of retouraanvragen met
betrekking tot dit product dient u rechtstreeks contact op te nemen
GARANTIE
Remarque: Assurez-vous que la chaîne lumineuse n’est pas pincée
ou pliée et protégez-la des dommages.
3. Branchez le câble adaptateur DC-USB dans la prise DC (4) et
connectez l’autre extrémité du câble à une source d’alimentation USB
comme un PC / ordinateur portable / powerbank ou à une prise de
courant à l’aide d’un adaptateur USB (non inclus).
Remarque: Assurez-vous que le courant de sortie de la source
d’alimentation est inférieur à 2 A.
4. La chaîne LED s’allumera.
UTILISER UNIQUEMENT COMME LUMIÈRE
• Après avoir connecté la chaîne LED à l’alimentation, elle est allumée
en mode d’éclairage 1 : toutes les lumières sont allumées.
• Appuyez sur le bouton Mode d’éclairage (2) sur le boîtier de
commande pour changer les modes d’éclairage.
• Il existe 8 modes d’éclairage différents, par ex. Flash, Changement
lent, Scintillement... Chaque fois que vous appuyez sur le bouton Mode
d’éclairage (2), le prochain mode d’éclairage disponible est activé.
• Débranchez la chaîne LED de l’alimentation pour l’éteindre.
UTILISER COMME LUMIERE ET HAUT-PARLEUR
A. SANS FIL VIA BLUETOOTH
• Appuyez et maintenez enfoncé le bouton Alimentation / Bluetooth
/ AUX (1) jusqu’à ce que l’indicateur LED (3) clignote en rouge et
bleu, ce qui signifie que la chaîne LED est en mode d’appairage et
recherche les appareils Bluetooth®disponibles.
• Laissez votre appareil musical Bluetooth®rechercher d’autres
appareils Bluetooth®. et sélectionnez « MLS-500 » dans la liste des
appareils trouvés.
• Une fois l’appairage réussi, le voyant LED bleu (3) clignotera
lentement. La chaîne LED et votre appareil de musique sont
maintenant connectés. Vous pouvez maintenant diffuser de la
musique à partir de votre appareil musical.
Remarque: La chaîne LED se reconnectera automatiquement au dernier
appareil connecté lorsqu’il sera à nouveau allumé. Si votre appareil de
musique Bluetooth®ne se reconnecte PAS automatiquement avec le
MLS-500, vous pouvez vous reconnecter manuellement avec votre
appareil de musique Bluetooth®(veuillez vous référer au manuel de votre
appareil de musique Bluetooth®).
B. PAR CÂBLE AUX
• Appuyez sur le bouton Alimentation / Bluetooth / AUX (1) et
maintenez-le enfoncé jusqu’à ce que le voyant LED (3) clignote en
rouge et bleu.
• Branchez le câble AUX dans le port AUX (5) et connectez l’autre
extrémité du câble dans la prise casque ou la prise AUX-IN de votre
appareil de musique.
• Appuyez une fois sur le bouton Alimentation / Bluetooth / AUX (1)
pour entrer en mode AUX. Vous pouvez maintenant écouter de la
musique à partir de votre appareil musical.
CONSIGNES DE SÉCURITÉ
INSTALLATION
CONTENU DE L’EMBALLAGE
FRANCAIS
OPÉRATION
SERVICE CLIENT
Pour plus d’informations, des questions techniques ou des
demandes de retour concernant ce produit, il faut contacter
GARANTIE
Copyright © DreamLED®. DreamLED®est une marque déposée de TE-
Group NV. La marque de DreamLED®est synonyme de produits de
qualité supérieure et d’un service après-vente excellent. C’est la raison
pour laquelle DreamLED®garantit ce produit contre tout défaut de matériel
ou de fabrication pour une période de deux (2) ans à compter de la
date d’achat initiale. Les conditions de cette garantie et l’étendue de la
responsabilité de DreamLED®en vertu de cette garantie sont disponibles
en téléchargement sur notre site Internet : www.dream-led.eu.
• Kinder sollten beaufsichtigt werden, um sicherzustellen, dass sie nicht
mit dem Produkt spielen. Dieses Produkt ist kein Spielzeug.
• Befestigen Sie die Verkabelung des Produkts nicht mit Heftklammern
oder Nägeln und legen Sie es nicht auf scharfe Haken oder Nägel.
• Stellen Sie das Gerät niemals in der Nähe von übermäßig heißen
oder kalten Quellen auf. Extreme Temperaturen haben negative
Auswirkungen auf die Lebensdauer der Elektronik.
• Halten Sie das Produkt von speziellen Flüssigkeiten und Dämpfen fern.
• Tauchen Sie keinen Teil des Produkts in Wasser.
• Trennen Sie das Gerät vom Stromnetz, wenn es längere Zeit nicht
benutzt wird oder bevor Sie das Gerät reinigen. Halten Sie das
Netzkabel immer am Stecker und nicht am Kabel fest.
• Führen Sie Reparaturversuche nicht selbst durch.
• Wenn das Produkt nicht korrekt installiert oder verwendet wird, kann
Dreamled®keine Verantwortung übernehmen.
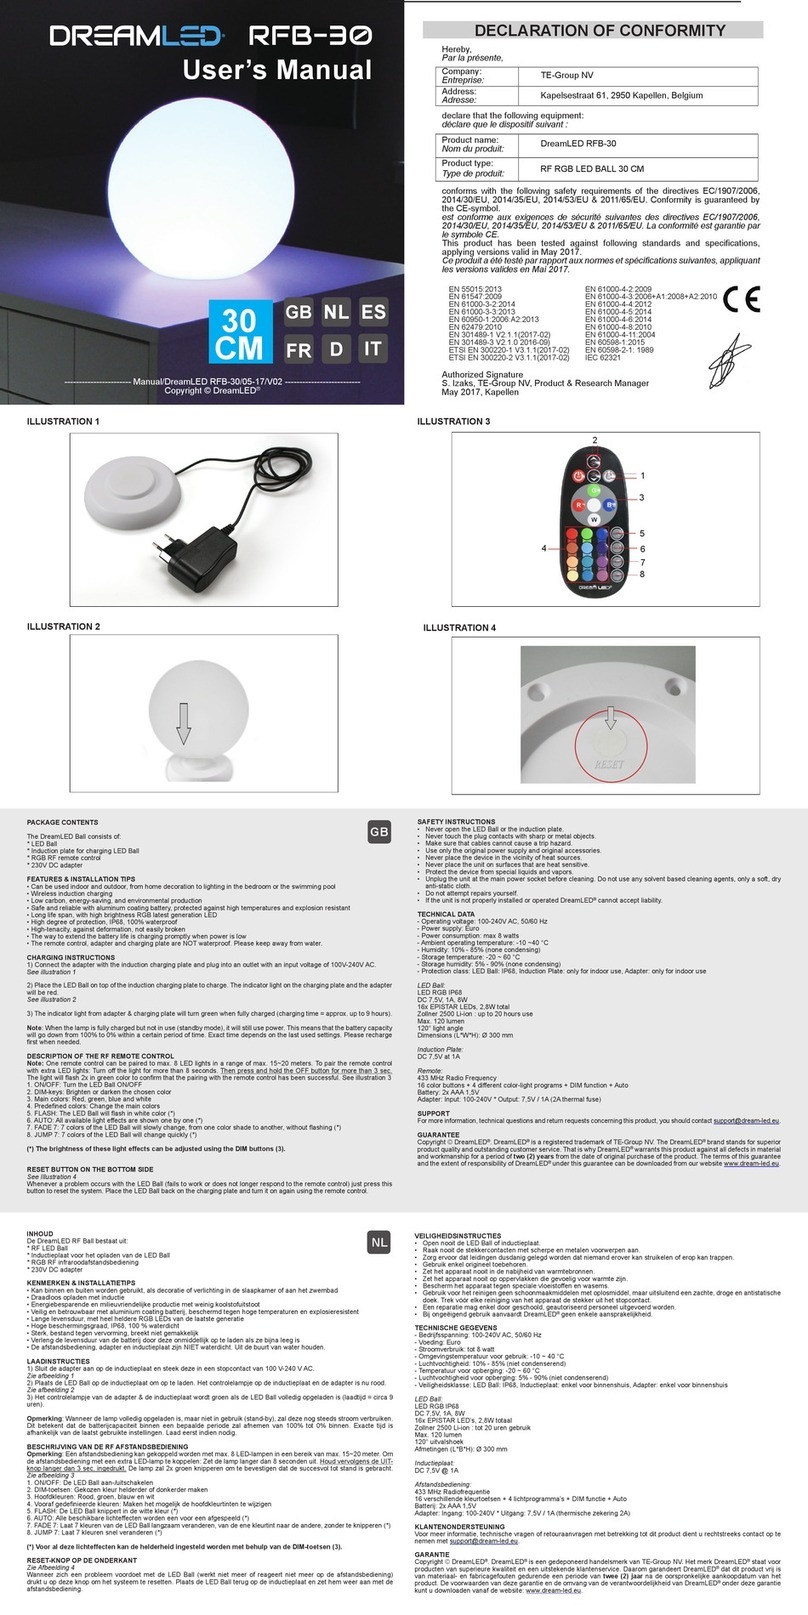
Siehe Abbildung I
1. Music Color LED string
2. Lautsprecher
3. Kontrollkasten
4. 1x DC-USB-Adapterkabel
5. 1x AUX-Kabel
1. Entfernen Sie die Lichterkette aus der Box und verteilen Sie es.
2. Befestigen Sie die Lichterkette an der gewünschten Stelle.
Vergewissern
Sie sich, dass die Lichterkette nicht eingeklemmt oder gefaltet ist und
schützen Sie sie vor Beschädigungen.
3. Stecken Sie das DC-USB-Adapterkabel in die DC-Buchse (4)
und verbinden Sie das andere Ende des Kabels mit einer USB-
Stromquelle wie PC / Laptop / Powerbank oder mit einem USB-
Adapter (nicht im Lieferumfang enthalten) an einer Steckdose.
Hinweis: Stellen Sie sicher, dass der Ausgangsstrom der Stromquelle
weniger als 2 A beträgt.
4. Die LED-Kette wird eingeschaltet.
NUR ALS LICHT VERWENDEN
• Nach dem Anschließen der LED-Kette an die Stromversorgung
wird sie im Beleuchtungsmodus 1 eingeschaltet: Alle Lichter sind
eingeschaltet.
• Drücken Sie die Lichtmodustaste (2) an der Kontrollbox, um die
Lichtmodi zu ändern.
• Es gibt 8 verschiedene Beleuchtungsmodi, z.B. Flash, Slow Fade,
Twinkle.... Jedes Mal, wenn Sie die Lichtmodustaste (2) drücken, wird
der nächste verfügbare Lichtmodus aktiviert.
• Trennen Sie die LED-Kette von der Stromversorgung, um sie
auszuschalten.
VERWENDUNG ALS LICHT UND LAUTSPRECHER
A. DRAHTLOS ÜBER BLUETOOTH
• Halten Sie die Power / Bluetooth / AUX-Taste (1) gedrückt, bis die
LED-Anzeige (3) rot und blau blinkt, was bedeutet, dass sich der LED-
String im Pairing-Modus befindet und nach verfügbaren Bluetooth®-
Geräten sucht.
• Lassen Sie Ihr Bluetooth®-Musikgerät nach anderen Bluetooth®-
Geräten suchen. und wählen Sie „MLS-500“ in der Liste der
gefundenen Geräte aus.
• Wenn das Pairing erfolgreich war, blinkt die blaue LED-Anzeige (3)
langsam. Der LED-String und Ihr Musikgerät sind nun verbunden. Sie
können jetzt Musik von Ihrem Musikgerät streamen.
Hinweis: Der LED-String verbindet sich automatisch wieder mit dem
zuletzt verbundenen Gerät, wenn es wieder eingeschaltet wird. Falls sich
Ihr Bluetooth®-Musikgerät NICHT automatisch wieder mit dem MLS-500
verbindet, können Sie die Verbindung mit Ihrem Bluetooth®-Musikgerät
manuell wiederherstellen (siehe Handbuch Ihres Bluetooth®-Musikgeräts).
B. ÜBER AUX-KABEL
• Halten Sie die Power / Bluetooth / AUX-Taste (1) gedrückt, bis die
LED-Anzeige (3) rot und blau blinkt.
• Stecken Sie das AUX-Kabel in den AUX-Anschluss (5) und das
andere Ende des Kabels in die Kopfhörerbuchse oder AUX-IN-
Buchse Ihres Musikgeräts.
• Drücken Sie die Power / Bluetooth / AUX-Taste (1) einmal, um in
den AUX-Modus zu gelangen. Sie können jetzt Musik von Ihrem
Musikgerät abspielen.
SICHERHEITSHINWEISE
INSTALLATION
PACKUNGSINHALT
DEUTSCH
BETRIEB
KUNDENDIENST
Für weitere Informationen, technische Fragen oder Rücksendungen
zu diesem Produkt wenden Sie sich bitte an
GARANTIE
Copyright © DreamLED. DreamLED®ist ein eingetragenes Warenzeichen
der TE-Group NV. Das Markenzeichen DreamLED®steht für hervorragende
Produktqualität und einen überdurchschnittlichen Kundendienst. Deshalb
gewährt DreamLED®eine Produktgarantie auf alle Material- und
Produktionsfehler für einen Zeitraum von zwei (2) Jahren ab Datum des
Kaufbelegs. Die Garantiebedingungen und der Haftungsumfang von
DreamLED®im Rahmen dieser Garantie können von unserer Internetseite
heruntergeladen werden: www.dream-led.eu.
Zie afbeelding II
Onderdelen bedieningseenheid:
1. Power / Bluetooth / AUX-knop
2. Lichtmodus-knop
3. LED-indicatielampje
4. DC-aansluiting
5. AUX-poort
Voir illustration II
Pièces du boîtier de commande :
1. Bouton d’alimentation /
Bluetooth / AUX
2. Bouton de mode d’éclairage
3. Indicateur LED
4. Prise CC
5. Prise AUX
Siehe Abbildung II
Teile des Kontrolkastens:
1. Power-/Bluetooth-/AUX-
Taste
2. Lichtmodustaste
3. LED-Anzeige
4. DC-Buchse
5. AUX-Anschluss

