Dreamus Astell&Kern AK UW100 User manual

INSTRUCTION BOOK
AK UW100
User Guide

CONTENTS
Before Using the Product
Included Items
Parts Names
Charging
Power Management
Connections
Connecting to a device
Getting Started _01
Using the Earbuds
Listening to Music
Making a Phone Call
Voice Recognition
Using the App
Using the Device _02
Safety Precautions
Troubleshooting
Copyright
Certifications
Disclaimers
Specifications
Miscellaneous _03
02
03
04
05
08
09
10
13
14
15
16
17
20
22
25
25
26
27

User Guide
Getting Started 02
The descriptions contained in this instruction book are based
on the product's default settings.
The contents of this instruction book may differ from the
actual product due to changes in the manufacturer’s
specifications. The images shown in this instruction book
may differ from the actual product.
Some features may not be available depending on the
manufacturer of the mobile device and the specifications of
the model. Please check with the manufacturer of the mobile
device.
Do not allow water to enter the product. It may result in
product failure. Do not wear the product when swimming or
taking a shower. Failures due to damage from liquids are not
covered by warranty.
Any modification of the software provided by the manufac-
turer, or any installation of software obtained through an
unapproved route can cause the product to malfunction or
fail, and will void the warranty.
Before
Using the
Product

Getting Started
03
User Guide
Ear tips: Select the ear tips that best fit your ears and affix
them onto the earbuds.
Charging case: Stores and charges the earbuds.
Charging cable: Connects the charging case to a charger to
charge the product.
Quick Start Guide: A basic guide for using the product.
Warranty Card: Please keep the warranty card since it is
required when requesting after-sales service.
Product User Guide: The User Guide can be downloaded
from the Astell&Kern website:
[http://www.astellnkern.com Support > Download].
Components may change without prior notice to improve the
performance or quality of the product.
Quick Start Guide
& Warranty Card
Charging cableCharging case
Ear tips (5 sizes)TWS earbuds
The DC 5V/2A charger is sold separately. Please use a
charger that meets the specifications.
Included
Items

User Guide
Getting Started
04
The appearance of the product as well as the information
printed and engraved on the product may vary depending on
the manufacturer's specifications.
LED indicator
Touch button
Charging port (USB Type-C)
Microphone
Ear tips Proximity sensor
Charging pin
Charging pin
Ear tips: Select the ear tips that best fit your ears and affix
them onto the earbuds.
Proximity sensor: Detects when you're wearing the earbuds.
Charging pin: The charging pins in the earbuds contact the
charging pins located inside the charging case to charge the
earbuds.
Touch button: Controls various features such as music playback.
Microphone: Using for calls.
Charging case
Charging pin: The earbuds are mounted onto the charging
pins for charging.
LED charging indicator: Indicates the charging states of the
earbuds and charging case.
Charging port (USB Type-C): Used to charge the product
with the connector cable.
Parts
Names

Getting Started
05
User Guide
Wireless charging
The charging case has built-in
wireless charging coils that
allow the battery to be charged
using a wireless charger or other
devices that act as a wireless charger.
1. Check the direction of the earbuds and place them to fit
the grooves inside the charging case.
2. Place the charging case on top of the wireless charger so
that the center of its bottom surface is touching the center
of the wireless charger.
3. The blue or green LEDs blink repeatedly depending on the
charging state, and the LEDs turn off when charging is complete.
When charging is complete, disconnect the charging case
from the charger.
Wired charging
1. Notice the direction of the
earbuds when replacing them
in the charging case so they come
in contact with the charging pins.
2. Connect the [charging port] on
the back of the charging case
with the charger using the USB
Type C cable included in the package.
3. Plug the charger into an outlet.
4. The blue or green LEDs blink repeatedly depending on the
charging state, and the LEDs turn off when charging is complete.
When charging is complete, disconnect the charging case
from the charger.
Charging

User Guide
Getting Started
06
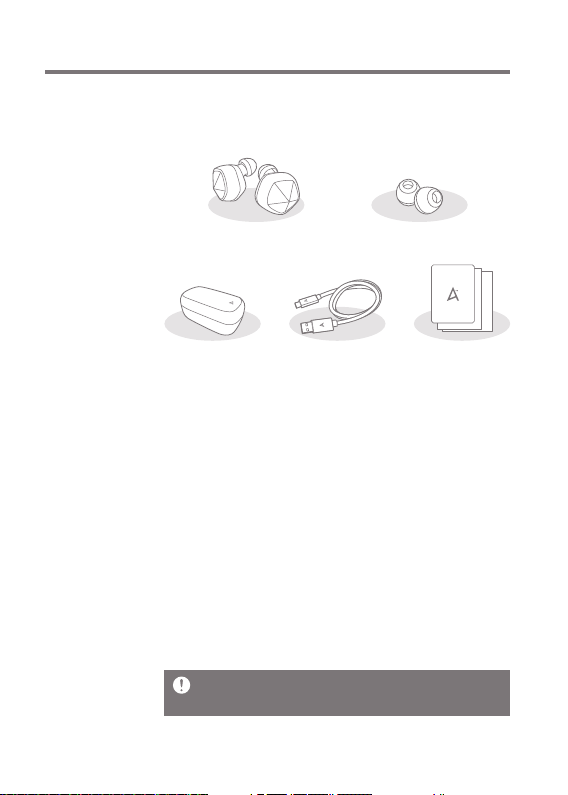
Be sure to use the USB Type C cable provided with the
product. Cables that do not meet the specifications may
cause product failure.
Recommended charger specifications: DC 5V/2A
Using a charger that does not meet the product’s
specifications may cause the product to fail. Any
damage caused by using an unauthorized charger
outside the recommended specifications will not be
covered by warranty service.
If the product is being used for the first time after
purchase, or if the product has been left unused for a
long time, or if the battery is dead, charge for at least 10
minutes before using.
If the battery is completely discharged as a result of not
using the product for a long time, battery performance
may be compromised. Please frequently check the
battery’s charging state and charge the battery when its
level is low.
Sweat or moisture on the charging pin can cause
corrosion on the product. Make sure to completely
remove any moisture before placing the earbuds into
the charging case.
The product and charger may become hot during
charging. This is normal and does not affect the life or
functioning of the product.
If the battery temperature rises above a certain level,
charging may stop for safety reasons. If charging
wirelessly, remove the charging case from the wireless
charging pad and allow it to cool before recharging.
Make sure to remove any conductive material (metals,
magnets, etc.) from the back of the charging case before
placing it on top of the wireless charger. Failing to do so
may damage the charging case.
Connecting the charging case to a computer, etc., may
result in a longer charging time.
Be careful not to bend the USB cable excessively. Doing
so may cause the USB cable to break.

Getting Started
07
User Guide
LED indicator (Charging case)
Blue: Blinks repeatedly
Blue: Turns off
Green: Blinks repeatedly
Green: Turns off
Blue/Green:
Blinks repeatedly in turn
Blue/Green: Turns off
Red: Blinks repeatedly
Color
Earbuds: Charging in progress
Earbuds: Charging complete
Cradle: Charging in progress
Cradle: Charging complete
Earbuds/Cradle:
Charging in progress (Both)
Earbuds/Cradle: Charging complete (Both)
Battery level: 10% or less
Status
LED indicator (Earbuds)
Blue LED: Blinks every second
Blue LED: Blinks every three seconds
Red LED only: Blinks every three seconds
Color
Pairing mode
Pairing status: Normal
Battery level: 10% or less
Status
If the LED indicator on the charging case does not turn
on, remove the earbuds from the charging case and
place them back in correctly, or disconnect the charging
case from the charger and try again.
If the charging indicator continues to blink quickly in
red, stop charging and contact us for service or repair.
The exact battery level can be checked using the app.

Getting Started
08
User Guide
Turn on/off
1. The earbuds power on automatically when they are removed
from the charging case.
2. The earbuds power off automatically when they are placed
into the charging case.
Reset
If the earbuds are not operating properly or have stopped
operating, reset them and try again.
1. With the earbuds in the cradle, touch both earbuds for
about 10 seconds to perform factory reset.
2. If one earbud is disconnected during use and the touch
control does not work, touch the disconnected earbud for
about 20 seconds to proceed with the reset.
Power
Manage-
ment
Enable the Bluetooth feature at [Settings > Connections
> Bluetooth] on your mobile device to pair the earbuds
again.

Getting Started
09
User Guide
Insert the ear tips
1. Select the ear tips that fit you
best among the five sets of
ear tips that have been provided.
2. Take out the ear tip and flip
the cover over backwards.
3. Turn slightly by applying a light force and affix it to the
socket of the earbud.
4. Flip the cover of the ear tip back over again to its original
position so it is ready to wear.
Wearing the earbuds
1. Check that the ear tip of the
earbud is facing your ear.
2. Insert the earbud into your
ear and adjust until it fits
securely.
Please wear the Talk microphone so that the front of the
microphone points slightly downward toward your mouth.
The earbuds have built-in magnets, which can affect
medical devices such as pacemakers and defibrillators.
If you are using any of these medical devices, please
consult your physician before using this product.
Maintain a safe distance between the product and any object
that can be affected by magnetic fields. Data may become
damaged or unusable by exposure to the magnet in this product.
Wearing the earbuds incorrectly may affect sound
quality or functions. Please select the appropriate size
of ear tips that maintain a secure fit.
In places where the use of wireless devices is restricted
(e.g., airplanes), please comply with all requirements
for that location.
Connec-
tions

Getting Started
10
User Guide
Connecting to a mobile device
1. When the earbud is removed from the charging case, it
automatically powers on and enters pairing standby mode.
2. Turn on your mobile device’s Bluetooth feature: [Settings
> Connections > Bluetooth]
3. Select [AK UW100] when it appears in the device search to
complete pairing with your mobile device.
4. The earbuds turn off automatically when they are placed
in the charging case.
A device only needs to be paired once and will
subsequently connect automatically.
If only one earbud is connected to the mobile device, the
sound is output in mono mode, but when both earbuds
are connected to the mobile device, the sound is output
in stereo mode.
The connection image may vary depending on the
connected mobile device and the software version.
If the earbuds and mobile device are not connected / If
the connection pop-up window does not appear/ If the
earbuds are not detected from the mobile device: Wear
the earbuds and touch one earbud for 3 seconds to
enter Bluetooth pairing mode. A sound will notify you
that the earbuds have entered Bluetooth pairing mode.
Connecting
to a device

Getting Started
11
User Guide
If one earbud gets disconnected during use, touch the
disconnected earbud for 20 seconds to reconnect.
Bluetooth pairing mode will turn off if the earbuds and
mobile device are not connected within 3 minutes
outside the range. If you put the product in the charging
case and take it out, the earbuds will enter Bluetooth
pairing mode.
Make sure to check and adjust the Bluetooth volume to
the appropriate level after pairing is complete. A high
volume can cause hearing damage.
When connecting the product to a device, make sure the
product is located close to the device. Failing to do so
may cause malfunction or noise depending on the user’s
environment.
Use the earbuds within 10 meters of the connected
device. The distance between the device and earbuds
may affect the quality of your wireless connection.
Make sure there are no obstacles between the product
and the connected device. Obstacles including other
people, walls, corners, supplementary partitions, etc.,
can affect the quality of your wireless connection. For
best performance, use in a location with no obstacles.
Be careful not to touch the device connected with the
product. It may affect the quality of your wireless connection.
Bluetooth uses the same 2.4 GHz frequency band as
industrial/scientific/medical/electronics devices and
wireless LAN. This can cause interference between
devices and affect the quality of the wireless connection.
Disconnecting from your mobile device
1. You can disconnect the Bluetooth connection to the mobile
device by placing the earbuds in the charging case.
You can also manually disconnect the earbuds by
unregistering them [Settings > Connections >
Bluetooth] from your mobile device.
To reconnect the temporarily disconnected earbuds to
your mobile device, Press one earbud for 3 seconds to
enter Bluetooth pairing mode.

If more than one mobile device is connected to the earbuds,
you can easily switch between mobile devices without
disconnecting the earbuds from the existing devices.
1. On the mobile device you wish to switch to, select the
earbuds at [Settings > Connections > Bluetooth >
Registered Devices].
Getting Started
12
User Guide
Connecting to a different mobile device
1. Turn off the Bluetooth feature in the connected mobile
device at [Settings > Connections > Bluetooth] or unregister
the earbuds from [Registered Devices].
2. Press one earbud for 3 seconds to enter Bluetooth pairing
mode.
3. Connect to the new mobile device via Bluetooth.
Switching between devices connected to the earbuds

Using the Device
13
User Guide
Using the
Earbuds
Using the touch button
Touch the outside of the earbud to
use various features such as
playing or pausing music.
Volume +
(Press once)
(Press twice)
(Press three times)
(Press and hold for
2 seconds or longer)
(Press once)
(Press twice)
(Press three times)
(Press and hold for
2 seconds or longer)
Action
Ambient mode ON/OFF
Ambient mode level control
Enable voice recognition
Volume -
Left
Right
Play/Pause
Play the next track
Play the previous track
Stand by/Playing media
Accept/end a call
Decline a call
Receiving a call
When touching the earbud, do so gently. Touching the
earbud with too much force may hurt your ears.
Do not press the earbud’s touch button with a pointed or
sharp object. Doing so may cause the product to fail.
Touching the button too quickly can cause malfunction.
Please touch the button accurately to ensure proper performance.
Voice guidance is enabled when switching functions
using touch, and some actions may take more time to
apply the change.
The touch functions of the left and right earbuds can be
changed from the dedicated app. Please refer to the
app’s instructions for details.
Action

Using the Device
14
User Guide
Playing music
You can listen to music playing on a mobile device by
connecting the earbuds to the mobile device. Play the music
stored in your mobile device or stream music while connected.
Controlling the volume
Touch the right earbud for 2 seconds or longer to increase
the volume, and touch the left earbud for 2 seconds or longer
to reduce the volume.
Pause/Play
During music playback, a single touch of the right earbud
pauses the playback, and a second touch restarts it.
Playing the next music file
Touch the right earbud twice while playing music to play the
next music file.
Play the previous music file
Touch the right earbud three times while playing music to
play the previous music file.
Touch the right earbud three times after three seconds
of music playback to return to the beginning of the
music currently being played . To play the previous
music file, touch the right earbud three times within
three seconds of playing the music.
When connecting your earbuds to the mobile device for
the first time, make sure to check the volume before
listening to music.
A high volume can cause hearing damage. Adjust the
volume to the appropriate level before listening to
music.
Listening
to Music

Using the Device
15
User Guide
Answering a call
When your earbuds are connected to your mobile device, you
can check and answer calls from your mobile device.
Accept/decline a call
When a call is received while you are wearing the earbuds,
the earbuds will emit a sound as well as a voice notification
to inform you of the phone number or name saved in your
contacts for that incoming call.
Touch the earbud once to accept the call.
Touch the earbud twice to decline the call.
End a call
To end a call, touch the right earbud once.
Making
a Phone
Call

Using the Device
16
User Guide
Voice Recognition
You can use the voice recognition features supported by your
mobile device. Touch the left earbud 3 times to activate the
voice recognition features.
Supported voice recognition features may vary
depending on the specifications of the mobile device
manufacturer.
To increase the recognition rate of voice commands,
please pronounce as accurately as possible in a quiet
place.
Slang words or derived words may not be recognized.
Noisy locations or mispronunciation can cause either no
recognition or misrecognition and the launch of
unintended features.
Voice
Recogni-
tion

Using the Device
17
User Guide
Using the AK TWS app, you can connect the earbuds to a
smart device to check the status of the earbuds and set up
the environment to use the earbuds.
Downloading the app
1. Search for the AK TWS app at the store for your smartphone
and install.
Android OS : Open Google Play Store. Search [AK TWS] >
Select [Install]
iOS : Open the App Store. Search [AK TWS] > Select [Get]
Launch the app
1. Launch the AK TWS app installed
on your device.
2. Grant access permissions. (just once,
when the app is first launched).
3. The app now connects with the
earbuds and shows information.
To use the AK TWS service, you must install the AK TWS app.
Supported operating systems:
Android: 7.0 or newer
iOS: 9.0 or newer (Supported products:iPhone 5 or
newer / Products not supported:iPad)
For firmware updates, make sure to grant access
permissions when installing the AK TWS app.
For information on how to connect to the earbuds, see
pages 10-11.
Depending on the connected mobile device, some items
may not be displayed.
Using
the App

Using the Device
18
User Guide
App screen
35
1
Displays battery status, Bluetooth status,
device name, etc.
Ambient mode and ambient mode level
control are supported.
Goes to the Home screen.
Goes to the EQ screen.
Goes to the Settings screen.
Goes to the tap action settings screen.
Product
status
Ambient
Home screen
EQ
Settings
Tap action
1
2
3
4
5
6
2
64

Using the Device
19
User Guide
App settings
Set up the device according to the user's needs.
The structure of the settings menu may vary depending on
the firmware version.
Updating the firmware
1. When a new firmware version is available, the screen will
display a firmware update guide window.
2. Select [Update] and move to the corresponding screen.
3. Follow the on-screen prompts to update the firmware.
Device settings
Language: Select the language for the device.
Reset settings: Reset all of the app’s settings.
Other: View system information, legal information, etc.
Update
Updates the firmware.
Details
Shows information about the product.
Other manuals for Astell&Kern AK UW100
1
Table of contents
Other Dreamus Headphones manuals