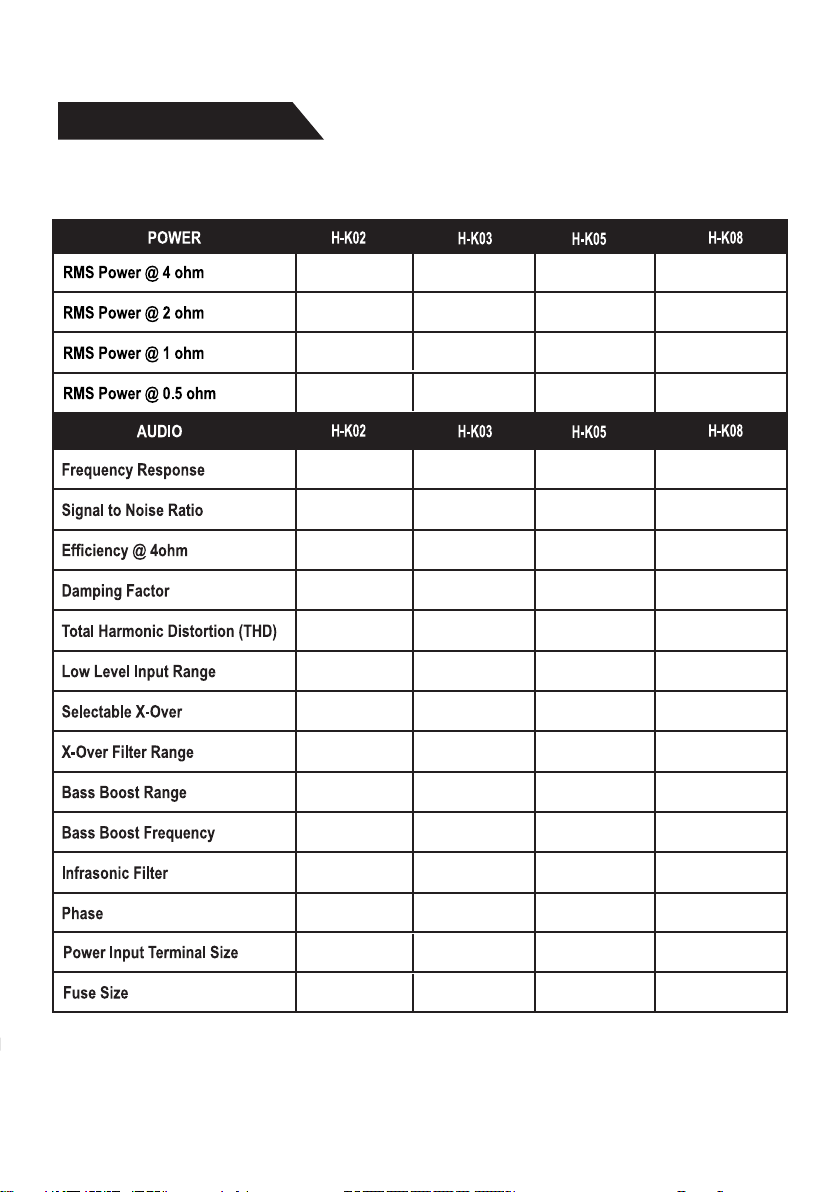
DS18 H-KO AMPS
INTRODUCTION
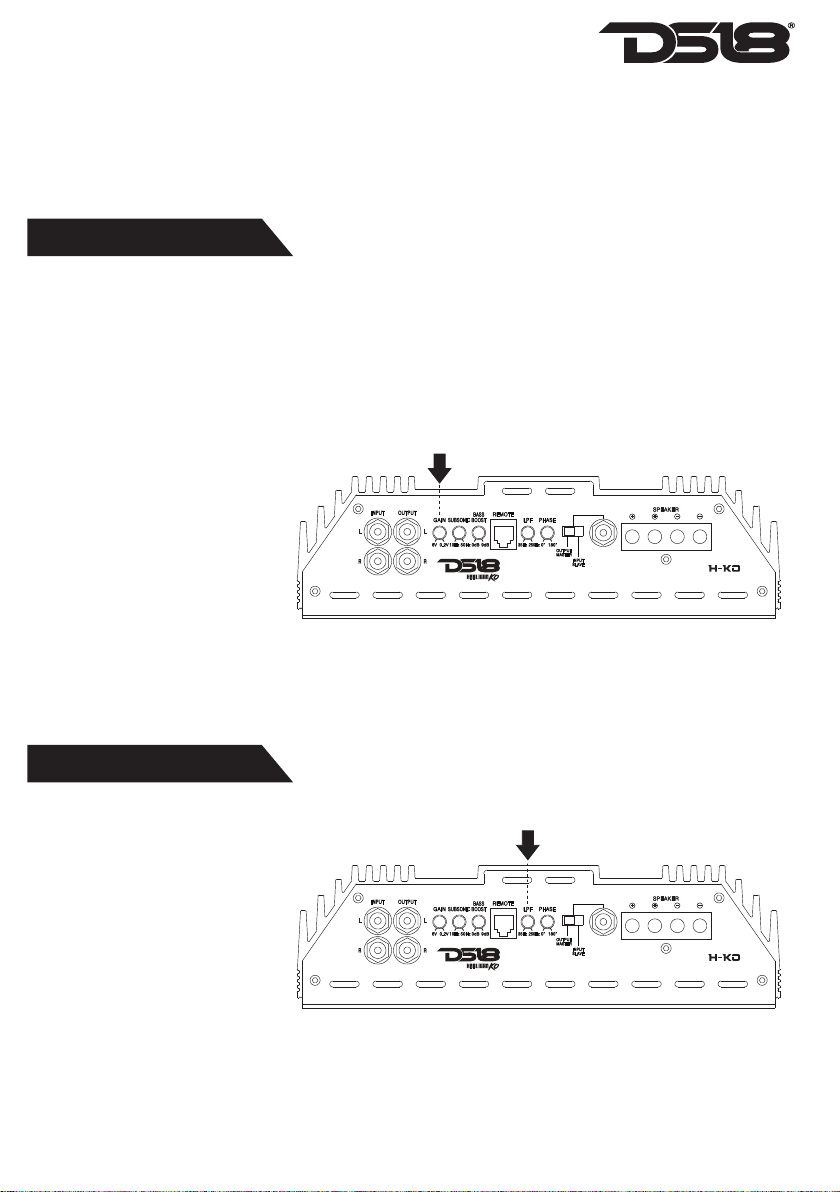
INSTALLATION
Fully variable crossovers promote installation
ease and save the cost of outboard crossovers.
Additionally, they may be used in conjunction
with outboard passive or active crossovers,
depending on the complexity required by the
system. The 12 dB per octave slope offers steep
roll-off above or below the selected frequency.
Against Overload, Short Circuit, Thermal, and
Reverse Polarity. These protection features are
designed to protect the amplifier from misuse,
as well as from common causes of amplifier
failure.
The DS18 HOOLIGAN KO Car amplifiers offer high quality audio reproduction for
the audiophile and the everyday listener alike. All models feature fully variable
crossovers with 12dB per octave slopes, allowing you the ability to tailor the
sound to best fit the speakers and your listening preferences.
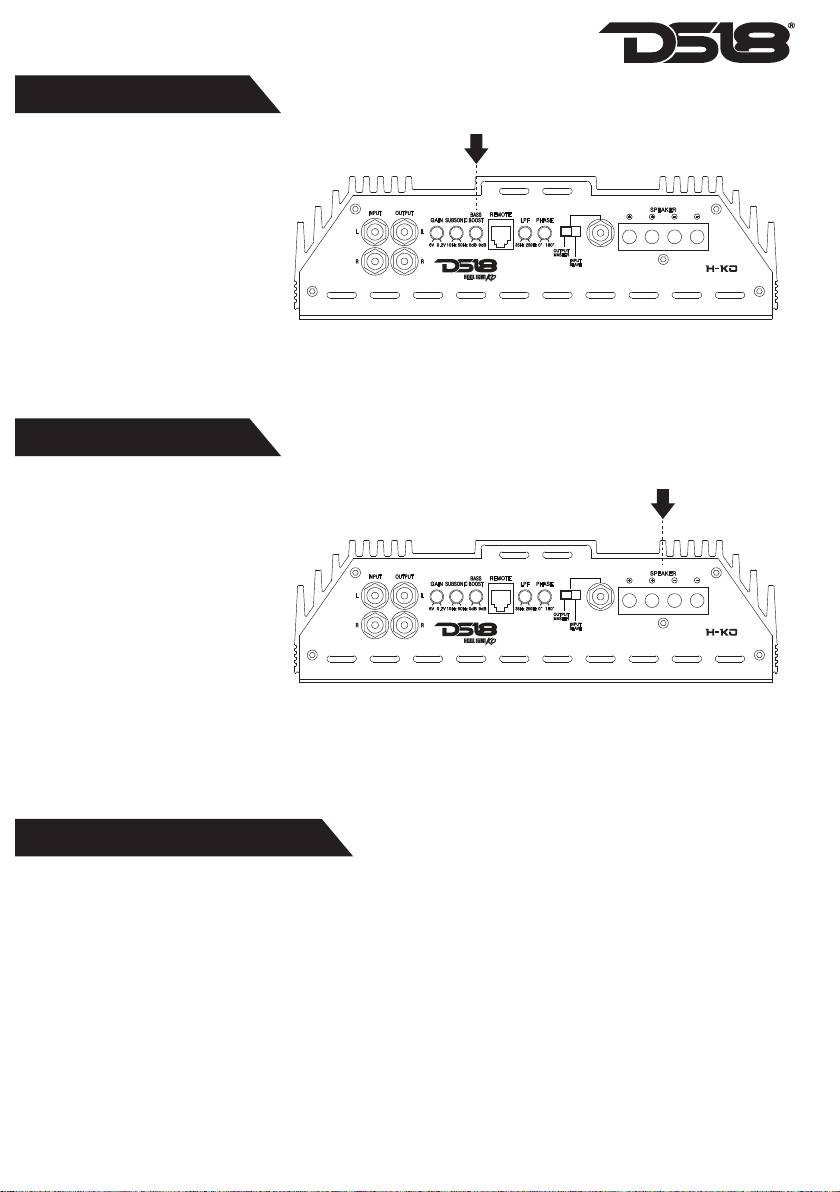
Ensures solid electrical connections that resist
corrosion.
Platinum Finish Connections
Fully Variable Crossovers
Protection Circuitry
Professional installation by an authorized DS18 H-KO amps dealer is highly
recommended! Otherwise, the performance of your new gear may not be
satisfactory. In the event that you decide to do your own installation, please read
and follow this manual very carefully. Failure to do so may compromise the
integrity of this product, your automobile, and possibly void the product warranty.
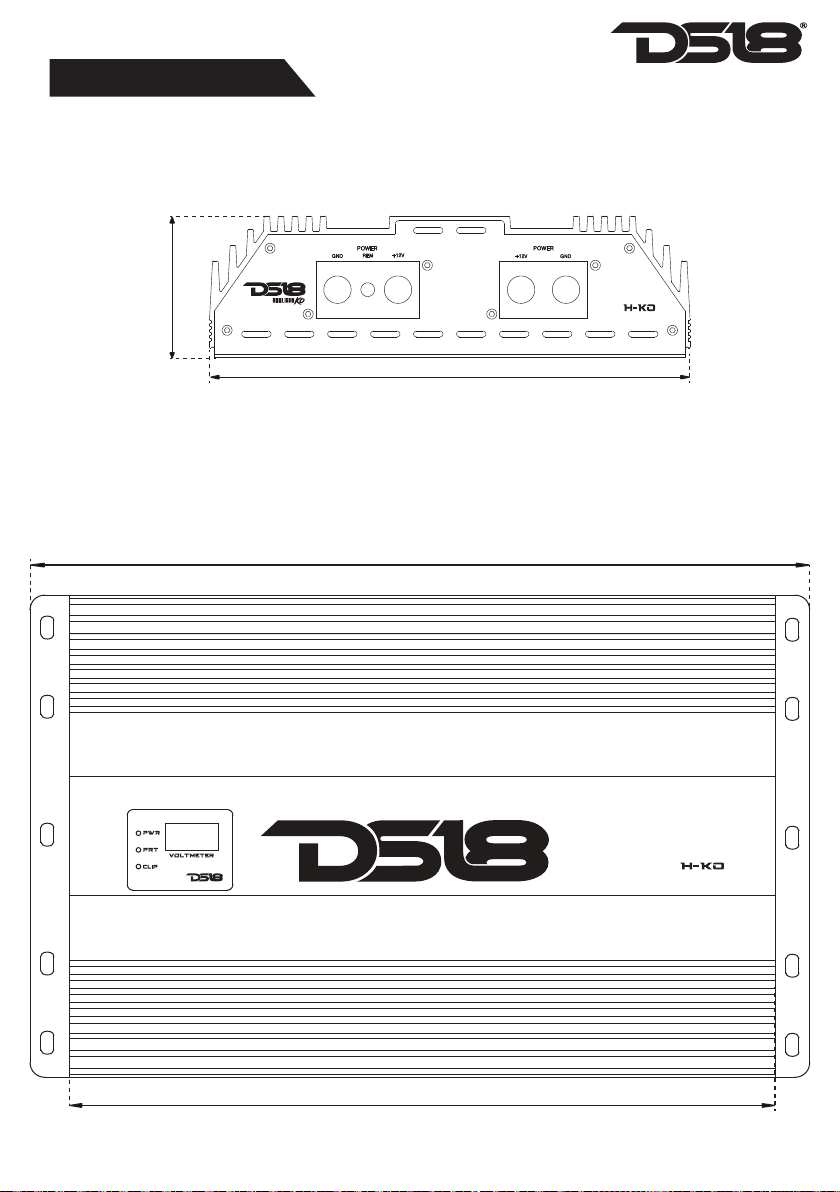
Amplifiers are generally mounted in the hatch/ trunk area of a car or SUV, and
under or behind the seat of most pick-up trucks. Select a location that will provide
adequate ventilation for the amplifier. Avoid mounting the amplifier with the fins
down. The fins should be facing up either vertically or horizontally. Secure the
amplifier with the screws provided.
Thank you for choosing DS18 HOOLIGAN KO amps!
To Take full advantage of the DS18 HOOLIGAN KO amps you have just purchased,
please read and follow the instructions in this manual. As with all of our products,
professional installation by an authorized DS18 dealer is highly recommended!
2