Tools Required
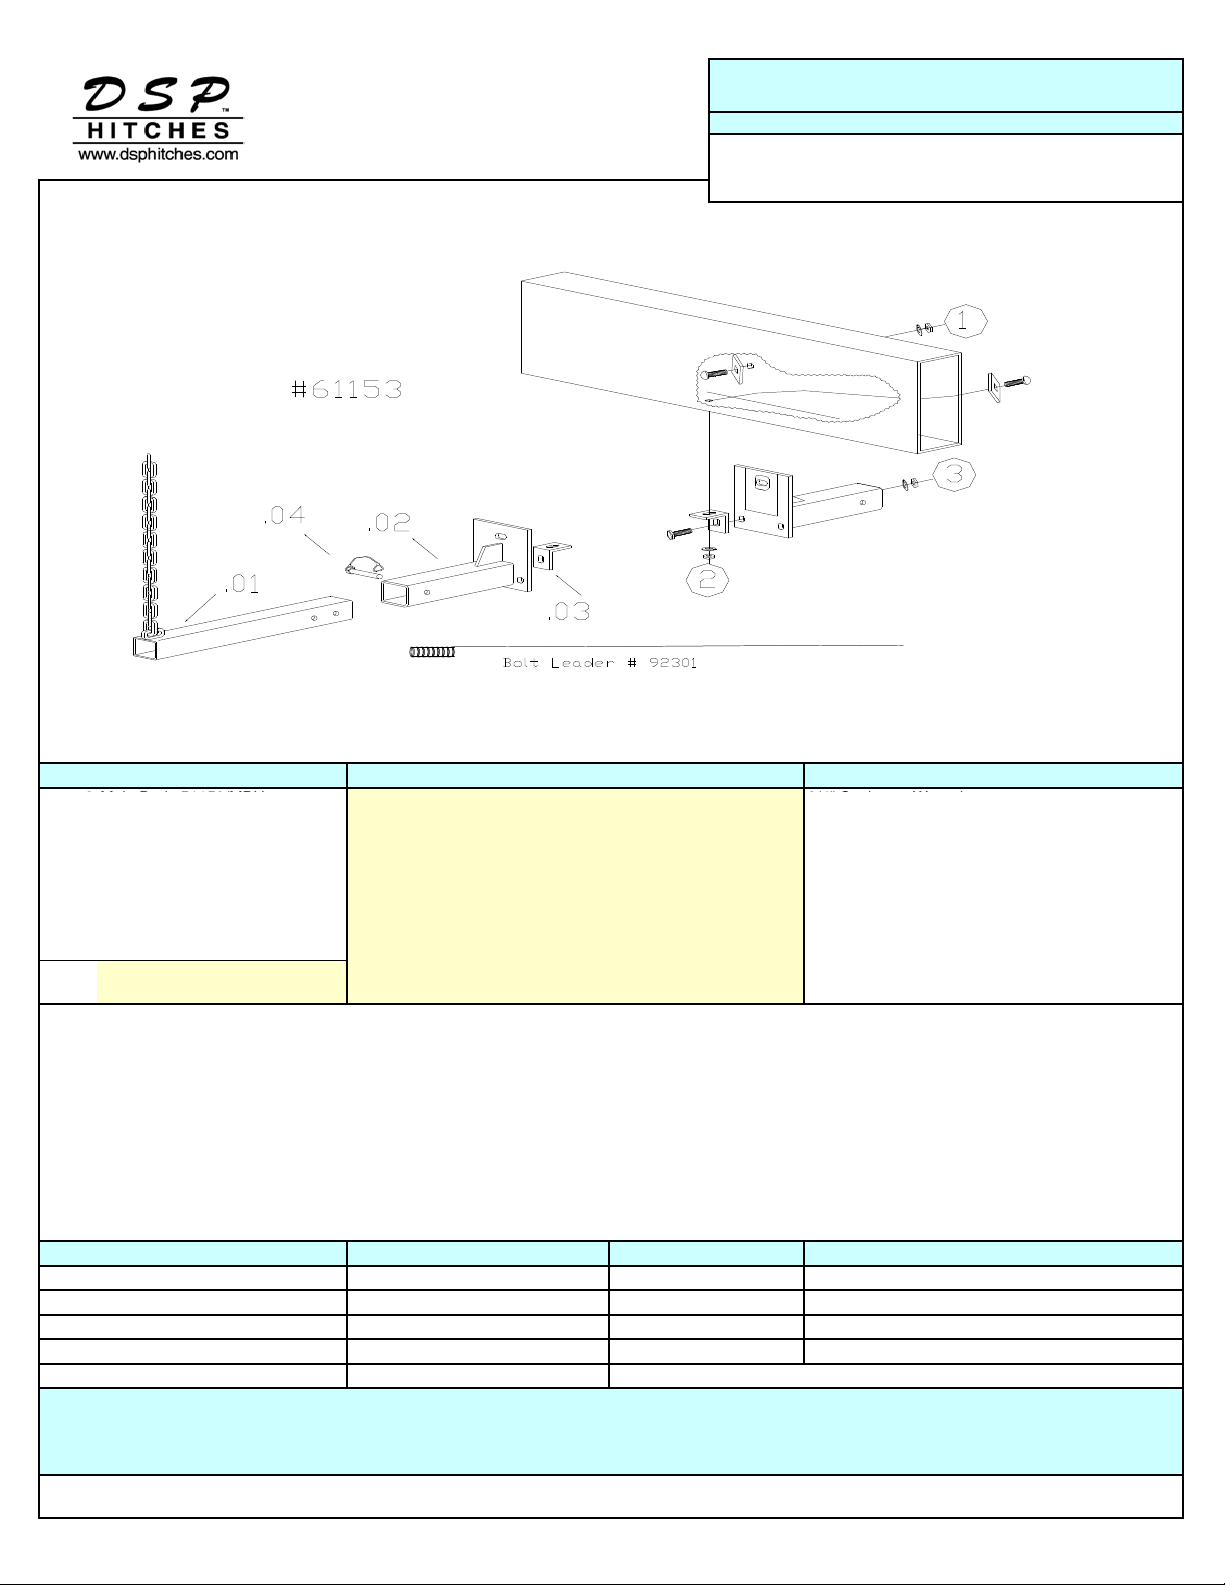
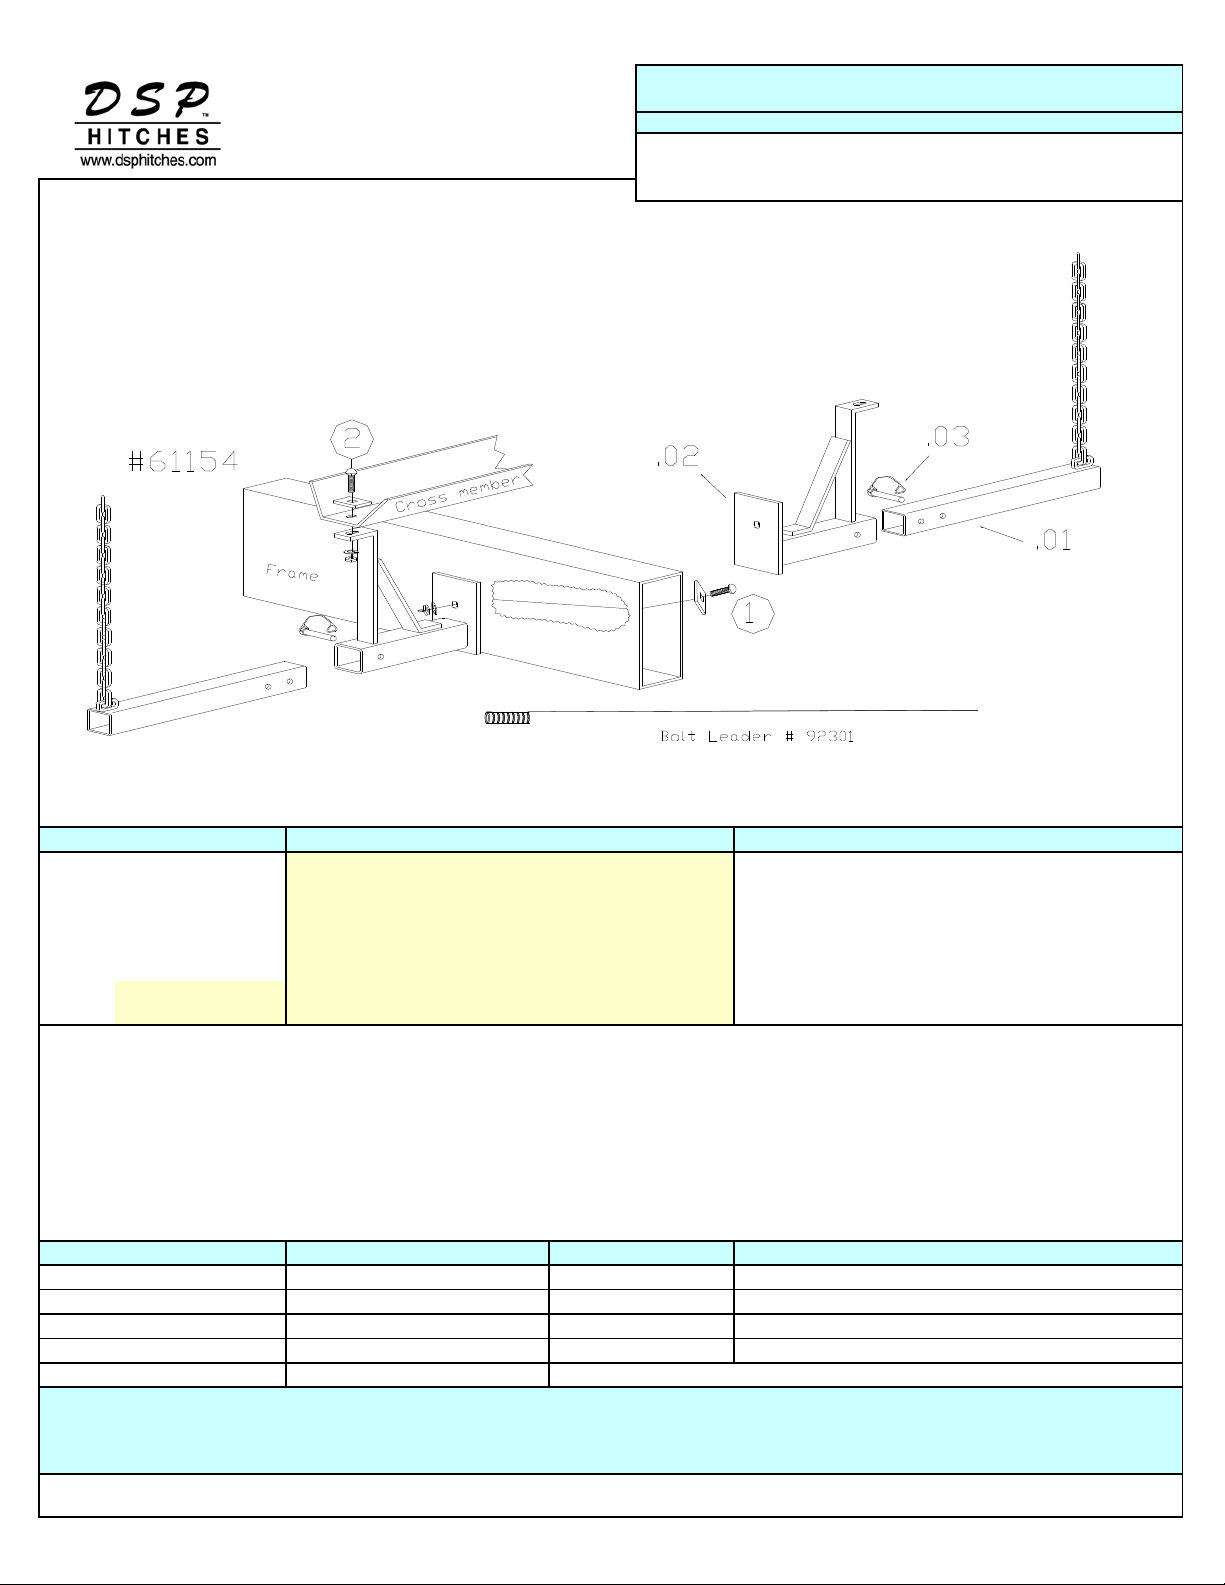
1 Mainbody Part# 61158/MBP 1 Bolt Leader 24" 11/16" Socket or Wrench
1 Mainbody Part # 61158/MBD 3 Hex Bolts 1/2 X 2, UNC, Grade 5, Plated 100 FT/LB Torque Wrench
Hex Nut 1/2", UNC, Grade 5, Plated
Edmonton, AB T6E 4M9 Canada
1 (800) 265-3377
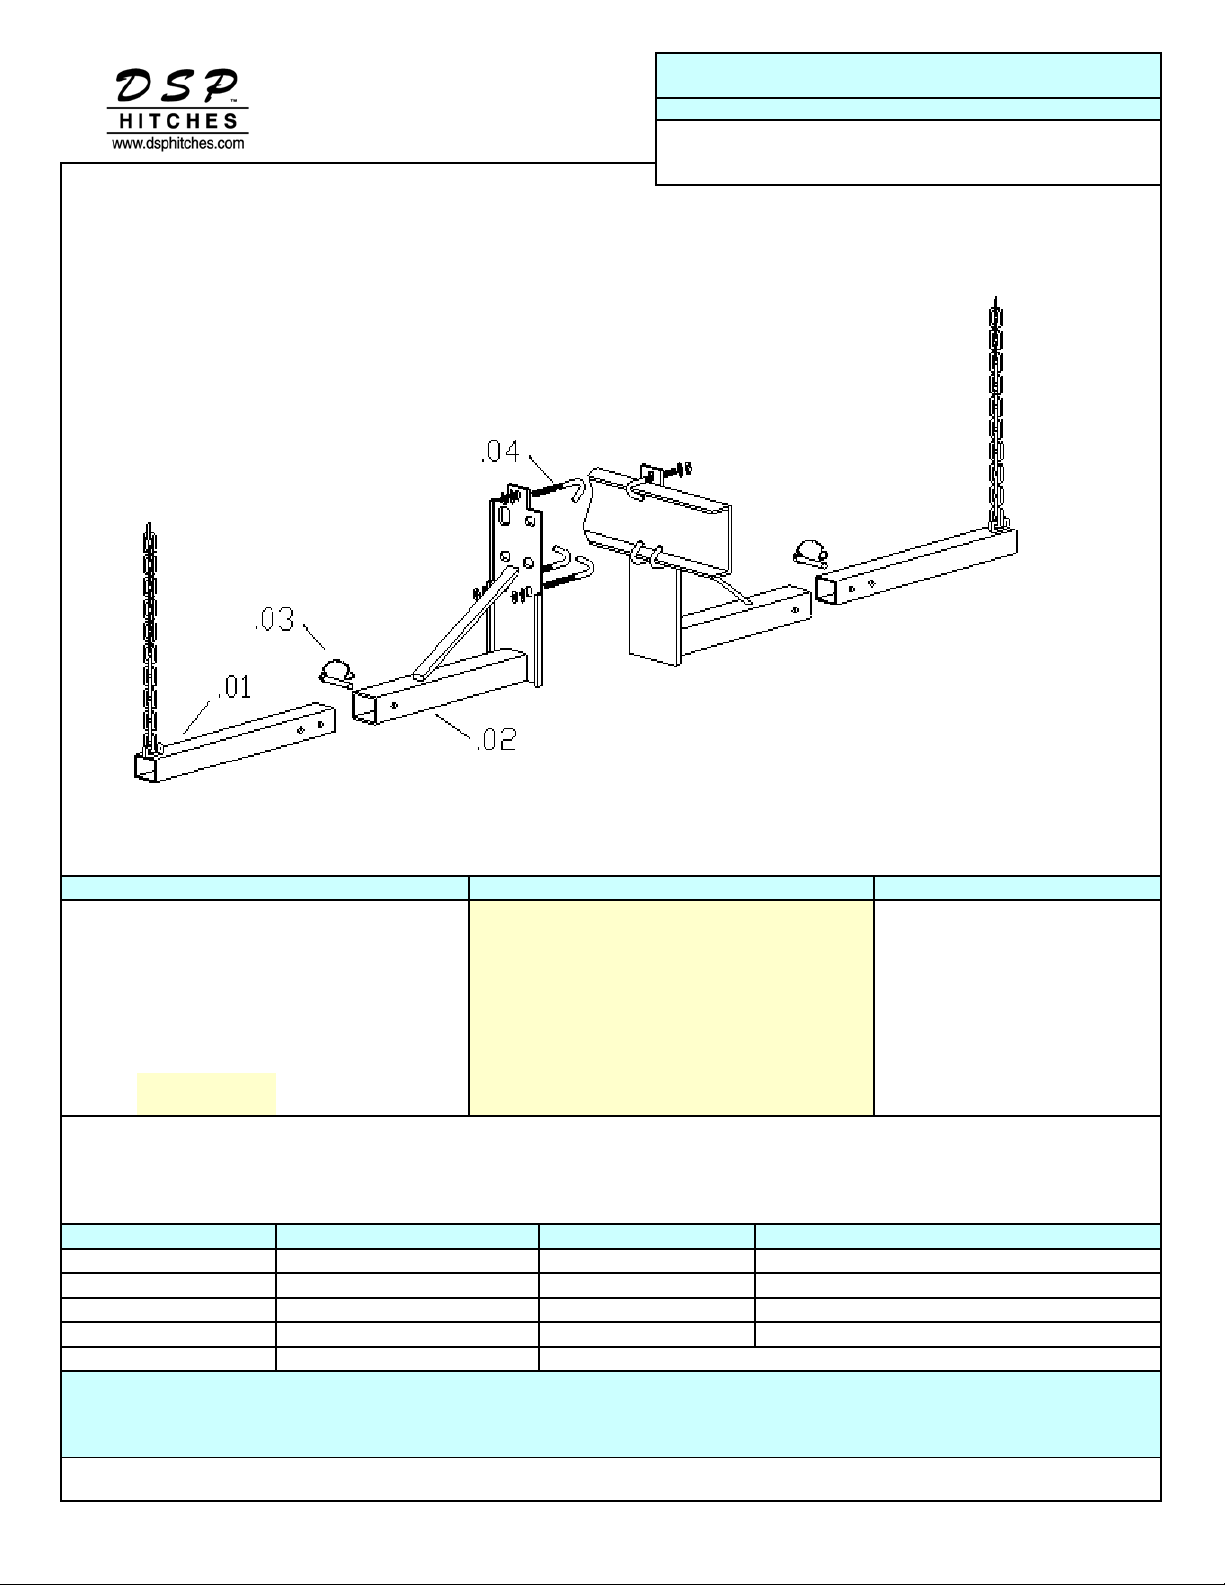
61158
Hitch application
Front Mount Camper Tiedown
For specific fit, see current fit list in our catalogue at www.dsphitches.com
Parts List Contents of Bolt Pack # 61158/B
Hex Nut 1/2", UNC, Grade 5, Plated
2 Bolt Pack 61158/B 7 Lock Washer 1/2", UNC, Grade 5, Plated
1 DSP Warranty Card 4 Conical Washer 1/2 Style 8 STL Zinc
1 Instructions T61000 Series 2 Quick Pins
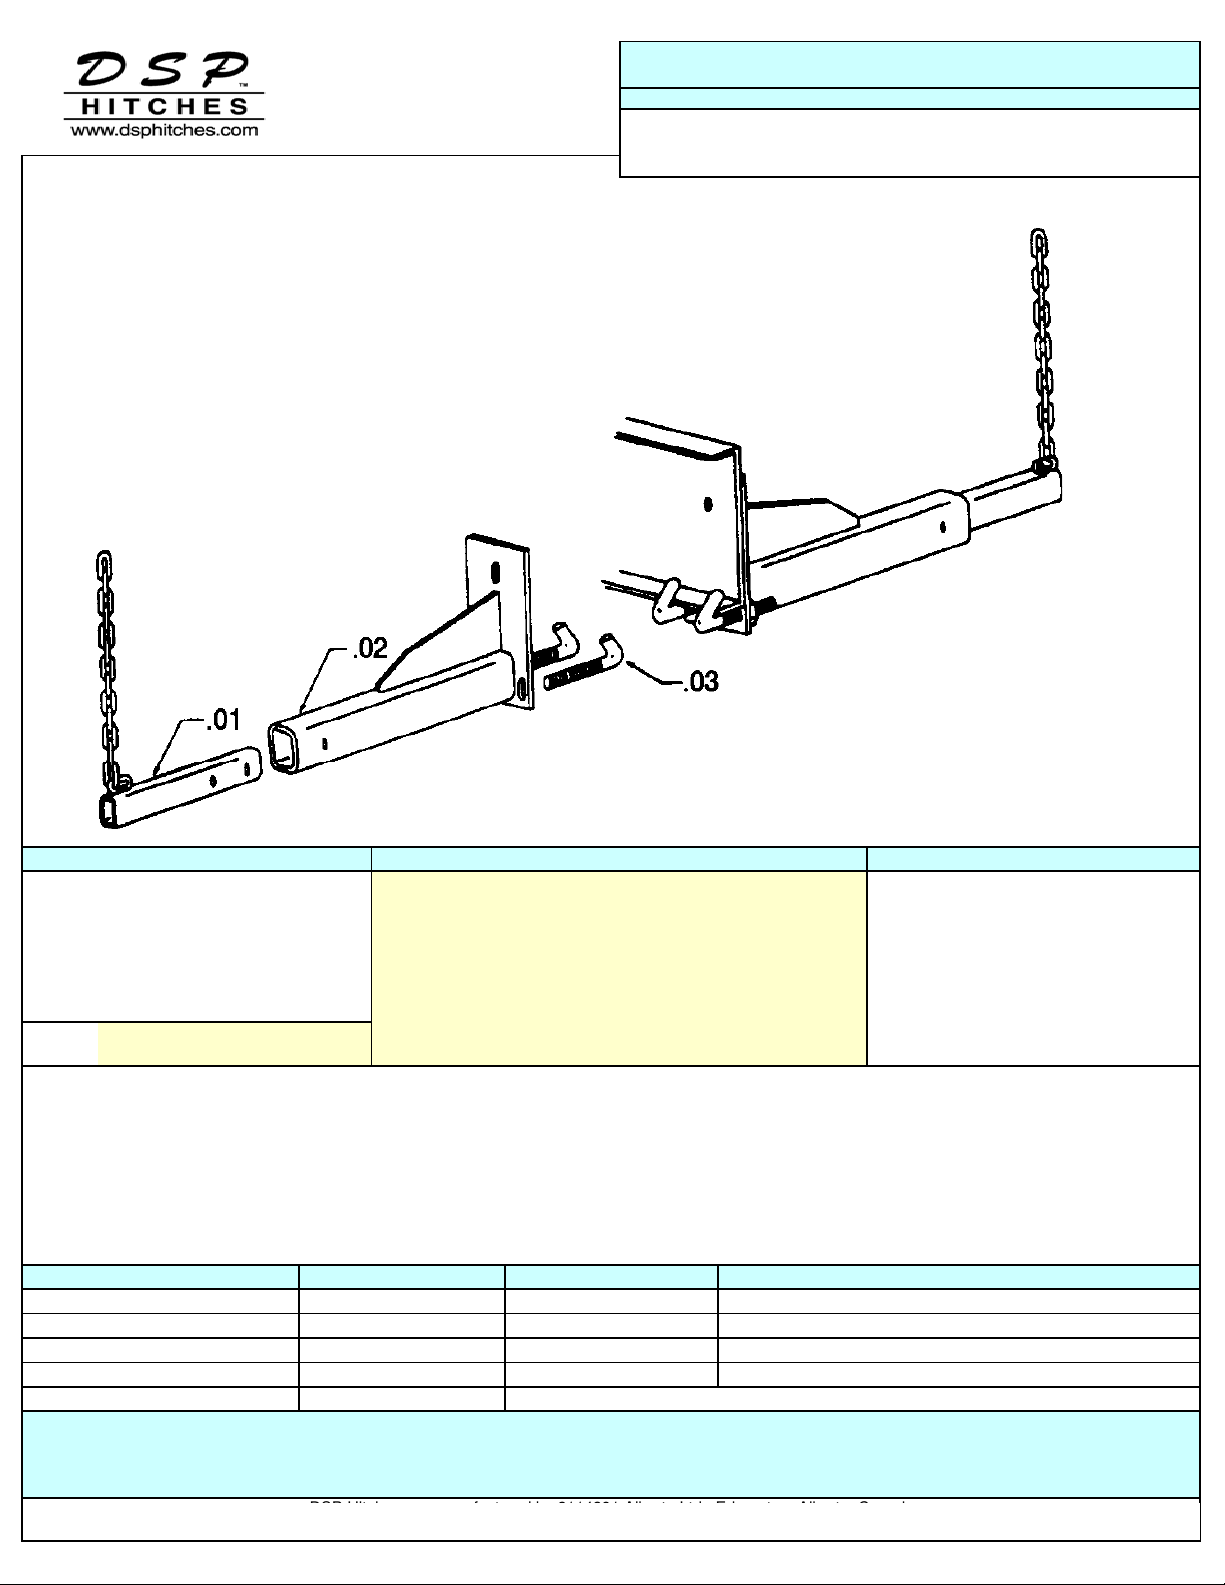
Shipping 35 lbs. 1 61158 Support Bracket DS 3Hole (Holes:1/2")
Weight 16 kg. No Drill Application
DSP Hitches are manufactured by 2114391 Alberta Ltd., Edmonton, Alberta, Canada
Warning: Check Fasteners annually or before usage, if the Tiedown is damaged replacement may be necessary. DO NOT drill or alter this product.
This product is only intended for the application listed above, see vehicle owner's manual for maximum camper capacity (GVWR). This product is
intended for usage with the correct towing accessories and not to be used with tow ropes, cables, chains or any type of stretch or elastic rope.
5/8 150 Ft. Lb 14 mm 103 Ft. Lb.
3/4 245 Ft. Lb Maximum torque for weld or weld nuts is 38 FT/Lb
7/16 54 Ft. Lb 10 mm 36 Ft. Lb.
1/2 72 Ft. Lb. 12 mm 75 Ft. Lb.
3/8 30 Ft. Lb 8 mm 18 Ft. Lb.
Holes 3 & 4)
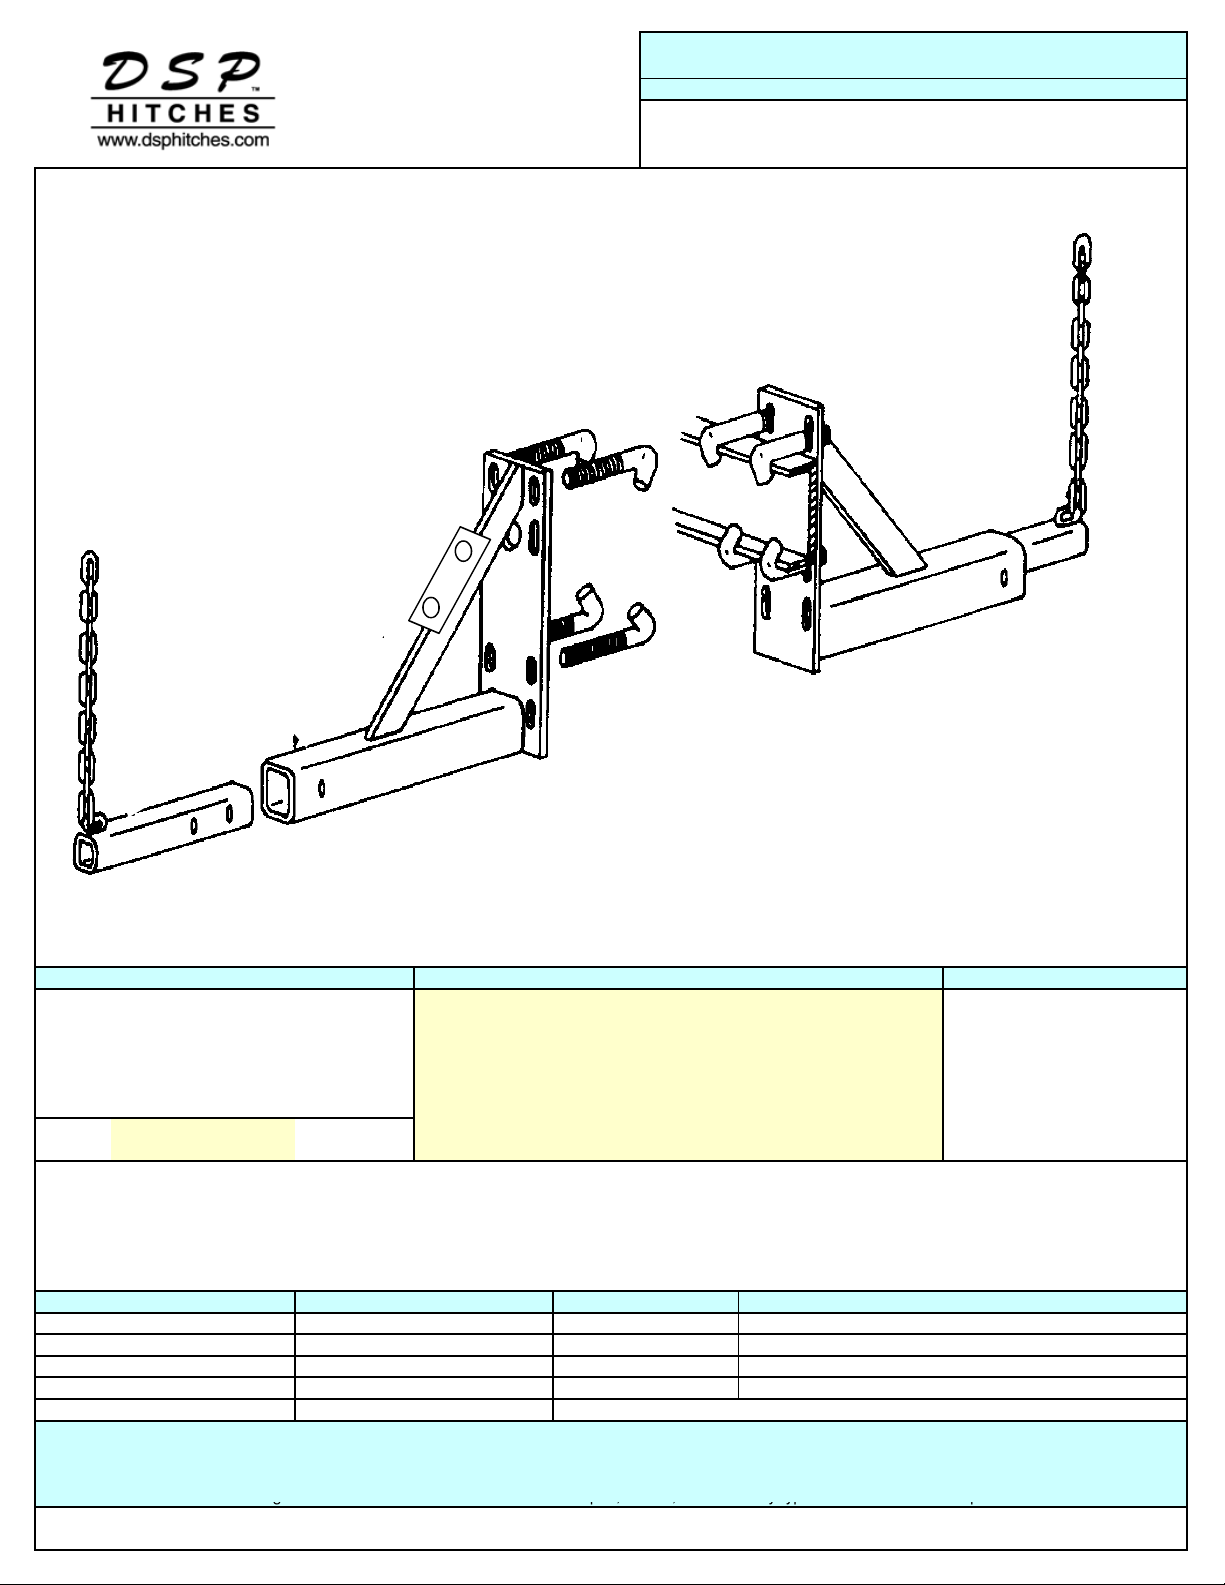
Line up the mainbody and insert the J-Bolts through holes and mainbody. Loosely fasten with 1/2" lockwasher and 1/2" nut. J-Bolt
for Hole 4 is located in the gap of the gas tank. Tighten all fasteners according to chart below.
Hole 5) Disengage e-break during installation, disconnect break line, mount the supplied 3 hole support bracket to the original factory brake
line bracket using 1/2"x2" hex bolt, 1/2" lockwasher and 1/2" nut. Reattach the break line through the low holes in the newly installed support
Passenger Side: This side does not have the gas tank and will be easier to install. There may be some electrical wires that may need to be
moved for installation and resecured when done. NOTE: Start with hole 2 to hold the mainbody in place.
Hole 2) Locate the oval hole between the bed mount brackets, using bolt leader, fish wire 1/2" conical washer and 1/2"x2" hex bolt into hole 2.
(Bolt leader may not be required on all models)
Holes 1, 3 & 4) Attach a J-Bolt onto the frame, fasten with 1/2" lockwasher and 1/2" nut.
Reinstall and relocate any electric wires if necessary. Fasten all fasteners on both sides to the torque specifications below.
WARNING: When tightening J-Bolt a torque wrench must be use, damage to the J-Bolt due to over tightening with power tools will
void the warranty of the J-Bolts!
Bolt Size Grade 5 Torque Metric Grade 8.8 Torque
Hole 1) Line up tiedown, insert J-Bolt into mainbody and loosely fasten with 1/2" lockwasher and 1/2" nut.
Drivers side: remove bolt that hold the gas tank cover to the frame. DO NOT remove cover, let hang!
Hole 1) Locate the gap in the in the frame, insert and slide J-Bolt below oval hole #2. Leave J-Bolt hanging for later use.
Hole 2) Using the bolt leader, fish wire conical washer and 1/2"x2" hex bolt through the top of the frame. Do not remove bolt leader from bolt.
Lift the main body into place and line up with the bolt in hole 2. Carefully remove the bolt leader and place 1/2" conical washer and 1/2" nut
onto bolt, loosely fasten.
DSP Hitches are manufactured by 2114391 Alberta Ltd., Edmonton, Alberta, Canada
For more information on DSP and DSP products call 1-800-265-3377 or visit us at www.dsphitches.com