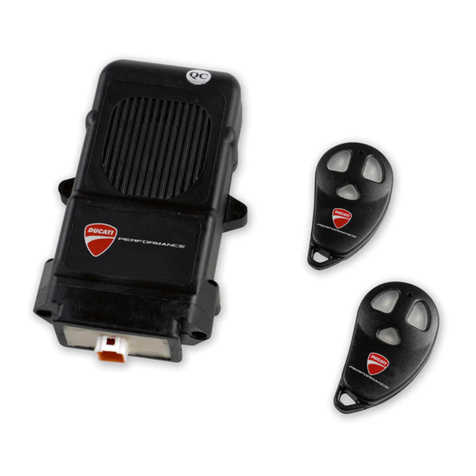
DUCATI Performance 96680534A User manual

Symbols
To allow quick and easy consultation, this manual uses graphic
symbols to highlight situations in which maximum care is required,
meaning of the symbols since they serve to avoid repeating tech-
nical concepts or safety warnings throughout the text. The sym-
bols should therefore be seen as real reminders. Please refer to
this page whenever in doubt as to their meaning.
Warning
Failure to follow these instructions might give raise to a dangerous
situation and provoke severe personal injuries or even death.
Caution
Failure to follow these instructions might cause damages to the
vehicle and/or its components.
Notes
Useful information on the procedure being described.
References
1) are the accessory to be installed and any assembly compo-
nents supplied with the kit.
A) are the original
travel.
General notes
Warning
Warning
Notes
The following documents are necessary for assembling the Kit:
Workshop Manual of your bike model.
Notes
Warning
highway motor vehicle can expose you to chemicals including en-
gine exhaust, carbon monoxide, phthalates, and lead, which are
or other reproductive harm. To minimize exposure, avoid breath-
ing exhaust, do not idle the engine except as necessary, service
your vehicle in a well-ventilated area and wear gloves or wash your
hands frequently when servicing your vehicle. For more informa-
tion go to www.P65Warnings.ca.gov/passenger-vehicle.
Simbologia
simboli, in quanto la loro funzione è quella di non dovere ripete-
quindi, dei veri e propri “promemoria”. Consultare questa pagina
ogni volta che sorgeranno dubbi sul loro significato.
-
Indica la possibilità di arrecare danno al veicolo e/o ai suoi compo-
Note
Fornisce utili informazioni sull’operazione in corso.
Riferimenti
1)
rappresentano l’accessorio da installare e gli eventuali componenti
di montaggio forniti a kit.
A) rappresentano i
componenti originali presenti sul motoveicolo.
del motociclo.
-
-
cati.
-
Note
Note
Nel caso fosse necessaria la sostituzione di un componente del kit
consultare la tavola ricambi allegata.
- 96680534A
96680534A
1
ISTR - 770 / 02

Pos.
1
2 Centralina
3 Telecomando Remote control
4 Gommino Grommet
5 OR per fissaggio Fixing O-RING
2
ISTR 770 / 02
2
3
2
5
4
SCRAMBLER
1

Removing the original components
(XDiavel versions)
Removing the rider seat
time.
Smontaggio componenti originali
(versioni XDiavel)
Smontaggio sella conducente
-
temporaneamente verso l’alto.
ISTR 770 / 02
3
A
B
C

Removing the passenger seat
side.
Smontaggio sella passeggero
motoveicolo.
4
ISTR 770 / 02
4
D

Wiring positioning
-
ISTR 770 / 02
5
E2
E1
F
G
H
H1
G1
E

Removing the original components
(Scrambler 1100 versions)
Removing the rider seat
backwards to release it from the front catches.
Smontaggio componenti originali
(versioni Scrambler 1100)
Smontaggio sella conducente
6
ISTR 770 / 02
6
I
J

Wiring positioning
Notes
The length of the wirings shown in the figure is to be considered
purely indicative
-
Note
La lunghezza dei cablaggi rappresentati in figura è da ritenersi pu-
ramente indicativa.
ISTR 770 / 02
7
K2
K1
K

ISTR 770 / 02
8
2E1
2
1
F
H
2
H1
2

Kit installation
(XDiavel versions)
Caution
installation. Adopt any precaution necessary to avoid damages to
on the side featuring the connection and then on the other side.
Montaggio componenti kit
(versioni XDiavel)
operare.
Montaggio centralina
-
la prima dal lato dotato di connessione, poi dall’altro. Collegare il
-
-
ISTR 770 / 02
9

Notes
Passenger seat reassembly
Note
-
Rimontaggio sella passeggero
10
ISTR 770 / 02
10
D
D
MH2
D1
2

Rider seat reassembly
that the rider seat is properly secured by gently pulling it upwards.
Remove key from the lock.
Rimontaggio sella conducente
-
-
moderazione verso l’alto la sella conducente. Sfilare la chiave dalla
serratura.
ISTR 770 / 02
11
B
B
C
B1

ISTR 770 / 02
12
2
5 L1
2
5
2
L
K1
4
1

Kit installation
(Scrambler 1100 versions)
Caution
installation. Adopt any precaution necessary to avoid damages to
on the side featuring the connection and then on the other side.
Notes
end until locking latch snaps. Make sure the seat is safely secured
to the frame and remove the key from the lock.
Montaggio componenti kit
(versioni Scrambler 1100)
operare.
Montaggio centralina
prima dal lato dotato di connessione, poi dall’altro. Applicare i n. 2
Rimontaggio sella
Note
-
la sella sia saldamente fissata al telaio e rimuovere la chiave dalla
serratura.
ISTR 770 / 02
13

ISTR 770 / 02
14
X1 X2
X5 X6
X3 X4
L1 L3
L8
L2
L5 L4
L7
L6
L9

Connect the diagnostic tool to the data acquisition socket. Select
above.
-
-
-
la conferma della operazione, tramite messaggio “Operation con-
-
ISTR 770 / 02
15

Remote controls
Caution
remote controls. To replace any lost remote control or to add
Checks
system; make sure it turned on. Should it not be on, check all
wiring connections made and make sure they are properly realized.
Caution
system switches to Stand-by mode. This occurs both when alarm
Telecomandi
-
mandi. La sostituzione di telecomandi persi o l’implementazione
fino ad un massimo di 8 è possibile richiedendo il kit telecomando
-
Verifiche
e assicurarsi che l’impianto entri in funzione. Nel caso non entri in
-
Parcheggiando la moto, dopo che saranno trascorse 36 ore circa il
sia dalla condizione di allarme disinserito sia dalla condizione di
16
ISTR 770 / 02
16
3
3B
N1
N
N
N1
N1
N1
3A

Condition with DISABLED alarm system
longer possible to enable the alarm since the receiver is disabled
or switching on.
To restore all functions and enable the alarm turn dashboard on
possible to use the alarm system as usual for other 36 hours.
Condition with ENABLED alarm system
alarm circuit remains completely operative all the same. In case of
To disable the alarm turn on the dashboard and use remote control
within 8 seconds.
for other 36 hours.
remote control you will only have to go near the motorcycle. If
the motorcycle is not used for more than 36 hours turn the key
to switch on the dashboard and use the remote control within 8
Arming the alarm system:
confirmed by:
- three blinks of the parking lights;
- warning buzzer activation.
Disarming the alarm system
confirmed by:
- a single long flash of the parking lights;
- warning buzzer deactivation;
Warning
Armed state
Once the arming phase is completed the central unit is ready to
figure.
inserito
trascorso il periodo di 36 ore il sistema entra in modalità Stand-by.
-
-
me occorre accendere e spegnere il quadro, non verranno emessi
bip o suoni di sistema e sarà possibile utilizzare normalmente il
sistema di allarme per altre 36 ore.
-
-
que operativo e funzionante al 100% il circuito di allarme. In caso
semplicemente accendere il quadro ed azionare il telecomando
toneranno operative per altre 36 ore.
-
-
quadro ed entro 8 secondi azionare il telecomando.
Inserimento del sistema d'allarme
-
mato da:
- tre lampeggi delle luci di posizione;
Disinserimento del sistema d'allarme
-
fermato da:
- un lampeggio lungo delle luci di posizione;
beep).
Terminata la fase di inserimento la centrale è pronta a segnalare
-
ISTR 770 / 02
17

Siren alarm disabling
siren was disabled. In this case the control unit shall indicate any
lights.
Warning
is enabled.
Alarm
the position of alarm triggering), key-on, the system triggers a
seconds. To interrupt the signalling without disarming the alarm,
Siren disabling for consecutive alarms
If, when alarm is armed, the alarm sensors detect an alarm cause
will disable the siren and signal the alarm only by the flashing
parking lights.
Esclusione sirena
che il suono della sirena è stato escluso. In questo caso la centra-
posizione.
-
sirena viene ripristinato.
Allarme
i due gradi dalla posizione di inserimento dell’allarme), accensio-
-
della durata di 30 secondi. Per interrompere la segnalazione senza
-
terrompere la segnalazione e disinserire il sistema premere il tasto
luci di posizione.
18
ISTR 770 / 02
18
3
3B
3A
1 2
3 4

Warning
Panic alarm
Tilt sensor
The sensor memorises the motorcycle position when the alarm
was triggered. A movement greater than two degrees on one of
sensor cannot be calibrated.
Alarm memory
If the control unit identifies one or more alarm causes, they are
of the parking lights and a number of beep sounds equal to the
guarantee its operation even when the power supply cable
Remote controls
expected not to be used for some time, in order to avoid damaging
shall not be subjected to shocks nor submerged into any fluid.
A progressive decrease in signal range indicates that the remote
you could incur in the case where alarm is armed and your remote
shown, prising in the slot using a screwdriver. Change the flat
Warning
-
sirena viene ripristinato.
Allarme panico
-
-
gue un ciclo di allarme della durata di 4 secondi. Per interrompere
Il sensore memorizza la posizione della moto al momento dell’in-
serimento dell’allarme. Uno scostamento maggiore di due gradi su
-
bile tarare questo sensore.
Memoria di allarme
segnalate al disinserimento tramite un ulteriore lampeggio degli
-
scono il funzionamento anche nel caso si interrompa il cavo che
Telecomandi
I telecomandi, per il proprio funzionamento, utilizzano delle bat-
terie alcaline facilmente reperibili sul mercato. Se un telecomando
-
terna andrà rimossa per prevenire danni causati dalla fuoriuscita di
-
alcun tipo di liquido. Una progressiva diminuzione del segnale della
in figura, facendo leva con un giravite nella fessura. Sostituire la
polarità.
-
teria e smaltirla secondo le normative vigenti. Non disperdere la
ISTR 770 / 02
19

Storing new remote controls
Caution
Please call the telephone number below in case of problems with
the implementation of the following procedure:
This procedure allows you to match new remote controls or remote
1.
paragraph).
2.
3.
4. The led on the panel turns on steady for 10 seconds to confirm
the procedure has begun.
5.
activate the remote alarm. An acoustic signal and led switch-
Using the secret override code
Caution
Please call the telephone number below in case of problems with
the implementation of the following procedure:
It shall be used to disarm the alarm system when the remote
controls are not working or are lost, and the control unit is still
armed.
shall be entered via the instrument panel, with control unit and
alarm armed, following this procedure:
1.
2.
3.
code).
third digit.
Changing the secret override code
Caution
Please call the telephone number below in case of problems with
the implementation of the following procedure:
In caso di problematiche nella realizzazione della seguente proce-
1.
-
sivo).
2. Al termine le luci di posizione del veicolo lampeggeranno ve-
locemente.
3.
4. Il led su plancia si accende fisso per 10 secondi confermando
che la procedura è avviata.
5. -
o eccitare il teleallarme. Un segnale acustico e lo spegnimento
del led di allarme segnalano che la memorizzazione è termi-
nata.
Uso del codice segreto di sblocco
In caso di problematiche nella realizzazione della seguente proce-
Va usato per disinserire il sistema quando i telecomandi non fun-
-
serita.
questa procedura:
1.
2.
-
3.
si disinserisce.
Cambio del codice segreto di sblocco
In caso di problematiche nella realizzazione della seguente proce-
ISTR 770 / 02
20
Other DUCATI Performance Security System manuals
Popular Security System manuals by other brands

Aritech
Aritech ADVISOR CD 7203 installation manual

Juniper
Juniper 3800 Hardware guide

Nice
Nice HSCU1 Instructions and warnings for installation and use

X4-Life
X4-Life 701387 instruction manual

ZyXEL Communications
ZyXEL Communications ZYWALL 2 WG Support notes

Brahler
Brahler DIGIMIC CamControl2 Bundle quick guide