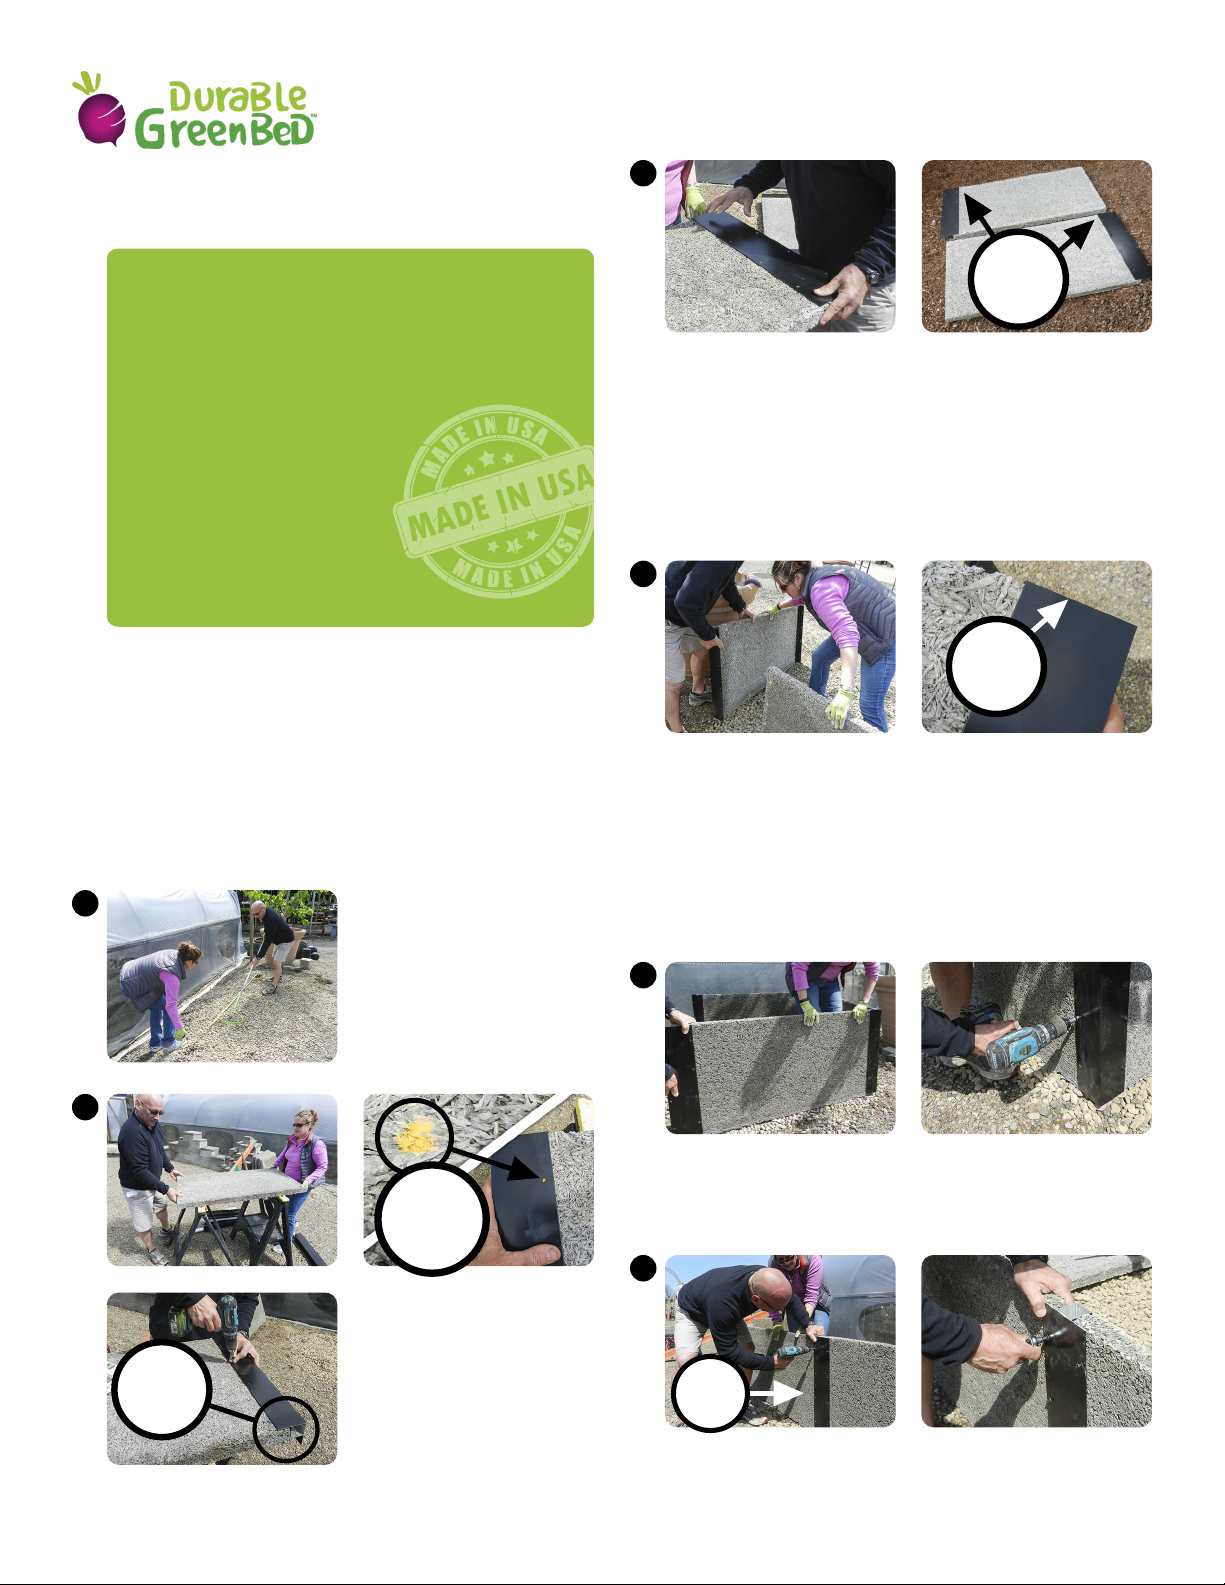
(6a) Next, take one of the remaining panels (smooth side out)
with no brackets and install it to the joiner bracket out in the
garden using the 1½” screws to lengthen the side wall of the bed.
Joiner
bracket
6
(5) Now, install the other panel with the joiner bracket into the
other corner of the end panel. Again, make sure the joint is square
and the panels are level before attaching it with the 1½” screws.
After this step you have an end panel and two side panels.
Bracket
top of
panel
5
(4a) Now you are ready to start assembling the panels in your
garden! Position one of the end panels with the corner brackets in
the garden. (4b) Take one of the panels with the joiner bracket
(make sure you have the top of the panel UP) and mate the bare
end of the panel into the corner bracket. NOTE: You may have
to dig out dirt from under the panel at one end or even shim
up the panel for the joint to be square and straight at the corner
bracket and the panel to be level. (4c) Once the panel is level and
it is seated into the corner joint, attach it with the 1½” screws.
4
Bracket
top of
panel
(3a) Now you are going to outt two new panels, each with one
joiner bracket. Place a new 4’ x 2’ Durable GreenBed™ panel on
your work table, smooth side up. (3b) Line up at, joiner bracket
with marked dimples. NOTE: Make sure the small slot in the
joiner bracket is at the top of the panel and the bracket is flush
with the top side. (3c) Attach with 1½” screws. (3d) Next, create
a second side panel using same steps above, however, this panel
will have the joiner bracket installed on the opposite edge
compared to the rst panel you assembled (see photo above).
Bracket
top of
panel
3
corner bracket on the other side of this panel. en outt another
panel with two corner brackets. You now have two completed end
panels each with two corner brackets.
(2a) Line up the holes of the
corner bracket with the colored
dimple. After aligning the
bracket to the colored dimple,
the bracket should be ush with
the top surface of the panel. If
not, simply turn the bracket end
for end and the alignment will be
correct. Use the 1½” screws to
attach the bracket. Carefully hand tighten. (2b) Now install a
Colored
dimple
top of
panel
Bracket
top of
panel
2
(1) Level the garden site! A
level site will make the installa-
tion go much smoother. Remove
rocks, roots and debris that may
prevent the panels from sitting
straight and level.
1
WHILE ASSEMBLING PLEASE USE CAUTION:
GreenBed™ panels are strong, but THEY CAN FRACTURE if
handled roughly. DO NOT stand on panels. Also, when using the
rubber washer screws, DO NOT over tighten them. Use a low
torque setting on your cordless drill and FINISH TIGHTENING all
screws with a ¼” socket wrench to avoid stripping out the
GreenBed™ material. IMPORTANT NOTE: e colored dimple
on each panel indicates that this is the TOP of the installed
panel. Also, the properly installed bracket is FLUSH with the
top of the GreenBed™ panel.
PARTS:
” x 24” (colored dimple
FASTENERS:
1
1
TOOLS NEEDED:
.
CONGRATULATIONS on purchasing the nest raised bed garden
kit on the market. Your completed GreenBed™ will provide many
years of service, far in excess of wood.


