Inbetriebnahme und Bedienung
Drehen Sie den Schalter auf ON, um das Gerät einzuschalten. Drehen Sie den Schalter auf OFF, um
das Gerät auszuschalten.
Drehschalter und Anzeigen
• Sobald Sie den Schalter auf ON drehen, leuchtet die Betriebsanzeige, das Gerät überprüft kurz die
Umgebungstemperatur und beginnt die Luft zu entfeuchten.
• Wenn Sie den Schalter wieder auf OFF stellen, erlischt die Betriebsanzeige und das Gerät geht aus.
• Sobald der Wassertank voll ist, stoppt der Kompressor und das Warnlicht für den Wassertank
leuchtet rot.
Wichtige Hinweise zur Benutzung
• Benutzen Sie das Gerät nur in Räumen, in denen die Raumtemperatur zwischen 5-32°C liegt.
• Sollte der Wassertank voll sein, entleeren Sie ihn umgehend, damit die Maschine durchgängig
weiterarbeiten kann. Sollte das Gerät während des Betriebs anhalten, warten Sie 3 Minuten lang,
bevor Sie es wieder einschalten, damit Sie den Kompressor nicht beschädigen.
• Um die Anzeige der Temperatureinheit zu ändern (Celsius und Fahrenheit), drücken Sie gleichzeitig
auf die Luftbefeuchtungs-Taste und die Timer-Taste.
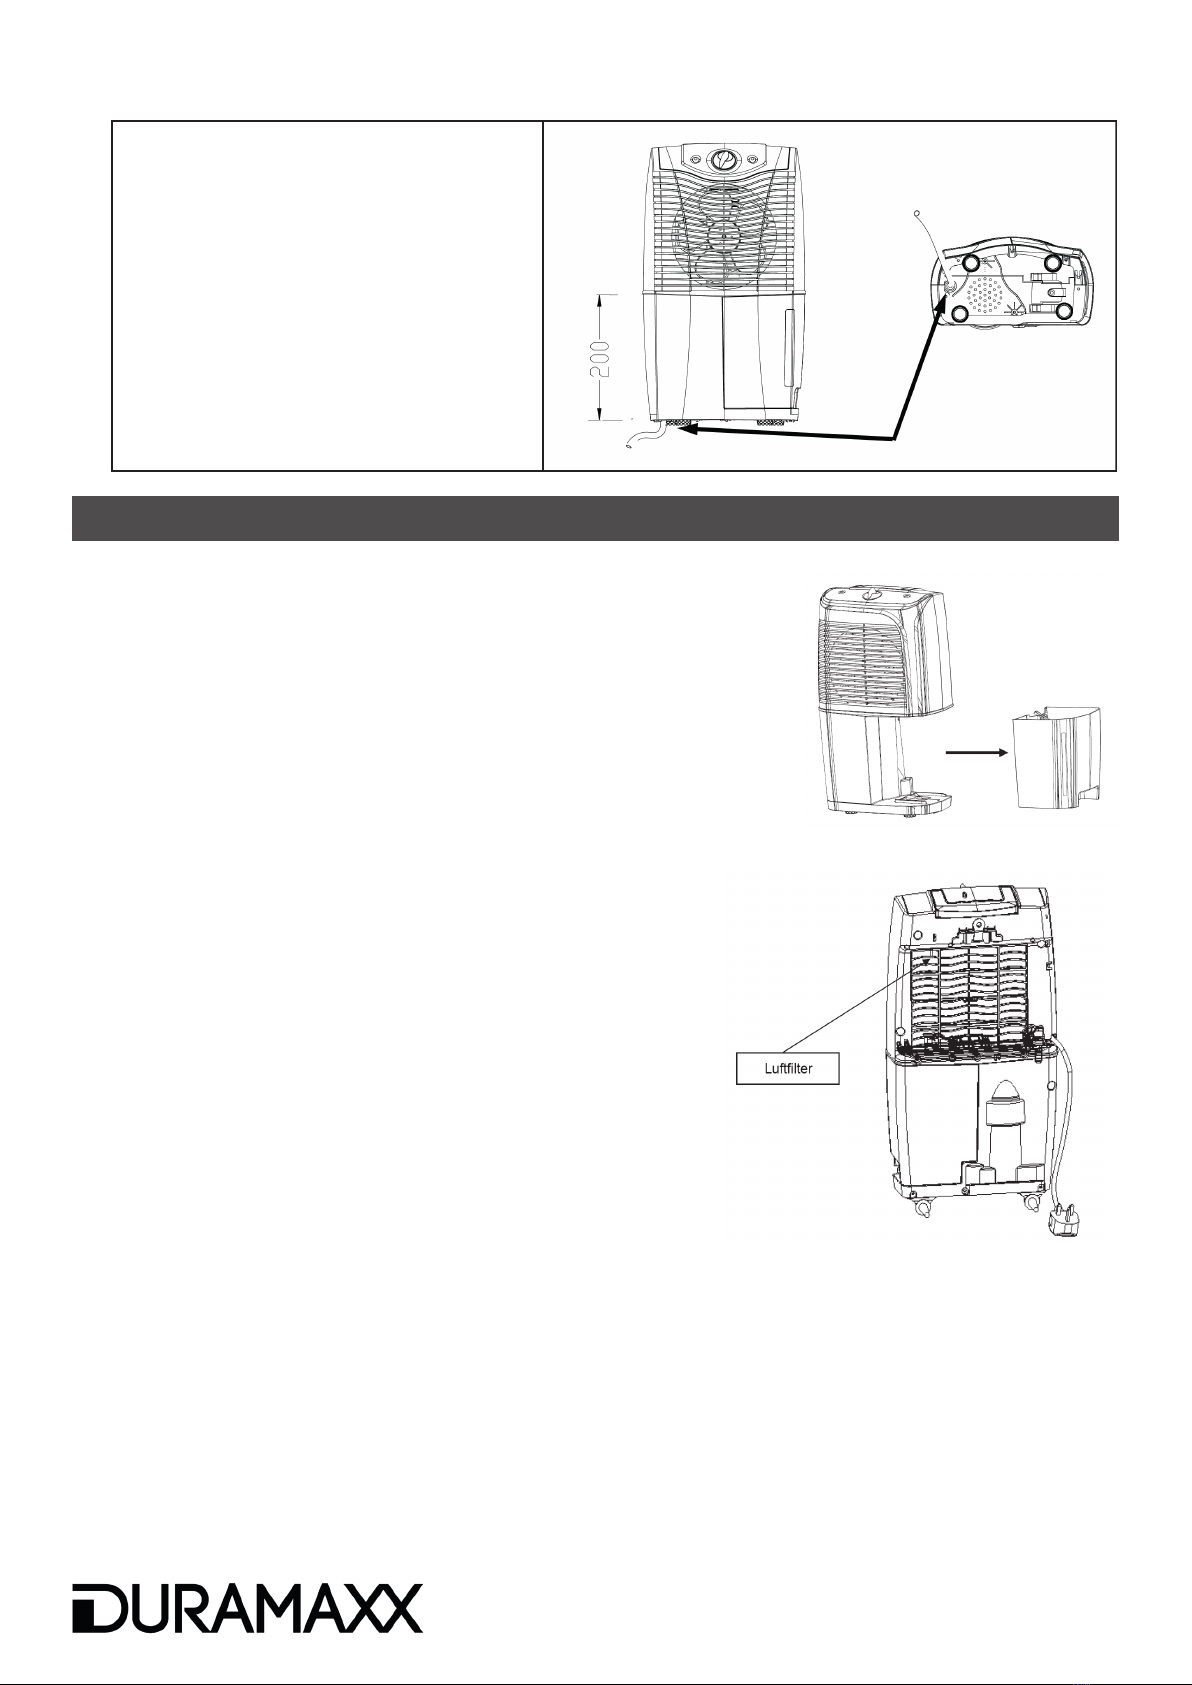
Wassertank und permanenter Wasserablauf
Wassertank entleeren
Sobald der Wassertank voll ist stoppt der Kompressor und die Warnleuchte für den Wassertank geht
an. Entnehmen Sie den Wassertank und entleeren Sie das Wasser. Schieben Sie den Wassertank
wieder in das Gerät und starten sie es.
Permanenten Wasserablauf einrichten
1. Entfernen Sie den Gummistopfen
aus dem permanenten Wasserablauf
an der Unterseite des Geräts.
2. Entfernen Sie den Wassertank und
drücken Sie den Stopfen in den Aus-
lass im Gerät.
3. Schieben Sie die Feder in den 9mm
(innerer Durchmesser) Ablauf-
schlauch und bringen Sie den Clip
am Schlauch an.
4. Befestigen Sie den Ablaufschlauch
am permanenten Wasserablauf,
indem Sie den Clip öff nen, den
Schlauch über die Öff nung ziehen
und den Clip wieder loslassen, um
den Schlauch zu fi xieren.
(1) Stopfen
hier entfernen
(2) Stopfen
hier einsetzen
5