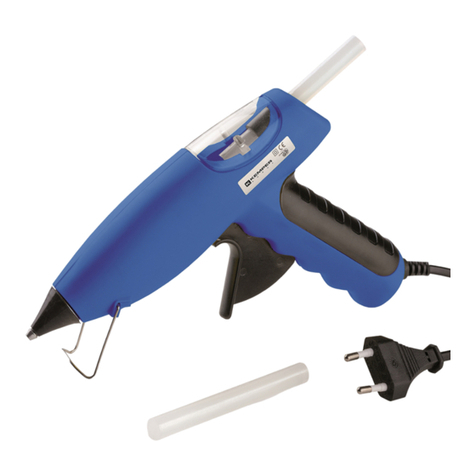
Duratool 22-13775 User manual

Model –22-13775
40W Cordless Glue Gun
User and Safety Instructions

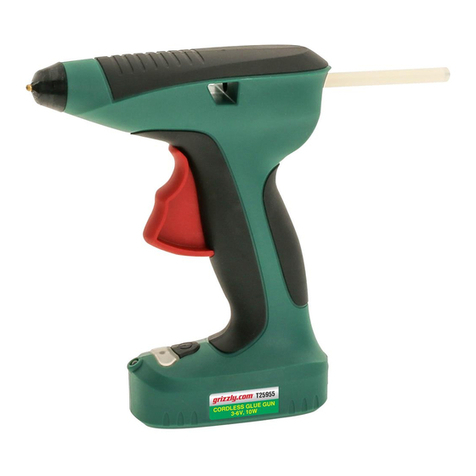
Device overview
Safety tips
Basic safety tips
Follow all warnings in these operating instructions.
This appliance is not intended for use by persons (including children) with
reduced physical, sensory or mental capabilities, or lack of experience
and knowledge, unless they have been given supervision or instruction
concerning use of the appliance by a person responsible for their safety.
Children should be supervised by an able adult when using the appliance.
Keep children away from packaging material. There is suffocation danger by
packaging and bags.
Do not use the device if it has visible damages.
Do not alter, refurbish, or make other working changes in the device.
Considerable damages can occur by improper care or attempted repair. If unit is
not working properly, discontinue use of product or return to vendor within 90 days
of purchase. This 90 returns warranty is not applicable to abuse, misuse, or
alteration of the product.
WARNING- This tool must be placed on its stand when not in use.
Electric shock danger
Do not use this device if parts of the case are absent or the case is damaged.
Do not use this device around water or become wet.
Connect the device only to an properly installed outlet (230 V ~ 50 Hz) with ground
fault protection switch (FI) with max. 30 mA conventional tripping current.
Use only extension cords suitable for power tools and that fall within local
regulations.
If the supply cord is damaged, it must be replaced by the manufacturer,
its service agent or similarly qualified persons in order to avoid a hazard.
Never touch the power plug with wet hands.
1. Nozzle
2. Heating duct
3. Feed opening for glue sticks
4. Handle
5. Power light
6. Power cradle
6a. Connection socket
6b. Ejection button
6c. Drainer
7. Glue gun power connection
8. Feed trigger
9. Supporting stand
10. Stand connection holes
12. Power cable

Always grip and pull the power plug, not the power cable, when removing the
power plug from the outlet.
Do not carry or hang up the device by the power cable. The cable could be
damaged or tore, and the device could fall and become damaged.
Safety tips specific for device
The persons who are not able to use the device, because of their spiritual or
physical abilities or their lack of experience, may use the device only under
supervision of adults or must be made familiar with the device before that.
Make sure that children do not play with the device and are fully supervisied by an
able adult while using the unit.
Switch off the device after ending of the application, and pull the power plug from
the outlet.
Rest the device on the supporting stand (9), until the device has cooled down
completely.
Do not cover the device in the switched on state. The case of the device heats up
in the switched on state. Overheating of the device can lead to fire.
Put down the device on the supporting hanger if it is not in use.
Combustion danger! The hotmelt adhesive and the nozzle reach up to
200 °C (392°F). Avoid skin contact with the device and the hotmelt
adhesive.
Use protective glasses to avoid eye injuries.
Use gloves to avoid skin contact and burns.
Intended Use
Glue sticks are heated up and liquefied in the hot glue gun. The glue makes a strong
bond as it cools. The following materials can be connected well together with the hot
glue:Wood, plastic, foamed plastic, textiles, cardboard, tiles, ceramics, etc.
The paste can be also used for closing holes, sealing joints, and keeping parts or wiring
in place.
This deviced was designed with an effecient and insulated heated system so that it can
be temporarily used without the power cord attached. The thermal energy captured in
the device continues to melt the glue for up to 10 minutes.

Preparations
Mount the supporting stand (9)
Put one end of the supporting stand (9) in one of the fixture hole (10). Carefully pull
apart the supporting stand (9) to place the other end in the opposing fixture hole (10).
Mount the nozzle
Screw the desired nozzle (1) up to the block in the thread in front in the device. Be
careful not to cross thread or excessively overtighten the nozzle. Only change the
nozzle when device is completely cool.
Load a hot melt glue stick
Use a desired hot melt glue stick and load it at the end of the device in the feed opening
for adhesive sticks (3). Slide the hotmelt glue stick forward intol the heating duct (2).
Connect device
You can use the device with as well as without power cable. Use the
power cradle (6) for heating of the device for the work without
power cable. Use the power cable (12) directly connected to the glue
gun for constant heating.
Connect power cables
1. Rest the device with supporting stand (9).
2. Insert the small plug of the power cable (12) in the connection socket of the power
cradle (6a) or the hot glue gun (7).
3. Insert the power plug of the power cable (12) into an electrical outlet. The device
will begin heating immediately, and the red power indicator (5) will light up.
Switch device off
•Carefully and slowly pull the power plug from the outlet.
•As soon as the device is switched off, the indicate light (5) goes out.
Prepare work area
Do not use flammable substances or cleaning agents and solvents in
or around the work area.
The work pieces to be adhered and the surroundings temperature
should be in the temperature range from 5 °C to 50 °C.
Clean all areas that will be adhered with the glue. After cleaning, allow these parts to
dry and make sure they are free of any debris.
Gluing techniques
For best results, the following two gluing techniques are recommended:
–Use zigzag-shaped gluing lines on flexible materials like textiles.
–Use individual drops on all other materials, enough to cover a majority of the work
pieces when they spread when the two materials are compressed.
Press both work pieces immediately for about 30 seconds firmly after applying glue.
For best results, use a clamp or weight on adhesred areas for an additional 5 minutes.

Using the hot glue gun
CAUTION! Do not leave the device unsupervise while it is hot.
Using with the power cable
For lengthier work in a stationary area, use the power cable for best results.
1. Rest the glue gun one the support stand (9).
2. Connect the glue gun directly to the power cable. Allow to heat for 4 minutes.
3. Press the feed trigger (8) one the handle (4) to start the flow of the hot glue.
4. When you are finished adhering the work pieces, rest the glue gun on the support
stand. Watch for excess glue that may drip from the nozzle (cover work surface with
a nonflammable, disposable material for protection).
Using the unit cordlessly
For work that requires more movement and less gluing frequency, you can use this unit
without the power cable attached.
1. Use the device in the loading station (6). Pay attention to the fact that the nozzle
stands exactly about the drainer (6c).
2. Connect the loading station (6) and heat it maximum 4 minutes.
3. Disconnect the device with the eject button (6b) from the loading station and take
the device.
4. As soon as the adhesive glue is no more liquid enough, start the device in the loading
station (6) and heat once more.
Change nozzle
CAUTION! The adhesive glue and the nozzle reach up to 200 °C. Keep
glue and gun tip away from flammable materials. Do not allow glue
and gun tip to touch exposed skin.
Note: Changing nozzle when the glue gun has completely cooled will cause
some parts of the glue gun damaged because of the left glue in the nozzle and
heating part. It’s better to change the nozzle when the glue gun is still warm,
but not dangerously hot. Take precaution when changing.
Disconnect the plug from the power source and allow the tool to partially cool before
attempting to change the nozzle. Such preventative safety measures reduce the risk of
accident burns.
Anti Drip feature
The anti-drip feature is activated by releasing the trigger which will cut off the flow of
glue into the channel. A small amount of glue will remain in the tip when the trigger is
released and this will need to drain from the tip. Be cautious not to allow any potential
drip to come in contact with sensitive surfaces or skin.
Technical data
Model: 22-13775
Voltage: 120V ~ 60Hz
Rated Power input: 40W
Protection class:
Trouble Shooting
Problem
Possible cause –solution
Device can not be switched on.
Unit is not plugged in.
Plug the power cable in a properly
functioning outlet.
Power cable is defective.
Contact distributor for replacement power
cable.
Device is overheated.
Allow device to cool for a few minutes and
power it back on.
Nozzle is crooked in the thread.
Nozzle has canted or is cross threaded.
Remove nozzle and carefully screw nozzle
so that the threads are properly situated.
Hotmelt adhesive is not thoroughly
melted.
Device has not full heated.
Heat the device longer.
If heating element has failed, the unit can
be replaced within the warranty period at
discreation of the distributor.
Warranty
This unit is protected by a 90 day warranty that covers the unit from manufacturer’s
defects. If this unit should not properly function due to manufacturer’s defects, please
return it within 90 days to the distributor which it was purchased from. This warranty
covers wear and tear and is fulfilled at the distributor’s discretion. Units that have been
damaged, exposed to water, used with improper substances, repaired, or otherwise
abused by the user, will not be covered by the 90 day warranty. Discontinue use of
damaged or improperly functioning units immediately.
Do not dispose of electrical appliances as unsorted municipal waste, use
separate collection facilities.
Contact you local government for information regarding the collection
systems available.
If electrical appliances are disposed of in landfills or dumps, hazardous
substances can leak into the groundwater and get into the food chain, damaging your
health and well-being.
Table of contents
Popular Glue Gun manuals by other brands

Master Appliance
Master Appliance PORTAPRO GG-100 instruction manual

Goobay
Goobay 59176 user manual

Wiha
Wiha DHT0003 instruction manual

Cleopatre
Cleopatre POPC4RGP Care and use instructions

Bostik
Bostik Thermogrip TG-4 quick start guide

FASANO TOOLS
FASANO TOOLS FG 494/A180 Safety instructions and instruction manual