DuraVent DuraChimney II User manual

DuraChimney ii
C o m p l e t e V e n t i n g S o l u t i o n s f o r t h e H e a r t h I n d u s t r y
Installation Instructions
Air-Cooled,All-Fuel Chimney
for Fireplaces
NorthlineExpress.com
http://www.northlineexpress.com
Toll-Free 1-866-667-8454

A MAJOR CAUSE OF VENT RELATED FIRES IS FAILURE
TO MAINTAIN REQUIRED CLEARANCES (AIR SPACES) TO
COMBUSTIBLE MATERIALS. IT IS OF THE UTMOST IMPORTANCE
THAT DuraChimney II BE INSTALLED ONLY INACCORDANCE
WITH THESE INSTRUCTIONS.
MH7399
Read through all of these instructions
before beginning your installation. Failure
to install as described in this instruction
will void the manufacturer’s warranty, and
may have an effect on your homeowner’s
insurance and UL listing status. Keep these
instructions for future reference.
DuraChimney is designed to stay cool on the
outside, to provide a hot draft on the inside,
and to provide for a re-safe design that
protects both the chimney and the building.
The double-wall air-cooled design allows the
chimney to expand under high temperatures.
Applications
DuraChimney II is listed to UL103 and
ULC S604 standards for use on masonry
replaces which burn wood, oil, coal, or gas.
Some factory-built replaces may be listed
with DuraChimney II. Check to the replace
manufacturer’s instructions for their listing and
conditions of use.
Materials and Construction
.016” 430 stainless steel inner wall and .021”
galvanized steel outer wall. 2” clearance to
combustibles.
Listings
ULListed to UL 103 and ULC S604 standards.
Dear Customer, Installer, or End User:
I welcome any comments regarding matters
pertaining to our Simpson Dura-Vent products.
I welcome any ideas, input or complaints and
I’ll make sure that someone responds directly
back to you.
Send your emails to:
If you are searching for tech support or product
information, please phone us at 800-835-4429.
Or email us at:
Sincerely,
Steve Eberhard, President and CEO
Simpson Dura-Vent Co., Inc.
NorthlineExpress.com
http://www.northlineexpress.com
Toll-Free 1-866-667-8454

3
CONTENTS
Clearances | Permits |Applications | Equipment | Installation Notes . . . . 4
ChimneyDiameter|ChimneyHeight|Requirements|Recommendations . . 5
Masonry Fireplace Installation | Frame Opening Chart. . . . . . . . . . . . . . . . 6
Chimney Sizing Chart . . . . . . . . . . . . . . . . . . . . . . . . . . . . . . . . . . . . . . . . . . 11
Elbow Offset Installation . . . . . . . . . . . . . . . . . . . . . . . . . . . . . . . . . . . . . . . 13
Elbow Offset Chart. . . . . . . . . . . . . . . . . . . . . . . . . . . . . . . . . . . . . . . . . . . . .14
Chimney Maintenance. . . . . . . . . . . . . . . . . . . . . . . . . . . . . . . . . . . . . . . . . . 15
Warranty . . . . . . . . . . . . . . . . . . . . . . . . . . . . . . . . . . . . . . . . . . . . . . . . . . . . 16
AIR-COOLED,ALL-FUEL CHIMNEY FOR FIREPLACES
DuraChimney ii
For the most up-to-date installation instructions, see www.duravent.com
NorthlineExpress.com
http://www.northlineexpress.com
Toll-Free 1-866-667-8454

4
CLEARANCES
Always allow at least a 2-inch air-space
clearance between DuraChimney II Pipe
and any combustible materials. Never ll any
required clearance space with insulation or
any other materials. Combustible materials
include, but is not limited to, lumber, plywood,
sheetrock, plaster and lath, furniture, curtains,
electrical wiring, and building insulation.
PERMITS
Contact your local Building Ofcial or Fire
Ofcial regarding permits, restrictions, and
installation inspections in your area.
CHIMNEY APPLICATIONS
DuraChimney II is a complete chimney
system tested and listed to test procedures
UL103 and ULC S604. In the United States,
DuraChimney II can be used with masonry
replaces or appliances fueled by oil, gas,
coal, or wood that have been tested and listed
for use with a UL103 chimney system. In
Canada, DuraChimney II can be used with
listed oil & gas red appliances or wood-
burning replaces requiring a Type A Chimney,
in accordance with ULC S604.
DuraChimney II may also be listed with
some factory-built replaces. Check with the
replace manufacturer if DuraChimney II
can be used on their replaces, and if there
are any limitations of use. Do not use with
forced draft or positive-pressure appliances.
The DuraChimney II system is designed to
extend vertically with a maximum of one (1)
offset (two elbows total) of up to 30° from
vertical. DuraChimney II is listed under ULRe-
examination Service Number MH7399.
EQUIPMENT & MATERIALS
Drill / Driver
Hammer
Caulking Gun
Plumb Bob
Screwdrivers (Phillips & Standard)
Tin Snips
Saber or Keyhole Saw
Level
Dependable Ladder
Tape Measure
Proper Gloves and Shoes
Eye Protection
Materials You May Need:
Non-hardening Waterproof Sealant
8-Penny Nails,
600°F RTV Silicone Sealant
Roong Nails
#8, 2-1/2” & 1-1/2” Wood Screws
INSTALLATION NOTES
Proper planning for your DuraChimney
II installation will result in greater safety,
efciency, and convenience, as well as
saving time and money. You must use only
authorized DuraChimney II parts to maintain
a listed chimney system. Do not mix parts
or try to match with other products or use
improvised solutions. Do not install damaged
or modied parts. Practice good workmanship.
Sloppy work could jeopardize your chimney’s
safety. Keep electrical wiring and building
insulation away from all chimneys. When
deciding the location of your chimney, try to
avoid modications to roof beams and other
structural components of the building. Contact
either your dealer or Simpson Dura-Vent
directly if you have any questions.
NorthlineExpress.com
http://www.northlineexpress.com
Toll-Free 1-866-667-8454

5
CHIMNEY DIAMETER
Follow the replace manufacturer’s manual
to determine required chimney diameter and
clearances between combustible materials
and your replace. Never use a chimney
with an inside diameter smaller than your
ue opening above rebox unless specically
allowed by the replace manufacturer. If you
are connecting to a masonry replace, refer to
Table 2 (pg 11) for proper sizing. To calculate
the chimney’s outside diameter, add 3 inches
to the inside diameter.
CHIMNEY HEIGHT
The National Fire ProtectionAssociation
Standard #211 states: “Chimneys shall extend at
least three feet above the highest point where it
passes through the roof of a building, and at least
two feet higher than any portion of a building
within ten feet.” (Fig. 1). Due to the overlap of
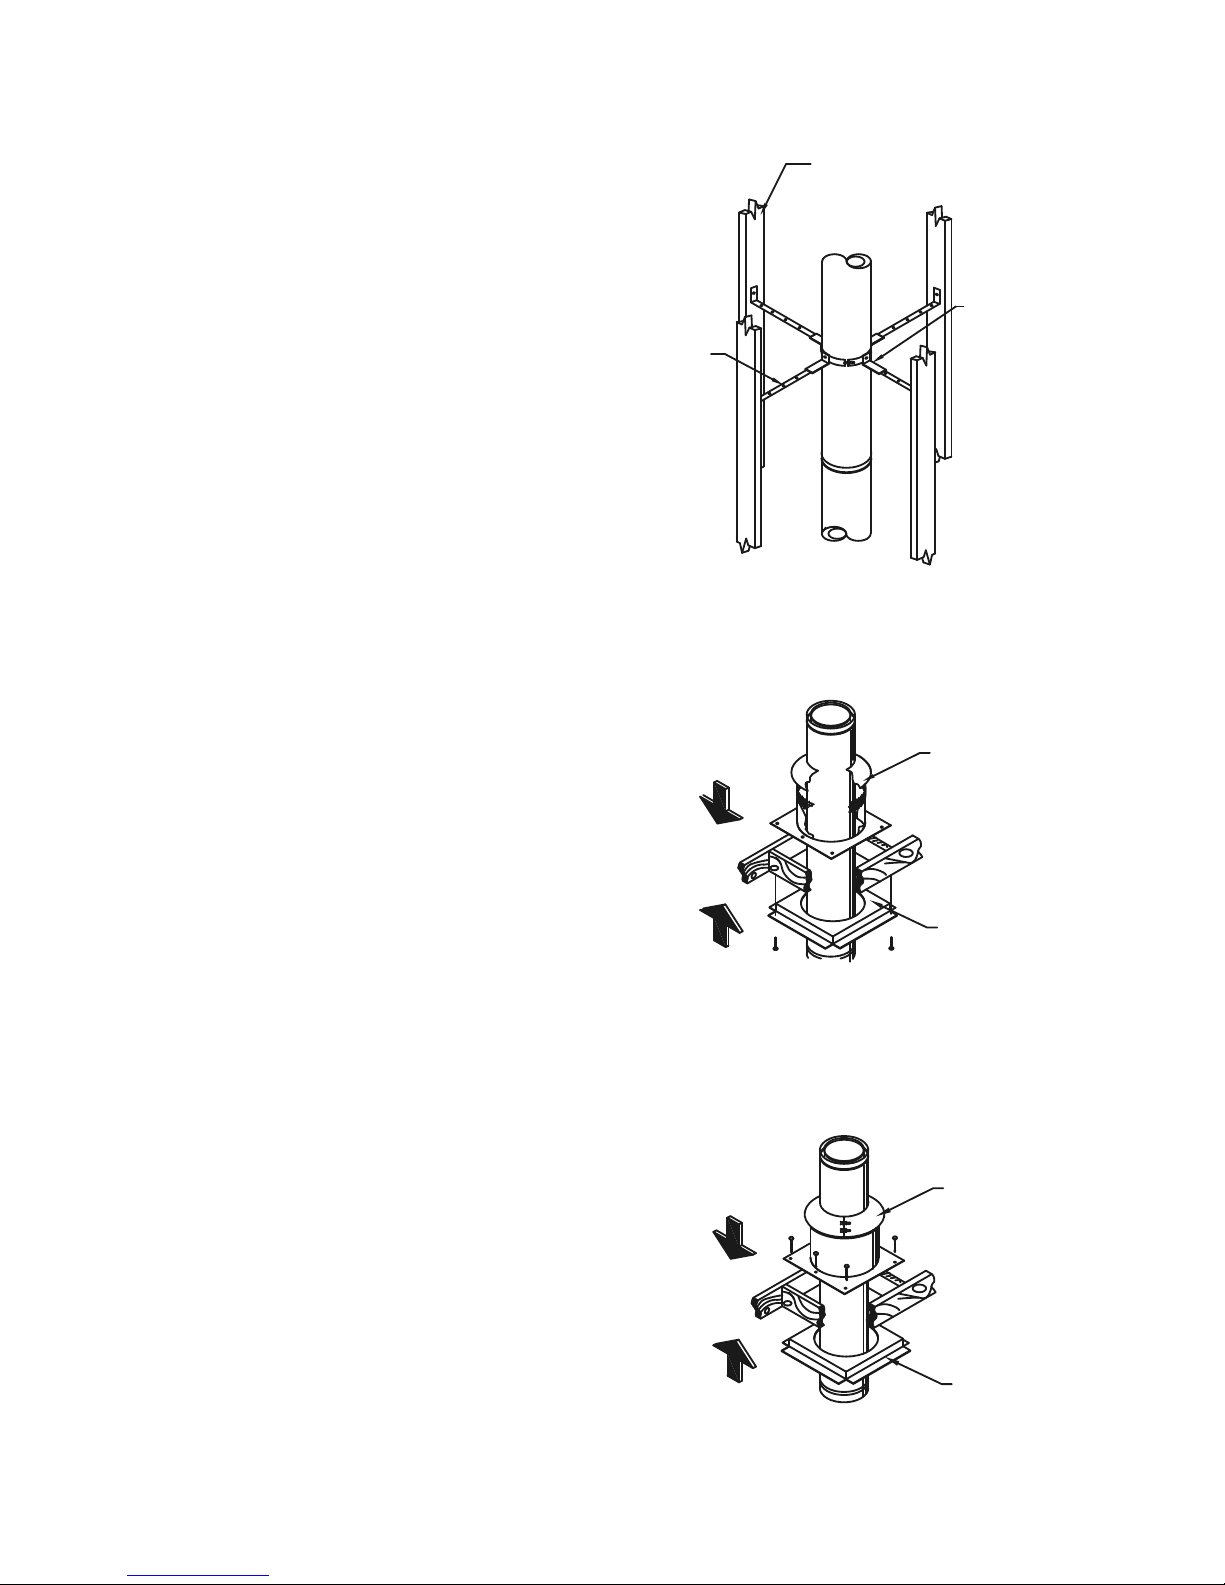
the joints, subtract1 inchfromeach Chimney
Section’s height to calculate installed height.
CHIMNEY ENCLOSURE
REQUIREMENTS
Through Rooms: Interior chimneys shall
be enclosed where they extend through
closets, storage areas, occupied spaces, or
anywhere where the surface of the chimney
could be contacted by persons or combustible
materials (including insulation). The air space
between the outer wall of the chimney and the
enclosure shall be at least 2 inches
Multi-Story: Consult local building code
ofcials for requirements in your area. The
National Fire ProtectionAssociation Standard
#211 states: “Factory-built chimneys that
pass through oors of buildings requiring
the protection of vertical openings shall be
enclosed with approved walls having a re
resistance rating of not less than one hour
when such chimneys are located in a building
less than 4 stories in height, and not less than
2 hours when such chimneys are located in a
building more than 4 stories in height.”
In Canada, except in single-family and two-
family dwellings, chimneys which extend
through another story must have an enclosure
with a re resistance rating equal to or greater
than that of the oor or roof assembly through
which they pass.
Cold Climates: In cold climates, chimneys
mounted on an outside wall should be
enclosed in a chase. Exterior chases reduce
condensation and creosote formation, and
enhance draft.Always maintain a 2” air-space
clearance to combustibles.
FIREPLACE RECOMMENDATIONS
Always follow the replace manufacturer’s
installationinstructions.
Installation: Install your replace as described
by the replace manufacturer. Be sure to
maintain all required clearances.
Flues: Connect only one replace per chimney.
Operation: Follow the replace safety manual
for maximum efciency and safety. Do not over
re. Any damage to the replace or chimney can
possibly voidyourwarranties.
Fuels: Donotburndriftwood, plastic,or
chemicallytreatedwoodsuchasrailroadties.
They are corrosive to your chimney system.
Follow the replace manufacturer’s instructions
regarding fuels.
3 FOOT MINIMUM
ABOVE ROOFLINE
2 FOOT
ABOVE
10 FOOT
HORIZONTAL
ANY POINT
WITHIN
Figure 1
NorthlineExpress.com
http://www.northlineexpress.com
Toll-Free 1-866-667-8454

6
Table 1
Frame Opening Dimension Chart
Diameter Framing Dimension
10" 17" X 17"
12" 19" X 19"
14" 21" X 21"
16" 23" X 23"
MASONRY FIREPLACE
INSTALLATION
1. Place Fireplace: Position the replace
according to the replace manufacturer’s
installation instructions. The ue outlet should
be placed between the rafters or joists above,
if possible.
2. Determine Chimney Size: Follow the
replace manufacturer’s instructions for
chimney size or use Table 2 (pg 11) to
determine the correct diameter chimney for
your replace.
3. MountAnchor Plate: Chimneys for
masonry replaces begin with an Anchor
Plate orAnchor Plate with Damper. Warning:
Anchor Plate with Damper is not allowed in
chimneys serving stoker-red, liquid or gas-
burning appliances. Caution: Do not install
Anchor Plate with Damper on Factory-built
replaces. Important: be sure the surface
of the masonry chimney has a level surface
on which to attach theAnchor Plate or
Anchor Plate. If the top of the masonry does
not have a level surface, then you will need to
modify the masonry accordingly. Center the
Anchor Plate over the masonry ue opening.
If a Damper is used, make sure nothing
interferes with the damper plate movement.
Seal theAnchor Plate in place with a high-
temperature sealant. SecureAnchor Plate
with (4) 2” x 1/4” masonry anchors (Fig. 2).
3a. Damper Plate: The Damper Plate should
swing freely once theAnchor Plate is installed.
When the chain is pulled down, the damper
plate should close (horizontal position). When
the chain is released (no weight on the chain),
the damper should swing open (vertical
position).
3b. Lintel Hook: With the damper plate in
the closed (horizontal) position, determine
and mark the location for the Lintel Hook. The
MASONRY
ANCHORS
HI-TEMP
SEALANT
ANCHOR PLATE
OR ANCHOR PLATE
WITH DAMPER
Figure 2
Figure 3
ANCHOR PLATE
WITH DAMPER
NOTE: DAMPER PLATE
IS CLOSED WHEN
CHAIN IS HOOKED
ON LINTEL HOOK
LINTEL
HOOK
NorthlineExpress.com
http://www.northlineexpress.com
Toll-Free 1-866-667-8454

7
Lintel Hook should be mounted in a position
so as to provide a small amount of tension in
the spring attached to the chain (Fig. 3). The
tension is needed to prevent the damper plate
from rattling when closed. Mount the Lintel
Hook to the masonry with the screws provided.
4.Attach Chimney: Attach the rst Chimney
Section onto theAnchor Plate by using the
sheet metal screws provided.Always maintain
at least a 2-inch clearance to combustibles.
The 2-inch clearance is an air space; do not
ll that clearance space with any materials. If
an offset is required, refer to the Elbow Offset
Installation Section below.
5. Frame Openings: From the ceiling, drop a
plumb bob to the center of the replace’s ue
outlet and mark this center point on the ceiling.
Refer to Table 1 for the framing dimensions.
Mark appropriate cutting lines around the
center point. Cut a square hole in the ceiling.
Frame a level, square opening centered over
the hole that you have cut. Frame openings at
each oor level above the Fireplace (Fig. 4).
These openings are to hold the Firestop and
Attic Insulation Shield. Locate each opening by
dropping a plumb bob to the four corners of the
opening below. Maintain the minimum 2-inch
clearance/air-space.
6. Cut Roof Opening: If penetrating through
the roof, determine and cut an opening in the
roof directly above the opening below. The
cut opening must be at least 4-inches larger
than the chimney’s outside diameter to provide
at least a 2-inch clearance all around the
chimney. The chimney must be centered within
this opening and maintain the minimum 2-inch
clearance to combustibles.
7. Install Firestop:AFirestop is required on
each oor penetration in multistory installations.
Building Codes require a Firestop at every
oor/ceiling level, including where the chimney
Figure 4
FIREPLACE
OR ANCHOR PLATE
FIRESTOP
SQUARE FRAME
CHIMNEY
FIRESTOP
ATTIC INSULATION
CHIMNEY SECTION
CHASE TOP
STORM
TERMINATION
SHIELD & COLLAR
CAP
COLLAR
SQUARE FRAME
FLASHING
(4) ROOF
RADIATION
SHIELDS
ANCHOR PLATE
WITH DAMPER
NorthlineExpress.com
http://www.northlineexpress.com
Toll-Free 1-866-667-8454

8
penetrates into the attic. Figure 4 shows a
typical 2-story installation with an attic. Note:
a Firestop is not installed where the chimney
penetrates through the roof. The Firestop is
installed on the underside of the ceiling/oor
framing (Fig. 5). Use a minimum of either (1)
8 penny nail or (1) 1-1/4” wood screws per
corner.
8.Assemble Chimney Sections: Chimney
sections are connected by lowering the female
end of a Chimney Section onto the male end
of a previous section of chimney. Sheet metal
screws are required to connect Chimney
Section together. For each additional Chimney
Section use (4) Sheet metal screws provided,
to make a secure connection between the
chimney sections (Fig. 6). Do not penetrate
the inner liner of the chimney. Use a Wall Strap
every eight (8) feet of chimney height.
9. Supplementary Support and Stabilizer:
Install a Supplementary Support if total
chimney height is greater than 50-feet, or
if the replace manufacturer requires it. If
additional support is needed, install one or
more Supplementary Supports which can each
support 25-feet of chimney (Fig. 7). Clamp the
Supplementary Support band around the pipe
using the nut and bolt provided, and anchor
the support to nearby building framing.Always
FRAMING
Figure 5
Figure 6
Figure 7
SECURE BRACKET TO FRAME
SUPPORT UP TO
25 FEET OF CHIMNEY
MAINTAIN 2" CLEARANCE
EACH SUPPLEMENTARYINSTALL SUPP. SUPPORT
IF HEIGHT EXCEEDS 50’
OR IF REQUIRED BY THE
FIREPLACE MANUFACTURE
FROM CHIMNEY TO FRAMING
NorthlineExpress.com
http://www.northlineexpress.com
Toll-Free 1-866-667-8454

9
maintain the 2” clearance to combustibles
from the chimney pipe.AStabilizer is available
and may be required by some replace
manufacturers to keep the chimney vertical
and help maintain clearances to combustibles
within a chase. Clamp the Stabilizer to the pipe
using the nut and bolt provided, and secure
legs to nearby framing using plumber’s tape
or guy-wires (Fig. 8). Note: the Stabilizer does
not support the weight of the chimney, it is only
used to keep chimney centered within a chase.
10. InstallAttic Insulation Shield: TheAttic
Insulation Shield must be installed where the
chimney passes into an attic. Its purpose is
to prevent debris and insulation from getting
too close to the chimney. In attic areas where
this shield cannot t, or is not used you must
enclose the attic portion of the chimney in
a framed enclosure (always maintain 2”
air-space clearance to combustibles). If the
chimney is fully enclosed through the attic, an
Attic Insulation Shield is not required. Install
theAttic Insulation Shield as follows:
a. Remove any insulation or debris from attic
oor around the framed opening.
b.Assemble Chimney Sections until at least 18
inches of chimney extends above the Firestop.
c. Slip theAttic Insulation Shield over the
Chimney until the base sits squarely on the
framed opening (Fig. 9).
d. Secure theAttic Insulation Shield to the
top of the framed opening using at least (2)
8-penny nails or (2) #8, 1-1/2” wood screws
per side (Fig. 10).
Figure 8
Figure 9
Figure 10
PLUMBERS
TAPE
STABILIZER
CHASE
FRAME
FIRESTOP
INSULATION
SHIELD
ATTIC
ATTIC
ATTIC SHIELD
ATTIC
COLLAR
FIRESTOP
NorthlineExpress.com
http://www.northlineexpress.com
Toll-Free 1-866-667-8454

10
e. Wrap the Collar of theAttic Insulation Shield
around the chimney and fasten it loosely. Slide
the Collar down to meet theAttic Insulation
Shield. Tighten the bolts to secure the Collar
in place (Fig. 10).
11. Install Roof Radiation Shields: Roof
RadiationShieldsprovide protectionfor roof
or chase framing members. Note: Roof
Radiation Shields do not allow for a reduced
clearance to combustibles. Clearanceto
combustiblesmustbe aminimumof2" away
fromthe chimneypipe. InstallRoofRadiation
Shields at either the top of the chase or where
the chimney penetrates the roof, whichever
isthetop ofthe installation.RoofRadiation
Shieldsarebuiltwith a1/2" airgapstandoff from
the joist face (Fig. 11). The corners of the Roof
RadiationShieldsoverlap each othertoensure
properposition. SecuretheRoofRadiation
Shieldsto thetopoftheframingmembers
using screws or nails in the corners (Fig. 11).
If framing members are further away from the
chimney than 2", center the Roof Radiation
Shieldtothechimneyon theframing member
and secureinplacewithscrewsornails.
12.Attach Flashing: For chase
enclosures, use a Chase Top Flashing.
The Chase Top Flashing allows for a 1-1/2”
clearance maintained from the chimney
and provides required ventilation air. Install
the Chase Top Flashing at the top of the
chase with a ½” minimum air clearance
off the top of the chase construction (Fig. 12,
13). Use spacing clips provided to establish
½” air clearance. If the Chase Top Flashing
does not t the dimensions of the chase, use
a Chase Top Collar Section and extend the
base of the ashing as needed for the chase
dimensions. Ensure the minimum ½” spacing
and perimeter ventilation requirements are
met as show in Figure 12. Secure the Chase
Figure 13
1 1/2”VENTILATION OPENING
AROUND CHIMNEY PIPE
MINIMUM
1/2 INCH
AIR SPACE
1/2 INCH
ESTABLISHED
BY SPACERS
AIR SPACE
1/2"
CHASE TOP
FLASHING
REQUIRED
SPACERS
Figure 12
Figure 11
(4) ROOF
RADIATION
SHIELDS
CHASE
ENCLOSURE
NorthlineExpress.com
http://www.northlineexpress.com
Toll-Free 1-866-667-8454

11
Table 2
Chimney Sizing Chart for Fireplace Installations
Dotted line represents sample problem. Example shows replace opening as 36" wide and 30"
high, and the chimney height as 20'. The correct ue size for the sample is 12" diameter pipe.
T
W
H
T
W
H
8
7
6
30
16
14
20
8
10
15
12
10
50
40
30
24
48
60
36
42
72
HEIGHT
36
30
42
24
48
18
WIDTH
18
20
22
24
20
18
60
72
84
84
HEIGHT (FEET)
CHIMNEY
FIREPLACE
OPENING (INCHES)
CHIMNEY PIPE
DIAMETER (INCHES)
T
W
H
T
W
H
8
7
6
30
16
14
20
8
10
15
12
10
50
40
30
24
48
60
36
42
72
HEIGHT
36
30
42
24
48
18
WIDTH
18
20
22
24
20
18
60
72
84
84
HEIGHT (FEET)
CHIMNEY
FIREPLACE
OPENING (INCHES)
CHIMNEY PIPE
DIAMETER (INCHES)
NorthlineExpress.com
http://www.northlineexpress.com
Toll-Free 1-866-667-8454

12
Top Collar Section to the eld-fabricated chase
top with sheetmetalscrewsorrivets(Fig. 14).
SealChaseTopCollarSectiontochasetopwith
non-hardeningwaterproofsealanttoensurea
weathertightconnection.Additionalscreening
as needed for eld-fabricated chase covers is
allowed.Additional½”minimumspacerscanbe
eld-fabricated as needed out of 24 GA sheet
metalorothersuitablenon-combustiblematerial.
Additionalnon-combustiblestructuralsupports
can be eld-fabricated to help support the chase
top ashing if needed, provided the air ventilation
requirementsaremaintained.SecuretheChase
TopFlashingtothechasewithatleast(3)screws
ornails perside. Wheninstalled, thebottom of
theChimneyCapmustbeatleast6”abovethe
ChaseTop Flashing(Fig. 15).
13. Finish Top: Apply anon-hardening
waterproofsealantaroundthechimneyatthe
pointwheretheStormCollarwillmeetthe
chimneyjustabove the Flashing (Fig. 15). Slide
theStormCollardownoverthechimneytothe
topoftheFlashing. TheStormCollarmustbe
installed1”offtheChaseTopFlashingtoprovide
properventilation(Fig. 15).Tightenthebolts
oftheStormCollarandsealtheStormCollar
againsttheChimneywithsealant. Besure
Chimneyand Offsets areproperlysupported.
AttachtheChimneyCapontothetopofthe
chimneybysettingthefemaleendoftheCap
ontothemaleendofthelastChimneySection.
SecuretheCapbyusing(4)sheetmetalscrews
provided(Fig. 16). Do notpush downfrom the
topportionofthecapasthismaydamagethe
cap. PushfromthelowersectionoftheCapif
needed. TheChimney Capcanberemoved for
chimneycleaningasdescribedintheChimney
Maintenancesectionoftheinstructions.
14. Enclosures: Enclosechimneyswhere
theypassthroughoccupiedspaces,including
closets. Alwaysmaintain atleasta2-inch
Figure 16
TERMINATION
CAP
Figure 14
Figure 15
6" MIN.
COLLAR
SEALANT
STORM OPENING
ABOVE ROOF
3' MINIMUM
CHASE TOP
COLLAR
SEALANT
SCREW OR
POP-RIVET
NorthlineExpress.com
http://www.northlineexpress.com
Toll-Free 1-866-667-8454

13
Figure 17
clearancebetweenthechimneyandany
combustiblematerials. Interior enclosures
maybeconstructedwithstandardframingand
sheathedwithsheetrockorplywood. UseaWall
Strapor Stabilizerat leastevery 8feet tomaintain
aminimumof2inchesofairspacebetweenthe
chimneyandcombustiblematerials.
OFFSET ELBOW INSTALLATION
A30° Elbow (measured from the vertical) is
the largest that can be used in an offset. A
30° Elbow may not be combined with another
elbow to make a steeper offset (e.g. two 30°
Elbows are not allowed to be put together to
form a 60° elbow). Avoid Elbows if possible. A
totally vertical chimney is more efcient. When
Elbows are necessary to avoid obstructions
such as rafters, ridgepoles, or joists, you
are only allowed to use 1 pair of Elbows in
any one chimney system. Refer to Offset
Chart in Table 3 (page 14) to determine the
pipe sections needed for the offset desired.
Horizontal runs of chimney violate building
code and are not allowed.
1.Attach Elbows: Attach Elbow to Chimney
Section or other Elbow by mating the male
and female ends with each other and
using the (4) sheet metal screws provided.
Attach one Elbow to the Chimney Section
below, and align it for the offset. Determine
the required offset length and attach an
appropriate length (or lengths) of Chimney
Section(s) above the Elbow. Attach the
second Elbow above the Chimney Section to
complete the offset (Fig. 17).
2. Secure Offset: Use an Elbow Strap to
secure the offset. Secure the Elbow Strap’s
band to chimney around the upper portion of
the top Elbow, then tighten the nut and bolt
until the clamp is rm. Wrap the Elbow Strap
end over an adjacent joist or rafter and secure
it with at least two 8-penny nails or #8, 1-1/2” Figure 18
screws. Add additional Elbow Straps for each
section of chimney in the offset (Fig. 18).
Every chimney section in the offset must be
supported. Do not add more Chimney Sections
until the Elbows and the offset are supported.
Be sure that the chimney above the second
elbow remains vertical.
30° OR 15°
ELBOW STRAP
ELBOW
ELBOW STRAP
1 PER
SECTION
ELBOW STRAP
NorthlineExpress.com
http://www.northlineexpress.com
Toll-Free 1-866-667-8454

14
Table 3
DuraChimney II Elbow Offset Chart
Elbow
Angle
From
Vertical
Chimney
Length
Between
Elbows
Size 10" I.D. Size 12" I.D Size 14" I.D. Size 16" I.D.
Offset
Inches Rise
Inches Offset
Inches Rise
Inches Offset
Inches Rise
Inches Offset
Inches Rise
Inches
15° 0" 2 ⁹/₁₆ 20 ⁵/₈2 ⁵/₈21 ⁵/₈2 ⁵/₈21 ⁵/₈2 ¾ 21 ¹/₈
15° 12" 5 ³/₈31 ¼ 5 ½ 31 ¾ 5 ½ 32 ¼ 5 ⁵/₈32 ¾
15° 18" 7 37 7 37 ½ 7 ¹/₈38 7 ¹/₈36 ½
15° 36" 11 ⁵/₈54 ½ 11 ⁵/₈55 11 ¾ 55 ³/₈11 ¾ 55 ⁷/₈
15° 48" 14 ¾ 66 14 ¾ 66 ½ 14 ⁷/₈67 14 ⁷/₈67 ½
30° 0" 5 ¾ 22 ³/₈622 ³/₈6 ¼ 24 ½ 6 ⁵/₈25 ½
30° 12" 11 ¼ 32 11 ½ 33 11 ¾ 34 12 35 ½
30° 18" 14 ¼ 37 ¹/₈14 ½ 38 ¹/₈14 ¾ 39 ¼ 15 40 ⁵/₈
30° 36" 23 ¼ 52 ¾ 23 ½ 53 ¾ 23 ¾ 54 ⁷/₈24 56 ¼
30° 48" 29 ¼ 63 ¹/₈29 ½ 64 ¹/₈29 ¾ 65 ¼ 30 66 ⁵/₈
RISE
OFFSET
NorthlineExpress.com
http://www.northlineexpress.com
Toll-Free 1-866-667-8454

15
CHIMNEY MAINTENANCE
1. Creosote and Soot: When wood is burned
slowly, it produces tar and other organic
vapors, which combine with expelled moisture
to produce creosote. The creosote vapors
condense in the relatively cool chimney ue
of a slow-burning re. As a result, creosote
residue accumulates on the ue lining. When
ignited, this creosote makes an extremely hot
re.
2.Access: Chimneys must be installed so that
access is provided for inspection and cleaning.
3. When to Clean: The chimney should be
inspected at least once every month during the
heating season to determine if creosote or soot
has built up. Check spark arrestor screens
at least every 2 to 4 weeks. If creosote or
soot has accumulated on the spark arrestor, it
should be cleaned or replaced to reduce the
risk of chimney re.
4. How to Clean: Have your chimney cleaned
by a professional Certied Chimney Sweep
if you have doubts about your ability to clean
it. Use a plastic, wood, or steel brush. Do not
use a brush that will scratch the stainless steel
liner of your chimney. Scrub the spark arrestor
with a wire brush. To remove the Chimney
Cap for cleaning, unscrew the four screws that
attach the top lid of the Cap to the cap's legs.
5. Coal: To reduce corrosion in chimneys
where coal is burned, clean the chimney
thoroughly within 48 hours of shutting down
the appliance for the season.
6. Chemical Cleaners: Use chemical
cleaners only as a last resort, and use only
those that the manufacturer specically
warrants as being non-corrosive to the
chimney. Simpson Dura-Vent will assume no
liability for damage resulting from the use of
chemical cleaners.
7. In Case of Fire: If a ue re occurs,
close all possible air inlets, and call your Fire
Department. Do not use the chimney again
until it has been inspected by a Certied
Chimney Sweep for possible damage.
8. Painting: As an option, you can coat all
exterior metal parts, with the exception of the
top portion of the Chimney Cap, with high
temperature, rust proof paint. Wash the metal
with a vinegar and water solution to remove
any oil residue before painting. Painting the
chimney will help to increase chimney life.
9. Creosote Formation: Simpson Dura-
Vent assumes no liability for structural
damage or roof contamination as the result
of creosote formation. It is the owner’s
responsibility to comply with inspection and
cleaning requirements as described in these
instructions, and those of the appliance
manufacturer.
NorthlineExpress.com
http://www.northlineexpress.com
Toll-Free 1-866-667-8454

DuraTech,DVL,DuraBlack, DuraLiner,DuraPlus,DuraPlus HTC,PelletVent,CornVent,PelletVentPro, DirectVentPro,
Dura-Vent, DuraFlex,
DuraConnect,DuraChimney II,FasNSeal, FasNFlex,and FasNSmoothareregisteredtrademarksof theSimpson Dura-Vent Co.,Inc.
Allrightsreserved, 2008. Madein theUSA. Simpson Dura-Vent isa divisionofSimpson ManufacturingCompany. NYSE:SSD.
Customer Service Support 800-835-4429 707-446-4740 FAX wwww.duravent.com
Simpson Dura-Vent, Inc
PO Box 1510
Vacaville CA95696-1510
Simpson Dura-Vent:
50 years of Engineered Excellence®
Manufactured in Vacaville CA
and Vicksburg MS
SIMPSON DURA-VENT LIMITED LIFETIME WARRANTY
Simpson Dura-Vent (“Simpson”) warrants the products identied below to the original purchaser to be free from substantial
defects in material or manufacturing for the lifetime of the product, if properly installed, maintained and used. This Warranty
does not cover normal wear and tear, smoke damage or damage caused by chimney res, or any Product that was: (1)
purchased other than from an authorized Simpson dealer, retailer or distributor; (2) modied or altered; (3) improperly
serviced, inspected or cleaned; or (4) subject to negligence or any use not in accordance with the printed materials provided
with the Product as determined by Simpson Dura-Vent. This warranty includes all components and ttings, except caps.
Caps have a 5 year warranty from the date of purchase, with dated proof of purchase.. This lifetime warranty applies
only to parts manufactured by Simpson Dura-Vent. This warranty may not be extended or modied by our agents or
representatives.
For 15 years from the date of purchase of a DuraTech Chimney, DuraPlus Chimney, DuraPlus HTC Chimney,
DuraChimney II, PelletVent Pro, PelletVent, CornVent, DuraLiner, DuraFlex, DirectVent Pro, Type B Gas Vent,
DuraConnect, or DVL, with dated proof of purchase, Purchaser’s sole remedy is replacement of component ttings
and chimney pipe lengths (removal and installation costs paid by Purchaser). From year 16, for the life of such Product,
Purchaser’s sole remedy is replacement of chimney pipe lengths at 50% of the retail list price in effect at the time of
replacement (removal and installation costs and 50% of the retail list price paid by Purchaser).
For 5 years from the date of purchase of a DuraBlack Single-Wall Stovepipe, with dated proof of purchase, Purchaser’s
sole remedy is replacement of component ttings and chimney pipe lengths (removal and installation costs paid by
Purchaser).
Simpson may inspect your Product to determine if, in Simpson’s sole discretion, the Product qualies for replacement under
the terms of this Warranty. To obtain warranty service go to www.duravent.com or contact Simpson promptly at
800-835-4429. The replaced Product is warranted under the terms of this Warranty.
Where lawful, Simpson disclaims all other warranties, including but not limited to implied warranties of
merchantability and tness for a particular purpose. In no event will Simpson be liable for incidental,
consequential, punitive or special damages or direct or indirect loss of any kind, including but not limited to
property damage and personal injury. Simpson’s entire liability is limited to the purchase price of this product.
Some states do not allow limitations on implied warranties, or the exclusion or limitation of incidental or
consequential damages, so the above limitations and exclusions may not apply to you. This limited warranty gives
you specic legal rights, and you may also have other rights that vary from state to state.
L i m i t e d
L i f e t i m e
L180 10/2008
NorthlineExpress.com
http://www.northlineexpress.com
Toll-Free 1-866-667-8454
Table of contents
Other DuraVent Ventilation Hood manuals

DuraVent
DuraVent DURASTACK PRO DAS1 Series User manual

DuraVent
DuraVent DuraTech Series User manual

DuraVent
DuraVent Type B User manual

DuraVent
DuraVent DURAPLUS CANADA 2 User manual

DuraVent
DuraVent DuraTech User manual

DuraVent
DuraVent FasNSeal W2 User manual

DuraVent
DuraVent DAS1 User manual

DuraVent
DuraVent SELKIRK Ultimate StovePipe USP User manual