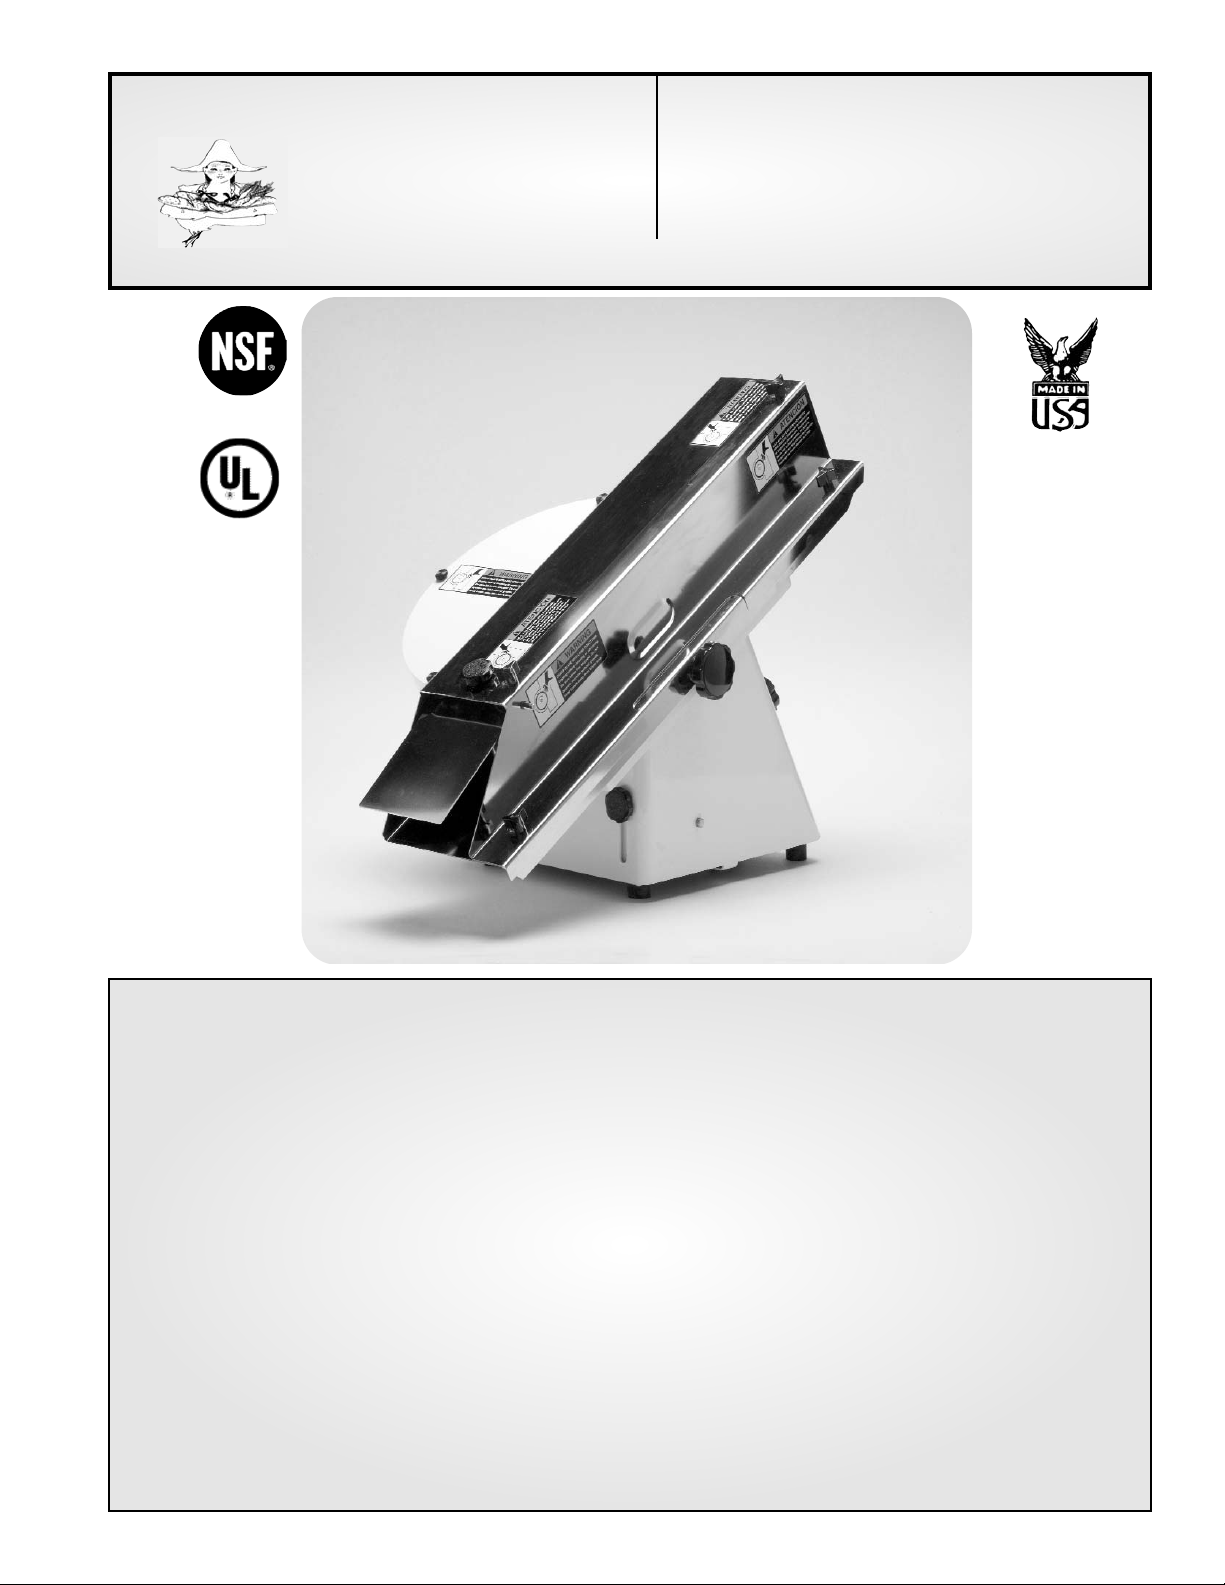
Dutchess 270C User manual

Dutchess Bakers’ Machinery MODEL 270C
302 Grand Avenue BUN & BAGEL SLICER
Superior, WI 54880
Since
1886
INSTRUCTION MANUAL
FOR THE
DUTCHESS MODEL 270C
BUN & BAGEL SLICER

Thank you for choosing the
"Made in the USA"
Dutchess Model 270C
Bun & Bagel Slicer
Our staff at Dutchess is dedicated to doing everything
possible to reassure you that in making the decision to
buy an American Made product you have purchased the
highest quality, most dependable Bun & Bagel Slicer
available anywhere in the world.
For solutions to product quality and results,
just give us a call and our professional
Customer Service staff will be glad to assist you.
For your convenience, please contact us on our
Toll Free Customer Service Hotline:
1-800-777-4498.
Sincerely,
Your Friends at Dutchess
AMERICAN BUILT QUALITY
~ Since 1886 ~
AFL ~ CIO
"Serving" the Food Service Industry Worldwide

Table of Contents
Safety Information ..............................................................................1 - 4
Uncrating Instructions ............................................................................ 4
Introduction .............................................................................................. 5
Adjustment Instructions ......................................................................... 6
Operating Instruction, Cleaning, Preventative Maintenance ..........6 - 8
Changing the Blade (New or Re-Sharpened Blades) .......................... 9
Electrical Schematic .............................................................................. 9
Troubleshooting .................................................................................... 10
Parts List ......................................................................................... 11 - 16
Maintenance Records ........................................................................... 17
Write your units information in the spaces below for future reference.
BAKERS' MACHINERY CO., INC. SUPERIOR, WI
SERIAL NO.
Dutchess
VOLTS
HZ
PH
AMPS HP
RPM
MODEL

DUTCHESS MODEL 270C
BUN & BAGEL SLICER
Operator Instructions and Safety Information
All employees operating, servicing and cleaning this machine must be properly trained as to its
operation and safety features.
WARNING: The slicing Blade is sharp and dangerous. Keep hands out of the cutting
area. A severe cutting or abrasion injury could result. Do not operate
this machine without guards in place.
WARNING: The slicing Blade is sharp and dangerous. Never attempt to clear a
product jam with your hands. A severe cutting or abrasion injury could
result. To clear a product jam, turn the machine “OFF”, disconnect the
power supply, push forward on the Blade Brake to stop the Blade from
rotating and then clear the Chute using a flat instrument.
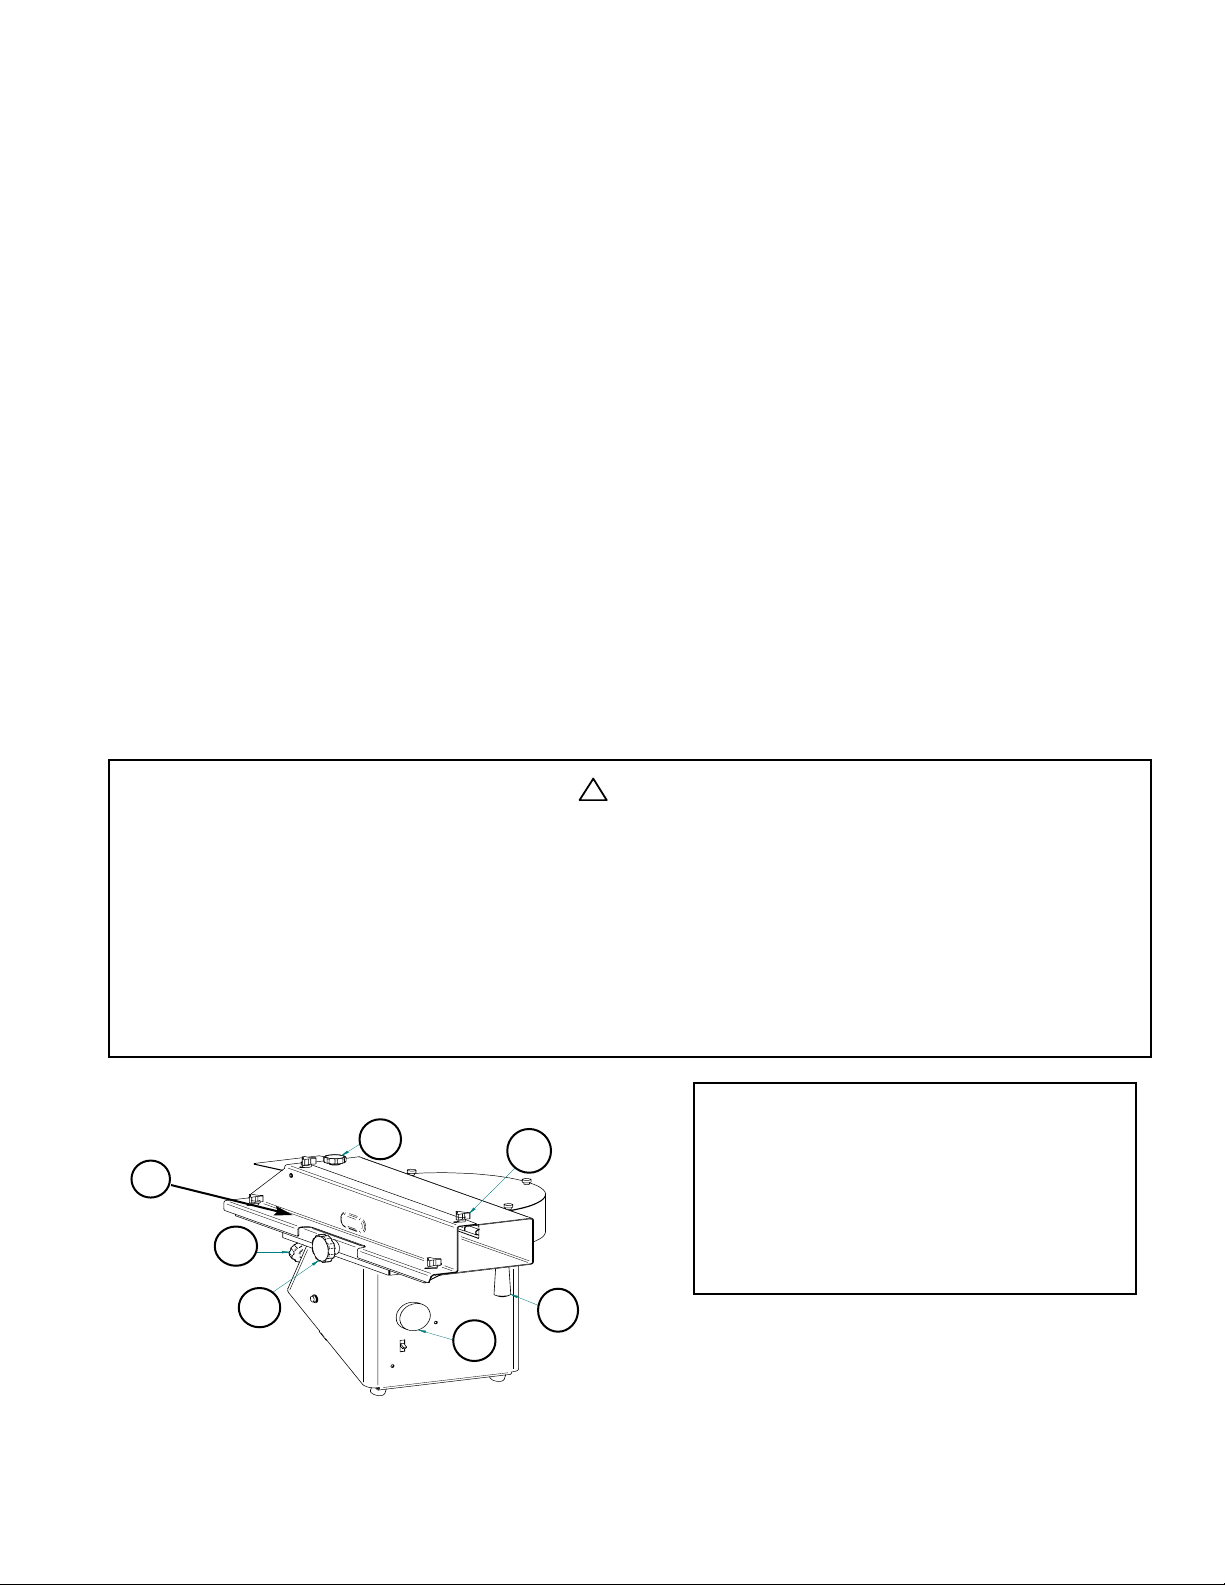
NOTE: Product can be removed easier by increasing the Blade cutting
height by turning the Large Black Knob [3] clockwise. (see Figure 1,
page 6)
WARNING: The Blade on the Model 270C Slicer will coast to a stop after the power
is switched to “OFF”. To prevent personal injury or possible damage to
the Slicer components, wait for the blade to stop completely before
making any adjustments. Blade can be stopped much quicker by
pushing forward on the Blade Brake.
IMPORTANT: It is imperative that the Slicer Blade is kept sharp and that the machine
is cleaned frequently. Slicing dense products or those with additives
such as raisins, nuts, or dried fruit chips may cause premature unit
wear or even failure if:
1) The Blade is not kept sharp.
2) The Slicer is not cleaned frequently.
3) The rate at which the product is fed into the Slicer is too great.
IMPORTANT: Safety and instructional labels are easily visible to the operator and
are located near any area of potential danger. Replace any decal that
becomes damaged or worn.
WARNING: TURN THE MACHINE OFF AND DISCONNECT THE POWER SUPPLY
BEFORE PERFORMING ANY TYPE OF SERVICING, CLEANING,
MAINTENANCE OR INSPECTIONS.
The General Safety Practices listed on the following pages are recommended precautions
and not related to any specific procedures. Operators should understand and apply these
safety precautions during all phases of operation and maintenance.
1
Read and understand all instructions and safety practices before attempting operation!
Pay particular attention to Warning and Caution messages indicating personal safety
instructions. Failure to comply with safety instructions may result in serious personal
injury.
!
!
!
!

GENERAL SAFETY PRACTICES
You will ensure safe working conditions for yourself and fellow employees by observing the
following general safety guidelines. Please take the time to study them carefully and review
them periodically.
Treat this equipment with the respect its power and speed demand.
- This machine was designed to run only when all safety devices and guards are in place. It
should never be operated if any guards or access panels have been removed.
- Warnings displayed on machinery were put there to inform and remind people of unsafe
practices. They are not to be altered or removed. Replace torn or worn labels immediately.
- Keep fingers, hands or any part of the body out of the machine and away from moving parts.
- Never bypass limit or other safety switches.
- “Horseplay” around machinery at any time is dangerous and should not be tolerated.
- Never sit or stand on anything that might cause you to fall against the machine.
Dress the part.
- Make sure that nothing you are wearing could get caught in the machinery. This means no
loose clothing or apron strings and no jewelry, ties, watch chains, unrestrained long hair, etc.
near operating machinery.
Correct operation equals Safe operation.
- BEFORE operating this equipment, read the operating instructions and become thoroughly
familiar with the machine and its controls.
- Know how to turn the machine off.
- Use the equipment only for its intended purpose.
- Make sure the electrical power is turned off when the machine is not in use.
- Disconnect the power supply before performing any type of servicing, maintenance, or
cleaning.
- If the machine is being serviced, the power source should be LOCKED OUT and the plug
disconnected. This will prevent anyone from accidentally turning power on to the machine.
- Anything with moving parts requires periodic maintenance. Failure to practice good
maintenance can lead to unsafe conditions. If you suspect faulty or damaged equipment,
remove it from service and have it repaired by authorized personnel.
2

Provide a safe, clean environment for yourself and others.
- Remove any tools or other foreign objects from the operating zone before starting. Do not lay
any items (coffee cup, scraper, knife, etc.) on the equipment or near the operating areas.
- Keep the operating zone free of obstacles that could cause a person to trip or fall toward an
operating machine.
Stay alert.
- Any machine with moving parts and electrical components can be potentially dangerous, no
matter how many safety features it has. It is essential that you make every effort to stay alert
and think clearly around power machinery. Anyone fatigued, emotionally upset or under the
influence of drugs or alcohol is primed for an accident.
- Be attentive to warnings displayed on the machine and know how to respond.
- Know where your FIRST AID SAFETY STATION is located in case of an emergency.
Safety Labels
The Safety Labels shown below must always be on your machine. An explanation of each label
is included. Inspect the machine periodically to be certain these warning labels are in place. If
any label is removed or becomes unreadable, replace it immediately. Order replacement labels
from Dutchess Bakers’ Machinery Co., using the part numbers shown.
Definitions
DANGER An immediate hazard with a possibility of severe personal injury or death if
instructions, including recommended precautions, are not followed.
WARNING Hazards or unsafe practices which could result in severe personal injury or
death if instructions, including recommended precautions, are not followed.
CAUTION Possible hazards or unsafe practices which could result in minor or moderate
injury or damage to product or property if instructions, including recommended
precautions, are not followed.
SAFETY LABEL used on Machine
3Replacement Part Numbers - English: A4-077-0057 - Spanish: A4-077-0063
!
!
!
SHARP BLADE WITH LONG COAST TIME.
Unplug before cleaning or servicing.
Be sure blade has stopped. Do not
operate machine without guards.
Keep hands away from blade area.
WARNING
!

Rotating cutters are SHARP and DANGEROUS in both the idle and running modes.
KEEP HANDS OUT OF THE CUTTING AREA. A SEVERE INJURY COULD RESULT.
All guards should remain on the machine for the safety of the operators.
DO NOT operate machine without guards.
ALWAYS lockout main power disconnect before attempting to clean, service, perform
maintenance or repair. Accidental start-up could result in a serious injury.
Safety and instructional decals, as applied by the manufacturer, are easily visible to
the operator and are located near any area of potential danger. Inspect the machine
periodically to be certain all warning labels are in place. In the interest of operator safety,
replace any decal that is damaged or lost.
UNCRATING INSTRUCTIONS
FOR THE DUTCHESS MODEL 270C BUN & BAGEL SLICER
CAUTION: KEEP THE CARTON UPRIGHT AT ALL TIMES
1. Remove the metal staples and remove the cardboard covering from the skid.
2. Unbolt the machine from the skid. Bolts are accessed from the bottom of the skid to the
machines base.
3. Lift Slicer off the skid by gasping the Base Frame and place it on the location where it will
be used - on a counter, sturdy table or other suitable flat surface.
4. Remove the Instruction Booklet from the Chute.
5. Make sure the Switch is in the “OFF” position.
6. Check to be sure the Chute is clear of obstructions.
7. Plug the cord into the proper voltage outlet.
4
NOTE:
Do not lift or carry the Model 270C Bun & Bagel Slicer by the infeed and
discharge ends of the Chute.
Lifting or carrying the machine in such a manner can cause damage to the Chute.
Lift by holding and supporting the base frame only.
!

INTRODUCTION
Many hours of engineering design and performance testing have gone into your Dutchess Model
270C Bun & Bagel Slicer. With proper care and maintenance this machine will give you efficient
performance and convenient operation throughout its long life.
Safety and reliability are engineered into all Dutchess equipment. We urge machinery operators
to study the safety section of this manual and to learn how to operate and maintain the
equipment correctly.
This manual has been made for your convenience and instruction. Keep this book on file
and always include Model Number and Serial Number of the machine when ordering parts.
ELECTRICAL CONNECTION
Electrical specifications for your machine are printed on the Serial Number tag which is located
near the On/Off Switch on the machine. Be sure to check your plant voltage with the voltage
specified on the machine.
(Refer to page 9 for additional electrical information)
A properly grounded receptacle is required for safe operation regardless of the voltage
requirements.
CUSTOMER SERVICE
If you encounter a problem with your Dutchess Model 270C Bun & Bagel Slicer, refer to the
Cleaning & Maintenance, or the Troubleshooting sections of this manual. If you cannot quickly
resume normal operation, contact Dutchess Customer Service (715) 394-4444. You must have
Model and Serial Number of unit Before Calling!
5
Read and understand all instructions and safety practices before attempting operation!
Pay particular attention to Warning and Caution messages indicating personal safety
instructions. Failure to comply with safety instructions may result in personal injury.
WARNING:
TURN THE MACHINE OFF AND
DISCONNECT THE POWER SUPPLY
BEFORE PERFORMING ANY TYPE OF
SERVICING, CLEANING, MAINTENANCE
OR INSPECTIONS.
WARNING:
The Blade on the Model 270C Slicer will
coast to a stop after the power is switched
off. To prevent personal injury or possible
damage to the Slicer components, wait for
the Blade to stop completely before mak-
ing any adjustments. Pushing forward on
the Blade Brake [ Figure 1, Item 2] will
reduce the Blade coasting time.
!
!

ADJUSTMENT INSTRUCTIONS
Refer to Figure 1, Page 6 for adjustment points. After turning machine off and disconnecting the power, make adjustments for
desired product as follows:
- To adjust for discharge rate of product, raise or lower the Output Flap, by turning the Small
Black Knob [1] up or down depending on desired results.
- To adjust for thickness of cut, turn Large Black Knob [3] clockwise to lower (thicker cut) or
counterclockwise to raise (thinner cut) the bottom of the Chute from the Blade.
- To adjust for depth of the cut, loosen all 4 Small Black Thumb Screws [6] and slide the Hinge Guide [7] in or out to desired
setting for either hinged or full through cut. Tighten Thumb Screws
- To adjust for Chute angle, loosen both Large Black Knobs [5] and raise or lower Base by
lifting to desired angle, and retighten both Large Black Knobs. (Be sure to support Base
while making this adjustment. The machines Base will automatically lower when Large
Black Knobs are loosened.)
Note: A steeper angle is required for smaller product such as Buns and Bagels to allow for better "gravity" feed.
A lesser angle will allow for French Bread to easily exit the Chute onto the work bench.
NOTE: Adjustments should be liberal to allow for irregular baking uniformity.
OPERATING INSTRUCTIONS
Turn the power switch on. Place a bun in the top of the Chute to the Left Side as you face the opening and let it slide. The sliced
bun will exit at the bottom of the Chute. Make bun and cutting adjustments as necessary following the instructions on pgs. 6 & 8.
CLEANING AND PREVENTATIVE MAINTENANCE
6
WARNING:
TURN THE MACHINE OFF AND DISCONNECT THE POWER SUPPLY
BEFORE PERFORMING ANY TYPE OF SERVICING, CLEANING,
MAINTENANCE OR INSPECTIONS.
The Blade on the Model 270C Slicer will coast to a stop after the power is switched off.
To prevent personal injury or possible damage to the Slicer components, wait for the Blade to
stop completely before cleaning or making any adjustments. To shorten the Blade
coasting time, push forward on the Blade Brake Handle [Figure 1, Item 2]
!
1
2
3
4
5
6
Figure 1
Note:
Do not lift the Model 270C Slicer by
the Input or Discharge ends of the
Chute as damage could occur. Lift by
supporting the Base Frame only.
7
4
5
3
2
6
1

GENERAL CLEANING:
The manufacturer recommends frequent cleaning, especially the removal of crumbs from around the Blade.
(Refer to instructions on Pages 8 - 9 to access the Blade area.)
Manufacturer recommends cleaning the slicing Blade and the Blade area with a damp cloth. Dry Blade and Blade
area thoroughly. See Page 8-9 for additional cleaning instructions.
IMPORTANT:
Cutting products such as bagels that leave a sticky residue or products with additives such as raisins or dried fruit
chips requires more frequent and thorough cleaning. The Blade should be scrubbed with a nylon brush.
CAUTION:
Do not spray the unit with water; damage to the electrical components will occur.
PREVENTATIVE MAINTENANCE
The motor in the Model 270C Bun & Bagel Slicer has sealed bearings.
No lubrication is required.
For optimal performance, the Slicer Blade should be re-sharpened after a period of use.
Dutchess offers a sharpening service. Please allow two (2) weeks for service.
We recommend keeping a spare Blade available at all times.
For Blade Sharpening Quotation, Call Dutchess Customer Service at: 1-800-777-4498.
For BLADE SHARPENING, Ship POSTAGE PREPAID to:
Dutchess Bakers’ Machinery Company,
302 Grand Avenue, Superior, WI 54880
7
1
2
3
4
5
6
Figure 2
WARNING:
TURN THE MACHINE OFF AND DISCONNECT
THE POWER SUPPLY BEFORE PERFORMING
ANY TYPE OF SERVICING, CLEANING,
MAINTENANCE OR INSPECTIONS.
WARNING:
The Blade on the Model 270C Slicer will coast to
a stop after the power is switched off. To pre-
vent personal injury or possible damage to the
Slicer components, wait for the Blade to stop
completely before making any adjustments.
The Blade can also be stopped by pushing
on the Brake Handle, [Figure 2, Item 2]
!
!
!

Chute Cleaning:
For daily cleaning of the Chute, remove the Knob [Pg. 7, Figure 2, Item 4] by turning counter clockwise. Next, grasp the Chute on
both ends and slowly slide towards you until it is free of the Base and bring to a bench or sink. Note: The Chute can now be
cleaned without any interference from the Blade. Use a mild soap and a non abrasive washcloth. (See pages 7 & 9 for additional
cleaning instructions). To reinstall the Chute, slide the Chute on the Lift Assembly making sure the hole is aligned with the
threaded hole in the Lift Base, replace Black Knob and tighten.
8
WARNING:
TURN THE MACHINE OFF AND DISCONNECT THE POWER SUPPLY BEFORE PERFORMING ANY TYPE OF
SERVICING, CLEANING, MAINTENANCE OR INSPECTIONS.
The Blade on the Model 270C Slicer will coast to a stop after the power is switched off. To prevent personal injury
or possible damage to the Slicer components, wait for the Blade to stop completely before cleaning or making
any adjustments. Blade can be stopped by pushing on the Blade Brake [Figure 2 Item 2, Page 7].
!
TIPS FOR SLICING BUNS (with Maximum Chute Angle)
(See Figure 2, Page 7 for diagram).
Step One:
The Chute opening is preset so the product has sufficient clearance to slide freely through the Chute. Note: For
best slicing results, feed product into the Chute to the Left Side as you face the upper Input end of the Chute.
Step Two:
Adjust for the Depth of Cut (Hinged Cut or Complete through Cut) by looswning the 4 Knobs [Item 6]. Slide the
Hinge Guide in to increase the Depth for a complete through cut, or pull outward for a hinged cut. Re-tighten Knobs.
Note: You may need to visually view into the Chute from the Input end of the Chute to determine the desired
position of the Blade to the Hinge Guide.
· For a Complete Through Cut, the Blade must extend into the oval shaped dimple in the Hinge Guide.
· For a Hinged Cut, the Blade should be kept away from the Hinge Guide approximately 1/4 - 1/2
inch to achieve your desired results.
Step Three:
Adjust for Thickness of Cut (from the bottom of product) by turning the Knob [Item 3] clockwise for a thicker cut, and
counterclockwise for a thinner cut.
Step Four:
Adjust the Output Flap by turning the Black Knob [Item 1] clockwise to speed up the discharge rate of the product,
or turn the Knob counterclockwise to slow the discharge rate of product.
FOR SLICING FRENCH BREAD (with Minimum Chute Angle)
Follow steps 1-4 above and add the following:
Step Five:
Reduce the Angle of the Chute by loosening the two Black Knobs [Item 5] and lifting the discharge end of the Base
which will allow the adjustable legs to lower. While holding/supporting the Base discharge end up, retighten the two
Black Knobs. Note: Be sure the power is turned OFF and the Blade has stopped before making any adjust-
ments.

CHANGING THE BLADE or CLEANING BLADE AREA
Refer to Page 9, Figure 3 for parts locations. TOOLS REQUIRED: Standard Screw Driver
Step 1. Remove the Top Guard [8] by removing the three (3) Small Black Knobs [7].
Step 2. Remove the three (3) screws securing the Blade and carefully remove the Blade.
Step 3. Replace the clean (or new) Blade and tighten the three (3) screws to secure the Blade.
IMPORTANT: Make sure that the points on the teeth are pointing in the opposite
direction of the rotation of the Blade, which is clockwise when looking at the shaft end
of the Motor.
Step 4. Replace the Top Guard [8], replace and tighten the three (3) Small Black Knobs [7].
ELECTRICAL SCHEMATIC - MODEL 270C
9
8
7
Figure 3
WARNING:
TURN THE MACHINE OFF AND DISCONNECT
THE POWER SUPPLY BEFORE PERFORMING
ANY TYPE OF SERVICING, CLEANING,
MAINTENANCE OR INSPECTIONS.
!
WARNING:
The Blade on the Model 270C Slicer will coast to
a stop after the power is switched off. To prevent
personal injury or possible damage to the Slicer
components, wait for the Blade to stop com-
pletely before making any adjustments.
!
L2
L1
T2
T1
M-943975
MOTOR
SWITCH
Motor
M-943975

TROUBLESHOOTING
The purpose of this guide is to trace safety and nuisance shutdowns, identify probable causes,
and correct such problems quickly.
Symptom Probable Cause Corrective Action
Motor does not start: Power interruption . . . . . . . . . . . . . . . Check power supply
Check ON/OFF Switch
Turn machine off for five
minutes. Press switch down
to reset, then up to turn
machine back on.
Excessive crumbs in Blade area . . . . Clean crumbs from Blade
area. (See pages 4 and 5)
Slicer stops running: Overload--from product jam . . . . . . . . Turn the machine "OFF," dis-
connect power supply, clear
the Chute using a flat
instrument.
Overload—from dull Blade . . . . . . . . . Sharpen or replace Blade.
Product isn’t cut clean: Product too warm . . . . . . . . . . . . . . Cool product to room
temperature before slicing.
Hinge Guide set too close . . . . . . . . . Adjust Hinge guide and Input
Flap so product has clean
passage. (See pages 6 & 8)
Dull Blade . . . . . . . . . . . . . . . . . . . . . Sharpen or replace Blade.
IMPORTANT: Due to the wide variety of finished product densities and additives (i.e. raisins,
onions, dried fruit chips, etc.), it is imperative that the machine be cleaned frequently and the
Slicer Blade be sharpened periodically. Slicing dense products or those with additives may
cause premature unit wear or even failure if:
1) The Blade is not kept sharp
2) The Slicer is not frequently cleaned
3) The rate at which the product is fed into the slicer is too great.
10
WARNING:
TURN THE MACHINE OFF AND DISCONNECT THE POWER SUPPLY BEFORE
PERFORMING ANY TYPE OF SERVICING, CLEANING, MAINTENANCE, OR
INSPECTIONS.
!

MODEL 270C CHUTE ASSEMBLY
Model 270C Chute Parts Descriptions
Item Qty. Description Part Number
1 1 Thumb Screw Knob, Rosette P4-939-0020
3 1 Hinge Guard C4-073-0042
4 2 Bushing Clip P4-909-0049
5 1 Lower Chute Assembly C4-073-0041
6 1 Output Flap B4-079-0049
7 1 Thumb Screw Knob, Rosette P4-939-0013
8 4 Three Arm Knob P4-939-0028
11
6
3
5
4
1
8
7
8

12
40
200
10
50 20
30
190
Model 270C Blade Brake Parts Descriptions
Item Qty. Description Part Number
10 1 Blade Brake Weldment B4-413-0017
20 1 Shoe, Blade Brake A4-084-0006
30 1 Round Hd. Sltd. Mach. Screw 14-20 x 1/2 23-E-0404
40 1 Hex Nut 14 - 20 W/Nylock 42-E-04
50 1 Knob, Tapered Grasp P4-939-0006
190 2 Lock Washer 63-E-06
200 2 Hex Hd. Cap Screw 375-16 x 875 SST18-8 11-E-0607
Model 270C Blade Brake Assembly

MODEL 270C BASE ASSEMBLY
13
90
290
310
270
280
190
200
300
210
10
540
340
30
360
480
400
380
370
480
180
490
420
390
600
590
590
590
295
365
330
LIFT SUB-ASSEMBLY

Model 270C Base Parts Description
Item Qty. Description Part Number
10 1 Base C4-030-0040
30 1 Foot, Adjustable B4-073-0033
90 1 Top Guard B4-073-0032
180 1 Motor, 1/2hp, 1725 rpm, 115v M-943975
190 4 Spring Lock Washer 63-E-06
200 4 Hex Hd. Cap Screw 11-E-0607
210 4 Skt. Set Screw 29-E-0403
270 3 Round Hd. Sltd. Mach. Screw 23-E-0404
280 3 Lock Washer 63-E-04
300 1 Blade Adapter M-A26083
310 1 Blade, 12.5" A4-037-0002
330 2 Socket Hd Cap Screw 12-E-0604
340 2 Thumb Screw Knob P4-939-0013
360 4 Bumpers, Foot M-950164
365 4 Vinyl Cap P4-955-0013
370 1 Manual Motor Starter P4-921-0148
380 1 Starter Heater P4-921-0149
390 1 Bushing P4-909-0005
400 1 Masonry Box P4-921-0078
420 1 Cord Set M93175805
480 2 Snap in Cord Grip, Straight P4-921-0150
490 1 Snap in Cord Grip, Flex P4-921-0151
540 4 Washer, Nylon M-9513-3005
590 2 Flat Hd. Ph. Mach Screw 22-E-0106
600 2 Truss Hd. Ph. Mach. Screw P4-927-0035
14

MODEL 270C LIFT SUB-ASSEMBLY
15
580
20
350
350
580
520
520
240
460
110
460
160
510
240
510
240
140 130
240
460
170
580
580
240
240 100
150
120

Model 270C Lift Sub-Assembly Parts Description
Item Qty. Description Part Number
20 1 Lift Base B4-030-0042
100 1 Chute Adjustment Rod A4-064-0017
110 1 Lift Bracket B4-073-0034
120 1 Lift Bracket - 2 B4-073-0035
130 1 Lift Rod A4-064-0019
140 1 Hinge Nut for Lift A4-019-0010
150 1 Hinge Bushing for Lift A4-019-0011
160 1 Rod - 3/8" x 8 1/8" A4-064-0015
170 1 Rod - 3/8" x 1 5/8" A4-064-0020
240 6 Heavy Duty E-Style Retaining Ring P4-935-0067
350 2 Fluted Knob P4-939-0017
460 3 Clevis Pin P4-927-0103
510 2 Push Cap Nut P4-935-0071
520 2 Dowel Pin 78-E-1212
580 4 Skt. Set Screw 29-Q-5302
16

MAINTENANCE RECORD
DATE MAINTENANCE PERFORMED
_____ ___________________________________________
_____ ___________________________________________
_____ ___________________________________________
_____ ___________________________________________
_____ ___________________________________________
_____ ___________________________________________
_____ ___________________________________________
_____ ___________________________________________
_____ ___________________________________________
_____ ___________________________________________
_____ ___________________________________________
_____ ___________________________________________
_____ ___________________________________________
_____ ___________________________________________
_____ ___________________________________________
_____ ___________________________________________
_____ ___________________________________________
AP/250/8-2007
Table of contents
Other Dutchess Kitchen Appliance manuals